Recent Posts

Pages: [1] 2 3 ... 10
1
Chatterbox / Re: Another RC model side project
« Last post by crueby on Today at 07:28:35 PM »
Wow, I didn't expect to see you place an order. But as you say, time, effort and materials for something that large plus the never ending risk of something going wrong near the end makes it an easier decision.

Looking forword to seeing the result.

gerrit
Yeah, I  did debate it for a while, but the more I  studied the prototype  prints I had  done, the more it seemed worth it. Very large and complex shapes, lots of deep inside corners, just not worth it. I'm  more interested in  spending my time on engine parts!


Thanks  all for tips and sources!!
 :cheers:
2
Chatterbox / Re: Another RC model side project
« Last post by gerritv on Today at 07:05:47 PM »
Wow, I didn't expect to see you place an order. But as you say, time, effort and materials for something that large plus the never ending risk of something going wrong near the end makes it an easier decision.

Looking forword to seeing the result.

gerrit
3
Your Own Design / Re: Kearsarge Windlass Engines
« Last post by cnr6400 on Today at 06:52:09 PM »
 :ThumbsUp: :ThumbsUp: :ThumbsUp: :popcorn: :popcorn: :popcorn: Runs really nicely Chris. Love those extra lightweight rods and cylinders on the chain hoist engine!  :Lol:
4
Chatterbox / Re: Another RC model side project
« Last post by crueby on Today at 06:00:17 PM »
Oh, yeah...4"x3"x3" is a lot bigger than I'd been imagining.  And the counterbalance effect would go against the PET shovel as well.  Cool to see it 3d printed in steel, I've looked into that a couple of times for work, but have never pursued it.
 :popcorn: :cheers:
Going to be interesting to see how it goes.  Latest is that they f8nished production and it is  ready to ship.
5
Chatterbox / Re: Another RC model side project
« Last post by bent on Today at 05:38:02 PM »
Oh, yeah...4"x3"x3" is a lot bigger than I'd been imagining.  And the counterbalance effect would go against the PET shovel as well.  Cool to see it 3d printed in steel, I've looked into that a couple of times for work, but have never pursued it.
 :popcorn: :cheers:
6
Your Own Design / Re: Kearsarge Windlass Engines
« Last post by crueby on Today at 04:31:16 PM »
Closing in on finishing up the chain drums. Got the base plate clamped down on the mill table to cut the openings for the chain pipes and drilled mounting holes for them as well. The locations were marked with things assembled, and the pipes/guides held by hand in place to fit under the drums.

And here is a family shot of all the parts so far, including the rope drum engine! This is about how the two engines will nest in together - in the original they were housed inside a cabin on the foredeck of the battleship, with the two rope drums on the outside, the chain drums and engines were inside the cabin. The outside deck sat on top of the rectangular frames you can see under the rope drum on the right.


And here is a short video of the chain drum being driven by a cordless drill, to test out the worm gear set and all the drums:
<a href="https://www.youtube.com/watch?v=-_RurSJl0NA" target="_blank">http://www.youtube.com/watch?v=-_RurSJl0NA</a>

7
Your Own Design / Re: Gassie. National Gas Engine
« Last post by Jasonb on Today at 03:04:53 PM »
You posted while I way typing the next installment.

Will the boys be supplying Nattie casting sets? As it should be possible for someone to build them into either engine if they can find some gears and carve up a head "casting"
8
Your Own Design / Re: Gassie. National Gas Engine
« Last post by Jasonb on Today at 03:00:28 PM »
Thanks John, I hope so.

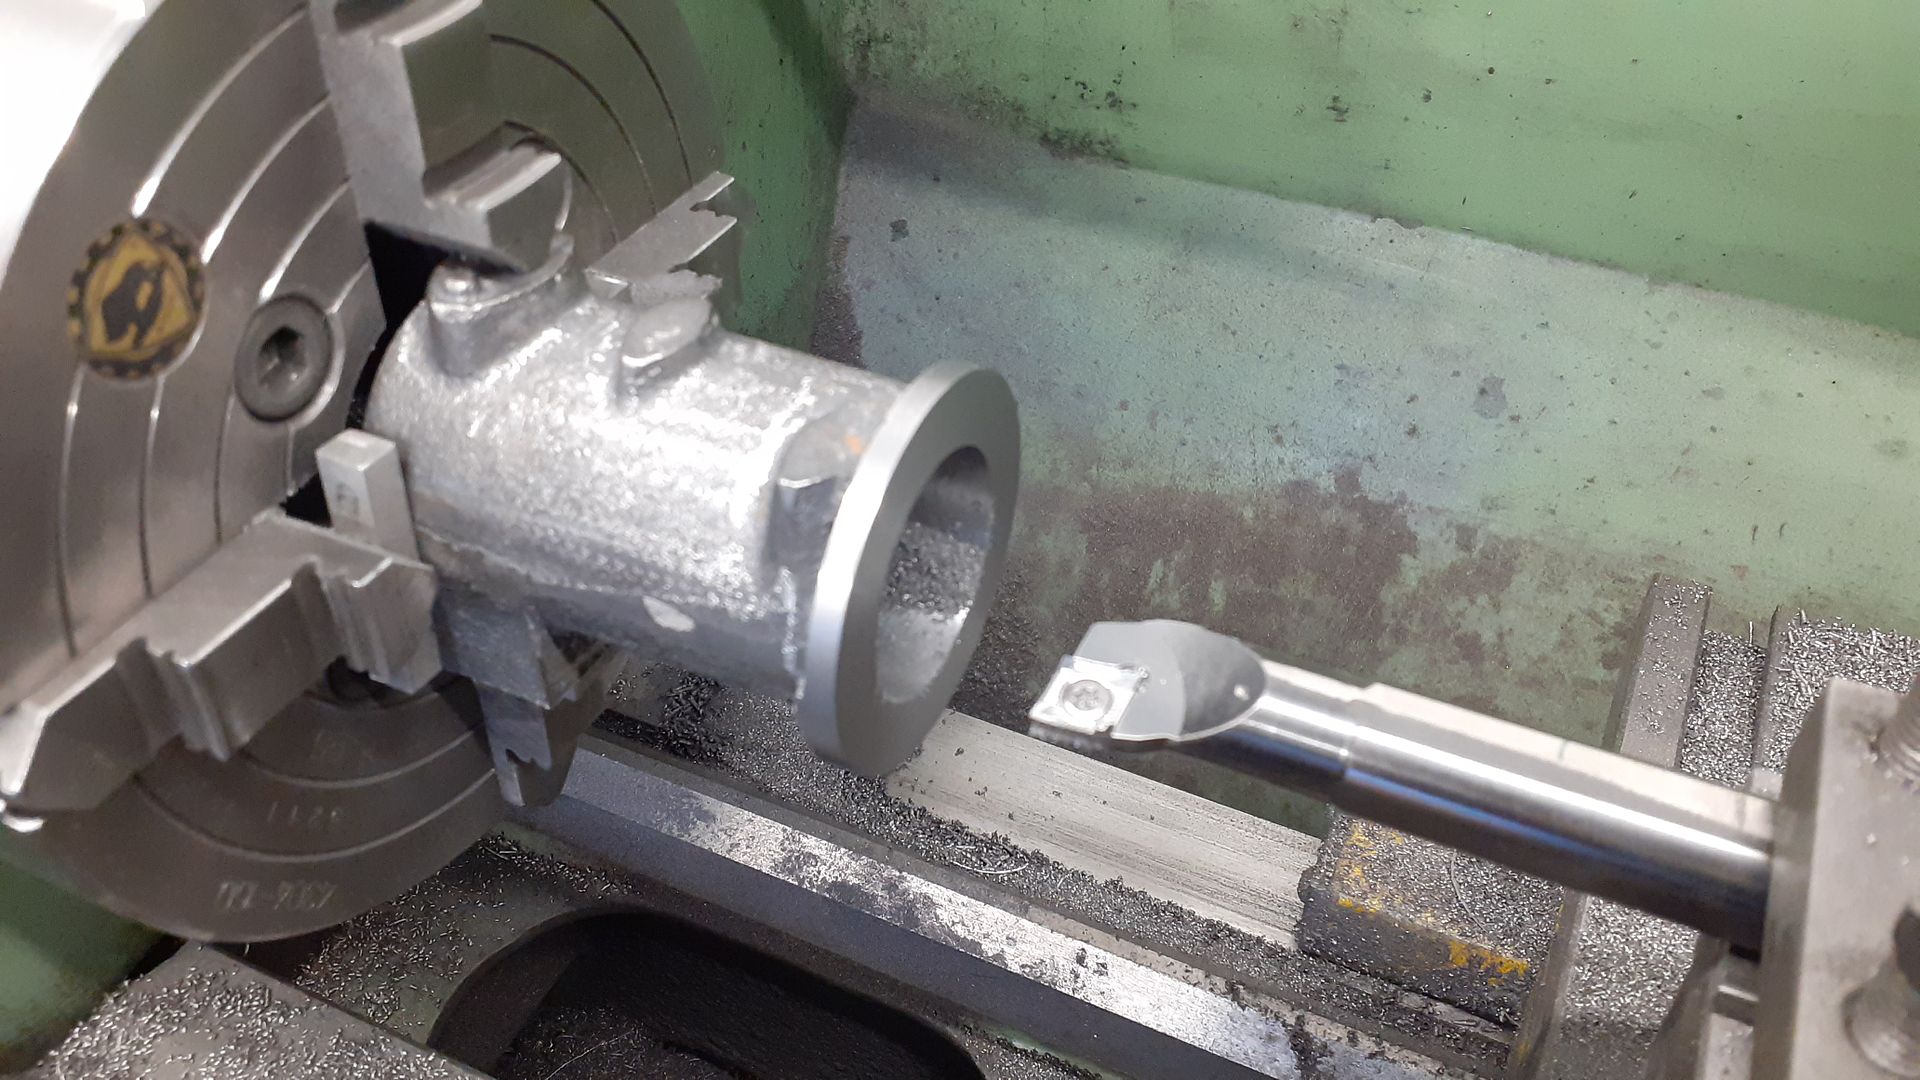
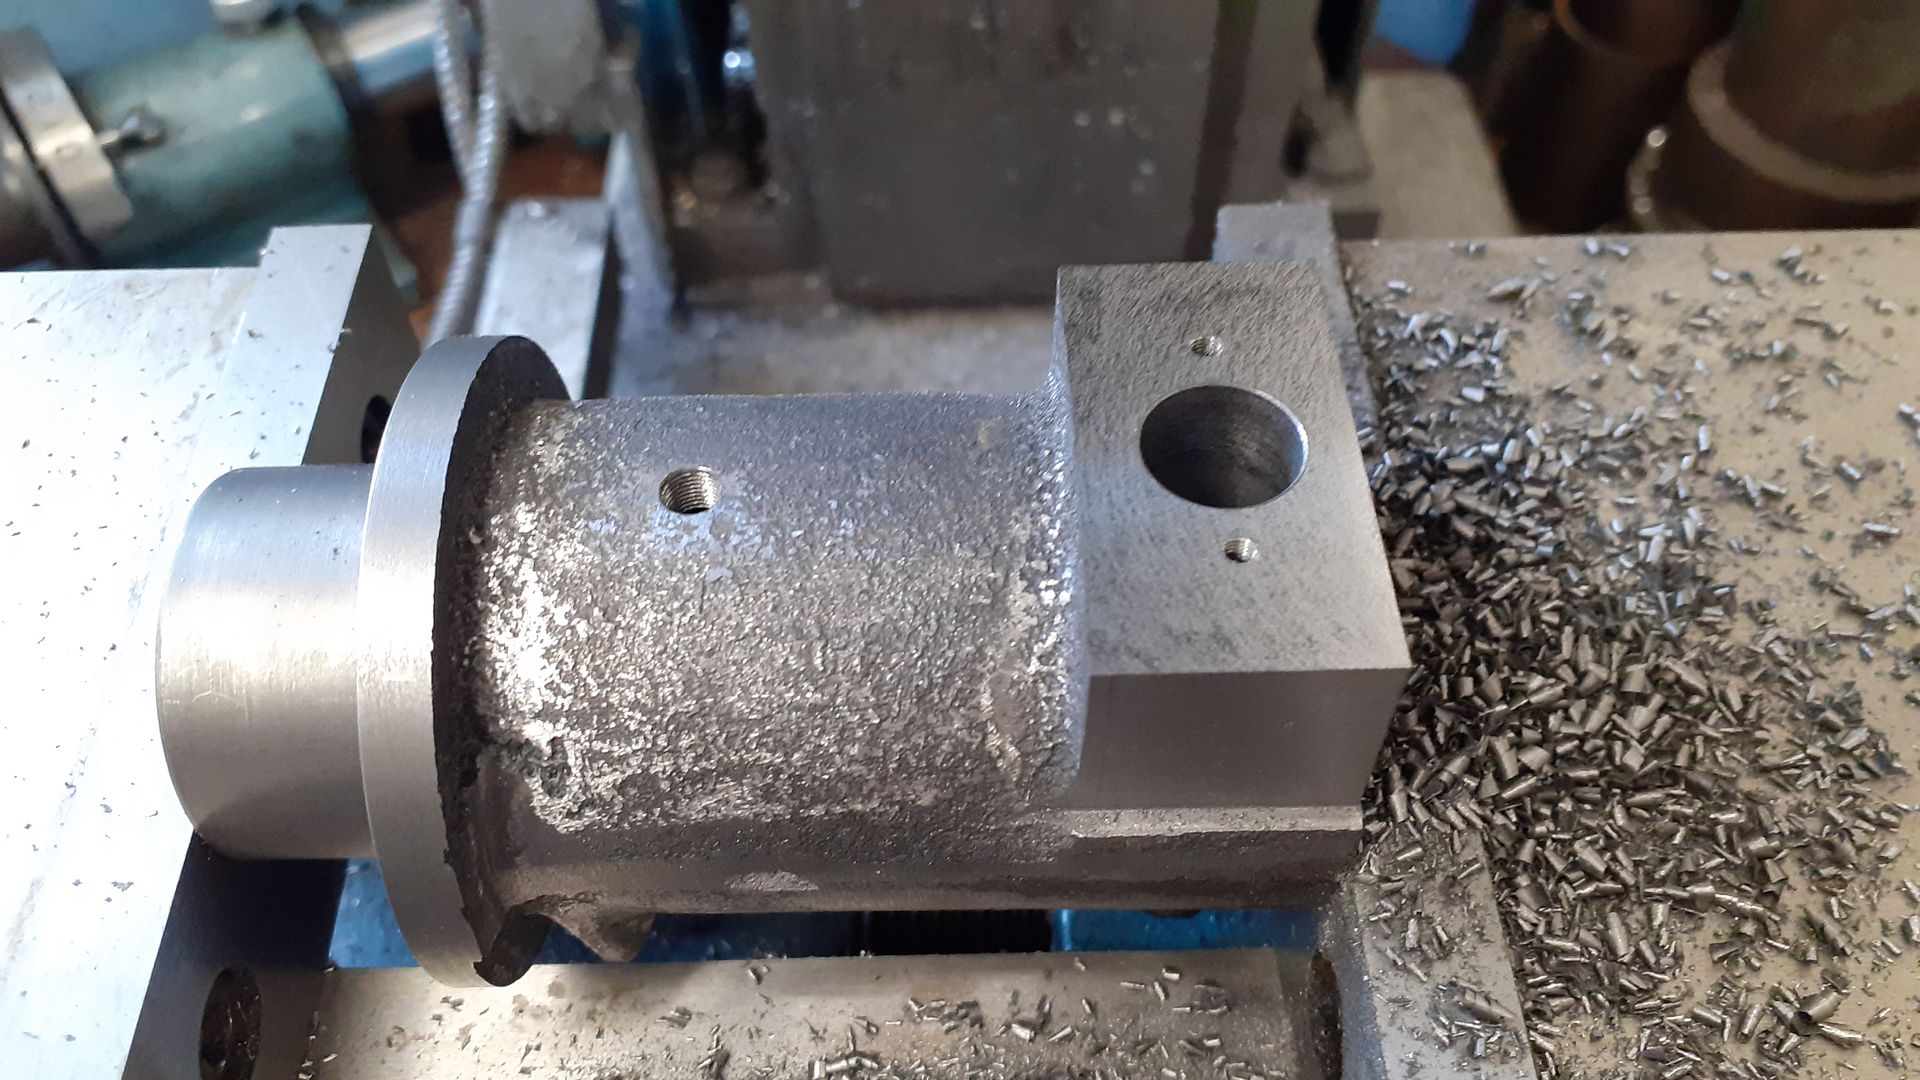
With the unwanted metal sawn off the cylinder jacket casting it was held in the 4-jaw to face the end flange, turn the flanges OD and finally bored to accept the liner. I spent some time getting the sides of the casting as square as possible to the chuck face as well as either end running as true as you can get with cast surfaces. I also took as much off the flange as was practical as the images of full size engines I was using for reference looked shorter than the casting.


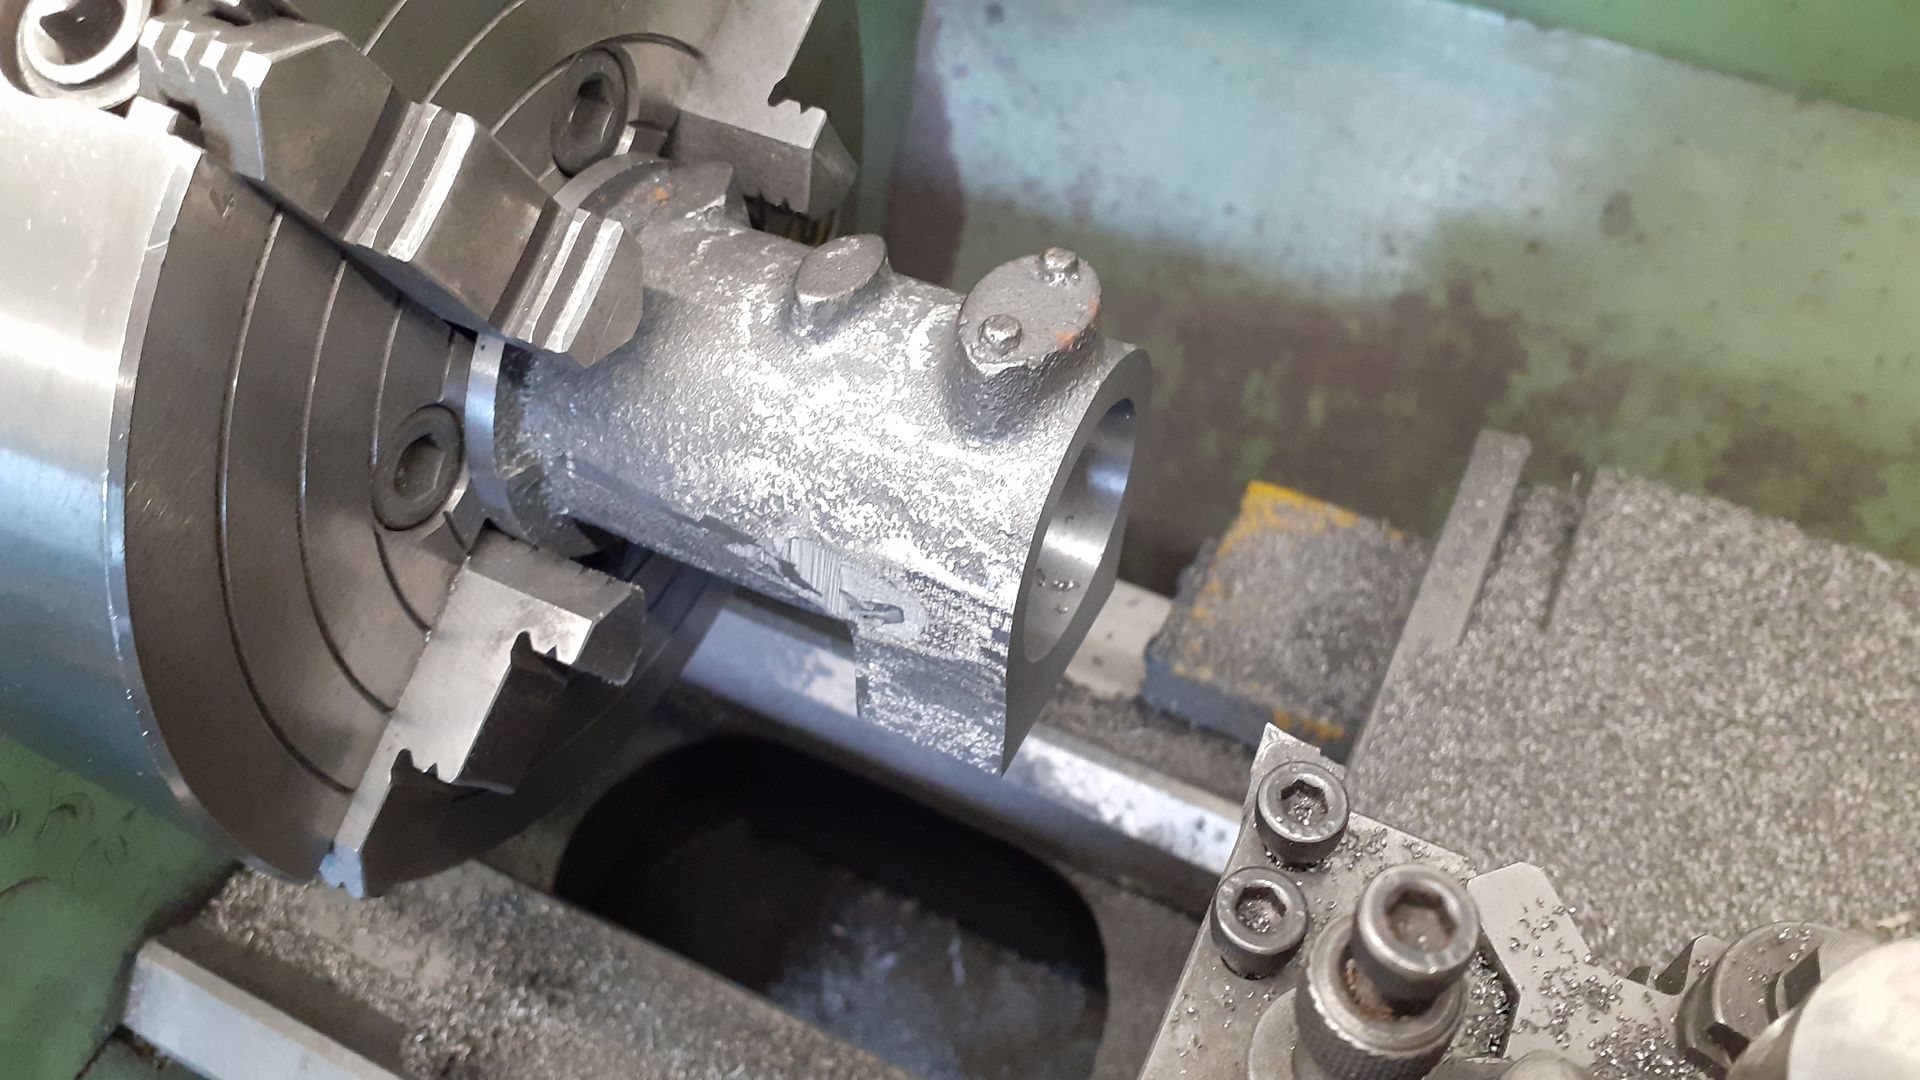
The casting was then flipped around and the head end faced back, again getting as close to the boss as possible, in this shot 0.5mm has been left to be skimmed off after the liner has been fitted.


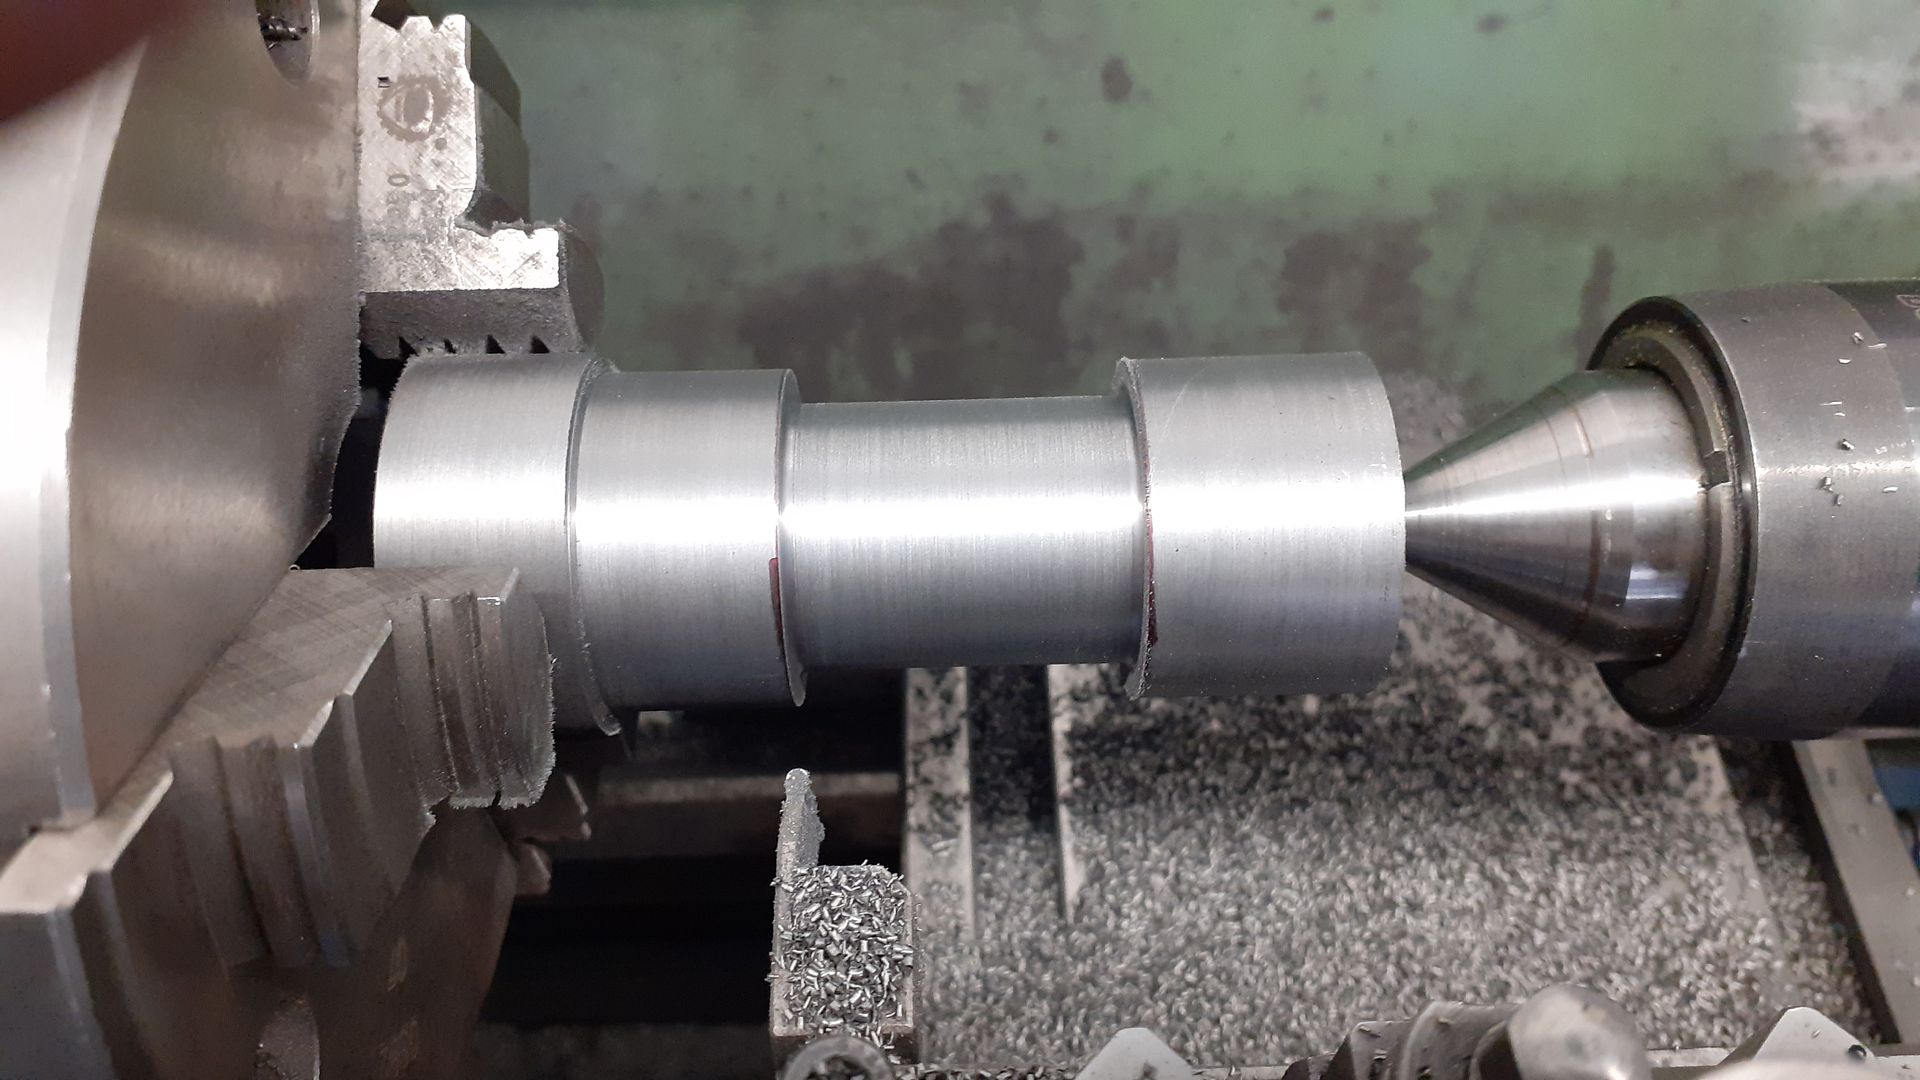
One end of some cast iron bar for the liner was cleaned up and then held by that section to turn the OD and cut a waist that will become the water space. I used tailstock support while doing this.


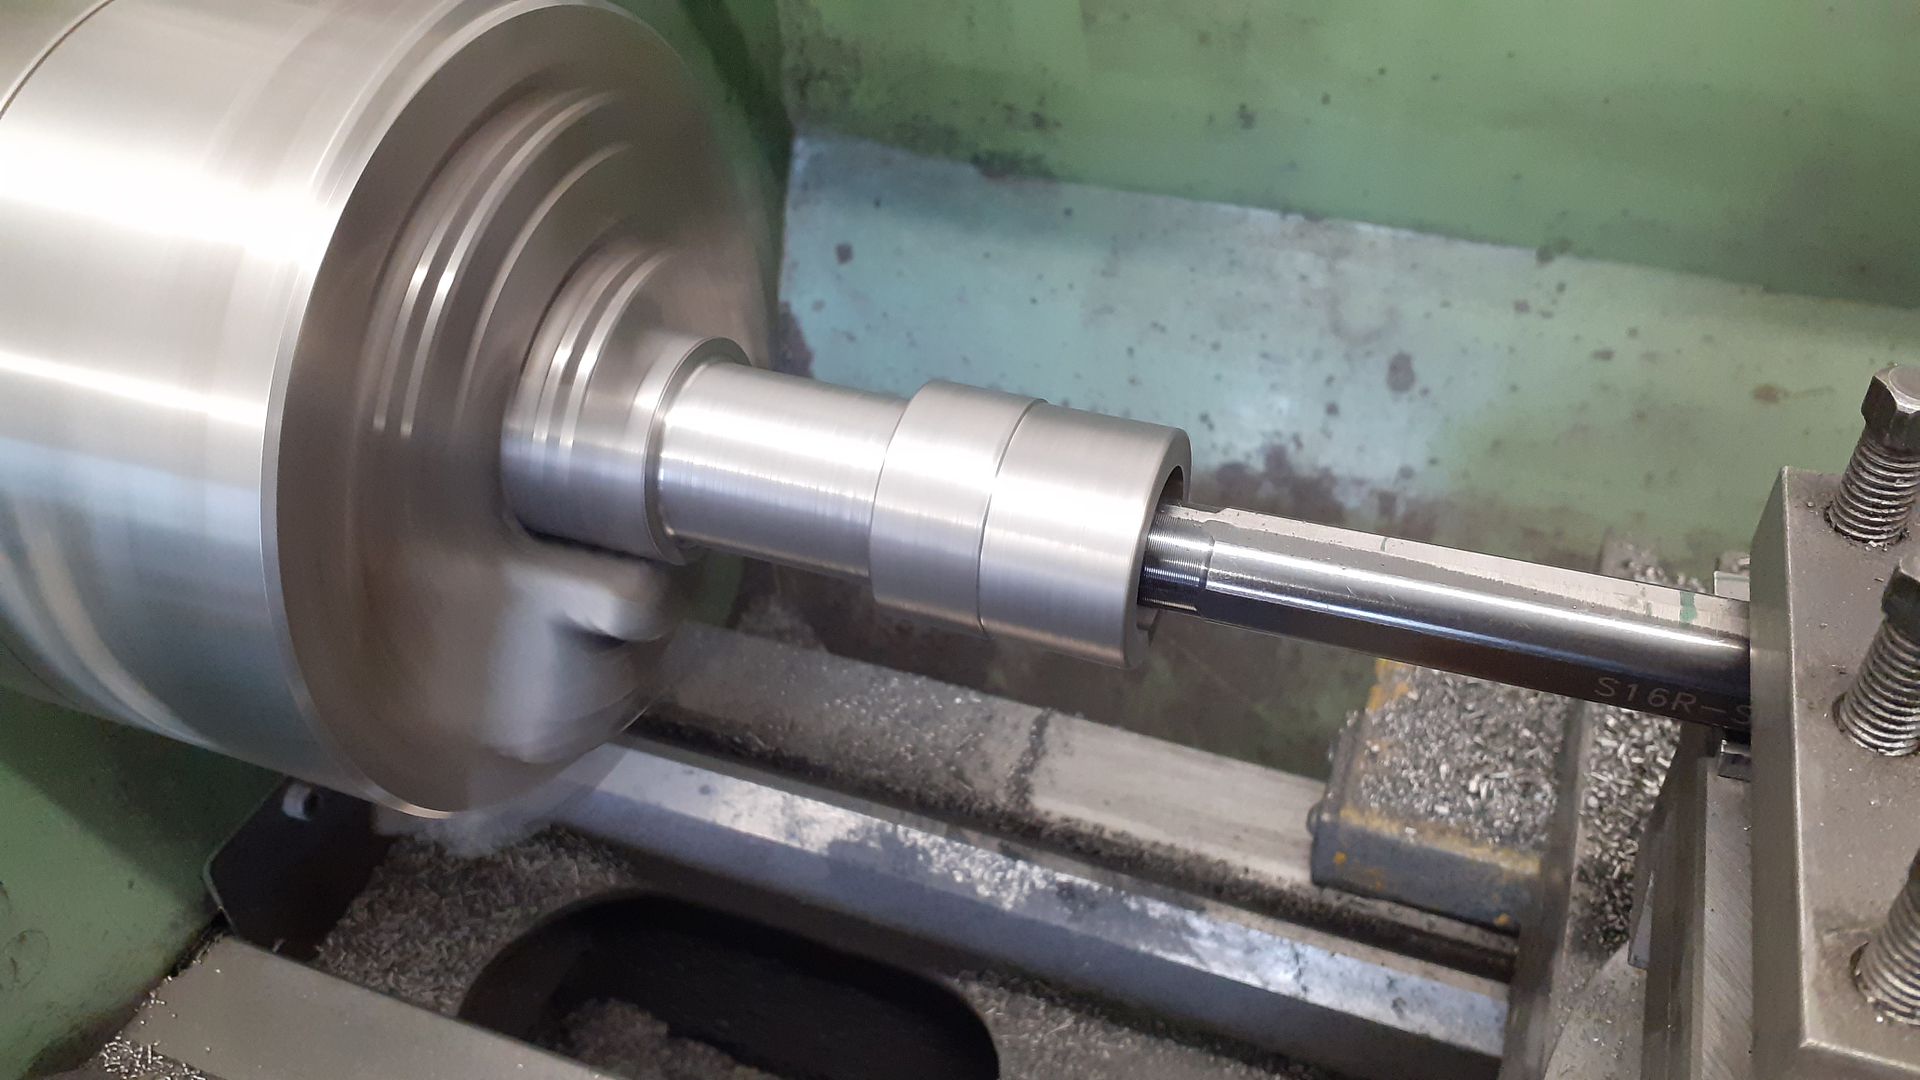
Gripping by the other end the chucking diameter was taken to it's final size and the cylinder drilled to 22mm and then bored to the final 24mm finished size after which it was loctited into the jacket with #648


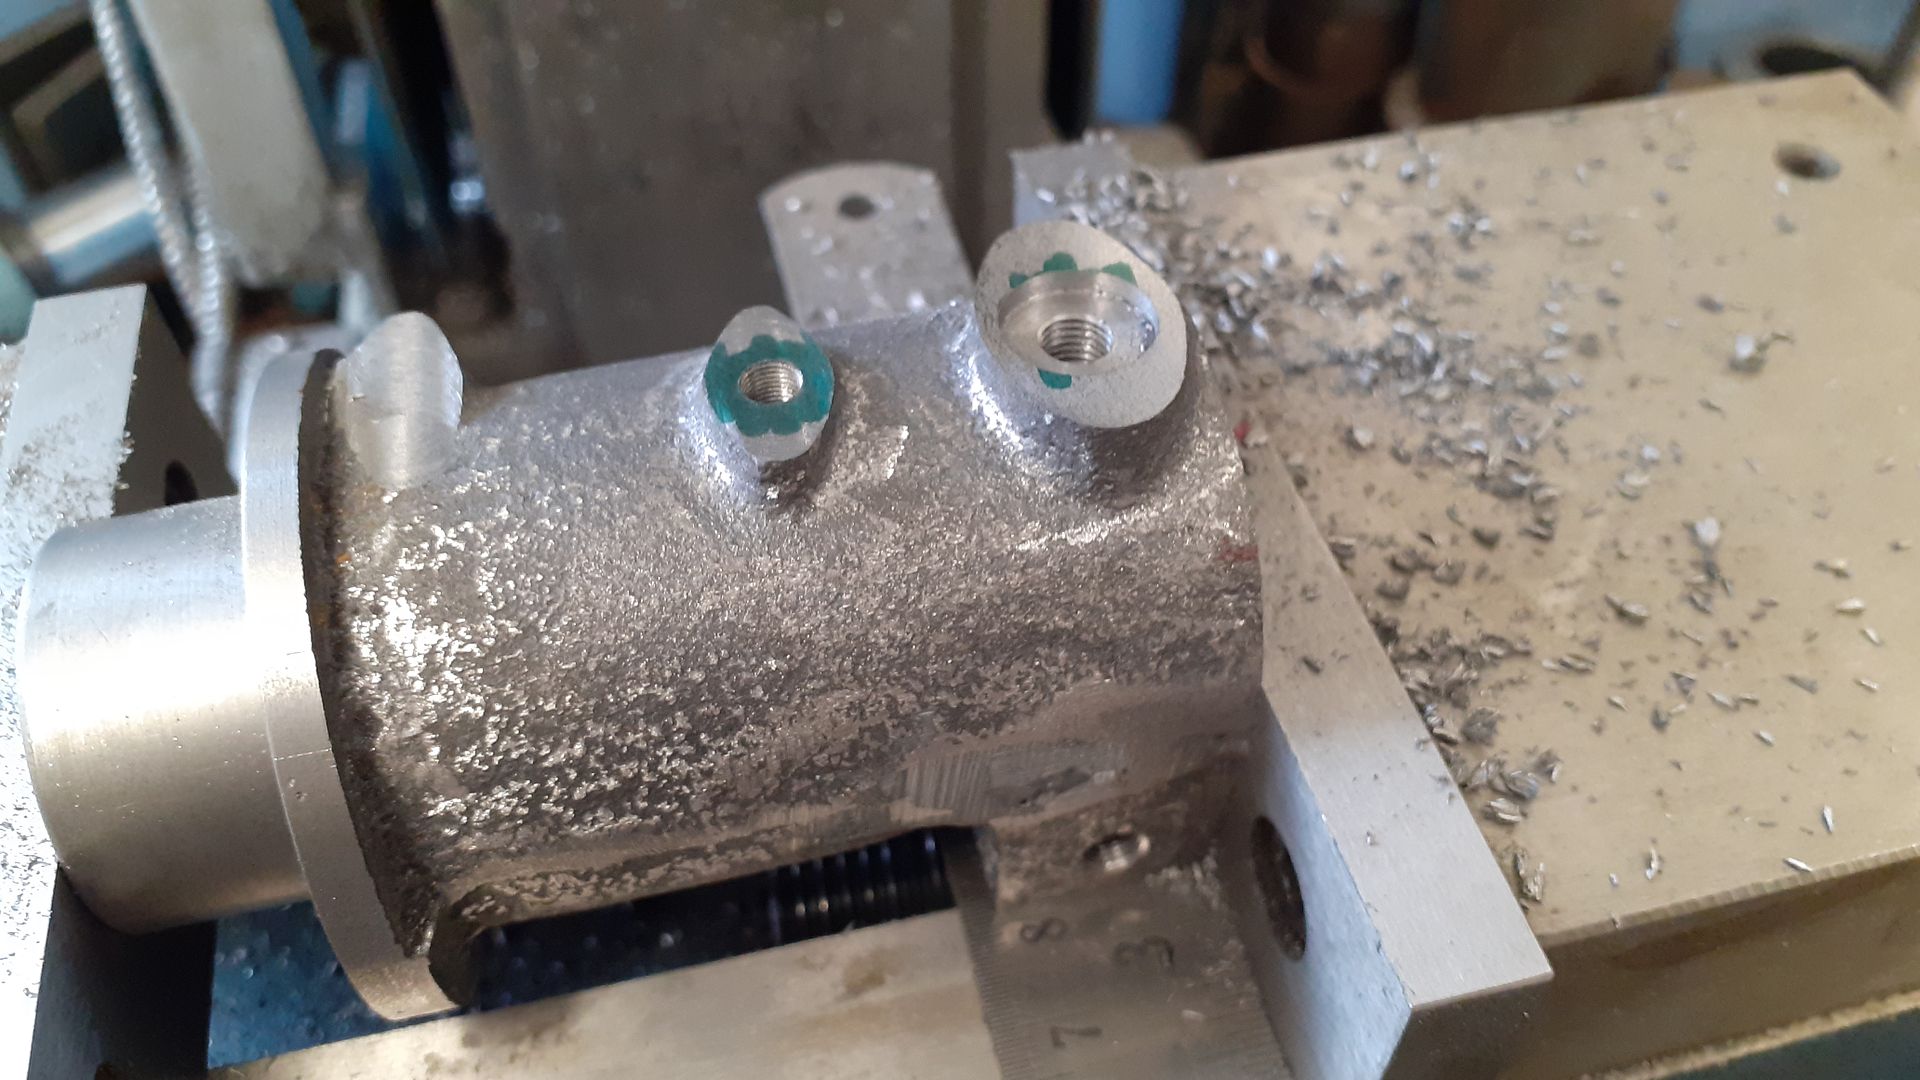
After a couple of days to make sure the loctite had set the 0.5mm was faced off the end of jacket and liner to give a true flat surface for the cylinder head to seal against. Then the 100mm vice was mounted lengthways on the mill table so that the assembly could be further machined. Firstly the exhaust block was milled to height and reamed to take the valve cage and it's two retaining stud holes drilled and tapped. A water inlet hole was also drilled and tapped and lastly at that setting one side of the exhaust block was milled flat to later receive the side shaft bracket.


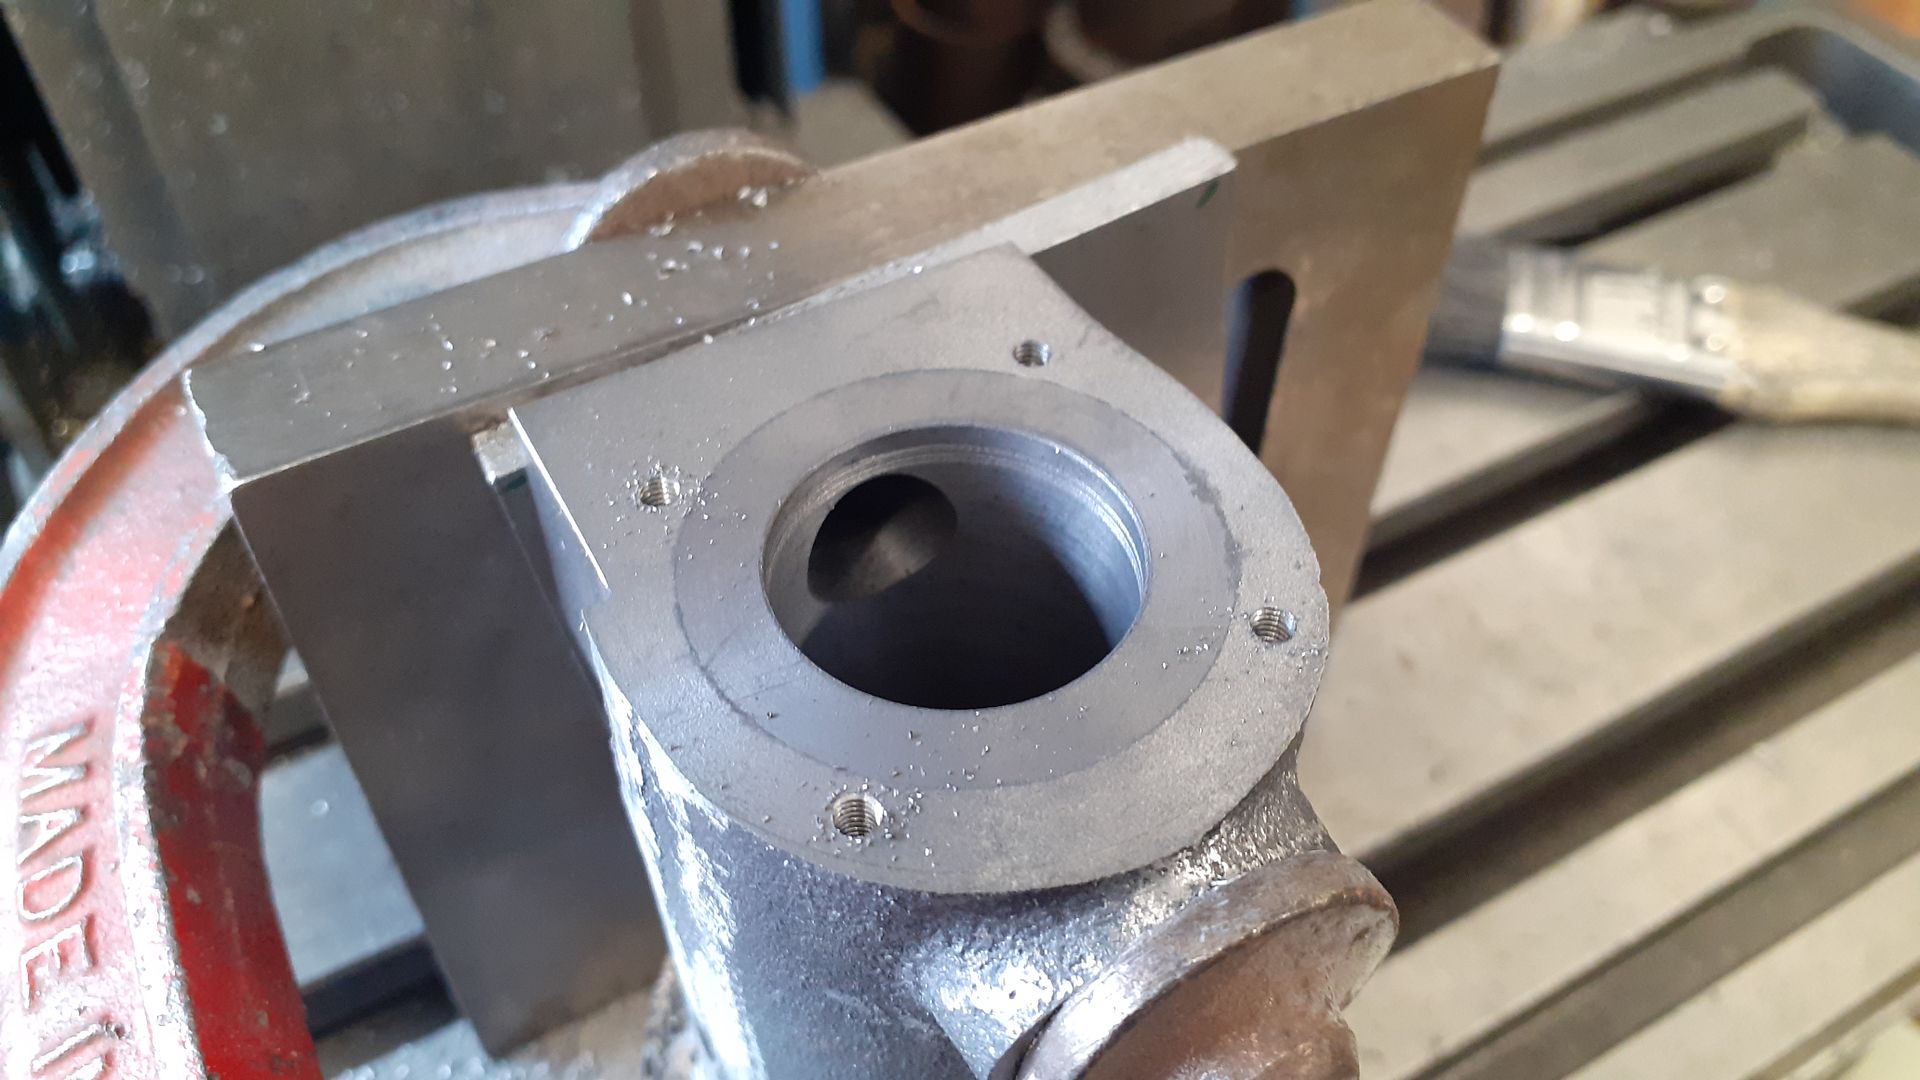
Turning the cylinder the other way up the tops of the various bosses were milled to their required heights, the central one tapped for the water connection and the one at the head end tapped and counterbored for a 1/4" x 32 Rimfire plug. The smaller one will get drilled to suit what oiling method I decide to eventually go for.


Lastly the two stud hole patterns were done on the flange and head ends


9
Your Own Design / Re: Gassie. National Gas Engine
« Last post by Alyn Foundry on Today at 02:52:04 PM »
Off to a great start there Jason…. :ThumbsUp:

Just to clarify, this will not be a kit offered by the boys.

 :cheers:  Graham.
10
Your Own Design / Re: Kearsarge Windlass Engines
« Last post by Kim on Today at 05:30:02 AM »
Great sign, Chris!  You really go all out on these things, don't you?  :Lol: :popcorn: :ThumbsUp:

Kim
Thats the fun part!   :Lol:   :shrug:   Its a lot of the reason I  like the larger scale models, more room for little working details.
Too true!
As one of my bosses used to say back when I was w*rking, "Anything worth doing, is worth overdoing!"

Words to live by!
Kim
Pages: [1] 2 3 ... 10
SimplePortal 2.3.5 © 2008-2012, SimplePortal