Dean, Dave, Roger, 'creast' thanks for your kind comments.
Dave don't expect too much - first indications are that these will not be particularly 'rev-vy' more a steady plod

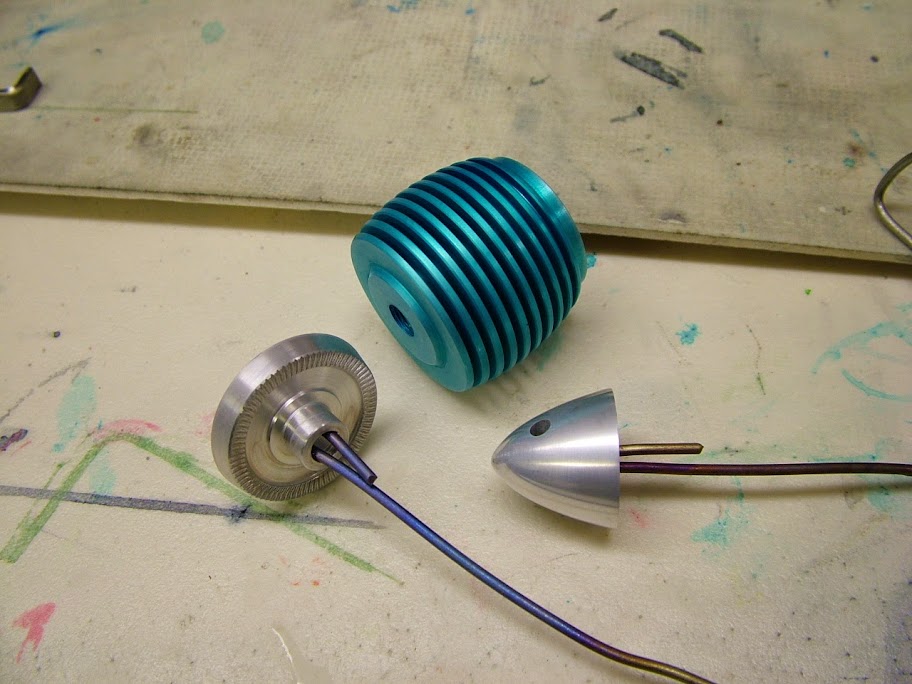
Both engines are now finished off completely. The second one has run on a prime in the hand but has not been tried on a full tank as yet.
The anodising did not go as well as in the past but I did get there in the end if not exactly what I had in mind on one of them.
This process can certainly have an inconsistency about it.
These three parts were all done together for the same length of time and all dyed together as well. Reasonable uptake of colour on the head - absolutely not a glimmer on the other two. Traced to a poor contact between the titanium hangars and the parts, a second go saw the anodising prove successful but then the dyeing varied

- no pics at this stage but you'll see what I mean when I do.
I really would be reluctant to take this on for anyone - it is mostly fraught with 'will it - won't it' concerns right through the process
Last op was to mill those backplates to form the mounting lugs. A boss was turned to locate and centralise the part

Then the waste removed. The lugs were finished using filing buttons and the usual files emery etc.

It was my intention to locate the part using a pin through one of the holes to prevent rotation. It was only after filing these pics tonight I realise that I didn't so it could so easily have moved during cutting being held with only that one clamp
Now that would have been a disaster at this late stage - Pheww!
Before we get to running them as finished - probably Monday - I got to grips with carving a couple of propellers. It's not a difficult task - laying out the blank is the important part and good workholding a close second. Tools used were a small block plane to trim things up after sawing, a chisel, wood rasp, big half round file and some 60 and 80 grit abrasive paper wrapped around a piece of 25mm dowel.
The pitch defines the angles required at the tip and the inner station and once worked out the blank can be cut. This should have been approx 60.0mm wide at the tips but the material to hand was only 40.0 so due allowance was made.
Two blanks and the initial template

The blanks marked out on the face and the taper marked on the sides

Rough sawn ready to shape the rear face

With one blade clamped to the bench and a dowel pin through the centre the rear faces are cut flat across at a slowly twisting angle from low edge to top edge - making sure it's the correct way, otherwise you make a pusher prop - yes you would be right
but it was a while ago


First stage done and the helical twist created

The prop shape is marked on the face biasing the blade to one side to give more thickness on the leading edge (the thinner side just created)

Bandsawn to the line ready to carve the front face

Clamped as before but using tapered packing the blade is carved to an approximate airfoil section

After rough sanding the true shape begins to materialise

This is as far as was reached today before having a nice get together this afternoon with some fellow ME's for a birthday (not mine) lunch.
I'm sure there will be many on here who have carved props in the past. Whats shown is it's most basic form and done so for those who might like to try it. Just bear in mind the harder the wood the harder the task
Sailing tomorrow but hopefully those first full runs will happen on Monday - have a great weekend

Regards - Ramon


