Author Topic: Pacific Vapor Engine from Morrison & Marvin Castings  (Read 215493 times)

Offline Art K

  • Full Member
  • ****
  • Posts: 1765
  • Madison, Wisconsin USA
Re: Pacific Vapor Engine from Morrison & Marvin Castings
« Reply #390 on: April 17, 2016, 03:51:14 AM »
Dave,
My finger is doing well. It has been quite difficult to stay out of the shop. I have six programs setup to machine the cooling fins & I & E ports on the side of the head because I'm not supposed to grasp things with it. I need to drill the holes on the fixture to mount the head on the 4th axis but it will have to wait. At least I'll have NAMES and a weeks vacation to distract me. I've got to admit a Z incision looks ugly and don't want another.
Enjoying your build & they're right you take great pictures.
Art
"The beautiful thing about learning is that no one can take it away from you" B.B. King

Offline Dave Otto

  • Full Member
  • *****
  • Posts: 4704
  • Boise, Idaho USA
    • Photo Bucket
Re: Pacific Vapor Engine from Morrison & Marvin Castings
« Reply #391 on: May 16, 2016, 12:03:12 AM »
Hi Guys,
Wow where does the time go? It has been a month already since my last update.


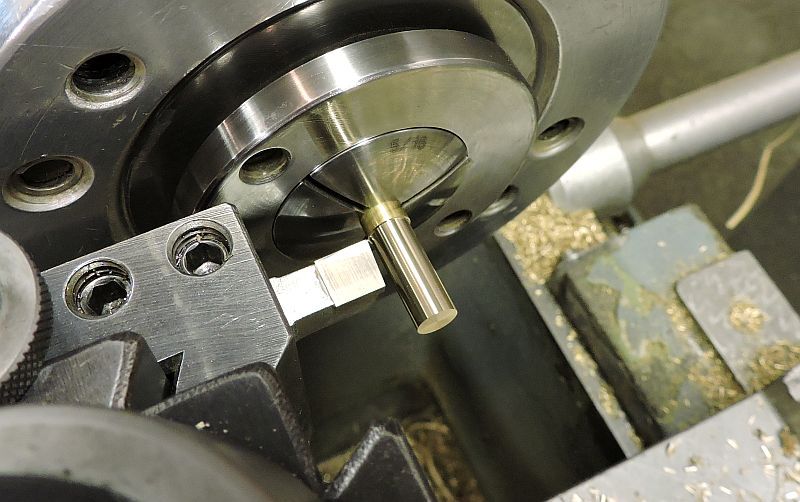
Starting work on the main stop valve spindle; first it is faced and turned to the major diameter of the part.


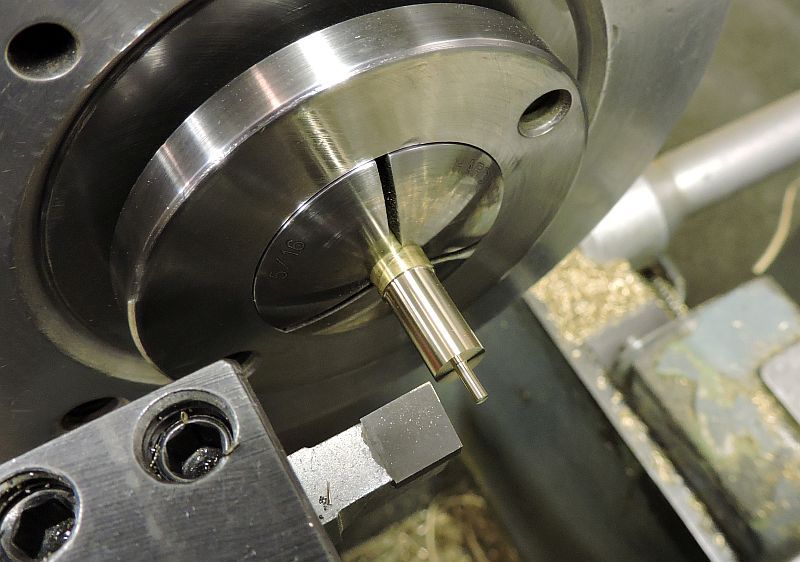
Next the smallest diameter is turned.


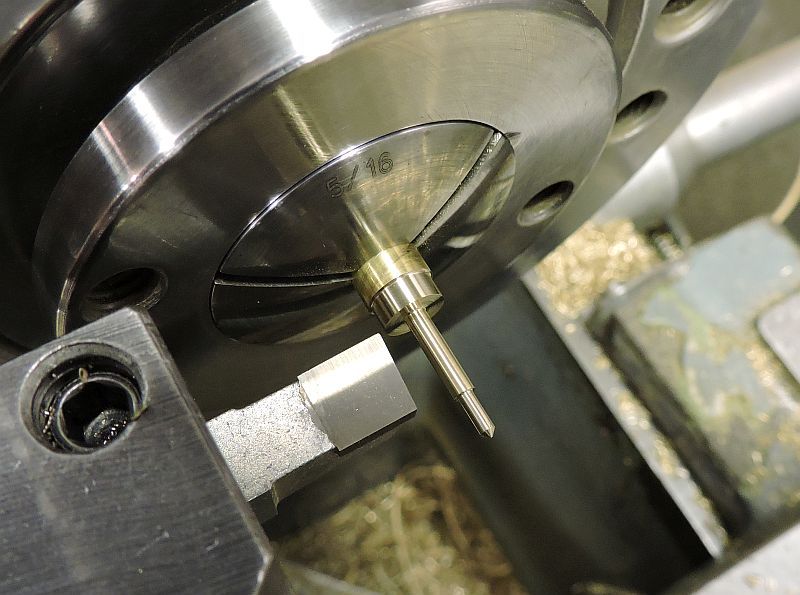
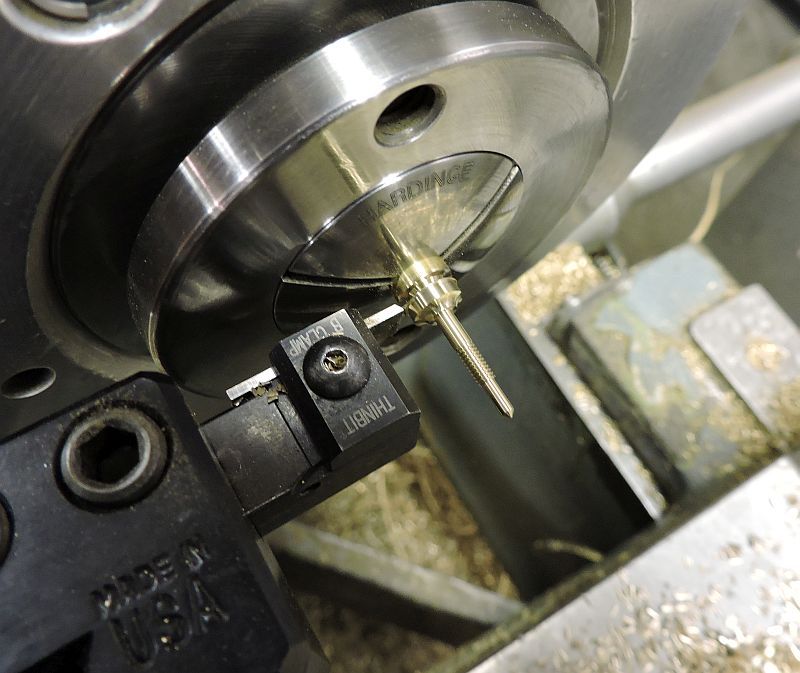
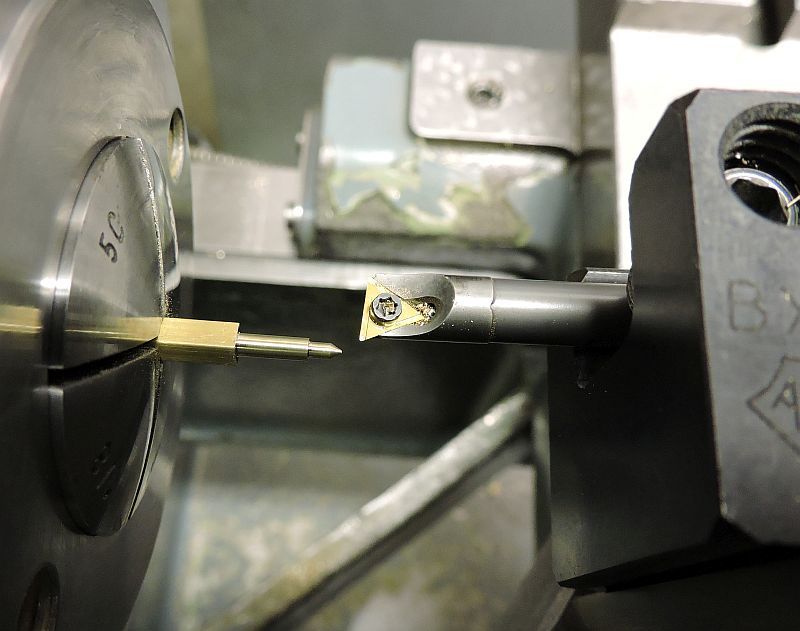
And before the part gets too flimsy the point is added.


Then the rest of the valve is turned.


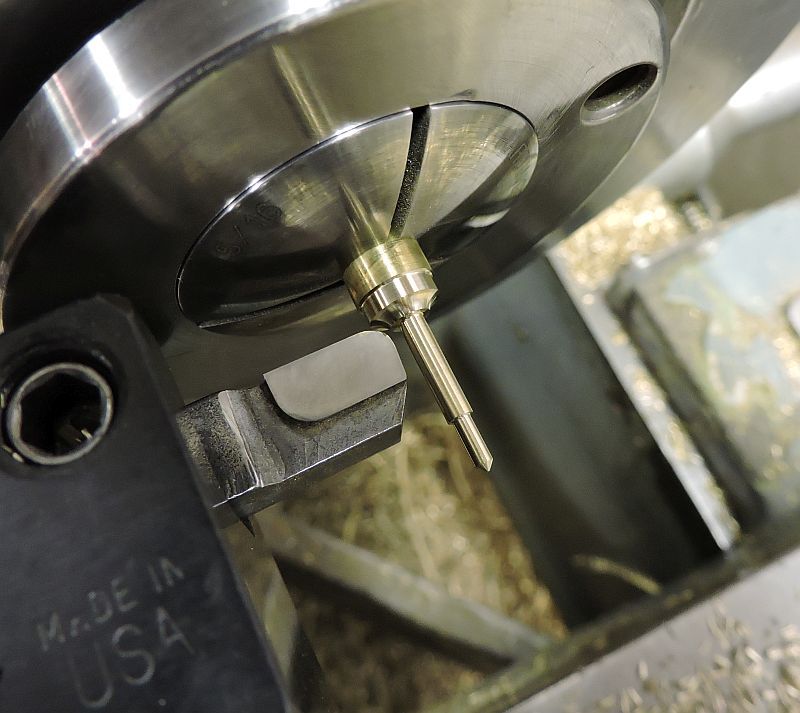
The decorative radius is added using a form tool.


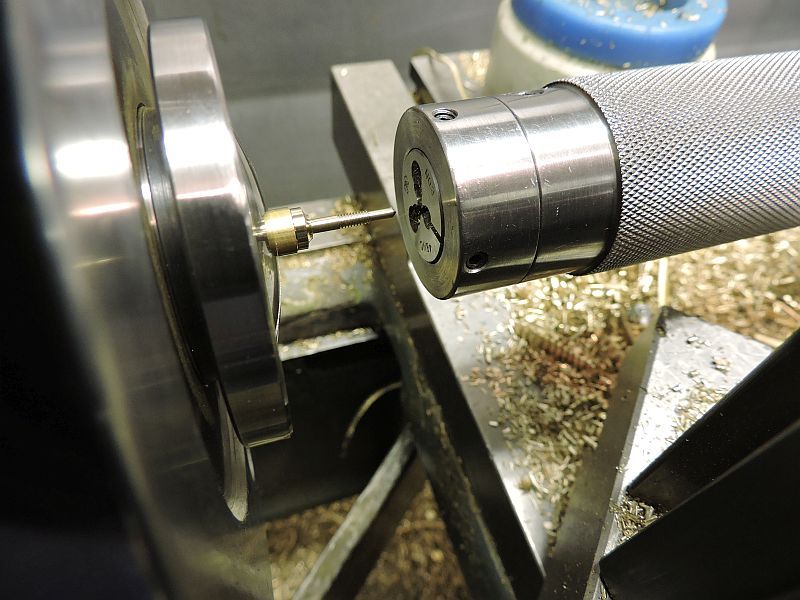
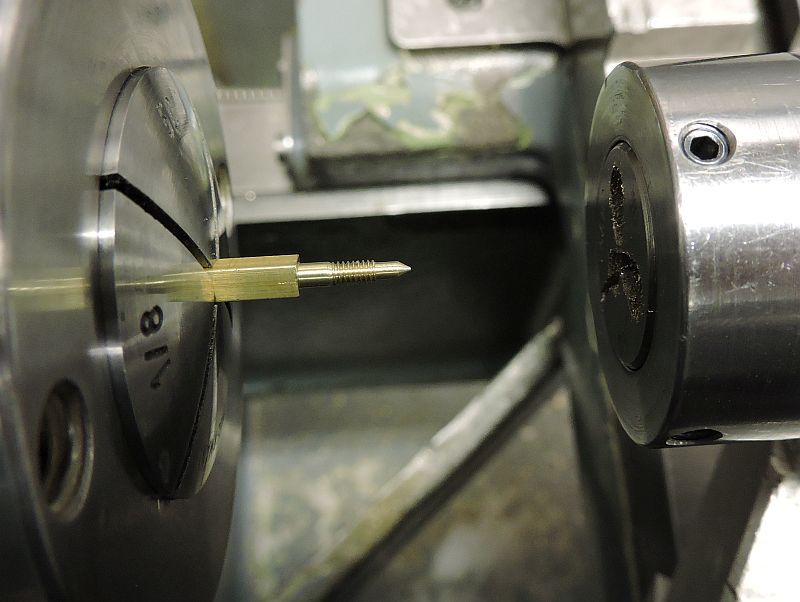
The 3-48 threads are added using a tailstock die holder.


Then it is parted off leaving enough material to finish the other end.


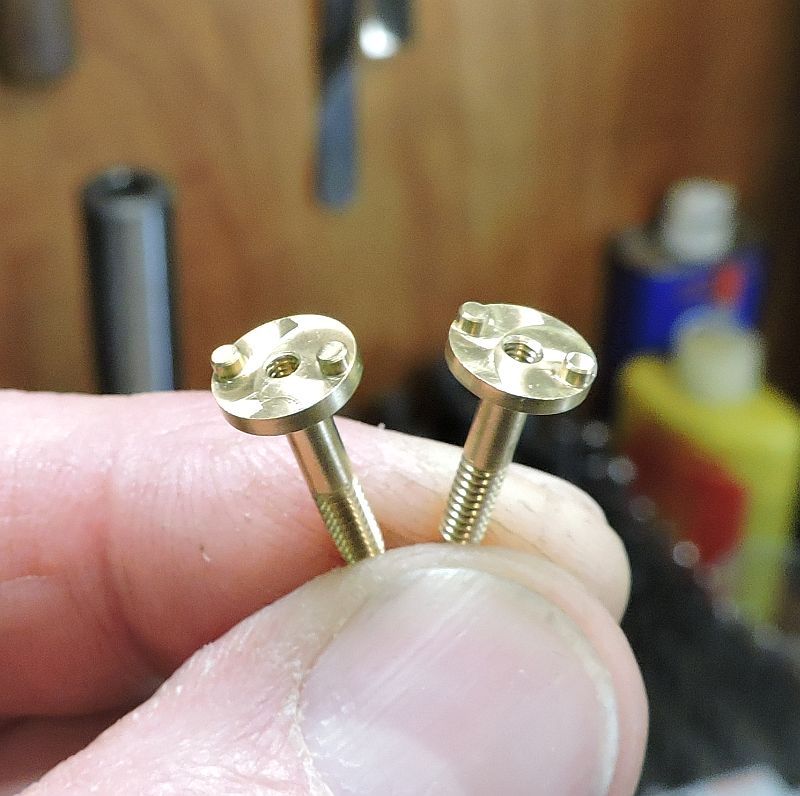
The valve is finished the same as the fill plug; a 1-72 drilled and tapped hole and two 1/16” posts that will fit into holes in the wood knob.


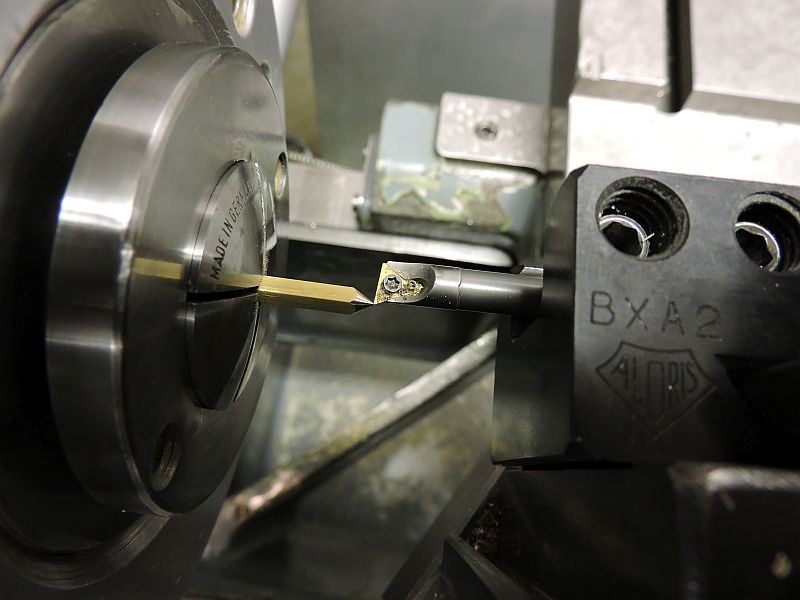
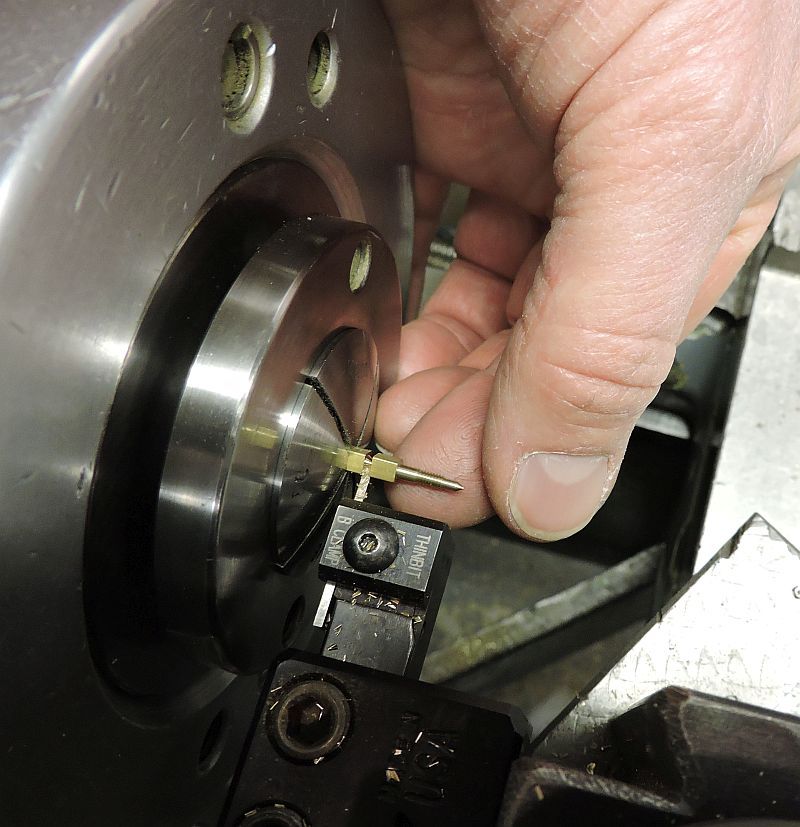
The smaller metering valve is made much the same way as the stop valve. I started out by turning the point first using a boring bar on the back side running the lathe in reverse.


Using the same tool the rest of the turning operations are completed.


The 2-56 thread is also added using the tail stock die holder.


And then parted off.


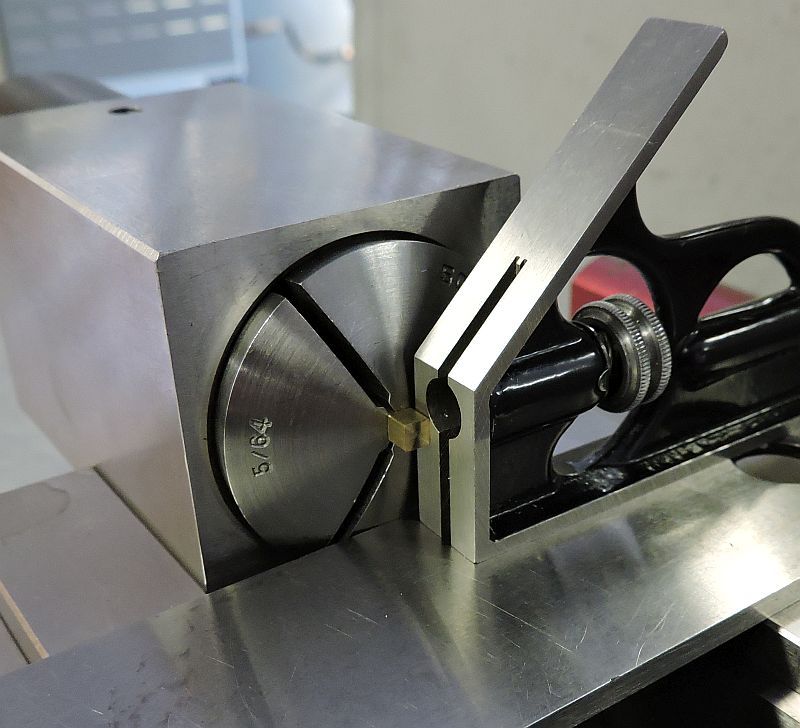
After the valve was flipped around and faced to length is was set up and squared in a collet block to drill and ream the cross hole.


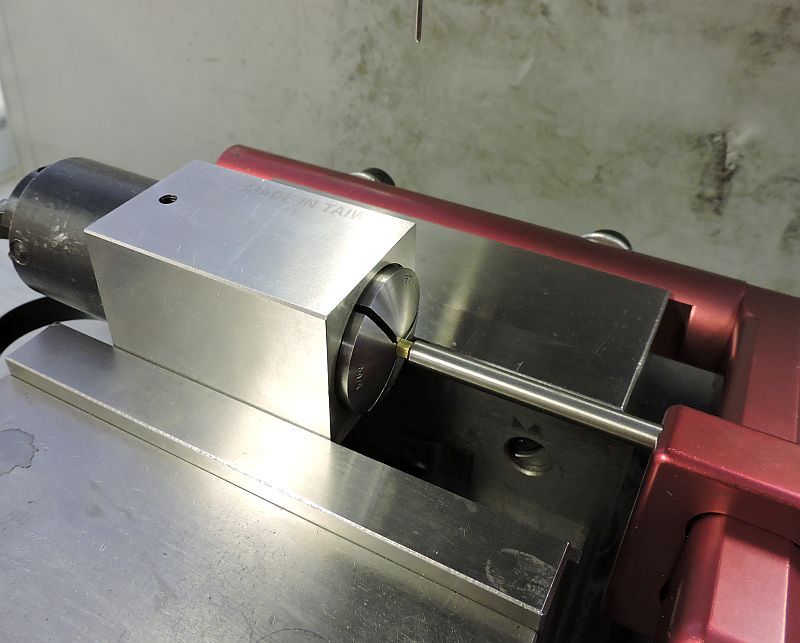
A vise stop was used to reference the end of the valve.


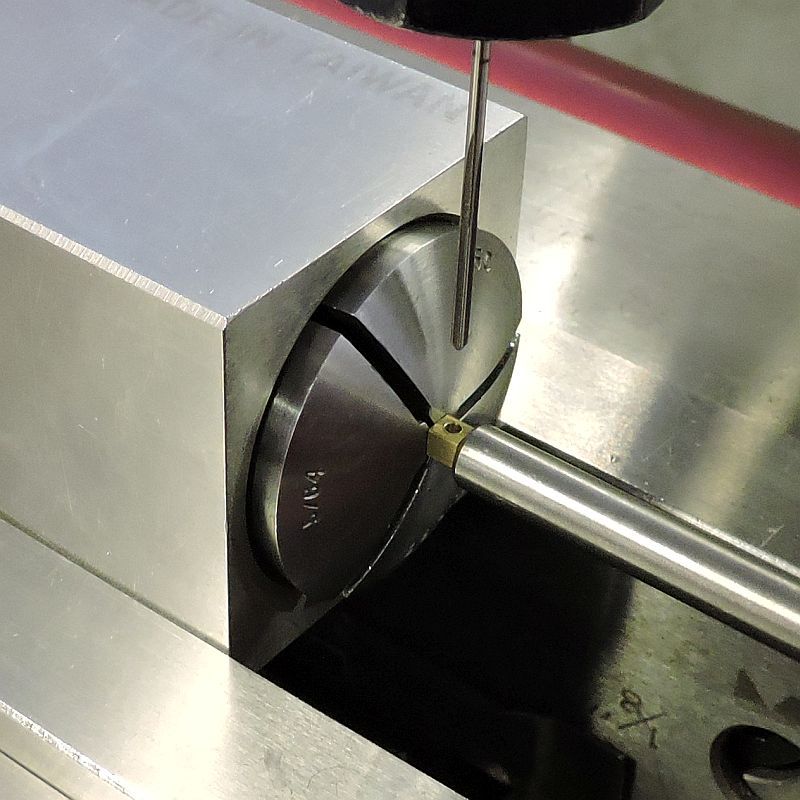
And the hole was drilled and reamed for a press fit of the 1/16” cross pin.


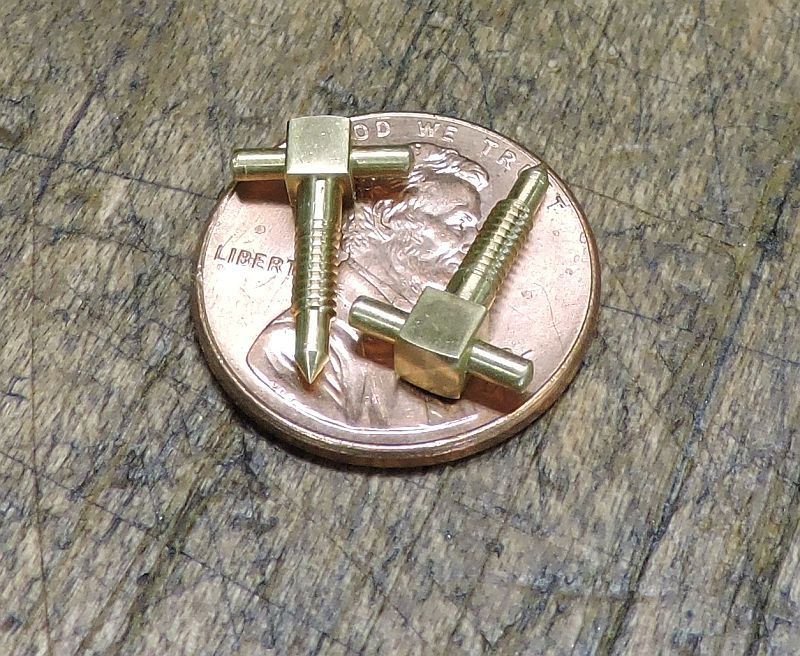
The cross pins were turned with a dome on each end (like the original) and pressed in place.


Next up I will continue with the machining of the two wood knobs and hardware.
Thanks for checking in,
Dave

Offline zeeprogrammer

  • Full Member
  • *****
  • Posts: 6811
  • West Chester, PA, USA
Re: Pacific Vapor Engine from Morrison & Marvin Castings
« Reply #392 on: May 16, 2016, 01:31:44 AM »
Wow. I'm at a loss for words. Fine work.  :ThumbsUp:
Carl (aka Zee) Will sometimes respond to 'hey' but never 'hey you'.
"To work. To work."
Zee-Another Thread Trasher.

Offline Tennessee Whiskey

  • Full Member
  • *****
  • Posts: 3781
  • Springfield, Tennessee. USA
Re: Pacific Vapor Engine from Morrison & Marvin Castings
« Reply #393 on: May 16, 2016, 01:36:21 AM »
Me too Zee.  About the only thing that I could add is : talk to your manicurist,  the cuticles need a little more work  :lolb:, as far as the machining : It's so good it's just stupid  :cheers:

Cletus

Offline crueby

  • Full Member
  • *****
  • Posts: 18660
  • Rochester NY
Re: Pacific Vapor Engine from Morrison & Marvin Castings
« Reply #394 on: May 16, 2016, 01:40:03 AM »
Incredible fine details on everything. Excellent!!

Offline vcutajar

  • Full Member
  • *****
  • Posts: 2555
  • Marsascala, MALTA
Re: Pacific Vapor Engine from Morrison & Marvin Castings
« Reply #395 on: May 16, 2016, 05:43:58 AM »
 :popcorn:

Great parts as usual.

Vince

Offline jschoenly

  • Full Member
  • ****
  • Posts: 87
Re: Pacific Vapor Engine from Morrison & Marvin Castings
« Reply #396 on: May 16, 2016, 06:33:39 PM »
Beautiful oiler parts!
Jared
                                 Cabin Fever Expo
--- Model Engineering and Home Shop Hobbies in all Forms! ---

Offline b.lindsey

  • Global Moderator
  • Full Member
  • *****
  • Posts: 13860
  • Dallas, NC, USA
    • Workbench-Miniatures
Re: Pacific Vapor Engine from Morrison & Marvin Castings
« Reply #397 on: May 17, 2016, 12:47:30 AM »
Somehow missed your post yesterday Dave. Lovely work as always!!

Bill

Offline Don1966

  • Full Member
  • *****
  • Posts: 6817
  • Columbia, MS
Re: Pacific Vapor Engine from Morrison & Marvin Castings
« Reply #398 on: May 17, 2016, 12:58:44 AM »
Somehow missed your post yesterday Dave. Lovely work as always!!

Bill
I second that Dave.......... :cheers:

Don

Offline Dave Otto

  • Full Member
  • *****
  • Posts: 4704
  • Boise, Idaho USA
    • Photo Bucket
Re: Pacific Vapor Engine from Morrison & Marvin Castings
« Reply #399 on: May 17, 2016, 01:03:20 AM »
Thanks for all the very nice comments everyone; I appreciate them all.

Hopefully I'm not boring everybody to tears; I'm getting close on the oilers, then I will be back to work trying to finish the engine and display stand.  I am looking forward to seeing the oilers mounted on the engine.

Dave

Offline Mosey

  • Full Member
  • ****
  • Posts: 1598
  • Rosemont, New Jersey, USA
Re: Pacific Vapor Engine from Morrison & Marvin Castings
« Reply #400 on: May 17, 2016, 01:57:22 PM »
I have to laugh, that tail stock die holder is a work of art also. The rest of your work is like music for the eyes.
Mosey

Offline steamer

  • Global Moderator
  • Full Member
  • *****
  • Posts: 12699
  • Central Massachusetts, USA
Re: Pacific Vapor Engine from Morrison & Marvin Castings
« Reply #401 on: May 17, 2016, 02:04:39 PM »
Always learning something new from you Dave....Nice set ups!

Dave
"Mister M'Andrew, don't you think steam spoils romance at sea?"
Damned ijjit!

Offline fumopuc

  • Full Member
  • *****
  • Posts: 3244
  • Munich, Germany, EU
Re: Pacific Vapor Engine from Morrison & Marvin Castings
« Reply #402 on: May 18, 2016, 07:00:10 PM »
Dave, great pictures and nice parts.
Kind Regards
Achim

Offline Dave Otto

  • Full Member
  • *****
  • Posts: 4704
  • Boise, Idaho USA
    • Photo Bucket
Re: Pacific Vapor Engine from Morrison & Marvin Castings
« Reply #403 on: May 22, 2016, 12:11:27 AM »
Mosey, Dave, & Achim thanks for the support and nice comments.

Dave

Offline Dave Otto

  • Full Member
  • *****
  • Posts: 4704
  • Boise, Idaho USA
    • Photo Bucket
Re: Pacific Vapor Engine from Morrison & Marvin Castings
« Reply #404 on: June 26, 2016, 01:17:55 AM »
Hi guys,
Here is an overdue update on the oiler project.

The 4 post oilers have two wood knobs; both are different sizes and each one different top to bottom. Actually the large knob is asymmetric and the small one is symmetric. I wanted to see if I could machine these on the CNC mill as opposed to other methods that were considered.


Roland found a source for some nice African black wood remnants; these were small but just right for some oiler knobs. Black wood is extremely dense and will not float in water. It is very much like ebony and is an interesting material to machine; it is so heavy the small chips that come off just fall and lay there; no dust to speak of. To start out the wood was cut into a ¼” slab on the band saw


After taking a skim cut with a shell-mill, the blank was taped down to a fixture plate. Part of the first operation was to drill dowel pin holes that will be used to locate the stock for the second operation.

The first operation included the features that will locate and secure the knob to its respective brass part. The knobs were roughed and finished down to just a little past the midpoint.


After the first operation was completed the stock was flipped over on the pins; taped down and faced to thickness. Then the top profile roughed and finished; a 1/16” flat carbide end mill was used for the roughing pass and a .030” carbide ball end mill used for finishing.


Small webs were created on the solid model to help retain the knobs in the parent stock  as the final material was machined away. Here the knobs have been roughed and the finishing pass has started.


The combination of double sided tape and the webs worked great. The webs are only .02” thick where they meet the rim of the knob. I thought that I would need to use a tiny razor saw to remove them from the stock; but they easily punch out using only finger pressure.


To keep the run time reasonable I used .005” step down on the finishing pass. I had planned to sand them anyway. They were mounted on a mandrill in the lathe and sanded to a nice finish; then a Danish oil to finish them off.


Here are a few shots of the finished knobs mounted on the stop valve spindle and fill plug.

Thanks for checking in.
Dave


« Last Edit: June 26, 2016, 01:34:01 AM by Dave Otto »


SimplePortal 2.3.5 © 2008-2012, SimplePortal