Ok, we're down to the last part for the hnm mechanism, the carrier. It's a complex bit and it took me some time to figure out the best approach for it.
I started on the lathe and turned out what is essentially a disk that has the correct ID, OD and thickness for the finished part. Nothing too complex so far, so here's the resulting bit on the print.

I decided that the only way to do this part was to make a fixture as seen in the pix. I squared up a piece of 5/16 flat AL stock and made the sides exactly 2.00" and then bored a locating recess and tapped the center 10-32. You can also see a small locating pin that fits the fixture and the carrier so that the carrier can be exactly located on the fixture. I also make a small hold down bar, not yet shown in the pix.

And here's the first op in the mill. You can now see the hold down bar that secures the carrier to the fixture plate and allows each side to be milled down to the .063" thickness called out. I started by locating the center for the fixture in x and y so I'd end up the correct dimension in the middle.

After milling the sides, I drilled 6 holes thru the carrier with clearance size for 2-56. Then I drilled and tapped the same holes in the fixture plate 2-56, which is shown in the pix.

Once those holes were drilled and tapped, I could secure the carrier to the fixture and remove the hold down bar and centering plug so that I could mill the center bit away. Shown is the milling operation using a 3/32" end mill spinning about as fast as the Bridgeport can go. I took it slow and easy and used my MQL system to make sure the chips were cleared and the cutter and work was well lubricated. The nozzle for the MQL is on the left of the pix.

Here's where you can see why I used a square fixture for this part. Now i turned the fixture in the mill vise and drilled thru tapping size and then tapped 2-56 on one side and the other side was opened up to clearance for 2-56.

And here's the finished carrier on the print. Note that i changed it up a bit from Upshur's original design. I left just a bit of material so that the 2 halves of the carrier remained together. My thinking is that this would assure easier alignment when installed on the flywheel.

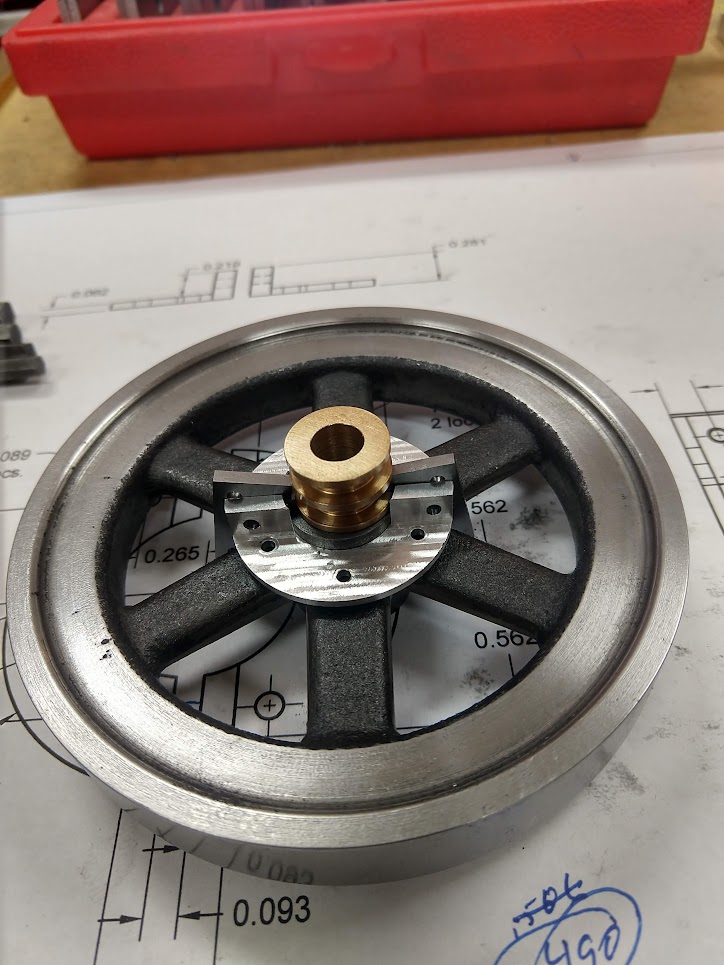
And here's how it will fit on the flywheel. This is just showing the general arrangement. I knew that I needed to trim down the hub of the flywheel and that became obvious when I started to fit it.
So it was back over to the lathe with the flywheel to reduce the height of the hub on the inner side of the flywheel. I used a boring bar to do so as it could easily reach into the area and it cuts well. I also machined the spoke area completely flat so that the carrier would fit securely on the flywheel. I didn't want to mark up the OD of the flywheel but yet I wanted to not have a bunch of runout on the flywheel as I was machining the hub. What I ended up using was as single layer of aluminum foil tape which is most commonly used for duct sealing. This stuff is very sticky and is completely uniform in thickness at right at .004". And it worked! No marks on the flywheel OD after machining. It's a good product and I'll certainly use it in the future.

Then back over to the mill to drill and tap 6 locations 2-56 to hold the carrier. I just centered the flywheel under the spindle and used xy coordinates to locate the holes. Note that I continued to use the foil tape to protect the OD. It continued to work!

Here's a mod to the flywheel that I had to do after I started trying to fit the hnm mechanism. Since I used a cast flywheel, the hub and distance at the spoke hub webs was larger than Upshur's design. So where the hnm arms are located I used a 3/16" end mill to remove the material at the 2 locations so that the hnm arms would close properly.

Here's part of the fitting process. Everything mounted but the shoulder screws that I wanted to use were interfering just a bit on their heads. Plus you'll note that they prevent the 2-56 mounting screws from being installed at 2 locations.

And here are some fitting mods to the hnm arms. I rounded the ends and kept trying them until the fit the spool properly. I also shorted the other short arms so that they'd allow movement toward the hub. I had to do this since my hub OD was a bit larger than Upshur's original design. Rounding was done on a belt sander after bluing and marking with a radius gage.

To cure the interference issue on the 2-56 screws, I made a couple of .093" pins out of drill rod and made grooves on each end of them to accept a 3/32" e-clip. I didn't use anything fancy for grooving. All I did was to grind down a bit of HSS to .020". The grooving actually went very well as the tool was sharp and I didn't have to go very deep. In case anyone hasn't used these very small e-clips before, my advise is to buy some extra ones as they are extremely likely to launch themselves into another dimension, never to be seen again, if you slip at all during installation or removal. The best tool I found to use was a pair of the locking type of hemostats.

Next was lots of assembly, trying, dis-assembly, fiddling around and repeating the cycle ad nauseum. I'll show only a few pix of some of the more interesting tweaks that I ended up doing.
The first tweak that I did was to shim up the hnm lever in the camshaft slot. For whatever reason it was fairly sloppy and my thinking was that was perhaps not moving freely as the end of it engaged at different places in the spool. So I made a thin brass shim just by drilling and parting off a piece of .25" brass. I was shooting for .012" and I managed to get pretty close. Even the Queen nodded her approval.

Here's the shim in relation to the hnm lever.

The next significan tweak was that I built in the end of the hnm lever with silver solder. I got overzealous when I was shaping it and got it way too sloppy where it fit in the spool. I just cleaned it with acetone, fluxed it and applied the silver solder to the end and then reshaped it. Here's the lever after building it up.

Now that I managed to get everything moving freely and pretty well as it should be moving, I moved the hnm mechanism by hand first to its 'hit' position, that is low rpm and made sure that the lever did NOT engage with the stop. That can be seen in this pix.

Then I moved the mechanism by hand to the 'miss' or 'ball-out' position and as you can see the lever clearly engages the stop which in turn locks the exhaust valve open.

And here's a view of the hnm mechanism fully installed showing the weights and springs in their 'hit' position. So far so good.

So, I was feeling good at this point and decided to run the mechanism with my drill motor as I could easily control the speed and could hopefully observe the hnm mechanism in action without the concern of actually trying to run the engine. Well, let me tell you what NOT to do. I had the ignition system all wired up but NOT secured in any way and had NOT paid attention as to where everything was laying. So after some time, running the engine with the drill motor, the ignition wiring decided to leap into the hnm mechanism and you can see the result.

That's a destroyed plug wire, ground wire, and the worst thing was that the ground wire was ripped out by the roots from the S/S CDI module and there's no obvious way to solder it back as it's all heavily potted inside.
So, what's next for our now incredibly stupid feeling small engine builder???
Stay tuned for the next post to find out the answer!
Mike


