Author Topic: Chris's Holly Pumping Engine Build  (Read 155349 times)

Offline cnr6400

  • Full Member
  • *****
  • Posts: 2776
Re: Chris's Holly Pumping Engine Build
« Reply #795 on: July 16, 2021, 10:16:54 PM »
 :ThumbsUp: :cheers:
"I've cut that stock three times, and it's still too short!"

Offline crueby

  • Full Member
  • *****
  • Posts: 18660
  • Rochester NY
Re: Chris's Holly Pumping Engine Build
« Reply #796 on: July 16, 2021, 10:25:10 PM »
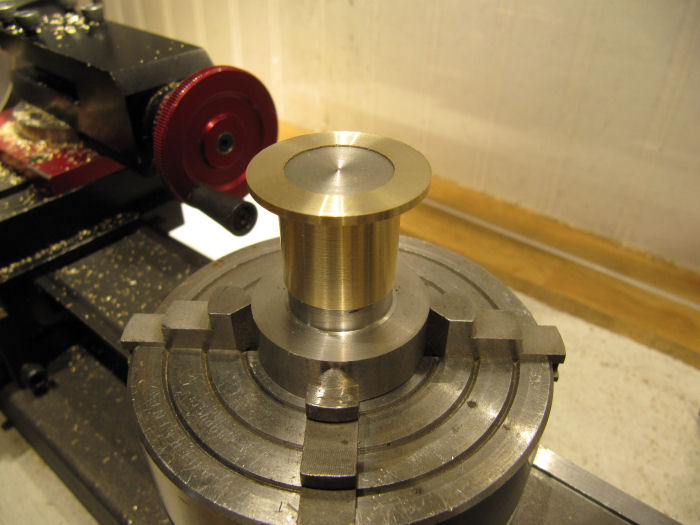
So, in thinking, plotting, planning, mind-changing, and all round procrastinating on the flywheels, I finally settled on how things would be done and how it would be held. Many ways to do it, this one seems to be working out so far. The desire was to use a taper lock for the hubs, but the hubs are fairly small diameter and there is not much width around them available, so it wound up being a slightly modified version of the usual lock design. Putting the taper into the hubs directly is not practical on my machines, since the lathe won't swing this large a piece (raw casting is 8" diameter, finished flywheel is 7.5" diameter) so that I can use the normal compound rest. What I wound up doing is not ideal, but works fine for a low-rpm engine like this one. I replaced the crankshaft on the lathe between centers and turned a shallow taper into the flywheel bosses, narrow end out to the outsides so the locks could be slipped on from the ends.
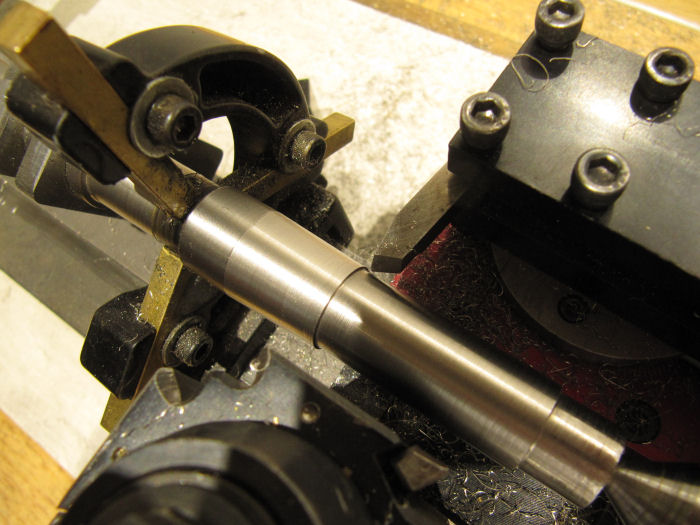
Then, with the compound rest still locked into its angle (3 degrees, any steeper and it would not take advantage of the full width) I also turned a mandrel that will stay locked into the four-jaw for the duration of these steps.
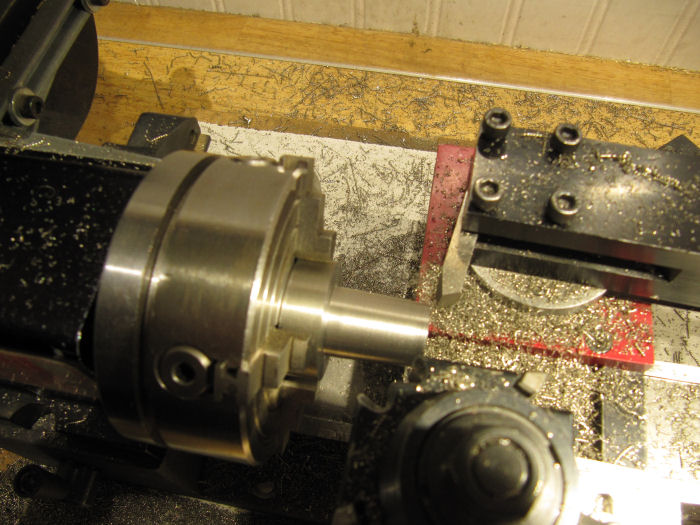
Both those operations were on the outside of the parts, the compound rest works with the cutter inverted and on the back of the cross slide. For the next steps, cutting the internal tapers on the locks, I switched to a boring tool held in a little adapter I made several years ago that holds the tool at the right hieght for cutting internally on the normal front side. The holes were first bored straight through to the size matching the small end of the taper. Then, cut on the taper angle to widen the outer end far enough to match the lengths of the tapers made on the crankshaft and the mandrel. The mandrel was used to check the size of the hole.
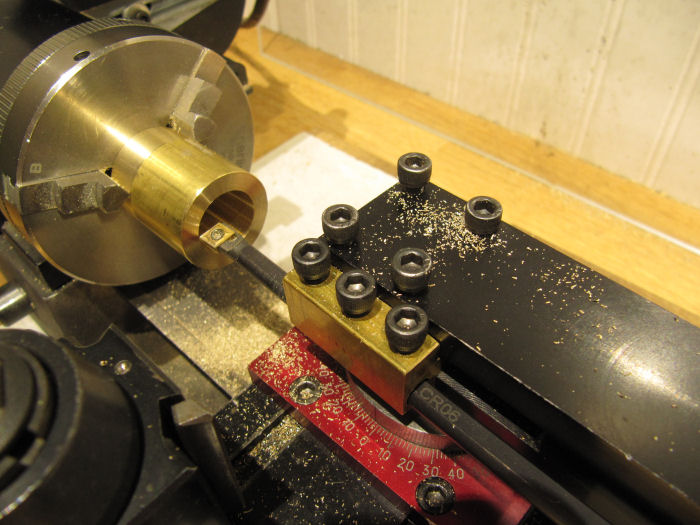

The turned the outside of the locks (making two of these, one for each flywheel) down to the size that I am going to bore in the flywheels. This is a straight parallel cut.
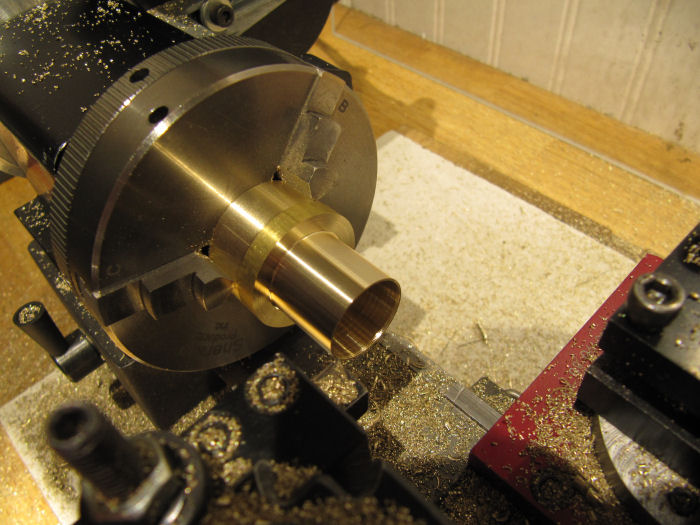
After parting off, here is the taper lock sitting on the mandrel - perfect fit, angles match.
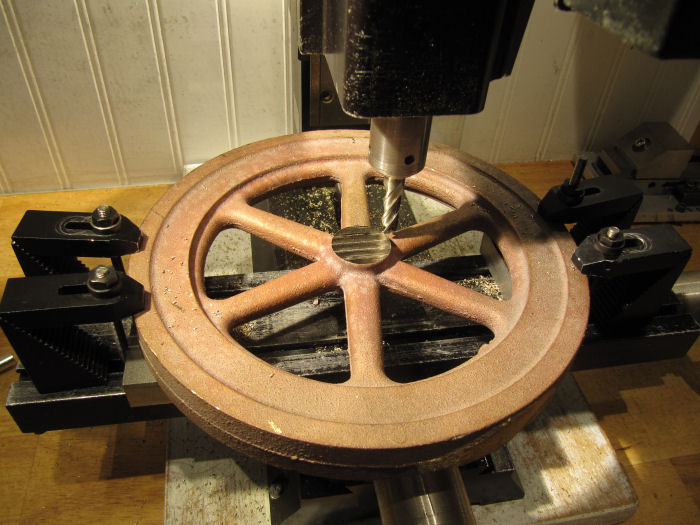
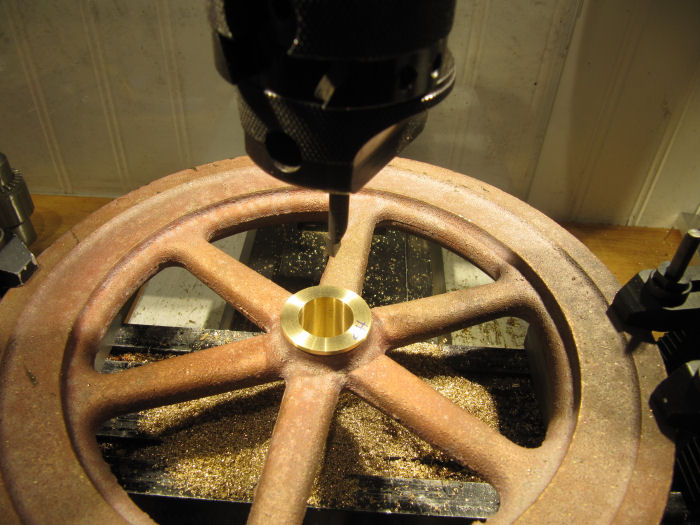
Now on to the first flywheel. The castings (from Martin Models) are bronze, and they are quite even, just a little of the usual offset between the sides, and the surfaces are pretty good for castings. I found a spot where it would sit level on the mill table, with blocks under each end to let me bore through without hitting the table. After clamping down with four step clamps, the end of the hub on that side was milled off flat - it had an '8' cast into it from the foundry.

 I used the co-ax indicator to center the hub under the mill head, and locked down the mill table.
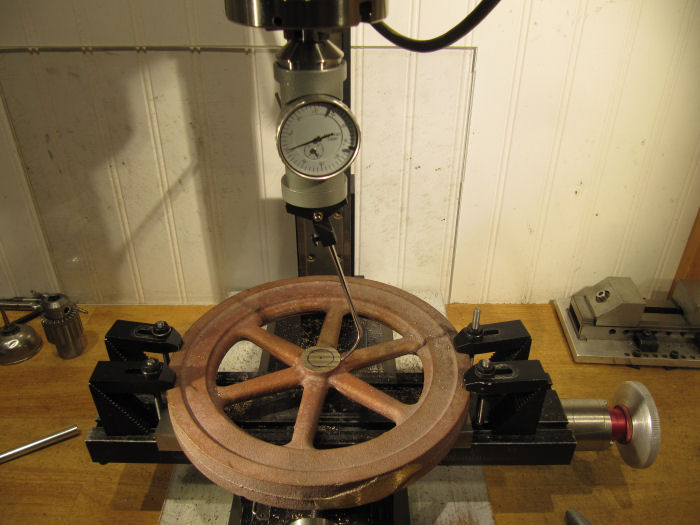

I checked both the edge of the hub and the edge of the rim, they matched within the size of the casting bumps. Next step was to drill a starter hole and begin boring out the center...
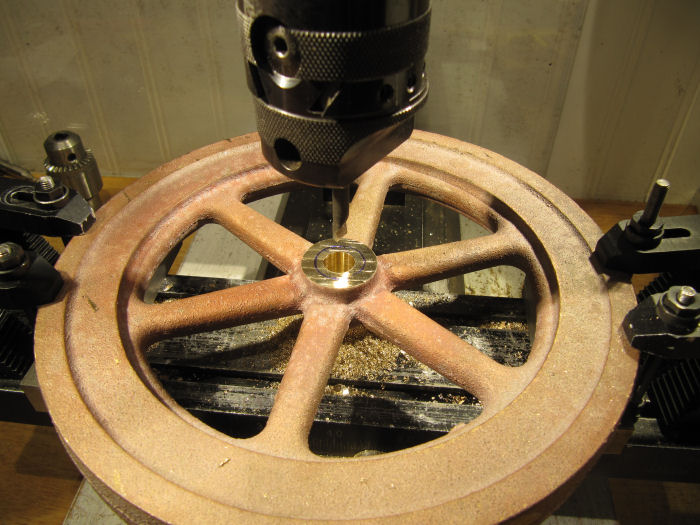
A 'boring' while later, the hole was sized to be a snug fit on the taper lock.

Then turned the headstock on the lathe 90 degrees and chucked up the flywheel - checked the tightness on the hub several times, and hand-spun the wheel to make sure it was all solid. All good, and running pretty true, so I started some light cuts to take off the uneven-ness.
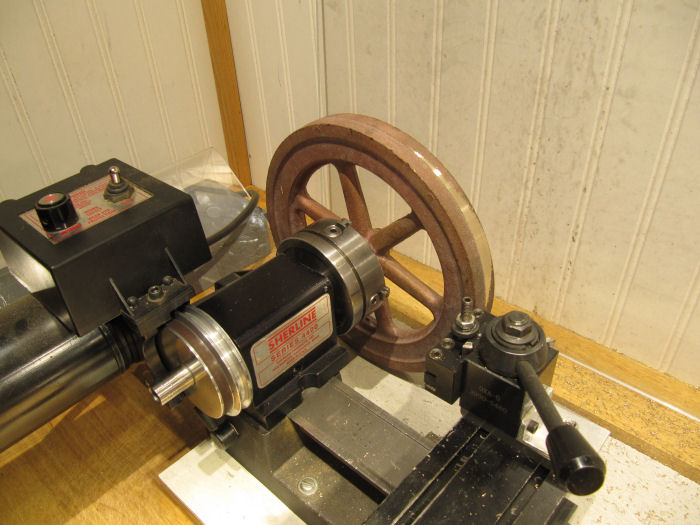
Both sides and the hub look to be pretty close, so that is good. Really glad I went for the bronze casting - no hard spots on the surface to deal with and no black powder like with cast iron!  The sprue location took a few extra passes.
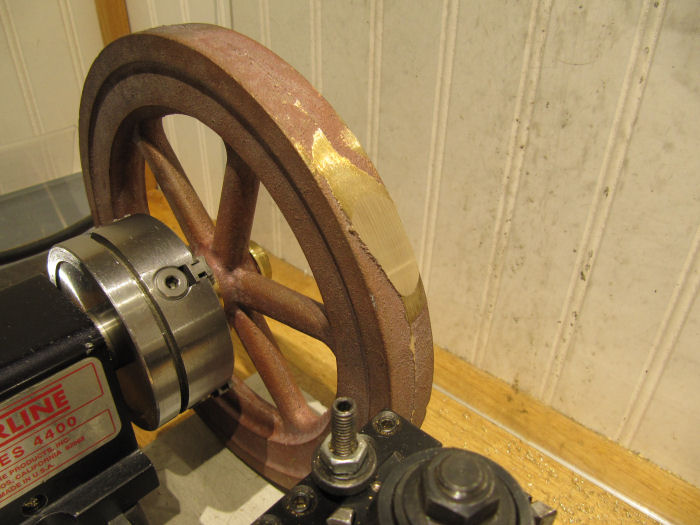
Once the high spots were off I could up the rpm a little more as it got into full cuts. Going to take a while to get it down to size - need to take the OD from 8" to 7.5", and the rim width from 7/8" down closer to 1/2". This casting was the closest I could find to the size needed for this engine.
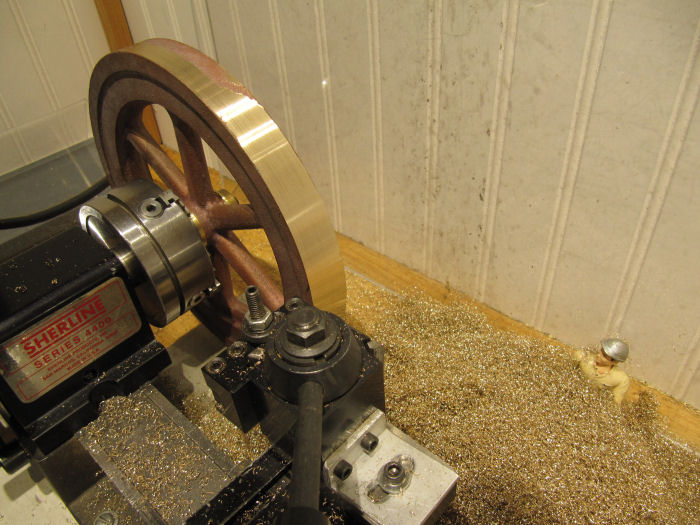
As you can see in that picture, the shop elves loved how soft the bronze wool coming off the cuts was, and decided to take a bath in it...
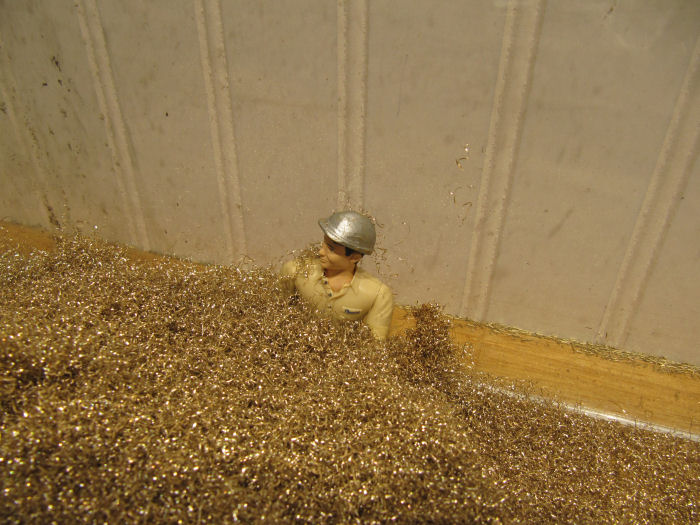
Cleanup will be easy, the shavings collect in a mat that can be picked up in one big carpet.

Offline RReid

  • Full Member
  • ****
  • Posts: 1697
  • Northern California
Re: Chris's Holly Pumping Engine Build
« Reply #797 on: July 17, 2021, 12:32:47 AM »
Being able to turn the headstock like that is a neat trick!  :ThumbsUp:
Regards,
Ron

Offline crueby

  • Full Member
  • *****
  • Posts: 18660
  • Rochester NY
Re: Chris's Holly Pumping Engine Build
« Reply #798 on: July 17, 2021, 02:01:50 AM »
Being able to turn the headstock like that is a neat trick!  :ThumbsUp:
Yeah, both the lathe and the mill allow it, only way to handle a part this big. I'm having to do the turning in sessions, running the motor slow with a load means it gets hot.

Offline cnr6400

  • Full Member
  • *****
  • Posts: 2776
Re: Chris's Holly Pumping Engine Build
« Reply #799 on: July 17, 2021, 02:52:15 AM »
 :ThumbsUp: :ThumbsUp: :ThumbsUp: :popcorn: :popcorn: :popcorn:

Where's that bug zapper circuit, to apply to each side of that bronze wool with Bob in the middle?  :LittleDevil:
"I've cut that stock three times, and it's still too short!"

Offline crueby

  • Full Member
  • *****
  • Posts: 18660
  • Rochester NY
Re: Chris's Holly Pumping Engine Build
« Reply #800 on: July 17, 2021, 02:58:41 AM »
:ThumbsUp: :ThumbsUp: :ThumbsUp: :popcorn: :popcorn: :popcorn:

Where's that bug zapper circuit, to apply to each side of that bronze wool with Bob in the middle?  :LittleDevil:


Evil!


Funny, but evil!   :lolb:

Offline EricB

  • Full Member
  • ****
  • Posts: 128
Re: Chris's Holly Pumping Engine Build
« Reply #801 on: July 17, 2021, 04:42:41 AM »
Being able to turn the headstock like that is a neat trick!  :ThumbsUp:
Yeah, both the lathe and the mill allow it, only way to handle a part this big. I'm having to do the turning in sessions, running the motor slow with a load means it gets hot.

Couldn't you move the belt to the slower pulley?

Great job so far!

Eric

Offline Admiral_dk

  • Full Member
  • *****
  • Posts: 3774
  • Søften - Denmark
Re: Chris's Holly Pumping Engine Build
« Reply #802 on: July 17, 2021, 12:35:43 PM »
Quote
and all round procrastinating

I'm sorry but I can not get my head around that you have this sentence in your vocabulary Chris - given your build record here ....  :???:

Per

Offline crueby

  • Full Member
  • *****
  • Posts: 18660
  • Rochester NY
Re: Chris's Holly Pumping Engine Build
« Reply #803 on: July 17, 2021, 01:28:04 PM »
Being able to turn the headstock like that is a neat trick!  :ThumbsUp:
Yeah, both the lathe and the mill allow it, only way to handle a part this big. I'm having to do the turning in sessions, running the motor slow with a load means it gets hot.

Couldn't you move the belt to the slower pulley?

Great job so far!

Eric
Only two positions, its normally on the faster one, and I never think about changing it since the parts are normally all small. Doh!


Will try that this morning!!!!!

Offline crueby

  • Full Member
  • *****
  • Posts: 18660
  • Rochester NY
Re: Chris's Holly Pumping Engine Build
« Reply #804 on: July 17, 2021, 01:29:18 PM »
Quote
and all round procrastinating

I'm sorry but I can not get my head around that you have this sentence in your vocabulary Chris - given your build record here ....  :???:

Per


 :Lol:   well, I delayed by making another part first! 

Offline crueby

  • Full Member
  • *****
  • Posts: 18660
  • Rochester NY
Re: Chris's Holly Pumping Engine Build
« Reply #805 on: July 17, 2021, 04:13:07 PM »
Eric - that worked great, got the motor into a better power band, keeps it cooler a lot longer, and gives more cutting power. Thanks for the reminder, I needed to move the trees to see that forest!    :cheers: :cheers:

Getting more done on the flywheel, about halfway to final diameter on the first one.

And the shop elves were looking at the bronze wool some more. They have always been fans of Wile E. Coyote, and now they are off at the library looking up how to build a 'Wool' E. Mammoth!!!


Offline crueby

  • Full Member
  • *****
  • Posts: 18660
  • Rochester NY
Re: Chris's Holly Pumping Engine Build
« Reply #806 on: July 17, 2021, 06:58:39 PM »
Uh oh, the Wool E. Mammoth is awake!


Offline Don1966

  • Full Member
  • *****
  • Posts: 6817
  • Columbia, MS
Re: Chris's Holly Pumping Engine Build
« Reply #807 on: July 17, 2021, 07:52:29 PM »
Lots of good turning and fab Dog, but hey you disappoint me Dog with a store bought flywheel. I was eager to see you fab one up and learn from it. All on all always excellent work….. :Love:


 :drinking-41:
Don

Offline crueby

  • Full Member
  • *****
  • Posts: 18660
  • Rochester NY
Re: Chris's Holly Pumping Engine Build
« Reply #808 on: July 17, 2021, 08:02:31 PM »
Lots of good turning and fab Dog, but hey you disappoint me Dog with a store bought flywheel. I was eager to see you fab one up and learn from it. All on all always excellent work….. :Love:


 :drinking-41:
Don
I really thought about piecing one up, seen others do it on this forum, one this size would need a lot of bar stock and even more work than turning this one down. Maybe next time!  On my MEM Corliss I pieced them up, using pipe sections for the rims - never tried a full wagon-wheel-style buildup of one. Yet.

Offline cnr6400

  • Full Member
  • *****
  • Posts: 2776
Re: Chris's Holly Pumping Engine Build
« Reply #809 on: July 17, 2021, 09:26:27 PM »
 :ThumbsUp: :ThumbsUp: :ThumbsUp: :popcorn: :popcorn: :popcorn:

Nice to see the mammoth doing a cameo appearance!
"I've cut that stock three times, and it's still too short!"


SimplePortal 2.3.5 © 2008-2012, SimplePortal