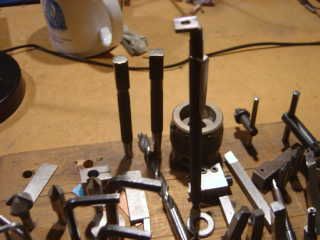
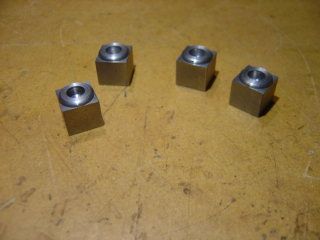
Well, I've made bit of progress. The columns consist of three sections, a square base, a plate at the top and the columns proper.
The bases are made from half inch square material, half an inch long. The book says to part these off in the lathe, but I chose to hacksaw them and machine from there.
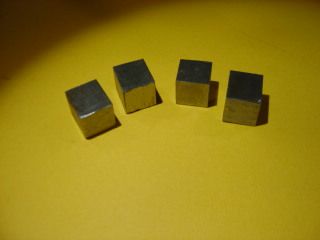
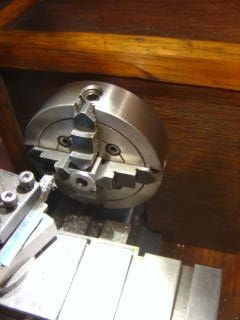
Now I don't have quick change tooling on my lathe so I arranged the work to reduce the number of tool changes. Fortunately the half inch square material sat nicely against the face of the four jaw chuck with sufficient material protruding from the jaws to do the necessary. So having cleaned up the end of each base, I set the first one up carefully centered and tapped back against the chuck face. This was then brought to length, drilled 3mm and counterbored 1/4" to take the column proper. Then I slacked off jaws 1 and 2 of the chuck, put the next in and treated it the same, using the same dial readings. The same was done for the last two and I ended up with four bases of the same length to within a couple of thou. Good enough for this job.
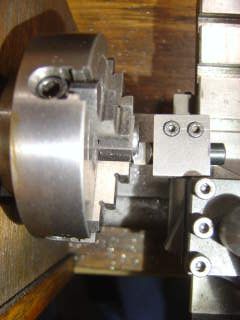
The tops of the bases have a little radius to make them a bit more interesting to look at. So each was rechucked and the top square reduced to a circle.
I used a form tool made from silver steel for the final shape.
So the bases were comlete.
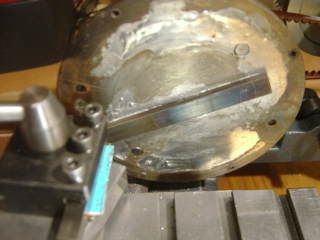
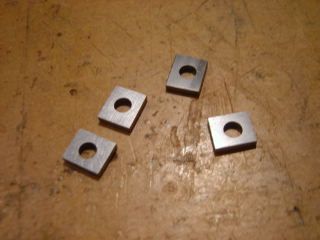
The plates at the top of the columns are no more than oblong washers, 3/8" wide by 3/32" thick. The nearest material I had was 3/8" by 1/8" so a length was soldered to a plate on the faceplate and brought to thickness.
Then drilled against the drill pad in the tailstock.

These were the cut to length and cleaned up.
It was while cleaning up that the workshop gremlin struck and I only had three washers. I searched high and low without luck, but fortunately there was sufficient 3/32" material left to make a replacement so now I'm back to a full set.
So that's where I've got to, with the columns proper being the next job.
It was while clearing up I spotted the missing washer so I now have a spare.