Recent Posts

Pages: [1] 2 3 ... 10
1
Your Own Design / Re: Squint Scale Curtiss Model K Aero I4
« Last post by Kim on Today at 05:29:20 AM »
Nice fuel tank you fabed up there, Ron.  And the base looks great too.  You're going to be done with this before we know it!  :ThumbsUp: :popcorn:

Kim
2
Your Own Design / Re: Kearsarge Windlass Engines
« Last post by Kim on Today at 05:26:02 AM »
The handle is only inserted to move the pawls, then its removed before starting the engine. There are holes all the way around the light blue disc, so they can pick a convenient one when they want to change the pawls. There will be a brake band in the groove on the far side of the pink drum, to hold the drum from moving when changing the pawls.

Ah... THAT's what I was missing!  The handle doesn't stay in place, and you don't change the position of the pawls on the fly. They're either engaged or not, when you start things up.  OK, that makes sense.

Besides, changing the engagement of the pawls on the fly seemed a little iffy without some kind of clutch mechanism there.  Seems like the ends of the pawls would get chewed up - or the inside of the yellow wheel, or both.

Makes a lot more sense this way!  Thanks for the explanation, Chris!
Kim
3
Vehicles & Models / Re: Pennsylvania A3 Switcher (Kozo)
« Last post by Kim on Today at 05:20:48 AM »
Thanks Chris and Jeff,  Good advice, all the way around!  ^-^

Kim
4
Your Own Design / Re: Squint Scale Curtiss Model K Aero I4
« Last post by cnr6400 on Today at 04:33:01 AM »
 :ThumbsUp: :ThumbsUp: :ThumbsUp: :popcorn: :popcorn: :popcorn:
5
Your Own Design / Re: Squint Scale Curtiss Model K Aero I4
« Last post by RReid on Today at 02:17:58 AM »
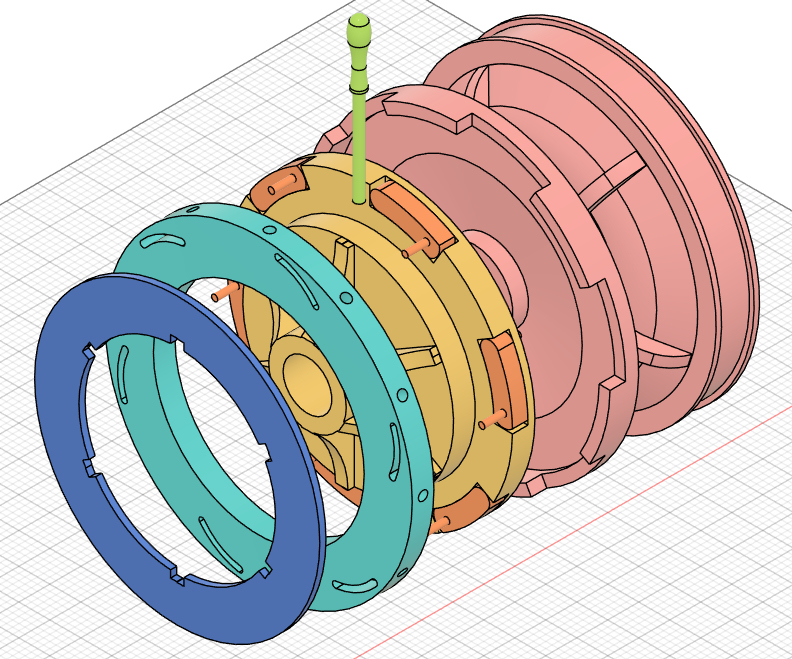
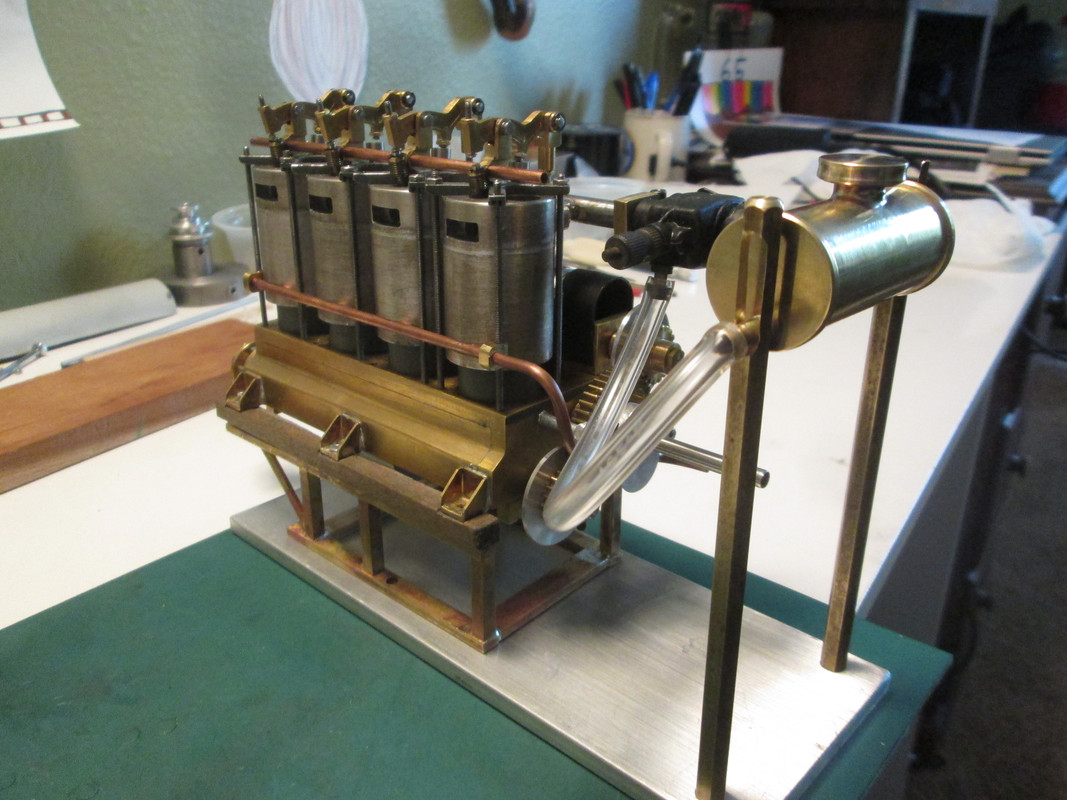
The next projects have been a new and better engine stand, and a fuel tank along with its mounting columns.

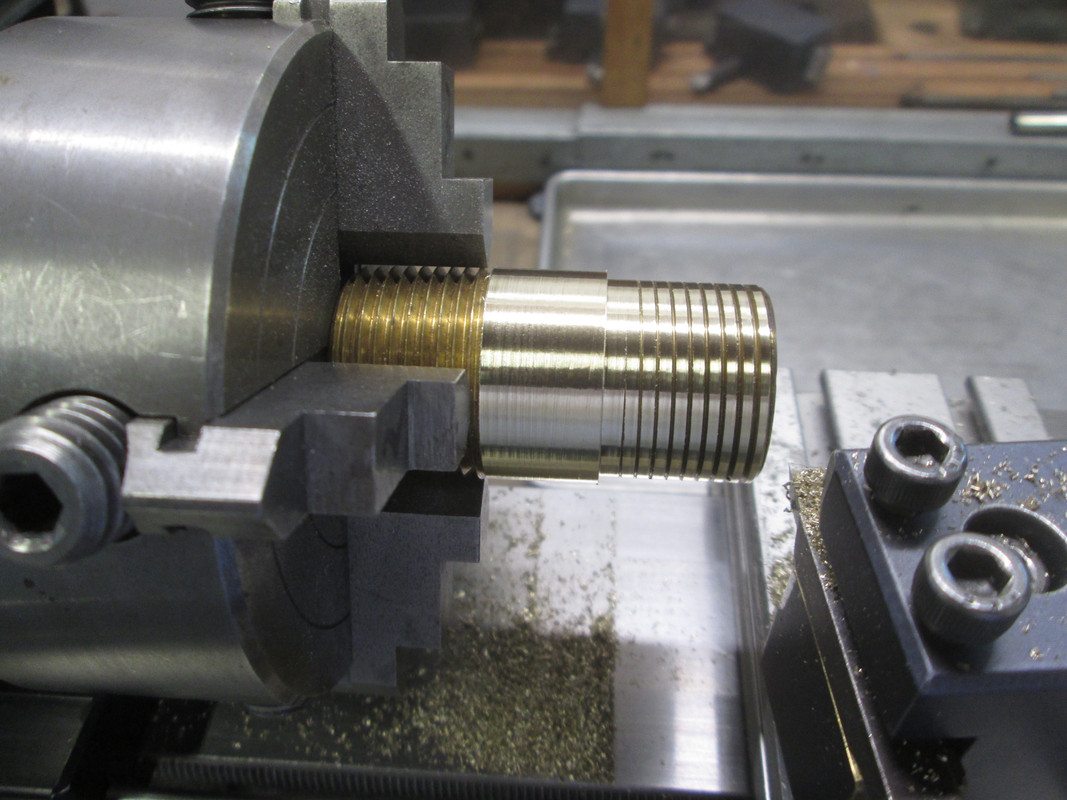
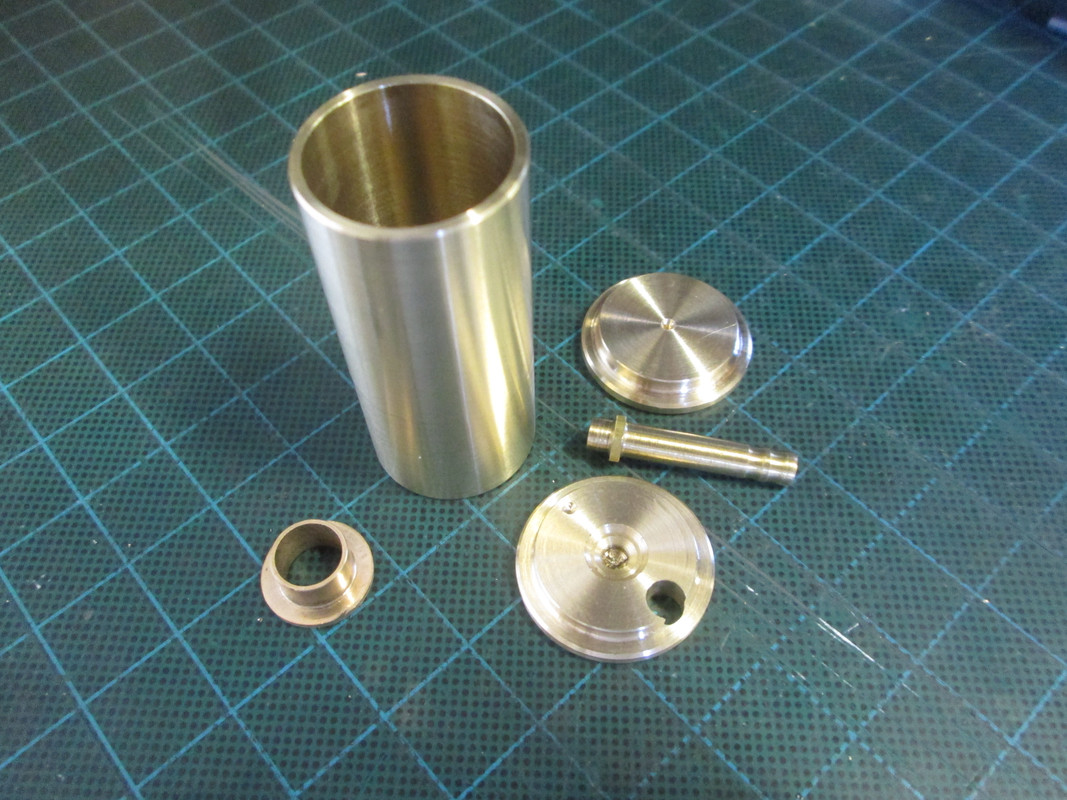
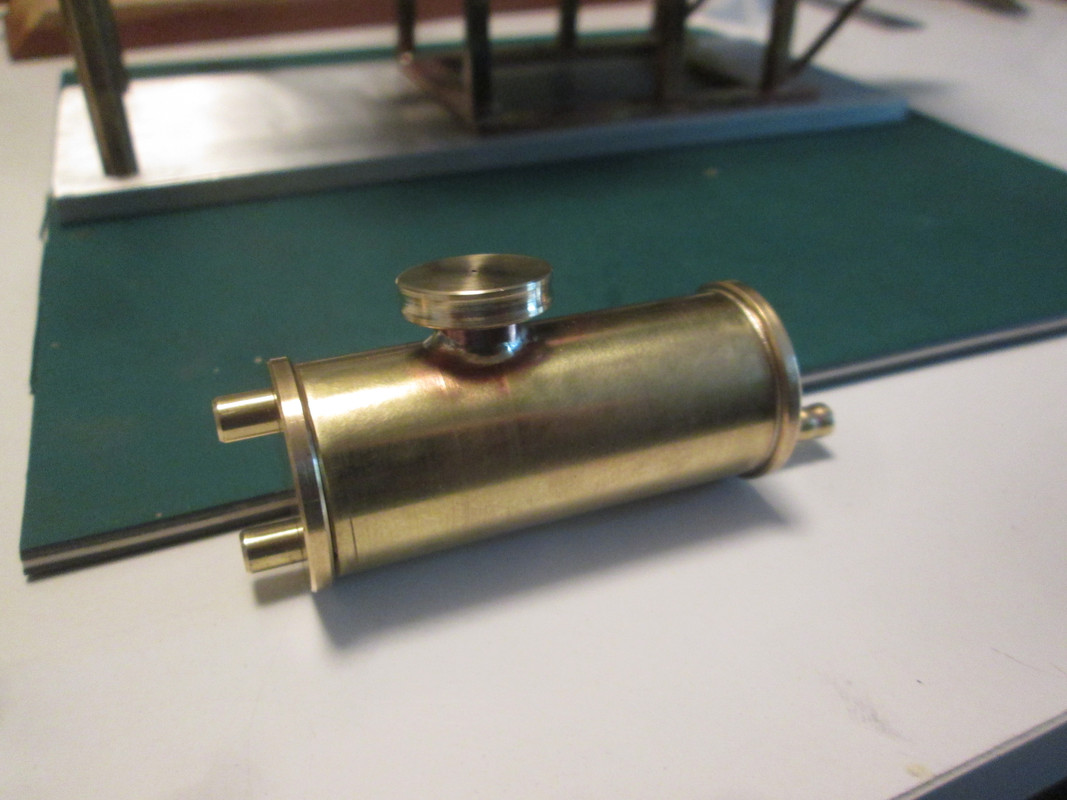
The fuel tank started as a brass pipe nipple that has been in the junk drawer for years. I turned the threads off, and bored it out slightly to clean up the inside and increase the volume a bit.


The end caps and filler cap were basic turning jobs, while the filler neck and the tube nipple were recycled from parts made for other purposes but not used.


The carburetor I plan to use, at least initially, came off of an Irvine 20 “Black Head” model airplane engine I've had since ~1980. I tried running it on my V-twin some time ago with success, so I know it can work. A vintage carb for a vintage engine.


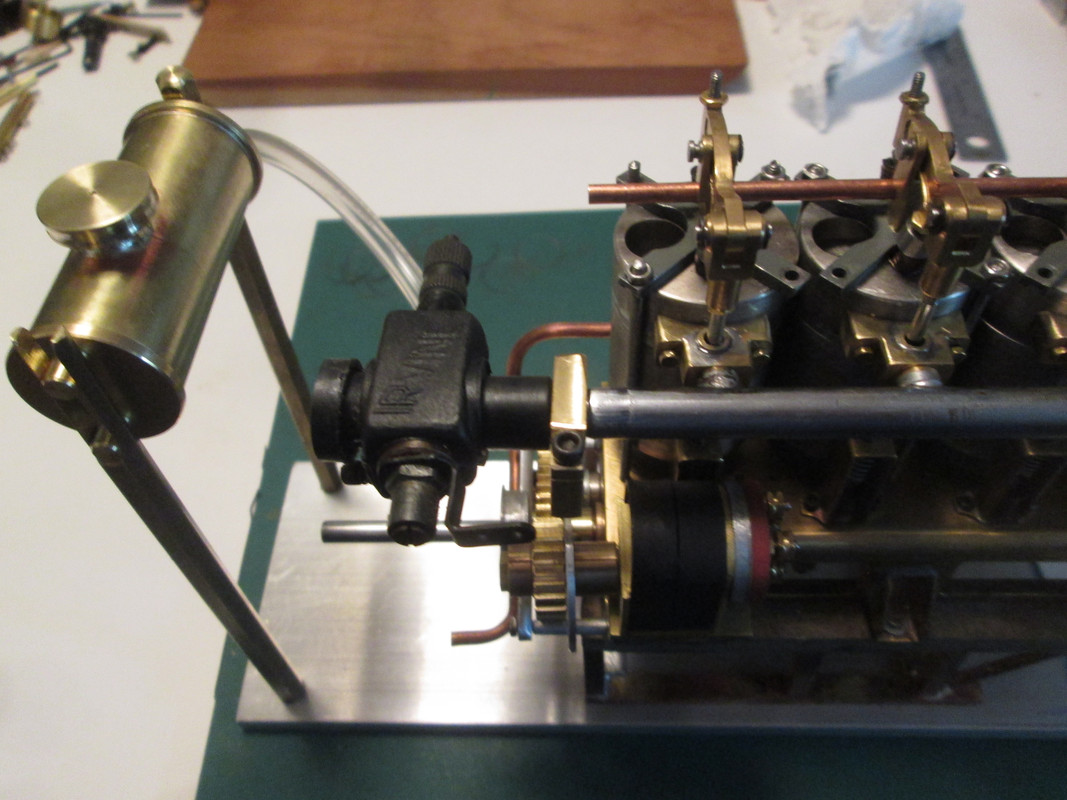
I didn't take any separate pics of the new engine stand, but it shows up in this last photo. It will be getting a coat of paint eventually.

6
Your Own Design / Re: Kearsarge Windlass Engines
« Last post by crueby on Today at 12:40:13 AM »
Thats a huge project! Its rare to get an inside look at one, nice!
7
Vehicles & Models / Re: Pennsylvania A3 Switcher (Kozo)
« Last post by cnr6400 on Today at 12:12:04 AM »
 :ThumbsUp: :ThumbsUp: :ThumbsUp: :popcorn: :popcorn: :popcorn: Re the method for the big hole to be cut - I'd go with the jigsaw myself, or chain drilling / belt sander method. These will have a lot less drama (and less un-intended rapid energy transfer to the user's limbs and person) than hole saws - hole saws in sheet steel with interrupted cut makes me nervous, based on several awful attempts with bad results. (thankfully no ambulance rides either). I really like fly cutting too, with one exception - trepanning holes in sheet steel! Again, had some less than fun experiences.  Good luck with the big hole excavation!  :cheers: PS if you know anyone with a plasma cutter, CNC sheetmetal shop, or laser metal cutting service, these methods are much better and safer in the long run for making big holes in thin steel sheet.
8
Your Own Design / Re: Kearsarge Windlass Engines
« Last post by redhouseluv on April 22, 2024, 11:59:32 PM »
Slightly off topic, but connected!

Whilst twiddling my thumbs waiting for house refurb to finish I have been following a full size capstan refurb. Its from the Tally Ho project which some of you may know; for those who don't, it's a bottom up rebuild of a 1910 cutter (193 episodes!!)

Parts have need to be recast and it shows the whole process including the making of patterns, other parts made from scratch where originals are worn.

My interest has been watching the capstan machining videos by Keith Rucker, the highly skilled engineer has a series of videos showing the dismantling followed by the machining element of the restoration; this is filmed in his amazing vintage workshop utilising an awesome selection of vintage machinery which in some cases he has rebuilt.

Its a fascinating watch................

The Capstan machining elements: https://www.youtube.com/playlist?list=PLbGC44mjwqrcH9uRb7E3DZvvR98Q_qIEv

The Capstan pattern elements: <a href="https://www.youtube.com/watch?v=dCAZjZa0U1M" target="_blank">http://www.youtube.com/watch?v=dCAZjZa0U1M</a>

The Capstan casting elements: http://www.yachttallyho.com/index.php/blog/videos-other-people-about-tally-ho/tally-ho-capstan-casting-part-1

The Tally Ho project is here: https://www.youtube.com/c/SampsonBoatCo
9
Your Own Design / Re: Kearsarge Windlass Engines
« Last post by crueby on April 22, 2024, 11:32:54 PM »

That is an excellent description, thank you!
But where I'm getting hung up, is, if the yellow disk is fixed to the shaft, then it rotates with the main shaft, right?  And then, doesn't the light blue disk (the one that holds the handle) also have to rotate with the yellow disk?   And if that is the case, doesn't the control handle rotate too? It seems hard to disengage if the handle is it's rotating.

I'm clearly missing something here...  :thinking:

Kim


The handle is only inserted to move the pawls, then its removed before starting the engine. There are holes all the way around the light blue disc, so they can pick a convenient  one when they want to change the pawls. There will be a brake band in the groove on the far side of the pink drum, to hold the drum from moving when changing the pawls.
10
Vehicles & Models / Re: Pennsylvania A3 Switcher (Kozo)
« Last post by crueby on April 22, 2024, 11:27:59 PM »
Ah... good advice, Chris!

I checked when I was out in the shop earlier, and I don't have a hole saw anywhere near the correct size.  I do, however, have a fly cutter circle cutter. I've used that many times to make round holes - in both wood and metal.  But I don't know how well it would react to the interrupted cut of a non-full circle in the steel.  Hmm... feels a little iffy.  I'll have to think about that.  Might just end up cutting it out on the jigsaw.

Kim
Yeah, I  agree on an interrupted  cut that large a diameter!
Pages: [1] 2 3 ... 10
SimplePortal 2.3.5 © 2008-2012, SimplePortal