Author Topic: Building a bigger Easton & Anderson Grasshopper  (Read 108796 times)

Offline Jo

  • Administrator
  • Full Member
  • *****
  • Posts: 15305
  • Hampshire, england.
Re: Building a bigger Easton & Anderson Grasshopper
« Reply #105 on: January 11, 2013, 08:33:26 PM »
Nicely done :ThumbsUp:. You made that look much easier than using the casting that came with the original smaller engine ;).

Looking forward to seeing how you are going to do the maker's plate.  :noidea: which reminds me I still have to layout the name plates for the DTC.

Jo
Enjoyment is more important than achievement.

Offline Jasonb

  • Full Member
  • *****
  • Posts: 9491
  • Surrey, UK
Re: Building a bigger Easton & Anderson Grasshopper
« Reply #106 on: January 11, 2013, 08:36:38 PM »
Really need someone with a pantograph engraver :thinking:

Or try photo etch as in the latest ME

Offline Jo

  • Administrator
  • Full Member
  • *****
  • Posts: 15305
  • Hampshire, england.
Re: Building a bigger Easton & Anderson Grasshopper
« Reply #107 on: January 11, 2013, 08:39:05 PM »
We might be able to come to some arrangement ;).

Jo
Enjoyment is more important than achievement.

Offline Jasonb

  • Full Member
  • *****
  • Posts: 9491
  • Surrey, UK
Re: Building a bigger Easton & Anderson Grasshopper
« Reply #108 on: January 11, 2013, 08:45:39 PM »
The problem is the lettering will only be about 1mm high and I'm still not decide if it is raised or engraved, what do you think from the photo on the first page ?

Offline Jasonb

  • Full Member
  • *****
  • Posts: 9491
  • Surrey, UK
Re: Building a bigger Easton & Anderson Grasshopper
« Reply #109 on: January 11, 2013, 08:48:46 PM »
Just blown it up and it does look like engraved letters but its a lot ot get onto a 3/4" dia plaque

Offline Jo

  • Administrator
  • Full Member
  • *****
  • Posts: 15305
  • Hampshire, england.
Re: Building a bigger Easton & Anderson Grasshopper
« Reply #110 on: January 11, 2013, 08:54:48 PM »
That is engraved (look at the shadows in "Easton") so it is easy enough to do ;D.

Jo
Enjoyment is more important than achievement.

Offline zeeprogrammer

  • Full Member
  • *****
  • Posts: 6811
  • West Chester, PA, USA
Re: Building a bigger Easton & Anderson Grasshopper
« Reply #111 on: January 12, 2013, 12:09:18 AM »
That's an amazing bit of forming and soldering. Wow.
Carl (aka Zee) Will sometimes respond to 'hey' but never 'hey you'.
"To work. To work."
Zee-Another Thread Trasher.

Offline Jasonb

  • Full Member
  • *****
  • Posts: 9491
  • Surrey, UK
Re: Building a bigger Easton & Anderson Grasshopper
« Reply #112 on: January 13, 2013, 08:17:26 AM »
Just noticed that I did not post a photo of the painted Valve chest cover so here you go.


Offline Jasonb

  • Full Member
  • *****
  • Posts: 9491
  • Surrey, UK
Re: Building a bigger Easton & Anderson Grasshopper
« Reply #113 on: January 20, 2013, 07:54:04 PM »
You may remember that when I was cutting the brass strips for the chequer plate that I said the method may work for cutting planking to go around cylinders, well now is the time to try it out.

I had some old mahogany that I ripped out of a house that was built about 1908-1909, it was the tops of some shelves in the alcoves either side of a fireplace that I replaced with this. It was machined down to 3/8" thick which was the width of plank that I wanted and then cut to the correct length to fit between the cylinder end covers.


I then held it in the mill vice and used a slitting saw to slice of 1/16" strips which will need little if any further work


And here they are tried up against the cylinder, there are a couple of brass bands to add and some small screws that will go into the MDF rings below.


Bit of a short one this week but I will make up for that in the next installment.

J

Offline NickG

  • Global Moderator
  • Full Member
  • *****
  • Posts: 1430
Building a bigger Easton & Anderson Grasshopper
« Reply #114 on: January 20, 2013, 07:58:15 PM »
Nice idea with the wood Jason, all looks very authentic.

Offline zeeprogrammer

  • Full Member
  • *****
  • Posts: 6811
  • West Chester, PA, USA
Re: Building a bigger Easton & Anderson Grasshopper
« Reply #115 on: January 20, 2013, 08:51:04 PM »
Bit of a short one this week but I will make up for that in the next installment.

More than I get done in a week.

Quality counts too and you've certainly got that.
Carl (aka Zee) Will sometimes respond to 'hey' but never 'hey you'.
"To work. To work."
Zee-Another Thread Trasher.

Offline black85vette

  • Full Member
  • ****
  • Posts: 366
  • Rick in Yukon, OK
Re: Building a bigger Easton & Anderson Grasshopper
« Reply #116 on: January 20, 2013, 09:27:38 PM »
Wood is looking great.  Nice that you could recycle some old pieces.   Adds a lot.

Offline Don1966

  • Full Member
  • *****
  • Posts: 6818
  • Columbia, MS
Re: Building a bigger Easton & Anderson Grasshopper
« Reply #117 on: January 20, 2013, 09:54:26 PM »
I am always amazed at how talented you are Jason. You just keep coming up with more and more ways to do things. Awesome progress on your engine.  :praise2: :praise2:
I think I going to sell my equipment and go back to Electrical and Electronic work.  :zap:

Don

Offline Jasonb

  • Full Member
  • *****
  • Posts: 9491
  • Surrey, UK
Re: Building a bigger Easton & Anderson Grasshopper
« Reply #118 on: February 03, 2013, 07:15:57 PM »
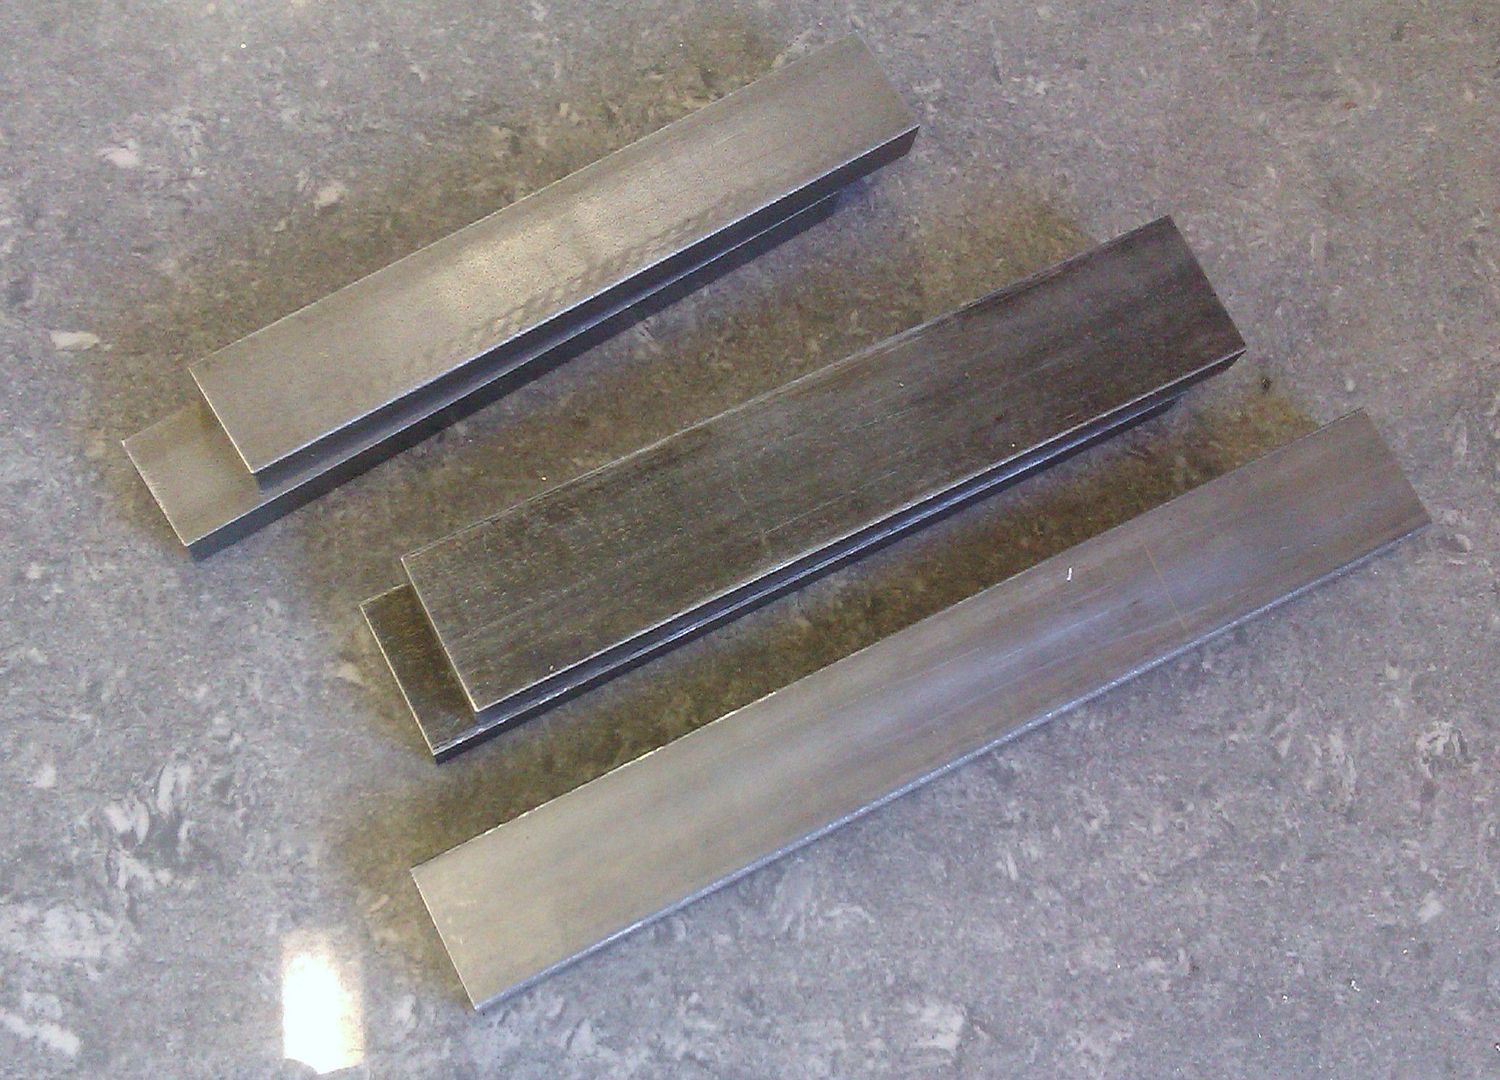
Next on the list was the conrod, this is made from a 9" length of 5/8 x 1 1/4 flat steel


When this was cut I thought that while I was setting up the machines for the conrod that I may as well do all the other similar rods in one go so also cut some steel for the two eccentric rods, pump rod and two tie rods


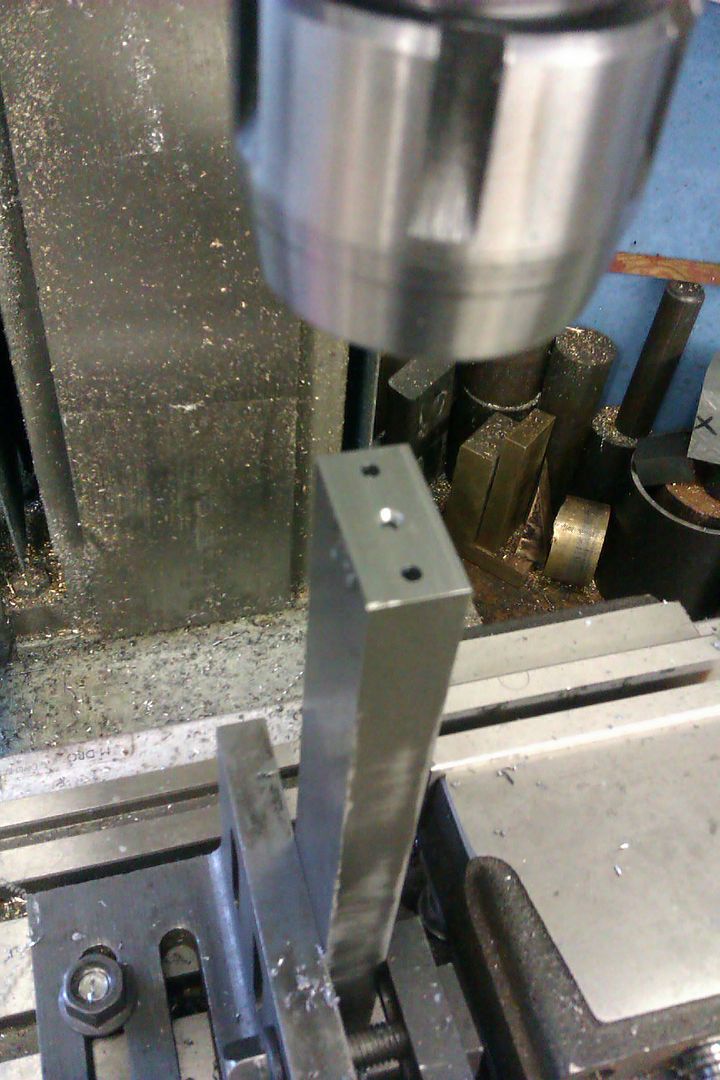
After squaring off the ends to length each bar was held on end and the two bolt clearance holes drilled together with a small centre hole formed with a BS 0 centre drill


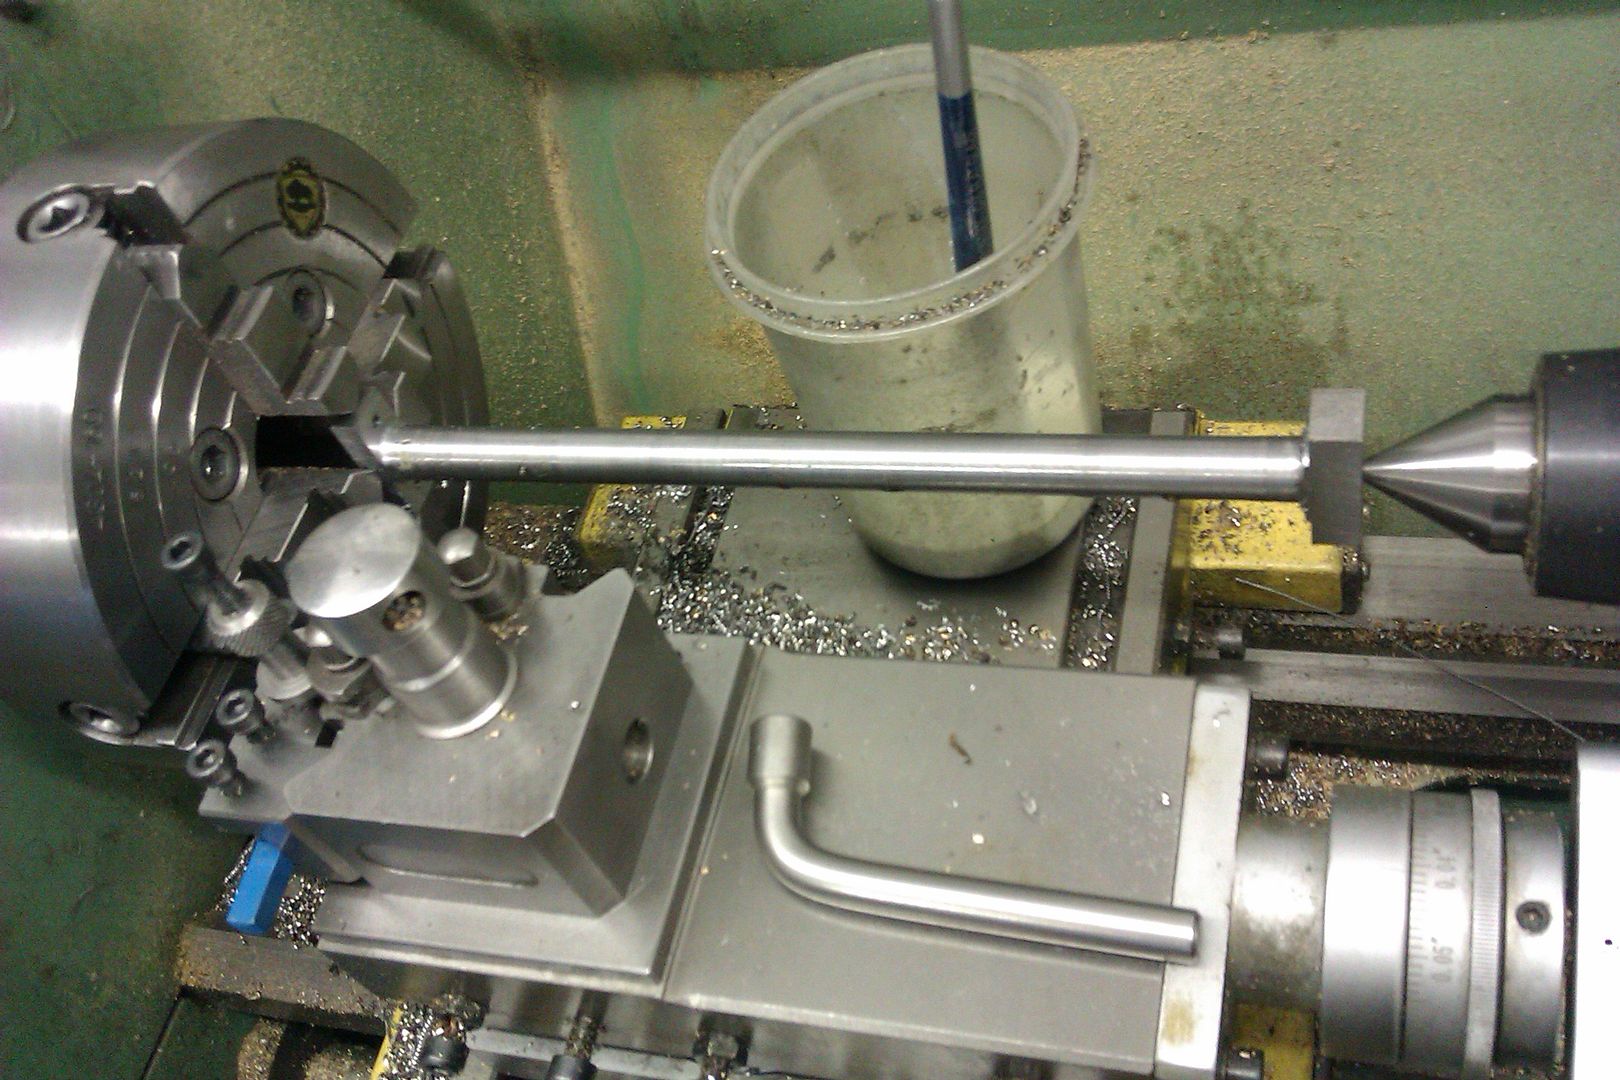
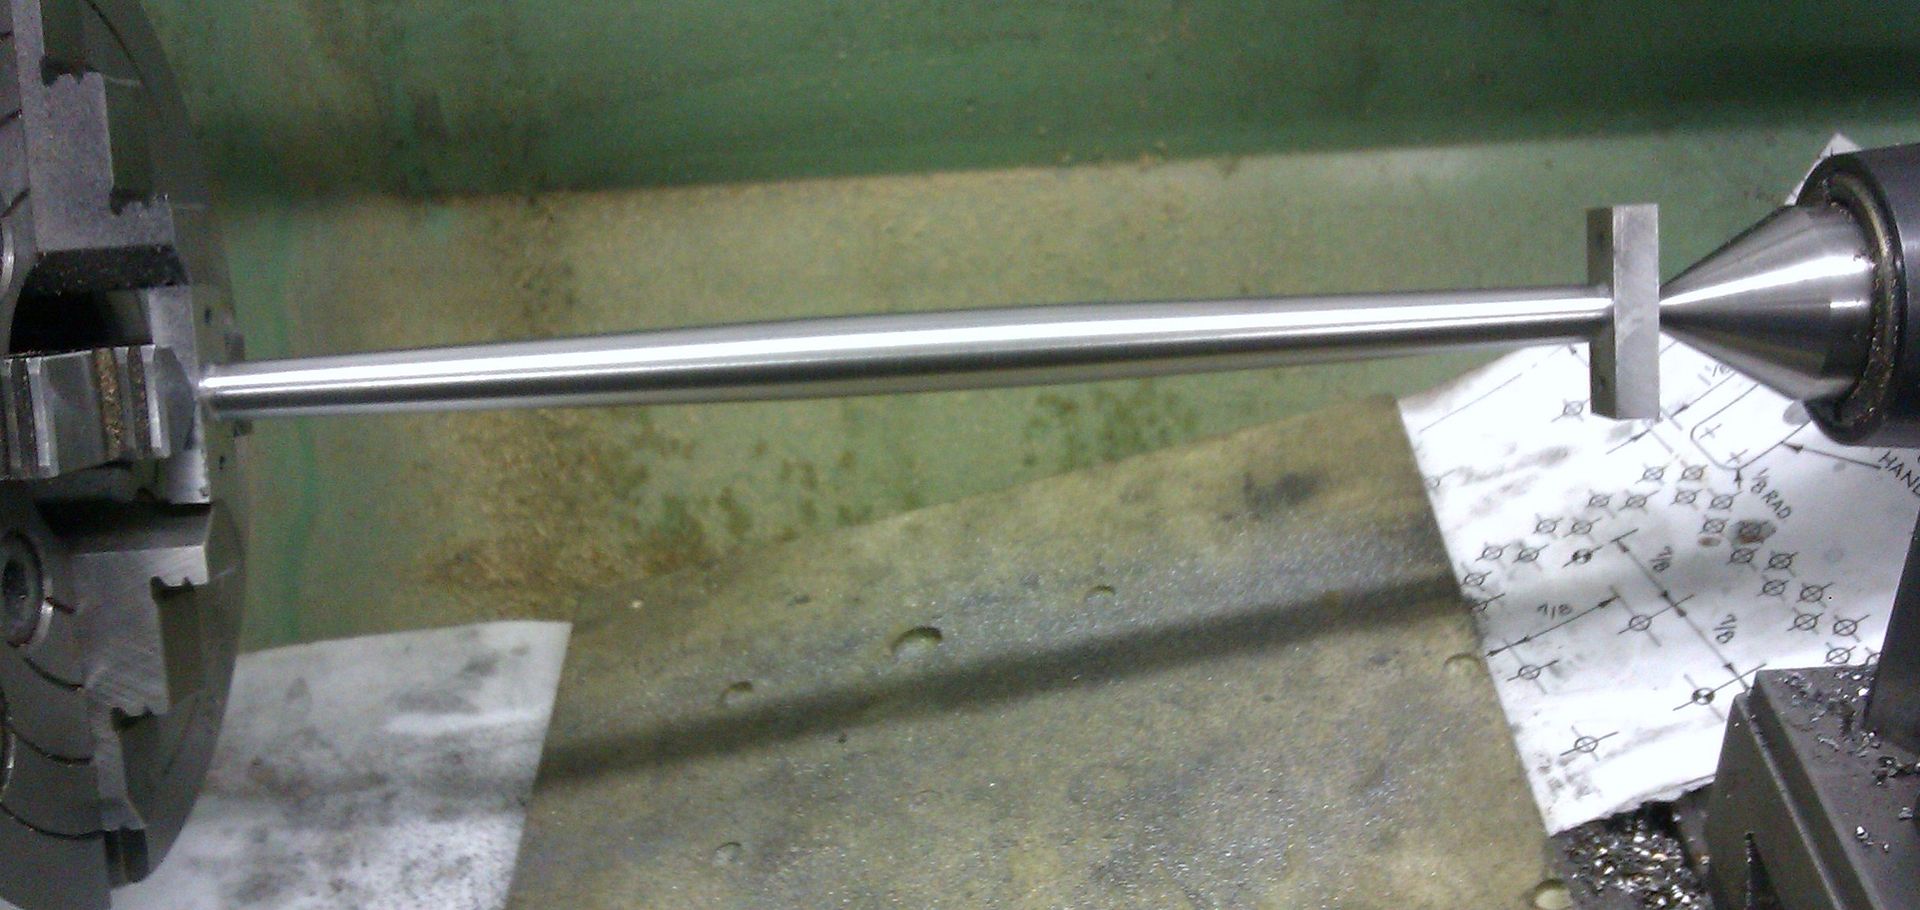
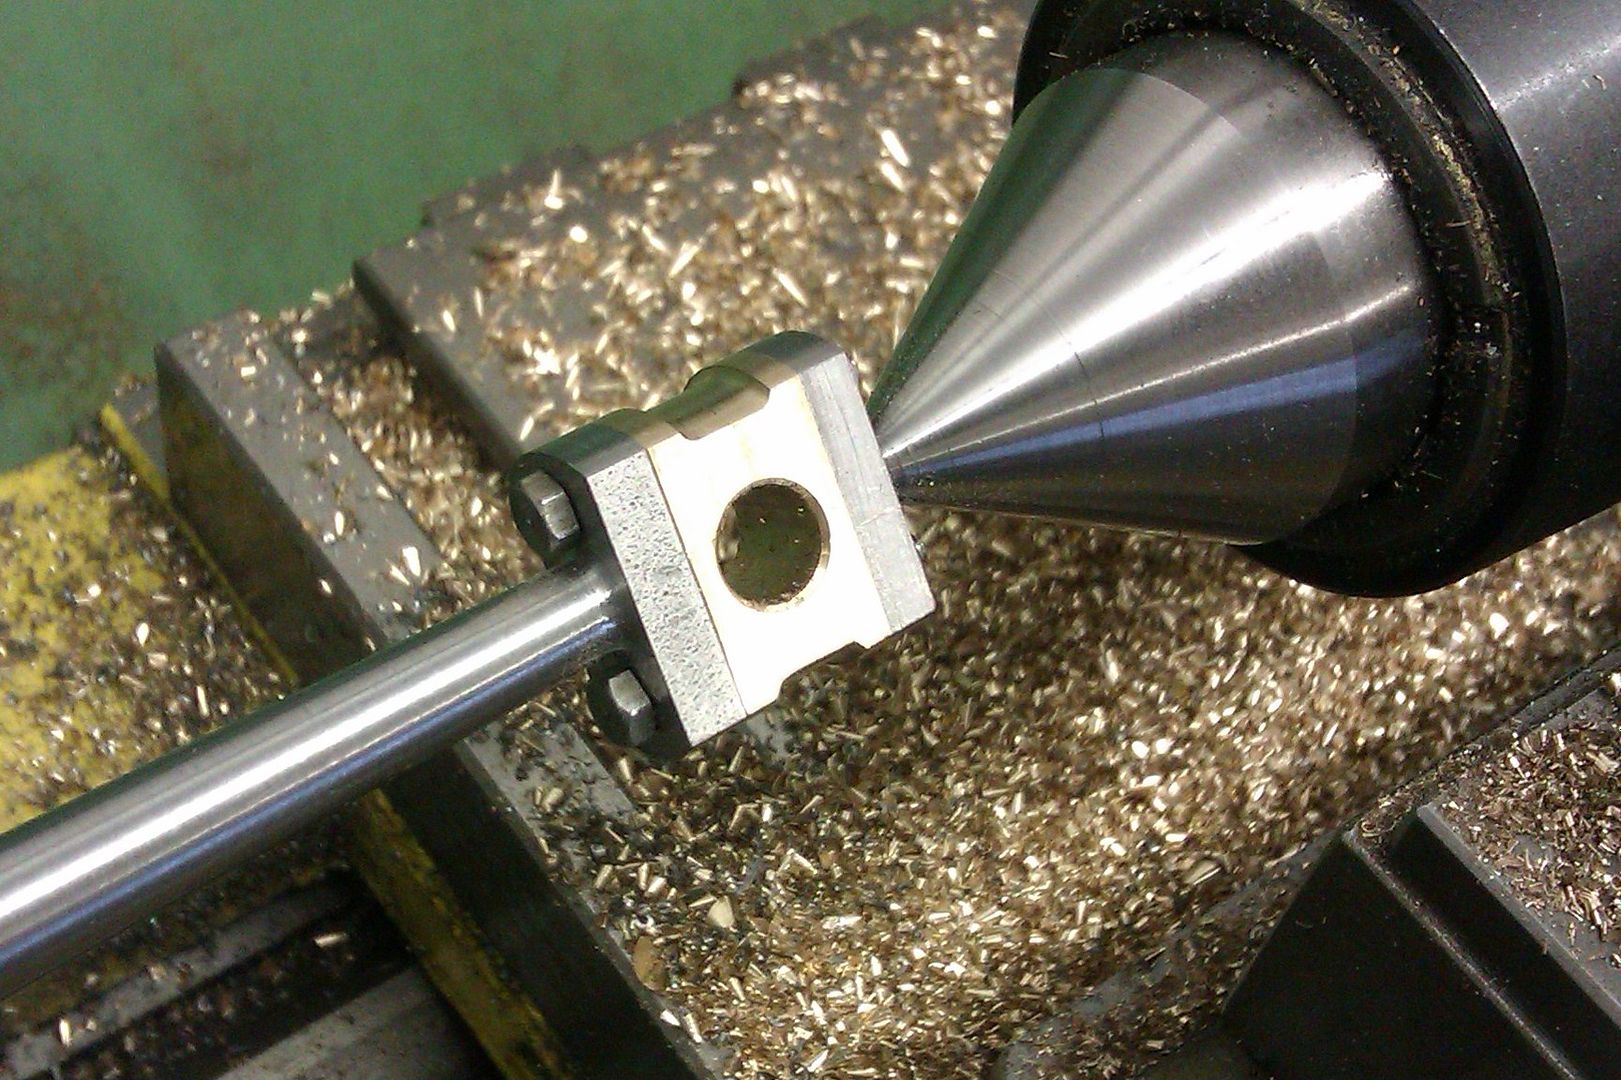
Each bar in turn was then held in the 4-jaw with tailstock support to reduce the majority to a cylinder followed by adding a slight taper to each end for about 1/3 of the length


The tapers were then blended by hand to give the traditional fish bellied shape


I then set the rods to one side and cut some bronze and steel for the bearings and end caps


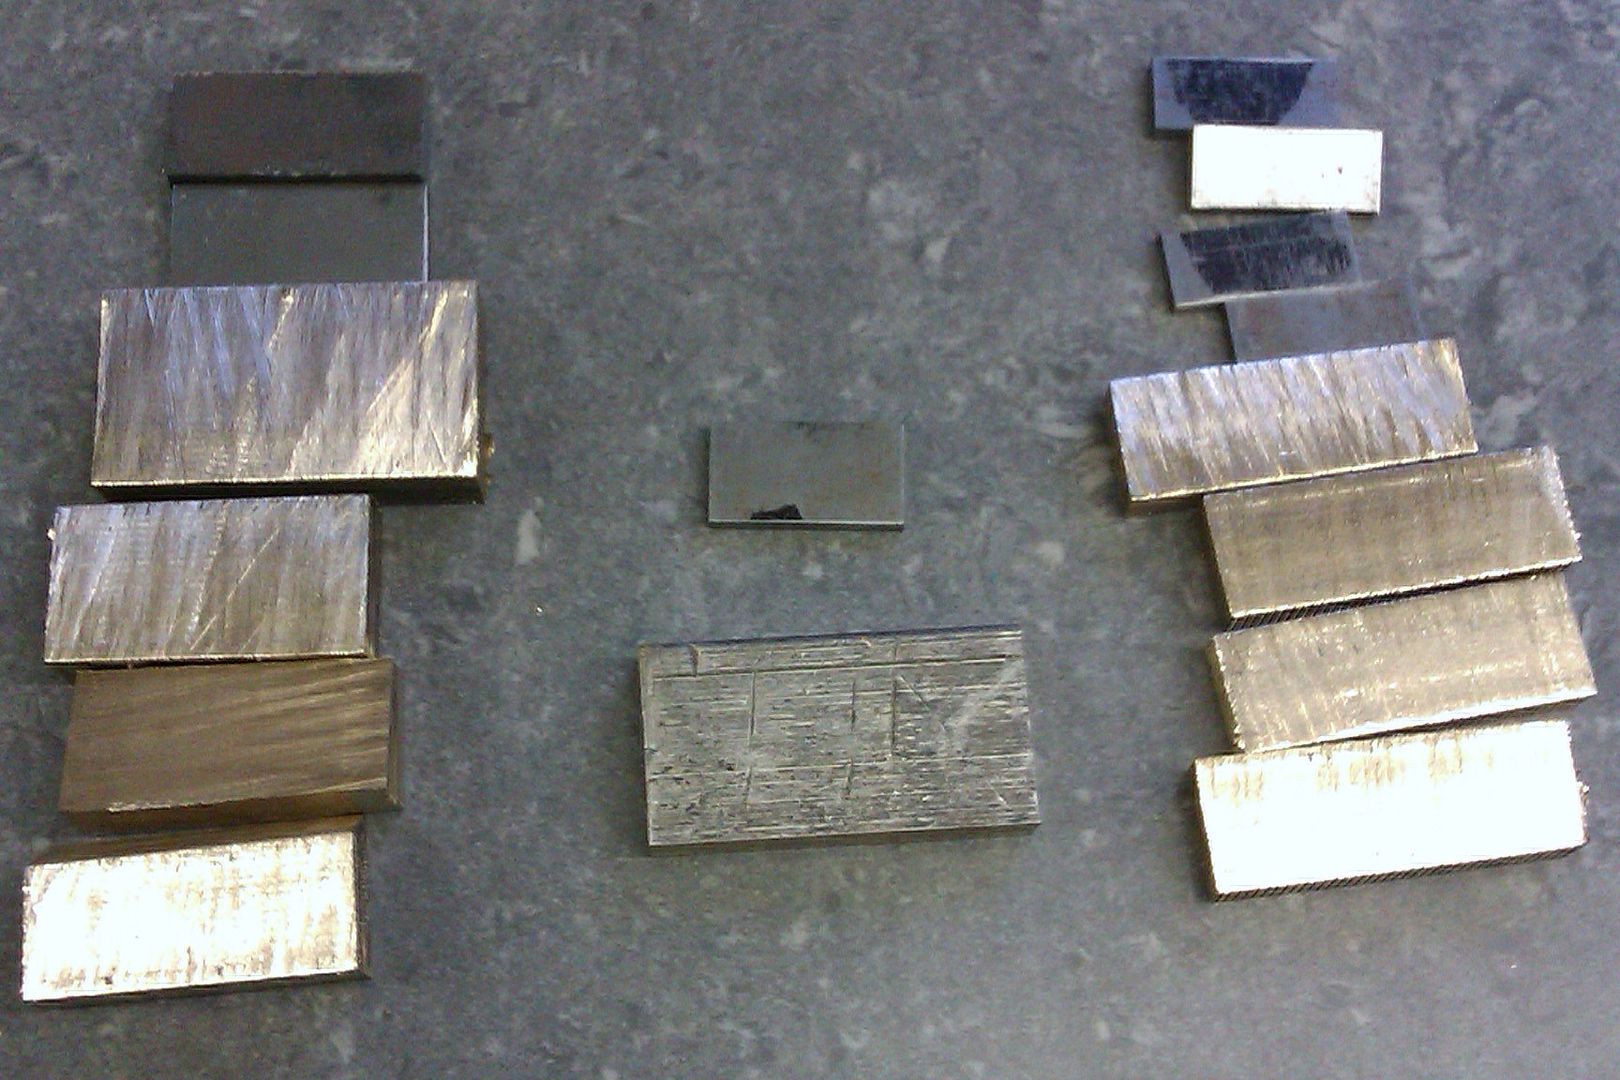
The bronze was then machined to thickness with a flycutter


Before being tinned with soft solder prior to being sweated together


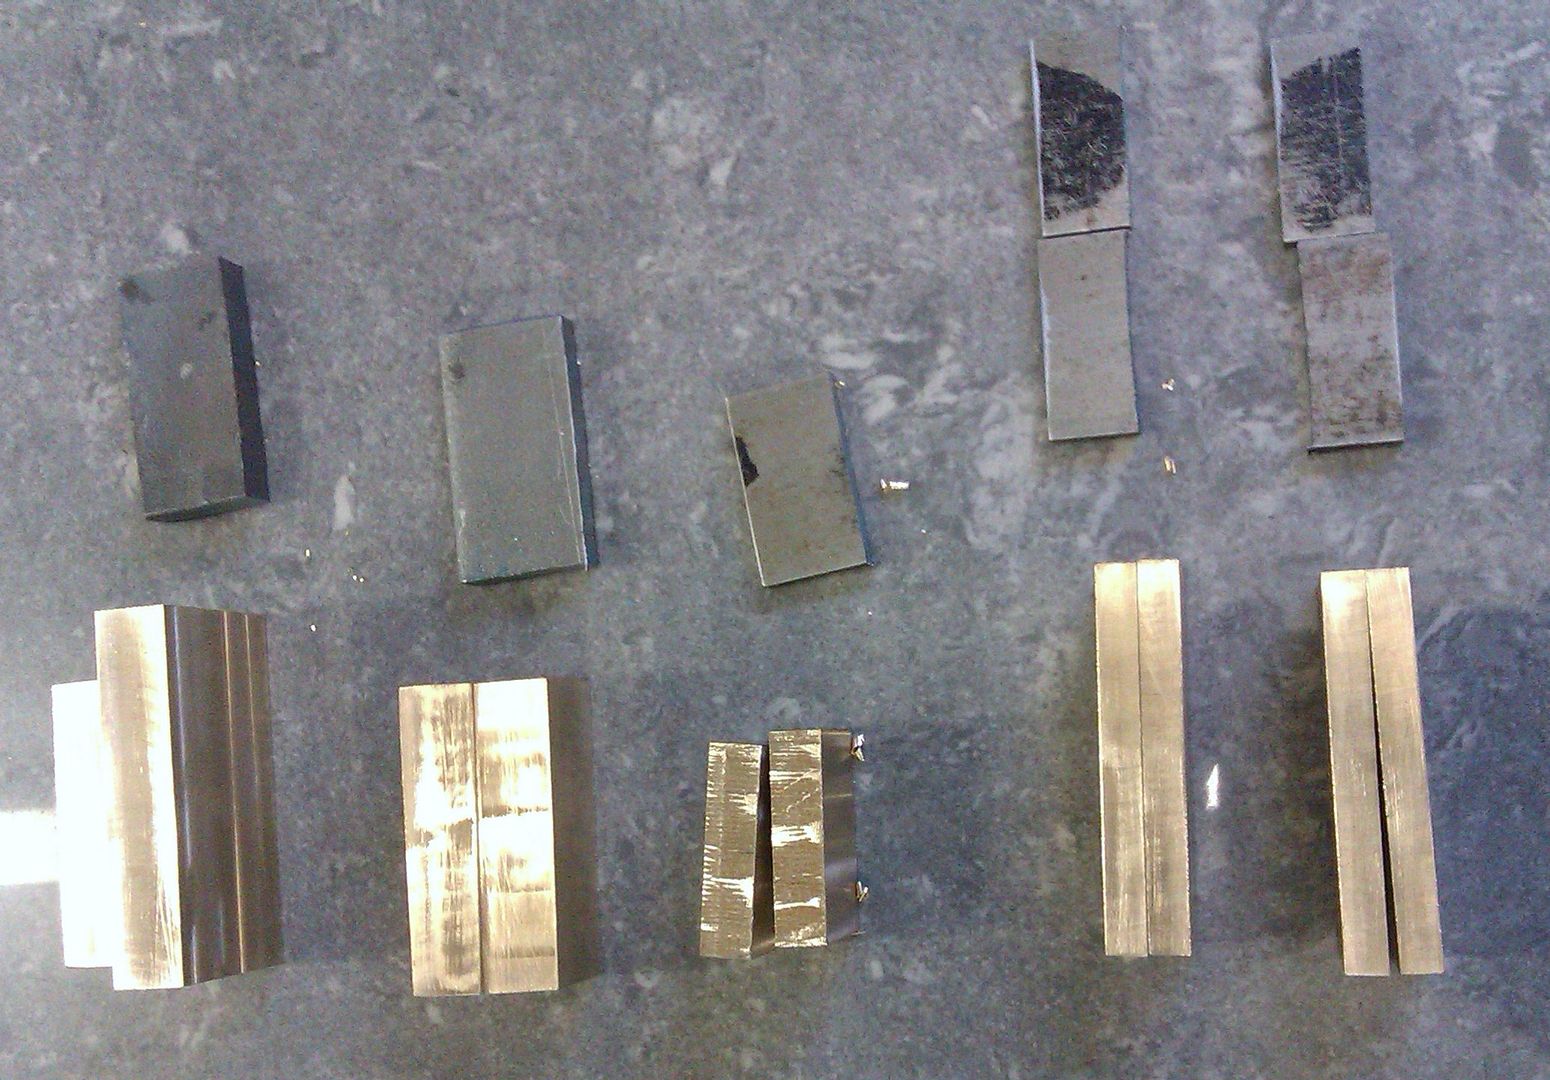
The bearings were then flycut down to the finished sizes


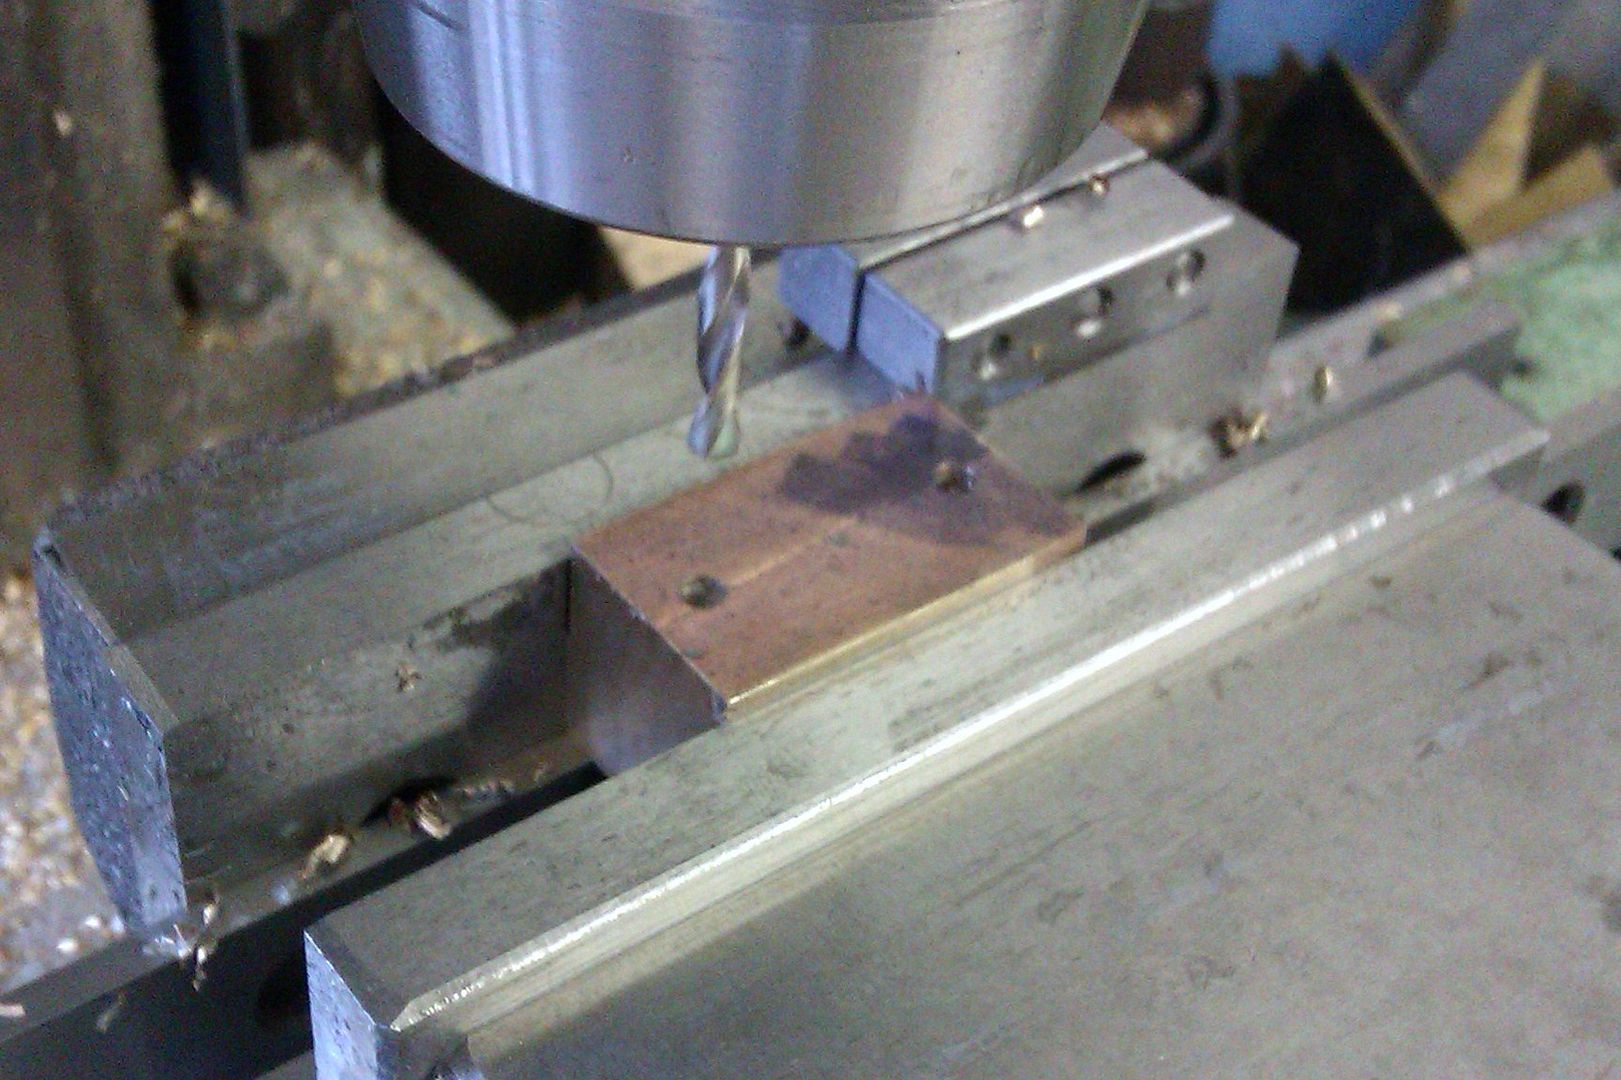
Then set up a stop on the mill vice so the bearings and plates can be drilled for the bolts


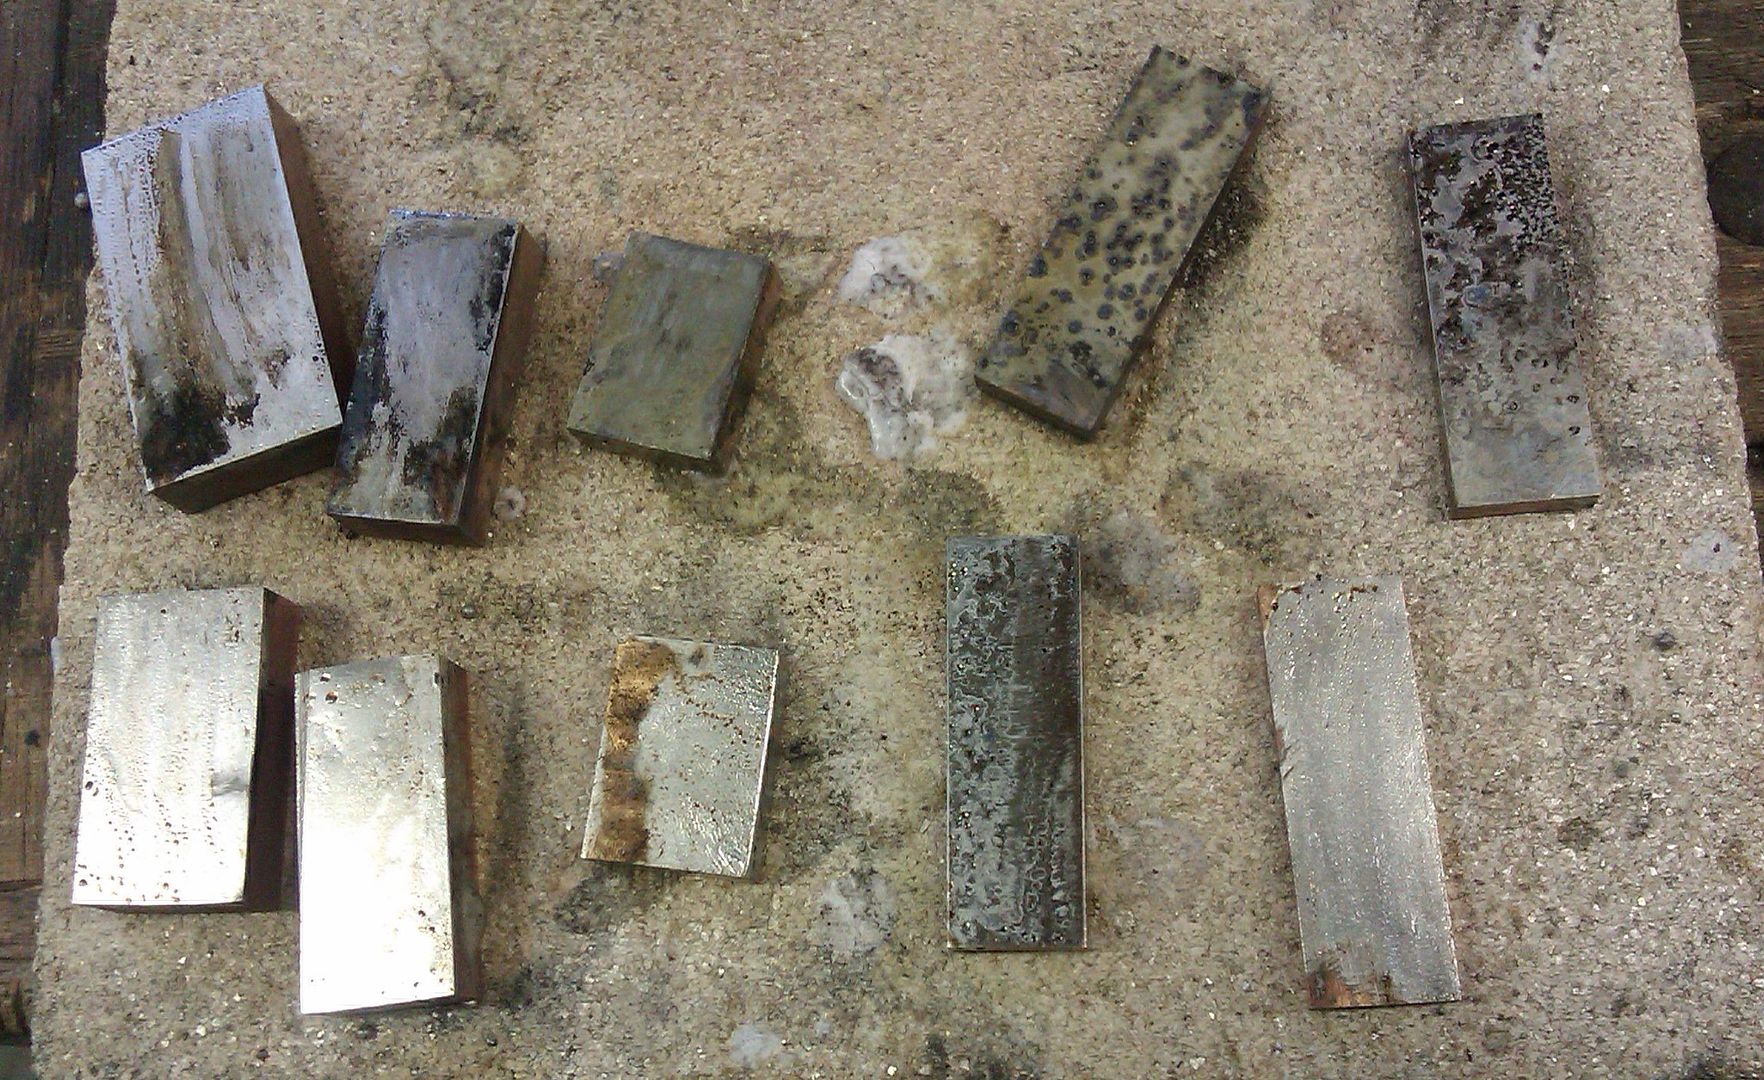
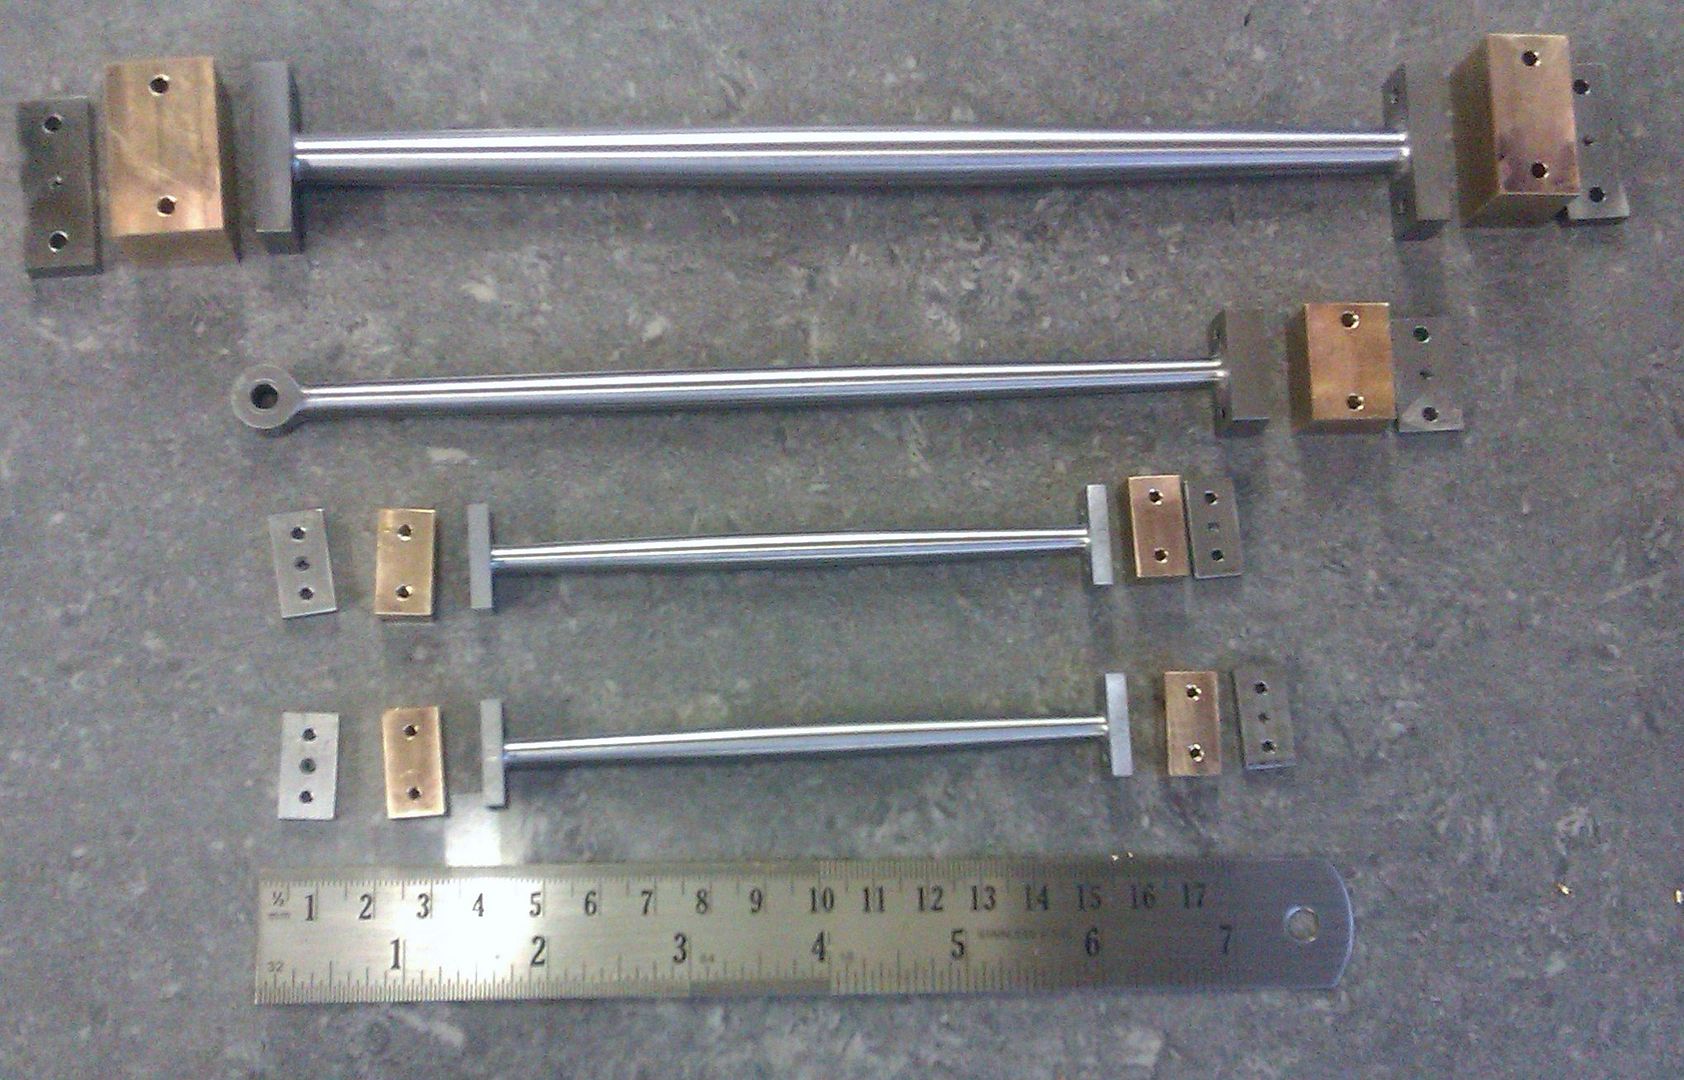
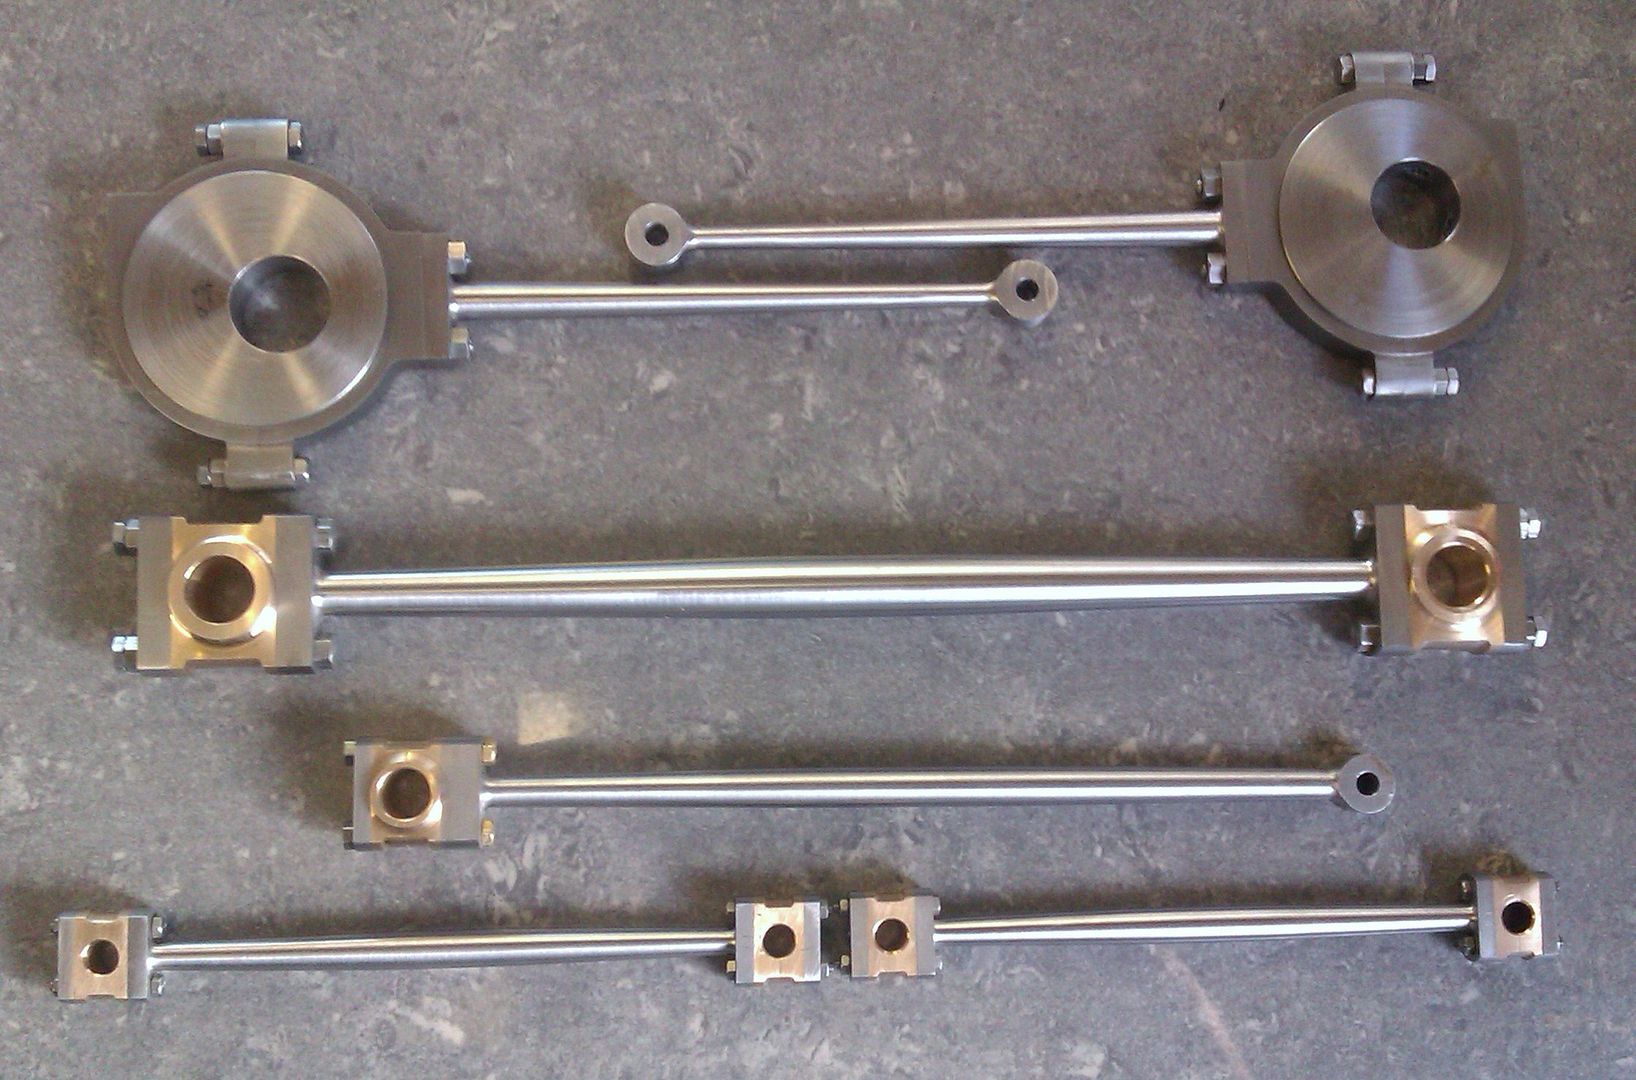
And here they all are ready for assembly


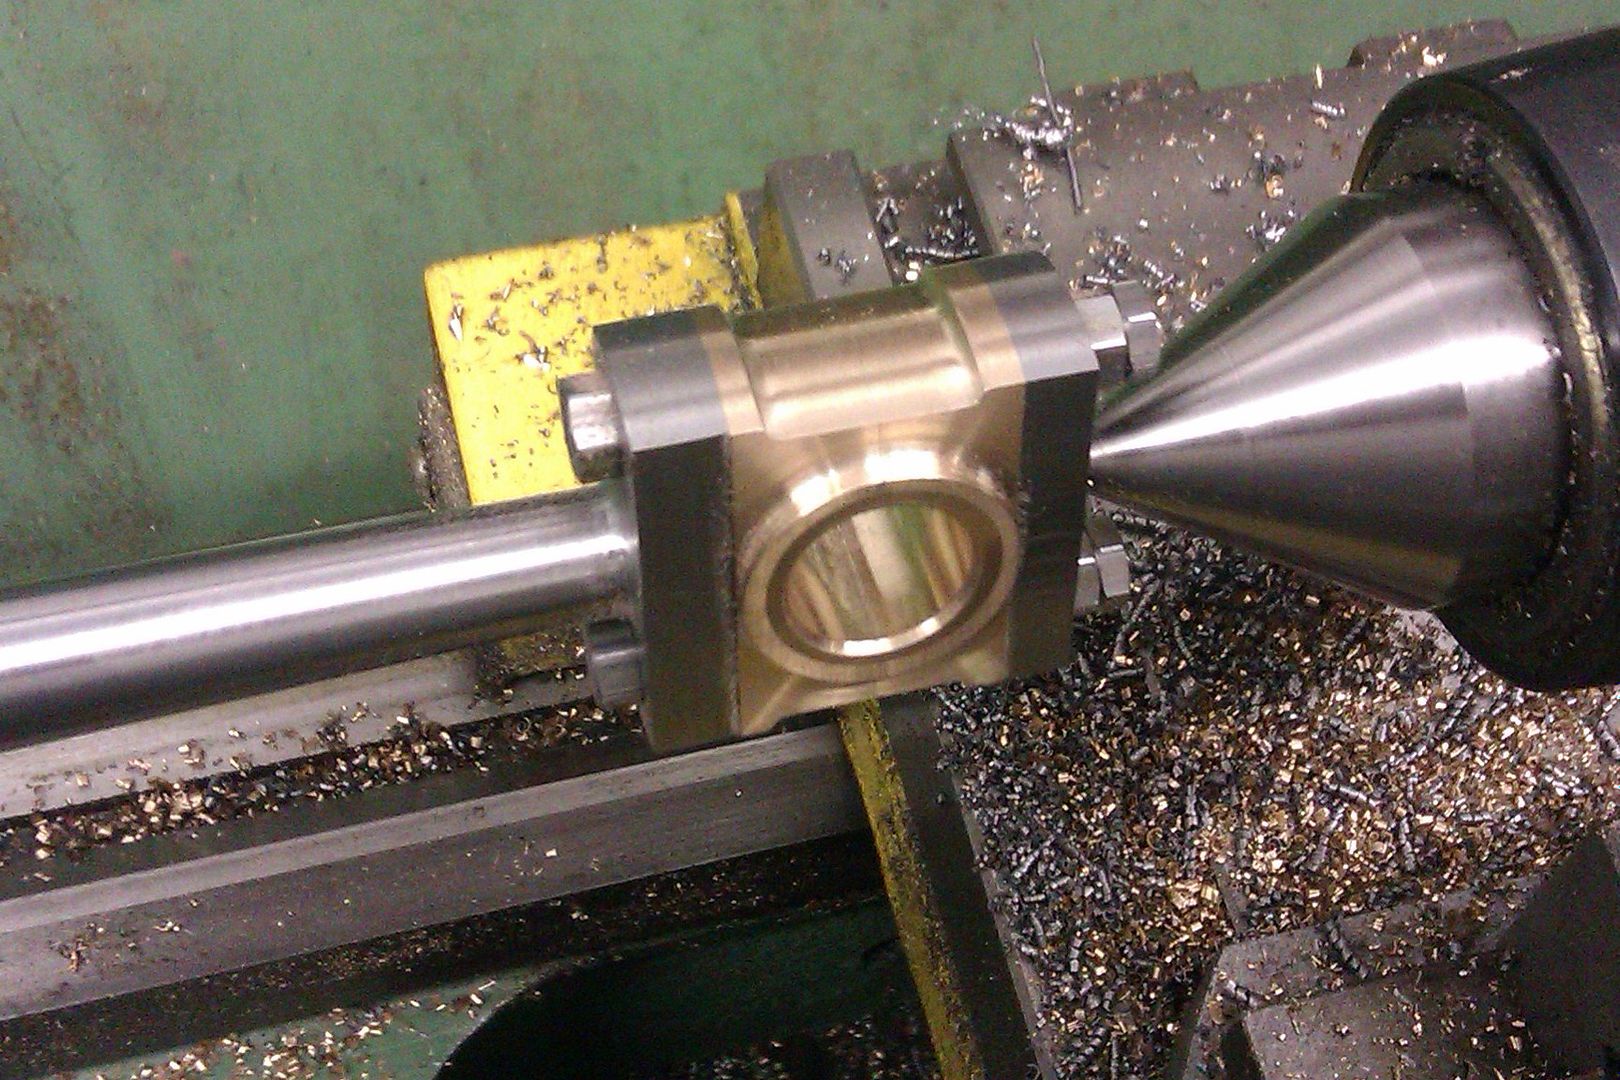
Well actually the bearings were bored first and the widths reduced to leave a raised section around the bore


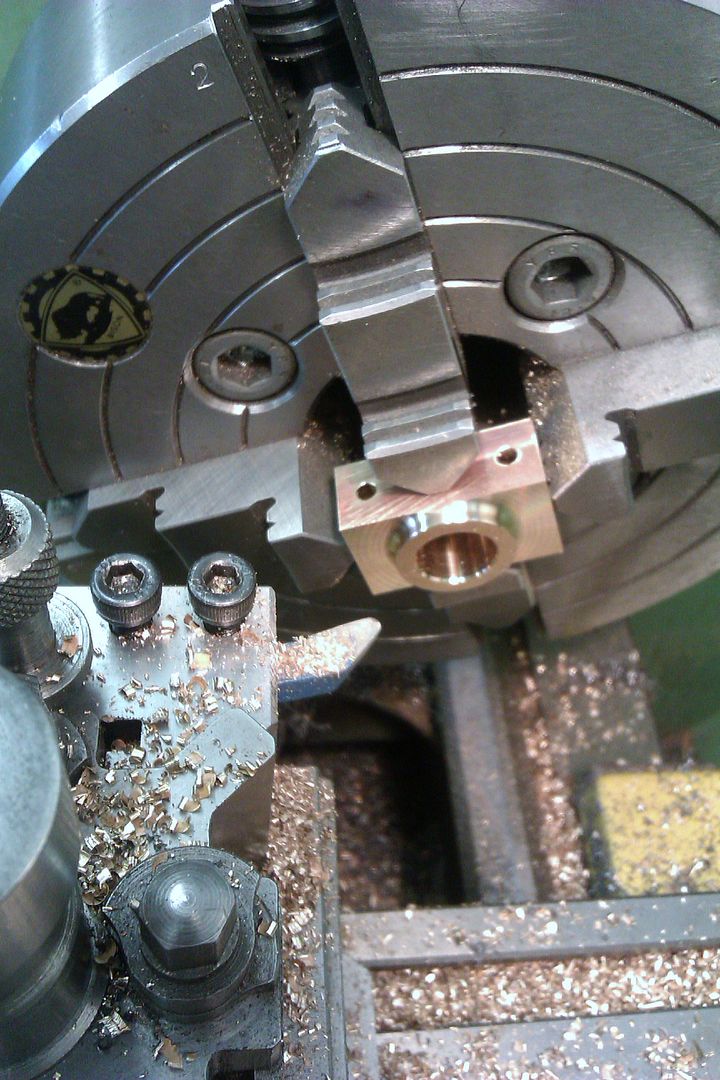
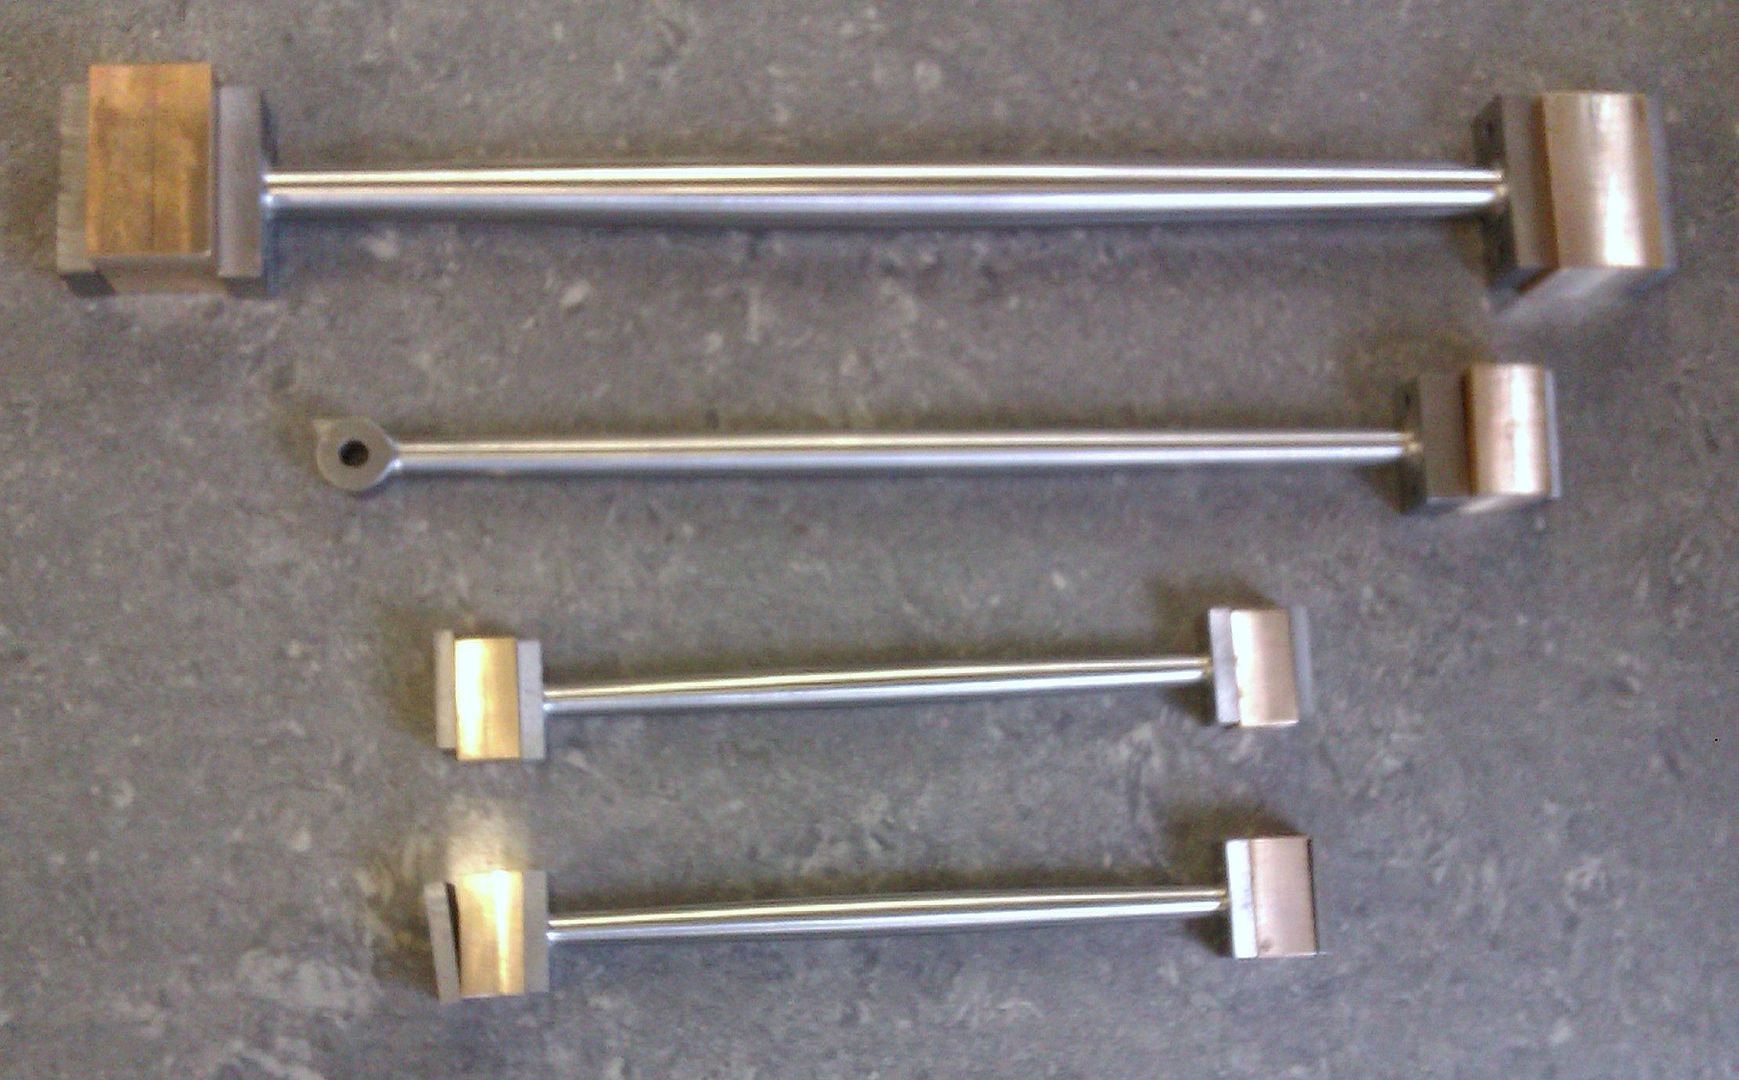
With then now assembled the narrow edges could be turned and recessed


Must be doing something right as the two tie rods seem to have ended up the same length


And them all completed


Well I said it wass going to be a long one, so will the flywheel thats comming next.

J
« Last Edit: February 03, 2013, 07:19:48 PM by Jasonb »

Offline Jo

  • Administrator
  • Full Member
  • *****
  • Posts: 15305
  • Hampshire, england.
Re: Building a bigger Easton & Anderson Grasshopper
« Reply #119 on: February 03, 2013, 07:31:33 PM »
I remember making those for my little one but I made mine out of round stock rather than rectangular. The rods are one of those bits that really make it look like the engine is making some real head way, that and the flywheel  :embarassed:

It looks like you even managed to fishbelly the two tie rods :ThumbsUp: and didn't have the joys of 12BA fasteners for them :hellno:

I must say she does look rather nice.

Jo
Enjoyment is more important than achievement.


SimplePortal 2.3.5 © 2008-2012, SimplePortal