Author Topic: Recreating a Stuart Lightweight  (Read 19765 times)

Offline tangler

  • Full Member
  • ****
  • Posts: 834
  • Christchurch, UK
Re: Recreating a Stuart Lightweight
« Reply #15 on: October 07, 2016, 10:54:57 PM »
Hi Mike,

They may even be selling the castings again in the not too distant future  ::)


But will the crankcase be cast in Elektron ?  :thinking:

Rod

Online Jasonb

  • Full Member
  • *****
  • Posts: 9491
  • Surrey, UK
Re: Recreating a Stuart Lightweight
« Reply #16 on: October 08, 2016, 07:47:22 AM »
Hi Mike,

Stuart Turner will sell you a set of plans for a very reasonable price if you contact them ;)

They may even be selling the castings again in the not too distant future  ::)

Jo

I hope they have redrawn the plans and are not using the feint ones that I had to work from >:(

They also told me they hoped to do the lwt soon but that was about 4 years ago when I asked :( Maybe this thread will create a bit of a demand and they will get their finger out.

Whatever the materials I can't see it being a cheap kit. With the complex cores in the head, cylinder and slightly easier one in the crankcase there will be a lot of work and possibly higher failure rate. Though I suppose some of the modern setting core mixes should help.

J

Online Jo

  • Administrator
  • Full Member
  • *****
  • Posts: 15305
  • Hampshire, england.
Re: Recreating a Stuart Lightweight
« Reply #17 on: October 08, 2016, 08:08:12 AM »
Reworking the Lightwieight plans is on my list of things to do next time they are paying me to have a break at work  :naughty:

Whatever the materials I can't see it being a cheap kit. With the complex cores in the head, cylinder and slightly easier one in the crankcase there will be a lot of work and possibly higher failure rate. Though I suppose some of the modern setting core mixes should help.

Based on the price of my missing IP/LP cylinder for one of my orphans I could see the cylinder being priced around £150. My guess would be around £600 to £800 for the set if they started doing them again  :(

Jo
Enjoyment is more important than achievement.

Online Jasonb

  • Full Member
  • *****
  • Posts: 9491
  • Surrey, UK
Re: Recreating a Stuart Lightweight
« Reply #18 on: October 08, 2016, 10:00:57 AM »
In that case it won't be a fast seller when all the metal to make one from scratch would be about £40-50 and you get a much more impressive pile of swarf as a bonus

Online Jo

  • Administrator
  • Full Member
  • *****
  • Posts: 15305
  • Hampshire, england.
Re: Recreating a Stuart Lightweight
« Reply #19 on: October 08, 2016, 03:25:05 PM »
Which is probably why they have not yet reappeared.

In the same vain you could built a triple for about £50 but for some reason people prefer to buy castings  :cartwheel:.

Jo
Enjoyment is more important than achievement.

Online Jasonb

  • Full Member
  • *****
  • Posts: 9491
  • Surrey, UK
Re: Recreating a Stuart Lightweight
« Reply #20 on: October 09, 2016, 03:31:27 PM »
Once the cylinder had cooled it was given a 1/2hr pickle to remove the scale and old flux then holding by the top of the cylinder the bore was taken out to final size and the bottom flange machined back to thickness. You can just see the fine brass coloured lines of the solder on the inside which is a good sign that it has flowed right into the joint. :)


After which it was reversed in the chuck, brought down to final height and a recess cut to take the lip of the liner (no pics)

Then onto the mill and each of the bosses were finished off, this is the exhaust one which had the slot cut to final size and a couple of stud holes drilled & tapped


Then onto the rotary table for final shaping of the flange, followed buy stud holes and cooling slots for the head.


The remaining bit of steel for the head had a spigot turned on it that would fit into the cylinder liner, then holding by this spigot the shape of the head was formed. I drew it out in Alibre and took offsets at 0.025" intervals which gave the basic shape. This was then refined with hand graver and files. The hole for the plug was also tapped M10x1 at this stage.


Then the head was bolted to the mill table and dialed in.


Following which the 4 stud holes and one water passage were drilled and then deeply counterbored.


A few stub ends of steel were then soldered into these counterbores to form the stud and water pipe bosses.


After a bit of a clean up the bosses were machined to height and the holes taken to finished size.


I also cut some slots into the head to match those in the top of the cylinder, these should allow some water cooling of the head.


The last job on the head was to shape the underside of the spigot to match the shape of the top of the piston and use a bit of JBWeld to form some fillets around the bosses to get that cast look.


J


Online Kim

  • Global Moderator
  • Full Member
  • *****
  • Posts: 7926
  • Portland, Oregon, USA
Re: Recreating a Stuart Lightweight
« Reply #21 on: October 09, 2016, 03:55:09 PM »
Wow Jason!  That is cool!
Very impressive fabrication to say the least.
And great pictures too!
Kim

Offline Roger B

  • Global Moderator
  • Full Member
  • *****
  • Posts: 6165
  • Switzerland
Re: Recreating a Stuart Lightweight
« Reply #22 on: October 09, 2016, 04:44:32 PM »
Very nice indeed  :praise2:  :praise2:
Best regards

Roger

Online fumopuc

  • Full Member
  • *****
  • Posts: 3256
  • Munich, Germany, EU
Re: Recreating a Stuart Lightweight
« Reply #23 on: October 09, 2016, 06:35:39 PM »
Hi Jason, very impressive fabrikation work, as usual. I enjoy to follow and to learn.
Kind Regards
Achim

Online Jasonb

  • Full Member
  • *****
  • Posts: 9491
  • Surrey, UK
Re: Recreating a Stuart Lightweight
« Reply #24 on: October 20, 2016, 07:39:03 PM »
A 3" dia piece of 6082 was held in the 3-jaw and a start made on the crankcase cover. After facing off it was bored and counterbored for the bronze bearing then the outside diameters were taken to size.


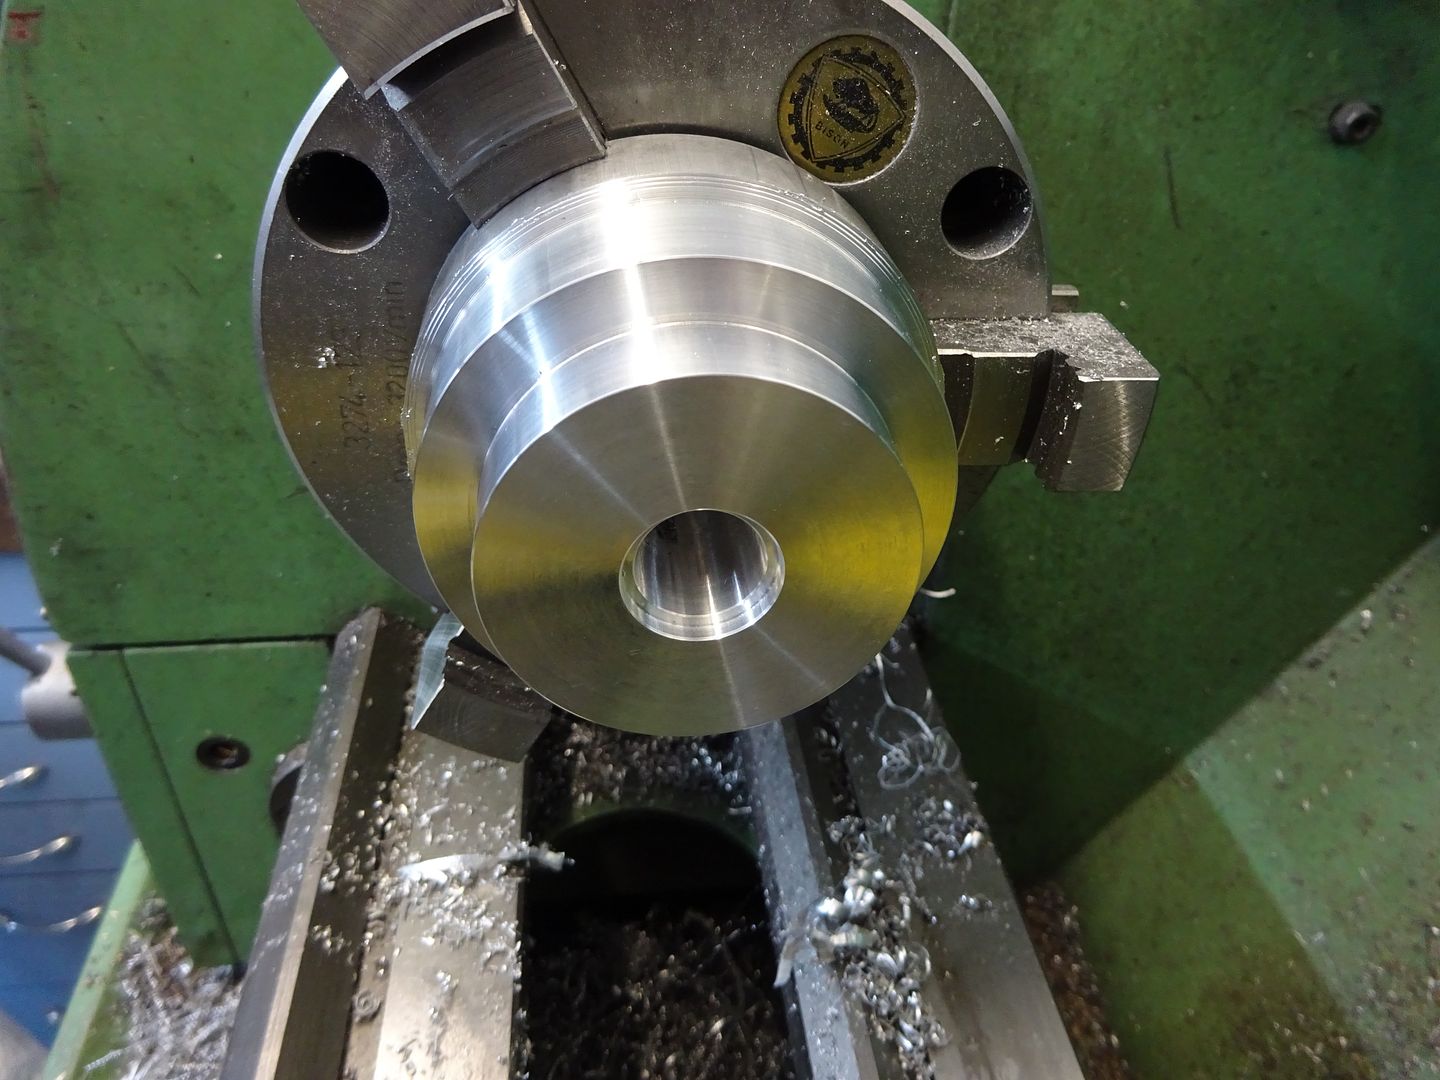
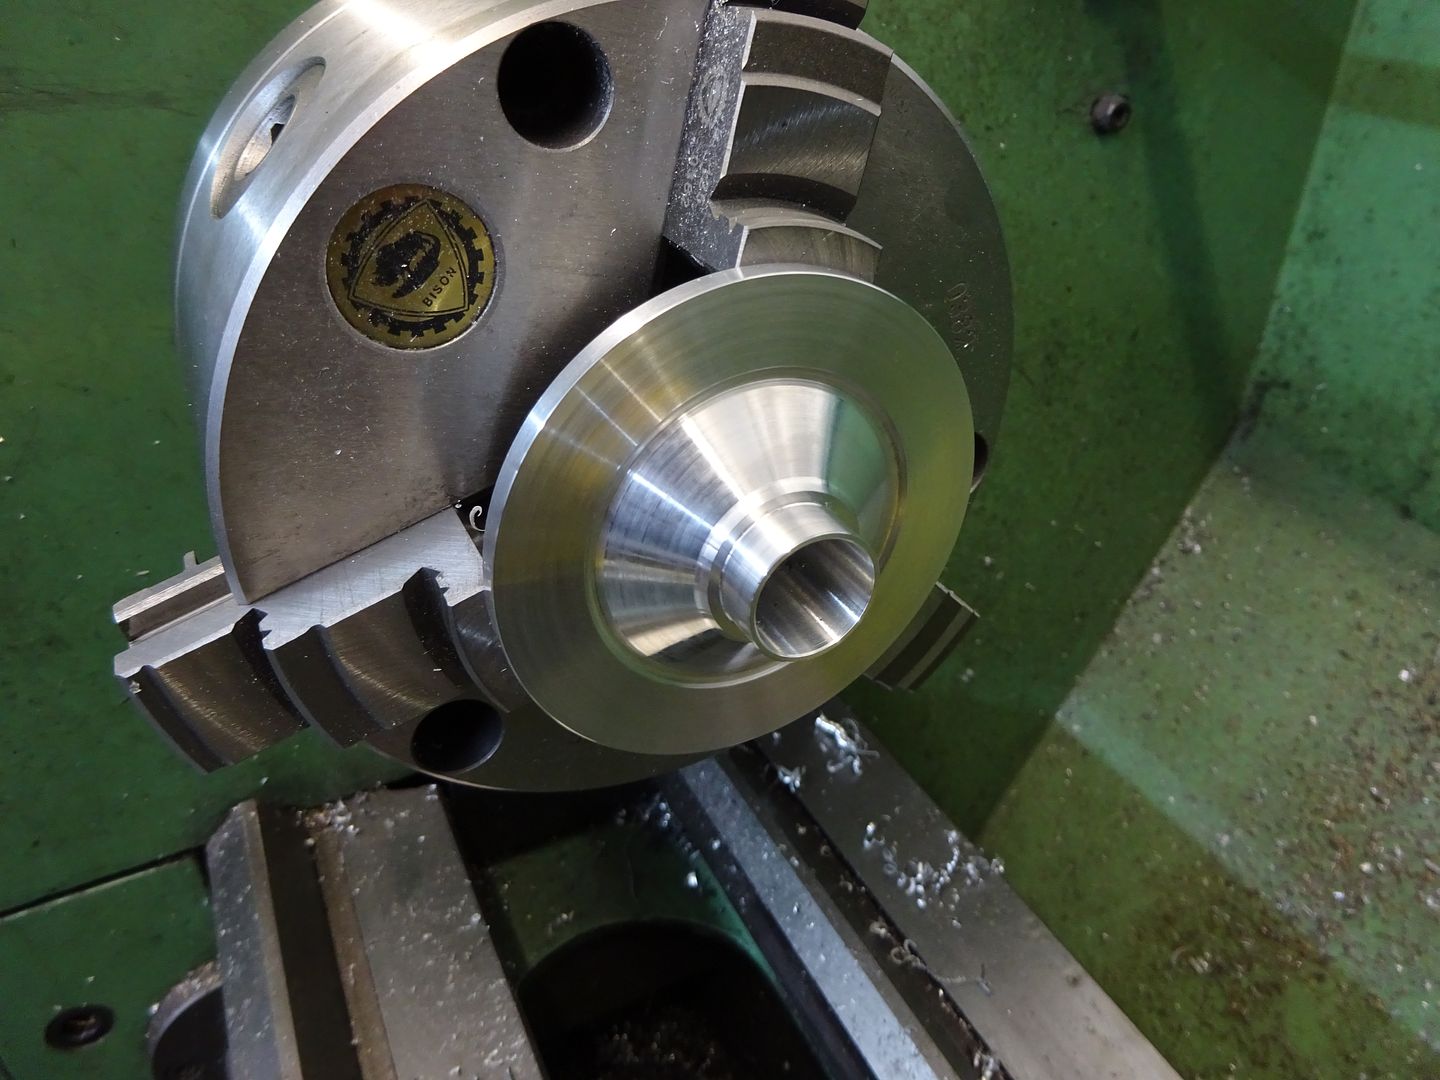
It was then reversed in the chuck, the bolting flange brought down to thickness, a spigot for the timing bracket turned and as much waste as possible removed between the two.


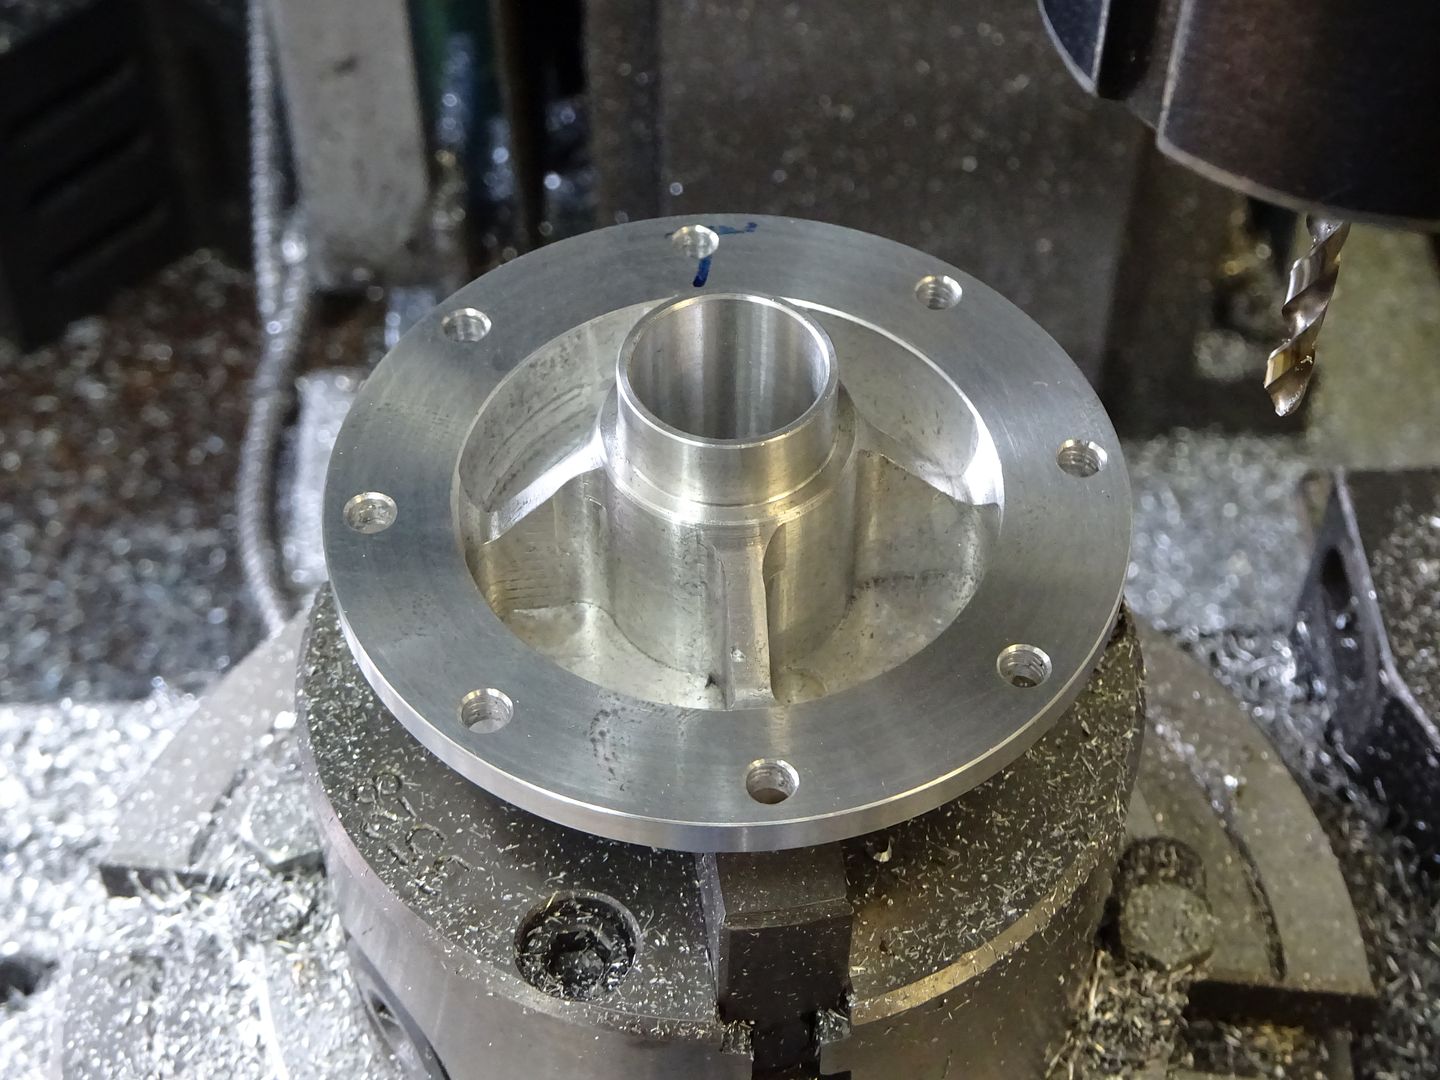
It was then over to the mill to drill the eight stud holes and mill out more material to leave four stiffening webs. After machining these were attacked with the Dremel to get them looking more like castings.


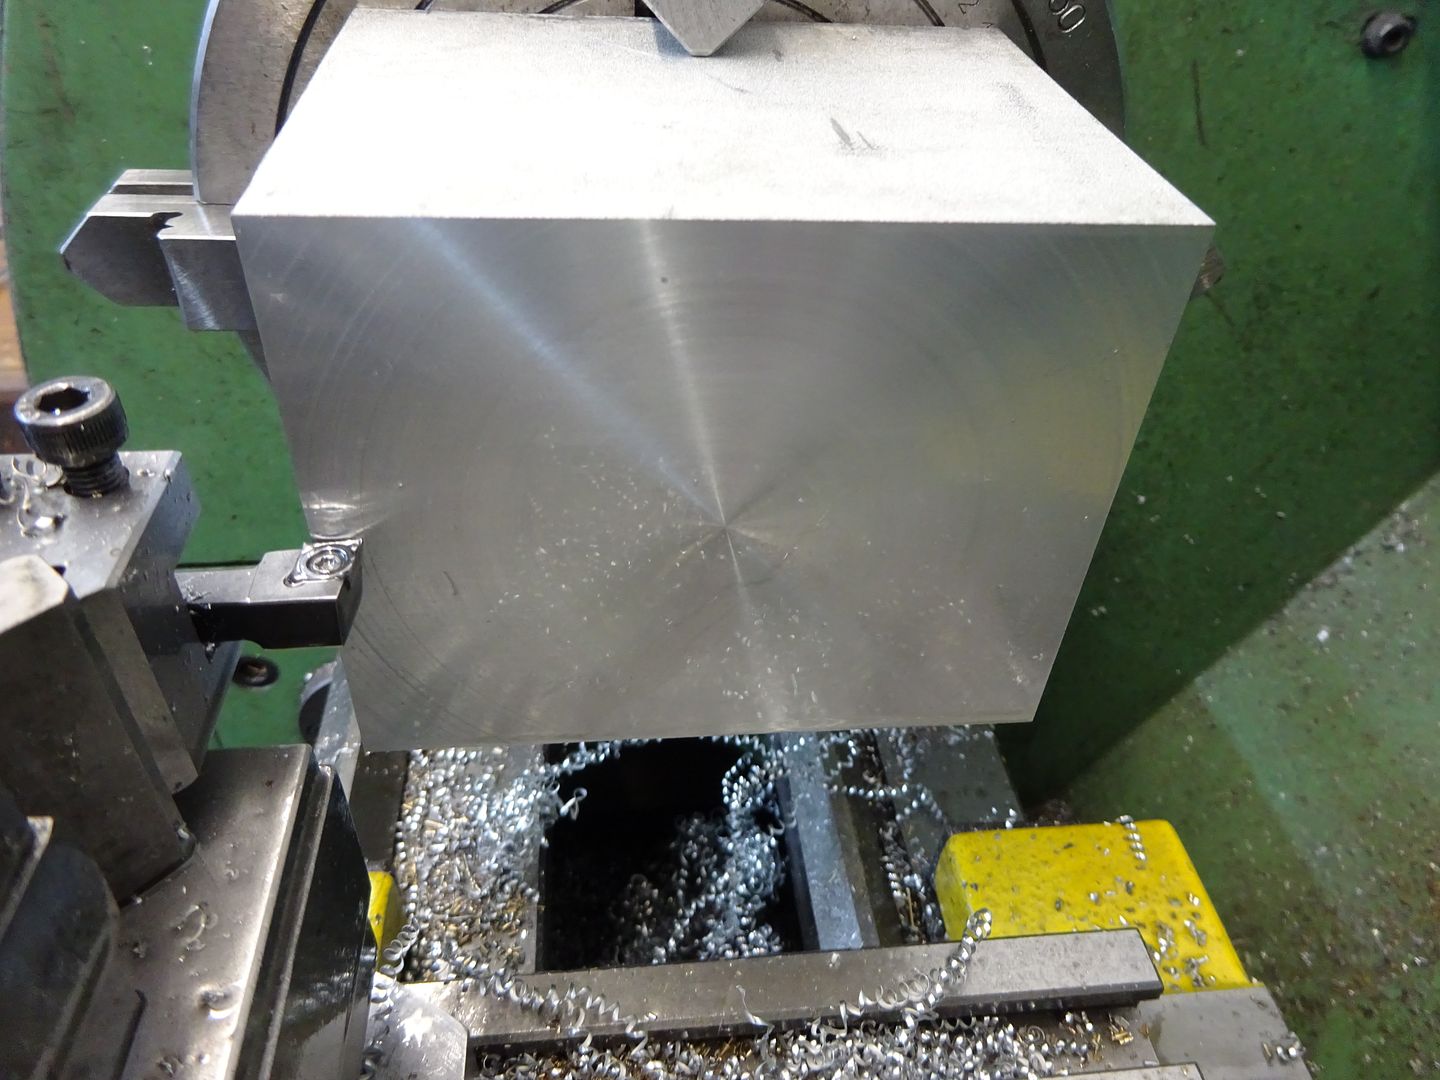
The cankcase started out as a 100mm length of 3" square 6082 and was quickly brought down to size on the vertical bandsaw, who says woodworking bandsaws can't cut metal :headscratch:.


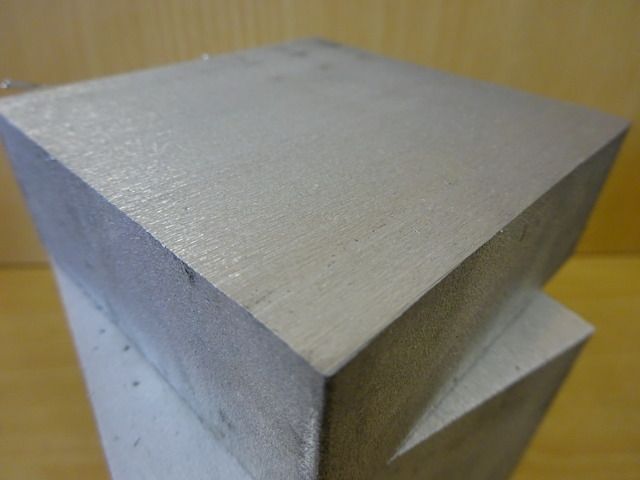
I started by cleaning up some faces on the lathe, cut quite nicely with a dab of kerosene and certainly was not sticky


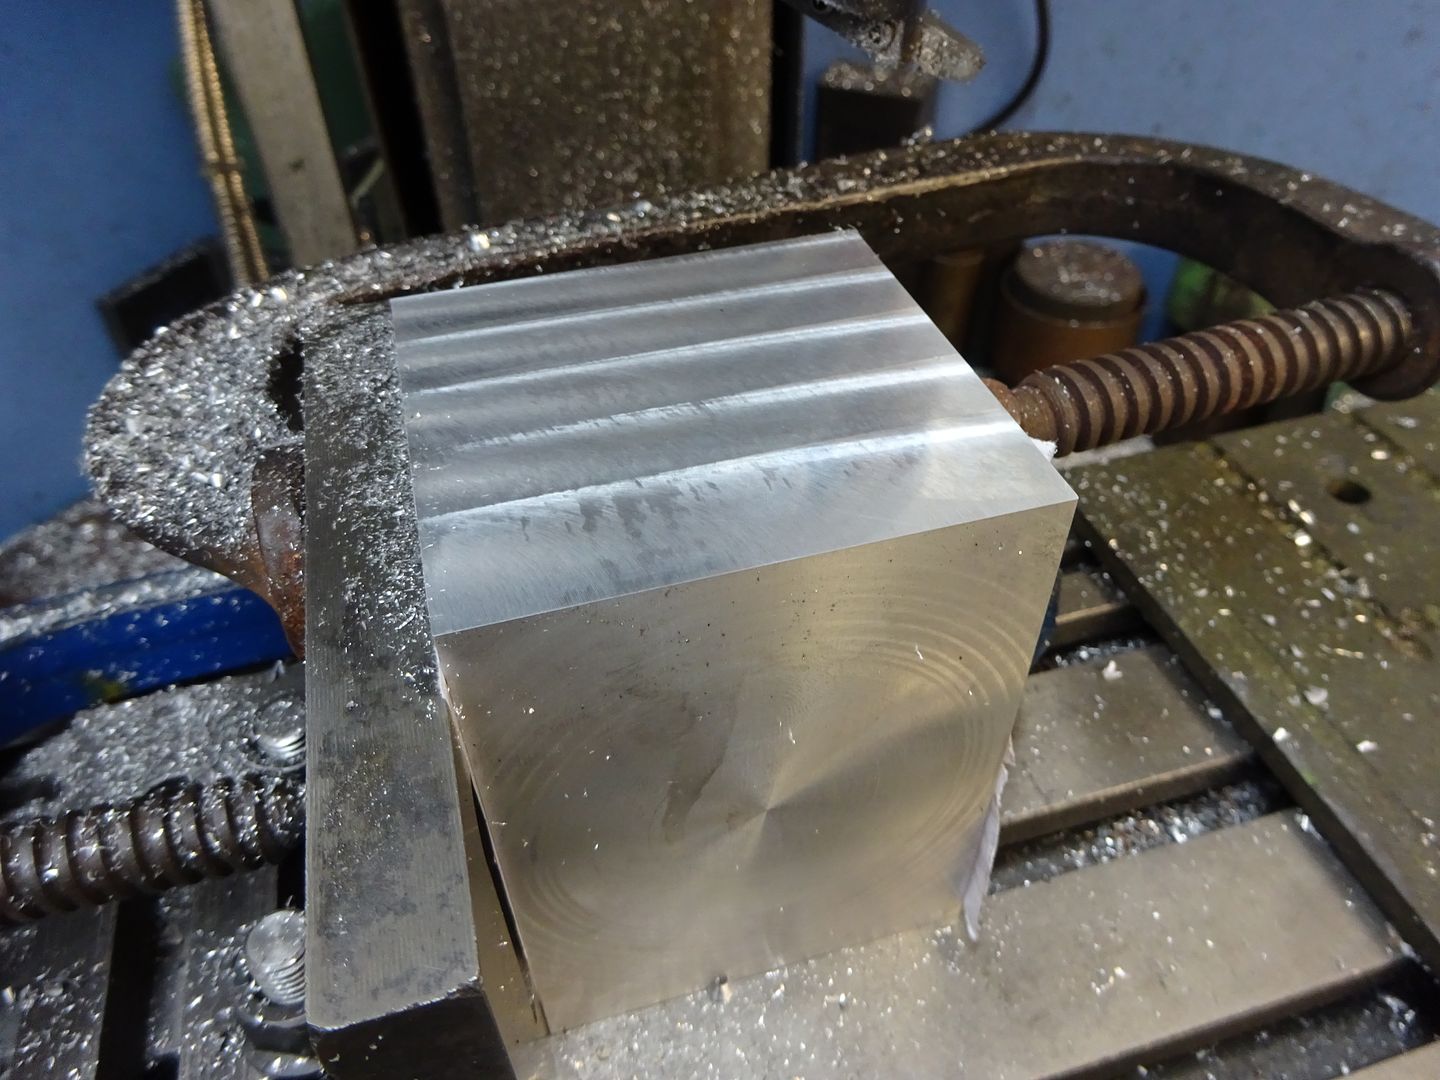
Then over to the mill equiped with a flycutter do do the rest of the faces.


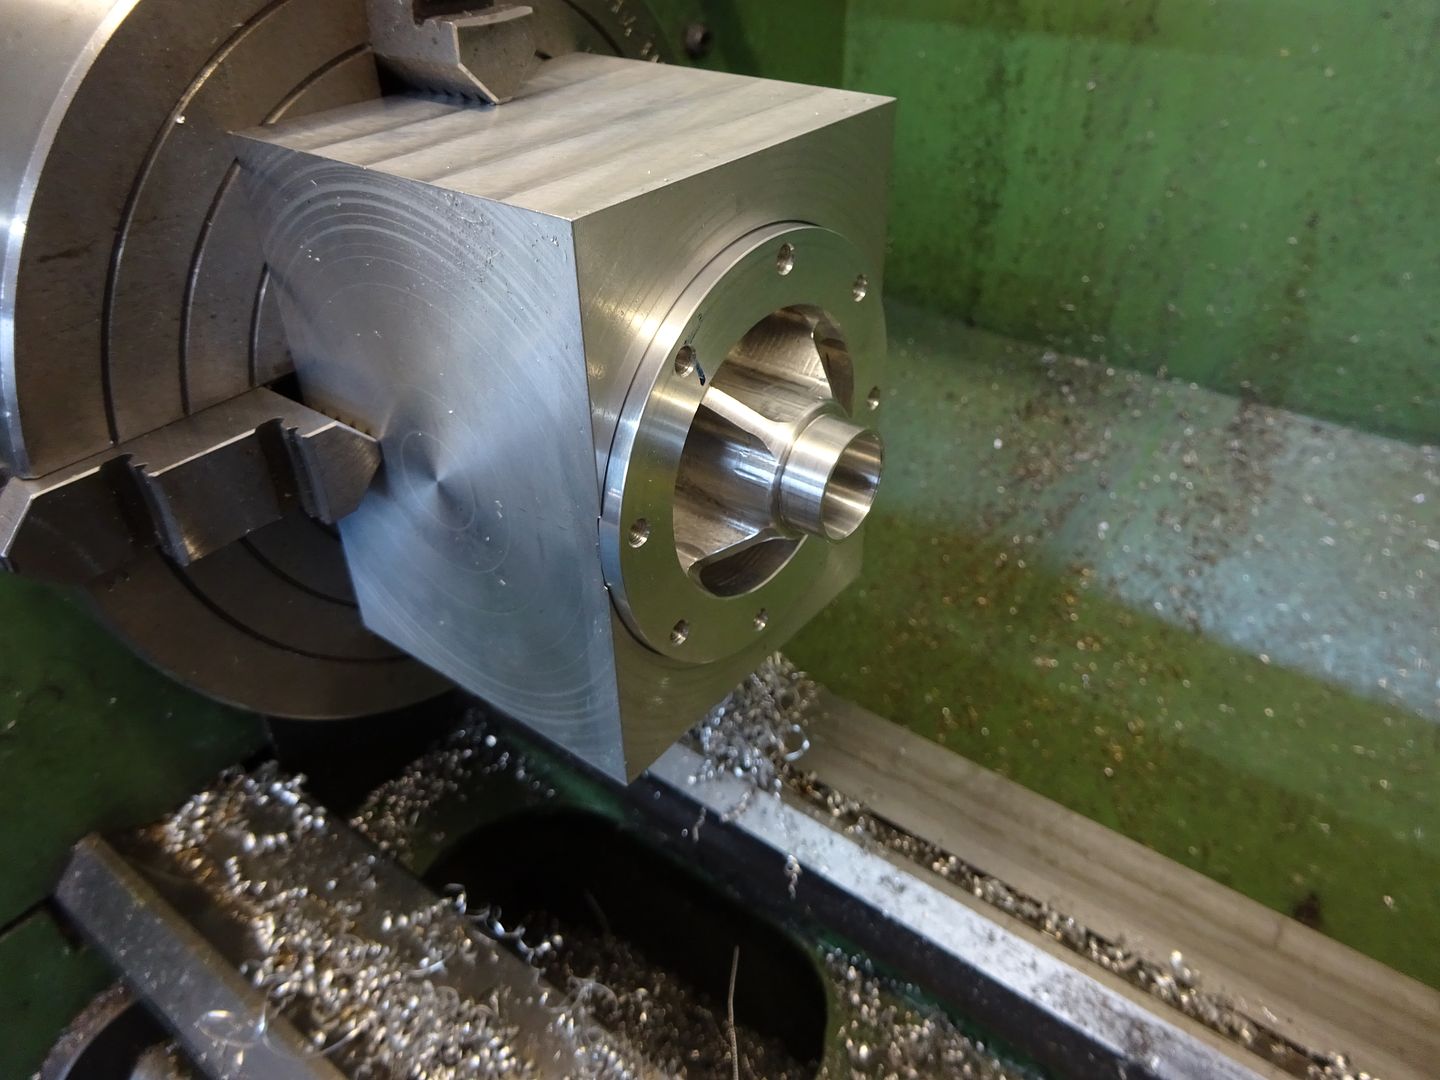
Back on the lathe and the crankcase was hollowed out, it's not that easy to see but there are several undercuts to give minimal clearance to the crank webs and conrod bigend, you can also just see the hole and counter bore for the bearing.


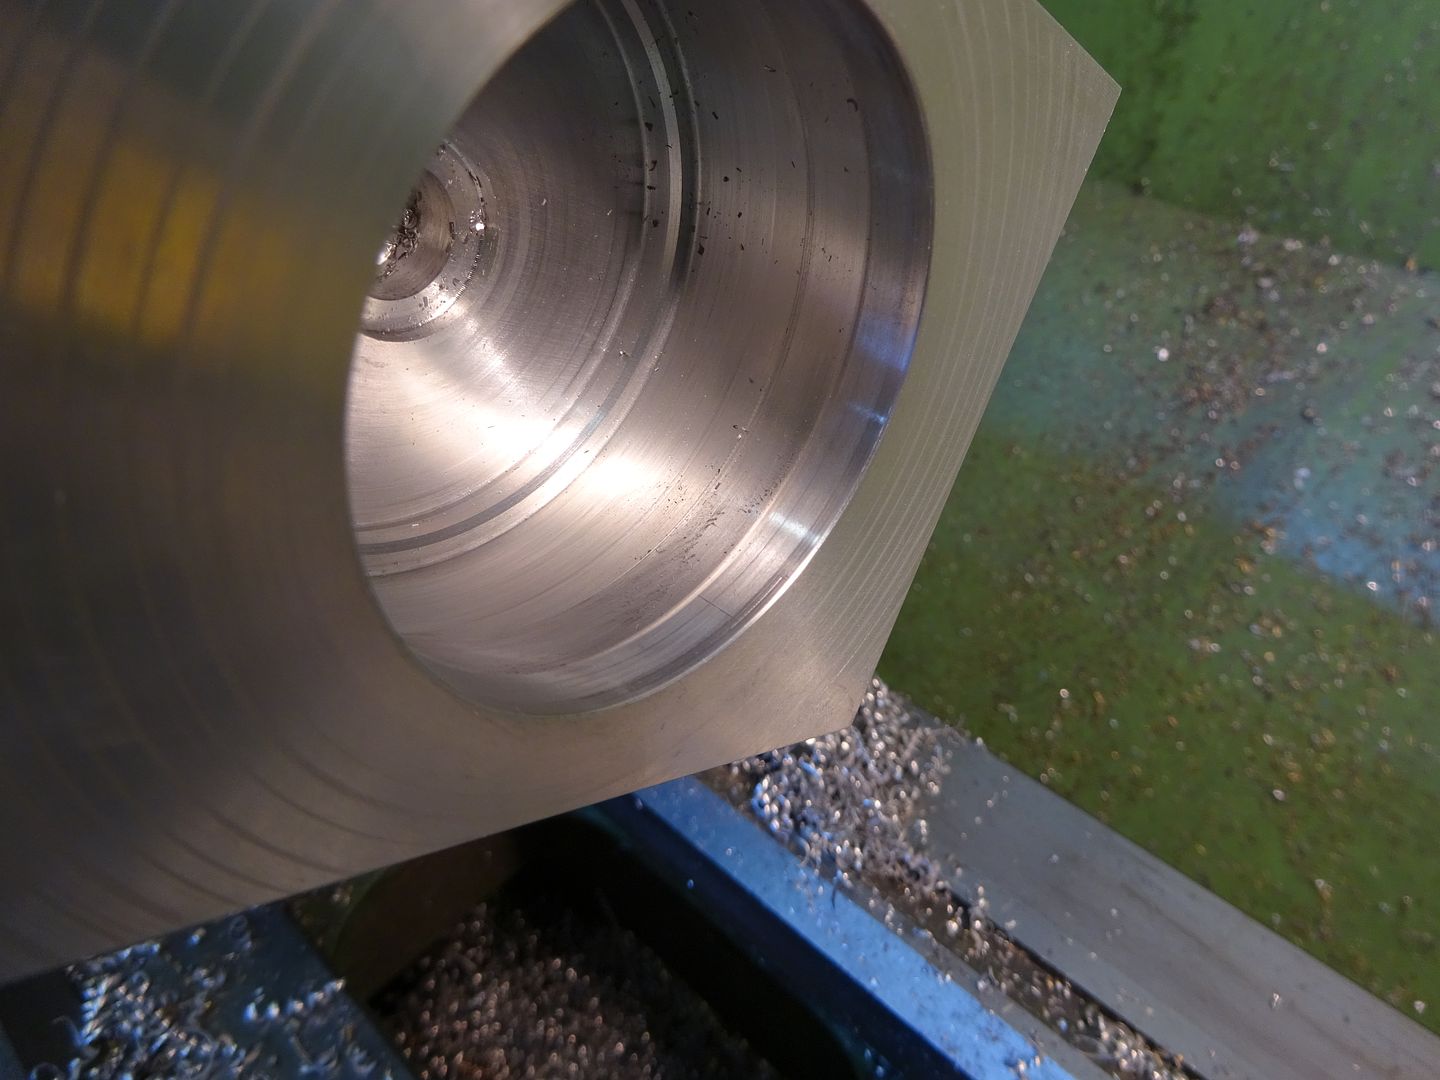
Finally add a shallow cut for the crancase cover to mate with, yes it is meant to just break the edge of the block.


And a quick test fit of the cover, this needs to be a good close fit as it ensures the two bearings either side of the crank are concentric.


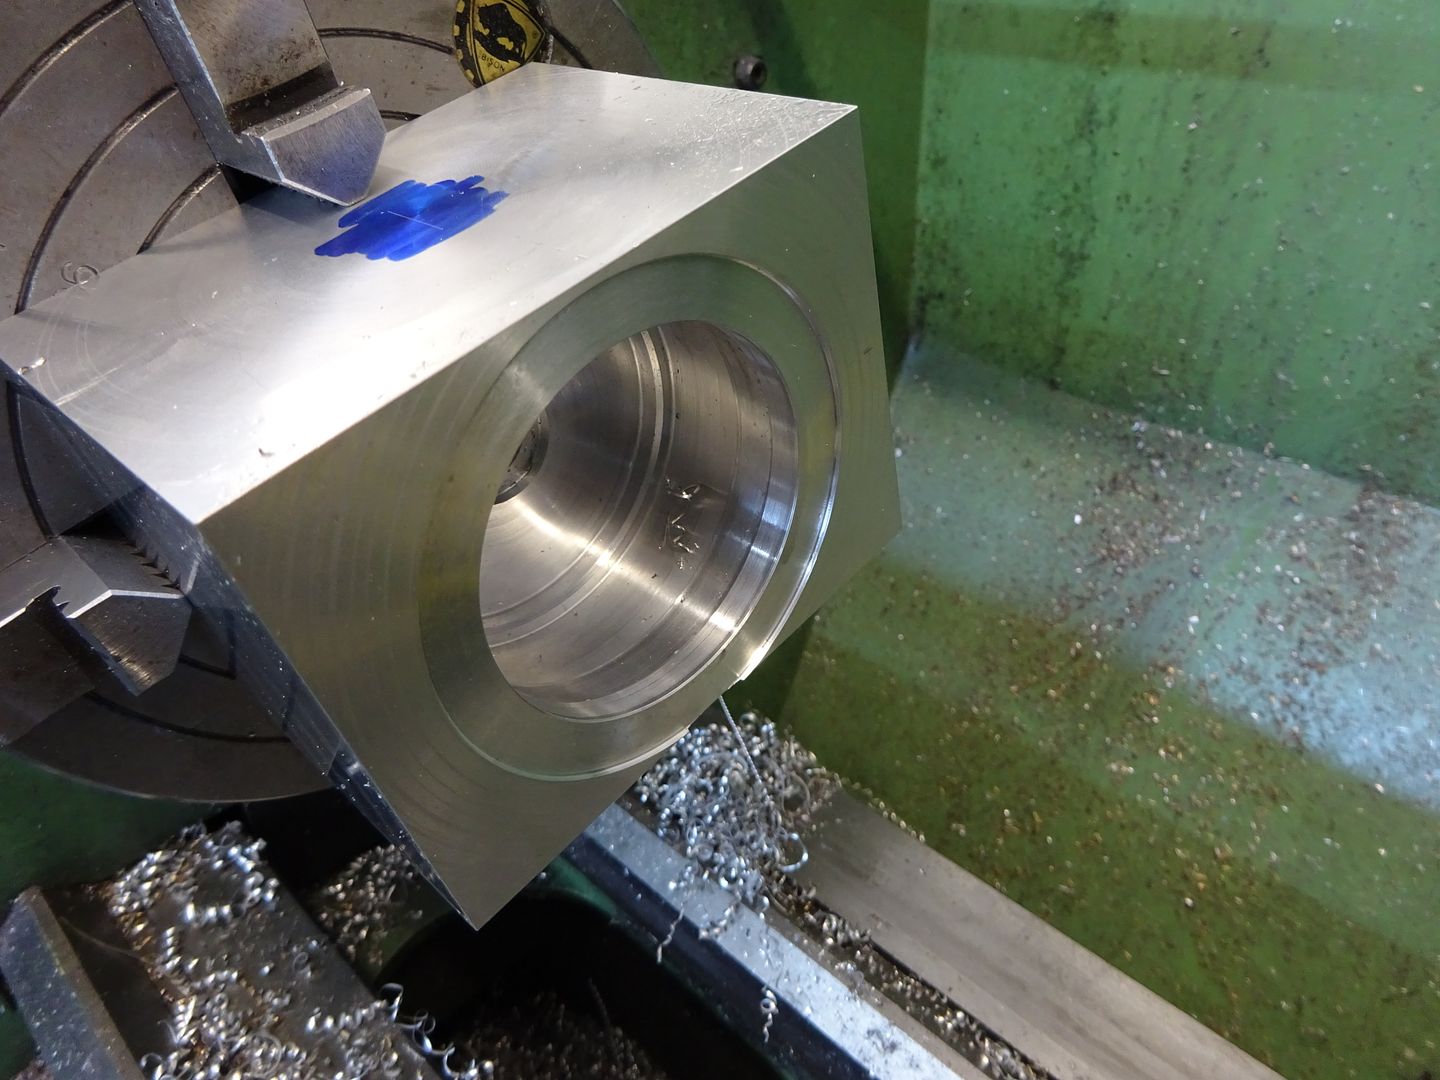
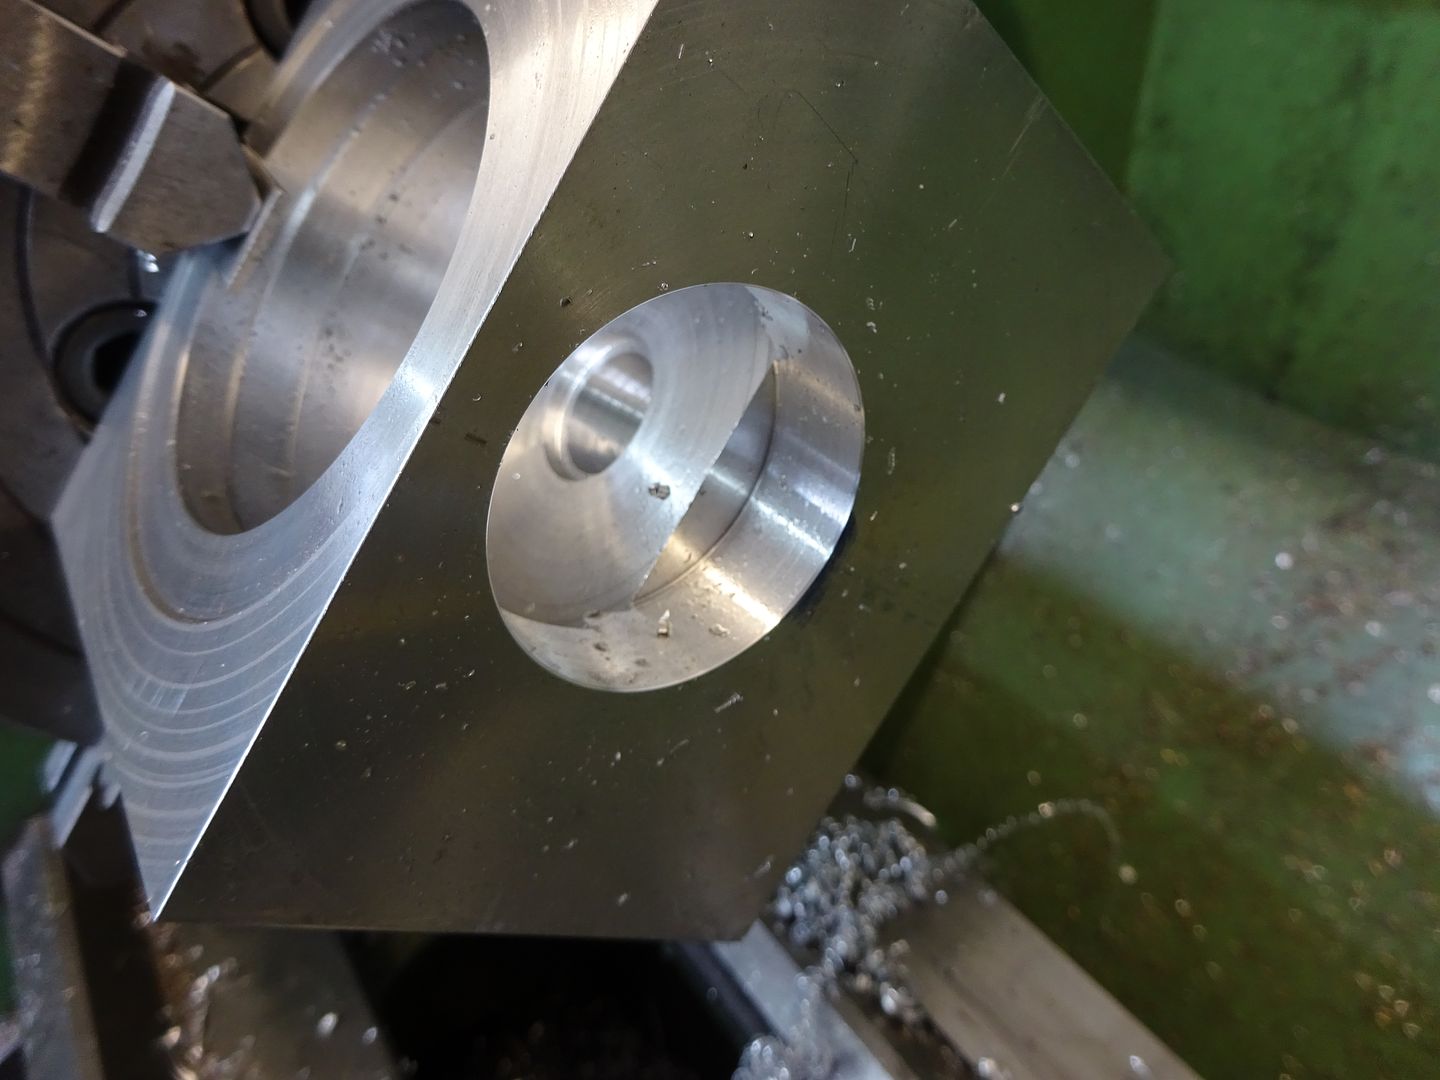
Now with the top of the crankcase facing outwards the hole for the cylinder liner was bored to depth, that little ledge you can see will later have a CSK oil hole drilled down through the bearing the idea being that some of the 2-stroke oil will gather on the ledge and then find its way down into the bearing.


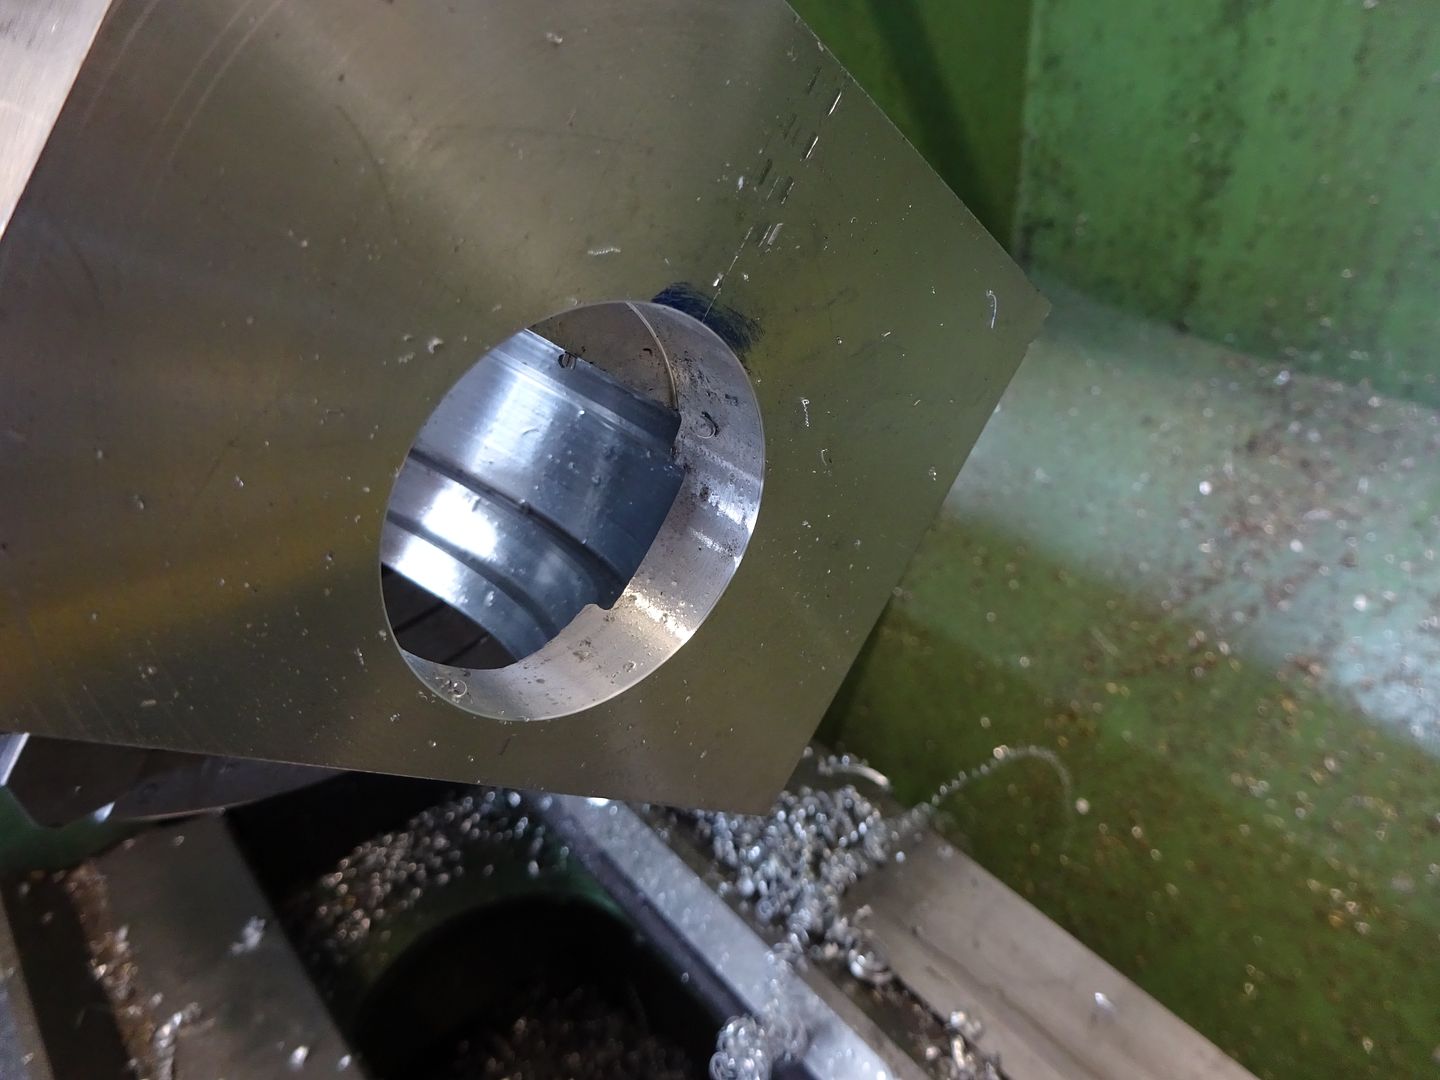
From another angle you can see the shape of the inside of the case better


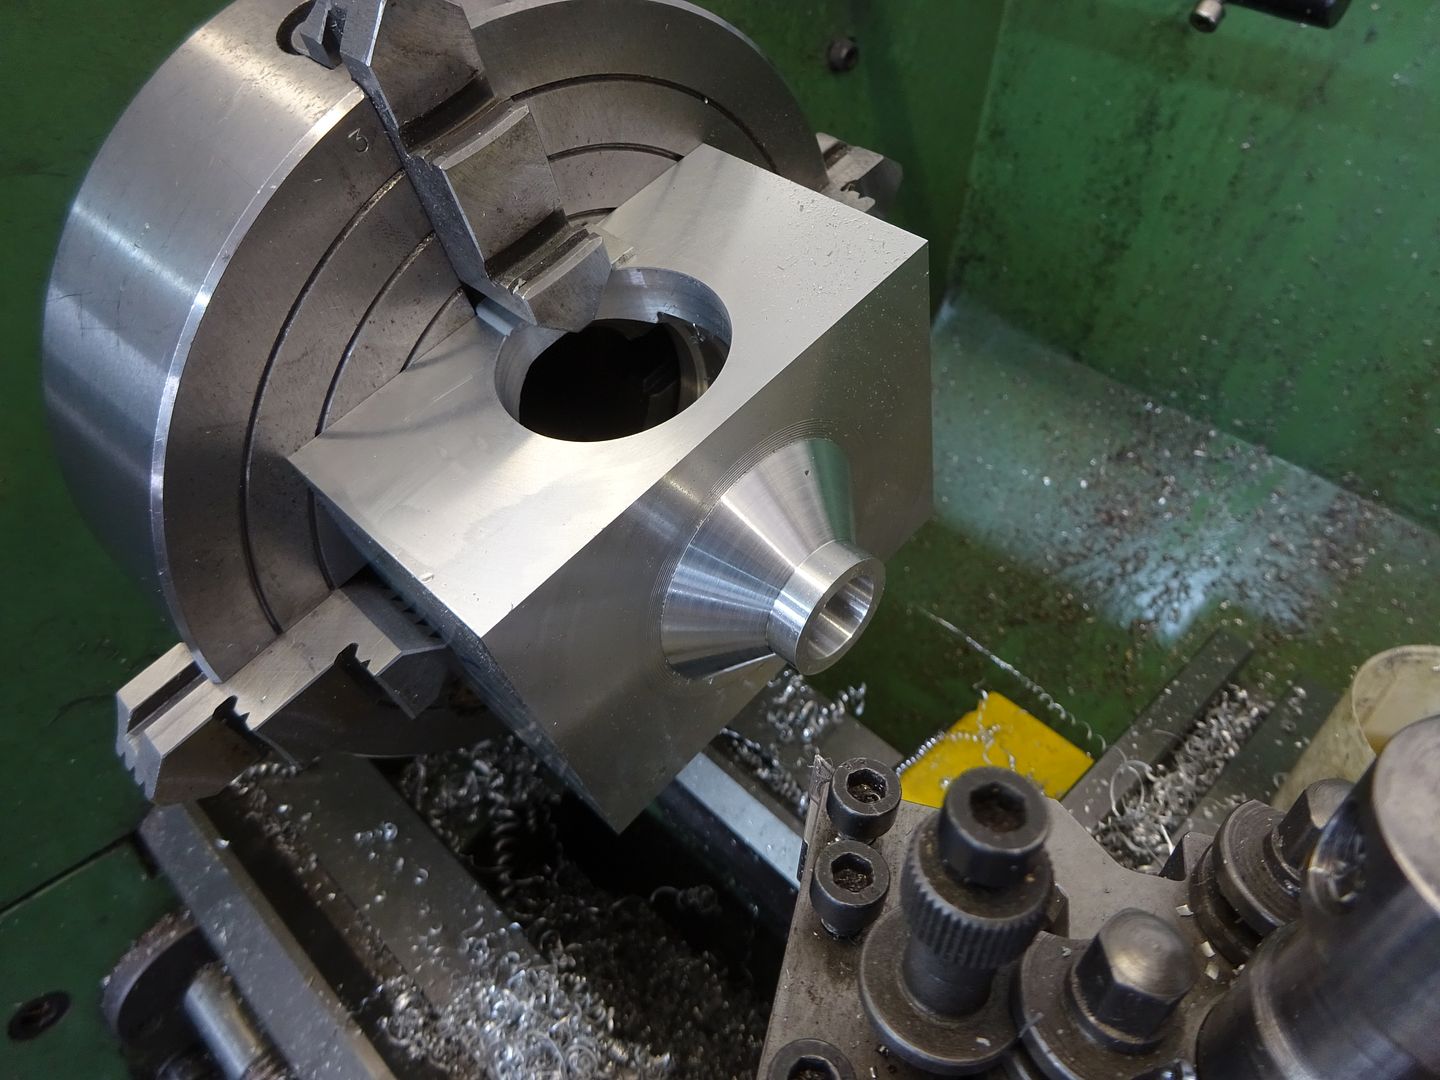
Finally the back of the engine had as much material removed as possible in a similar way to the cover earlier.


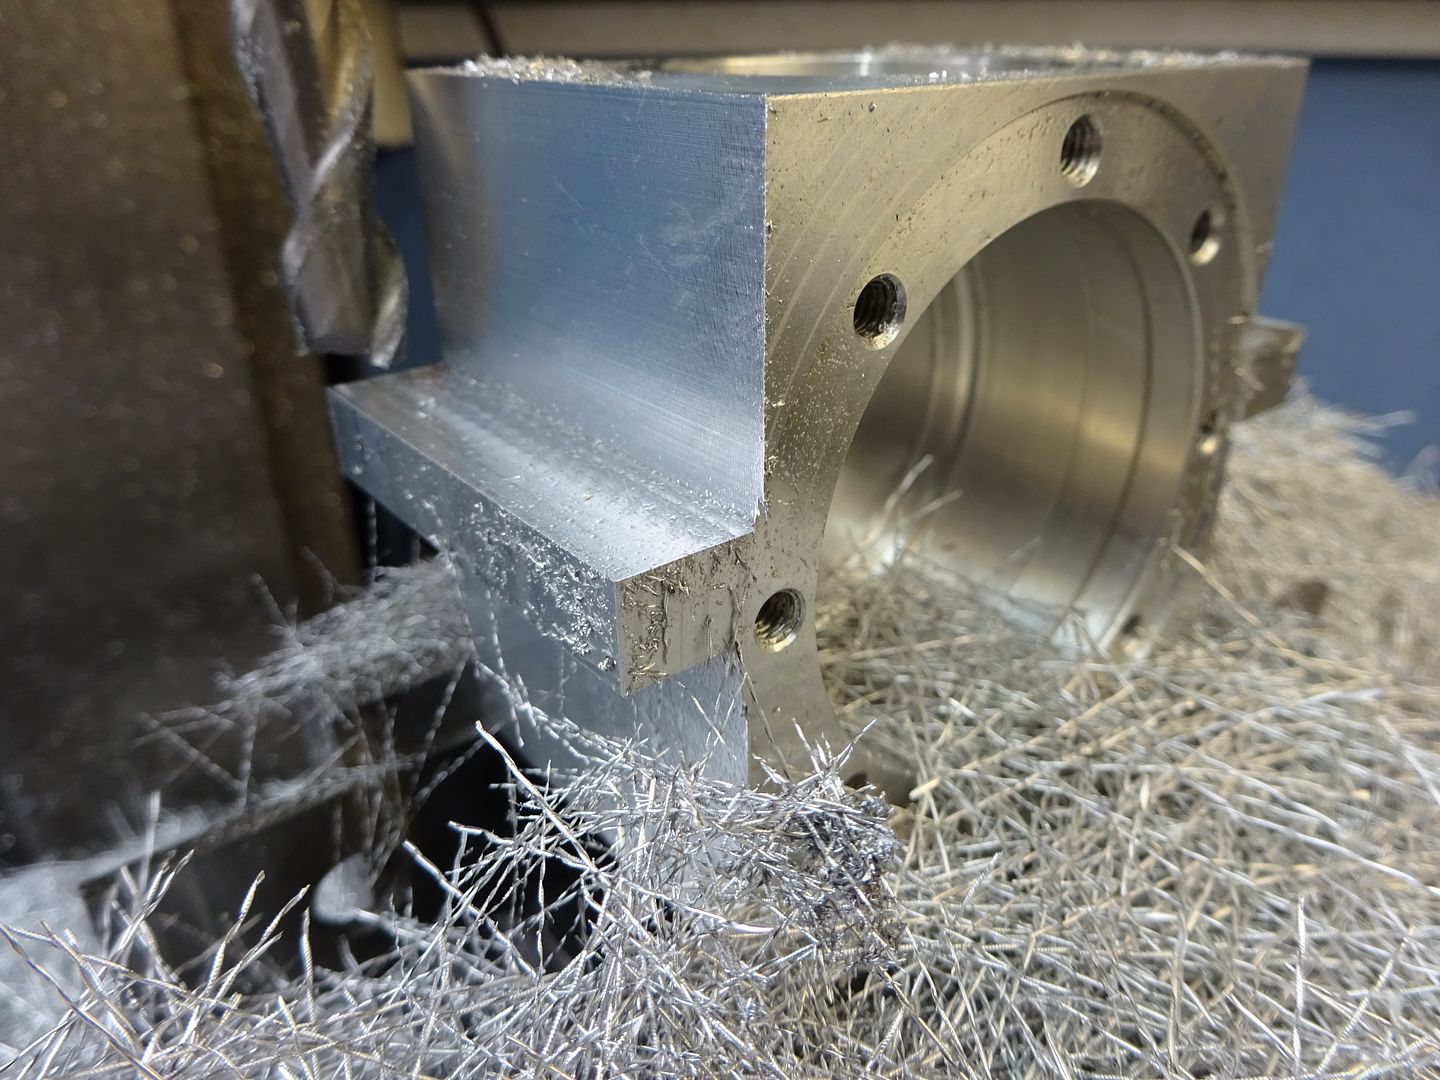
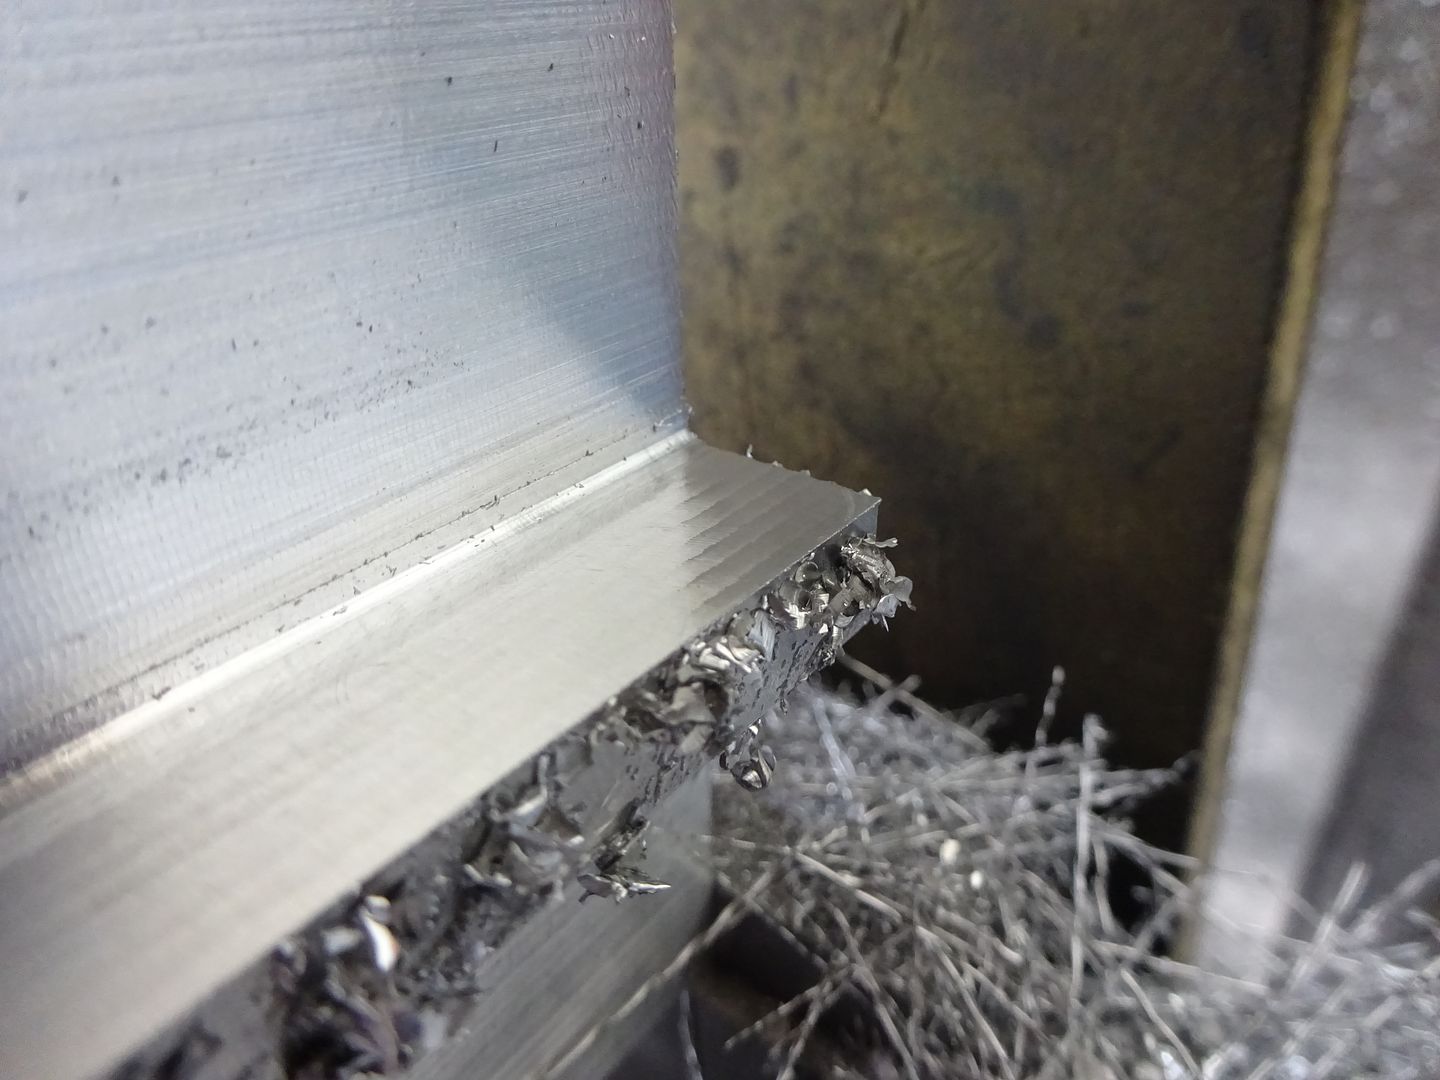
With all the turning done it was over to the mill to make some serious swarf by machining away a lot of the waste to leave the two mounting lugs. I used one of the 2-flute milling cutters from ARC that are designed specifically for alumininm, this is a 12mm cutter and I'm cutting with 35mm of the flute length, 0.020" (0.5mm) depth per pass.

[youtube1]https://youtu.be/AXk2zimLC2c[/youtube1]


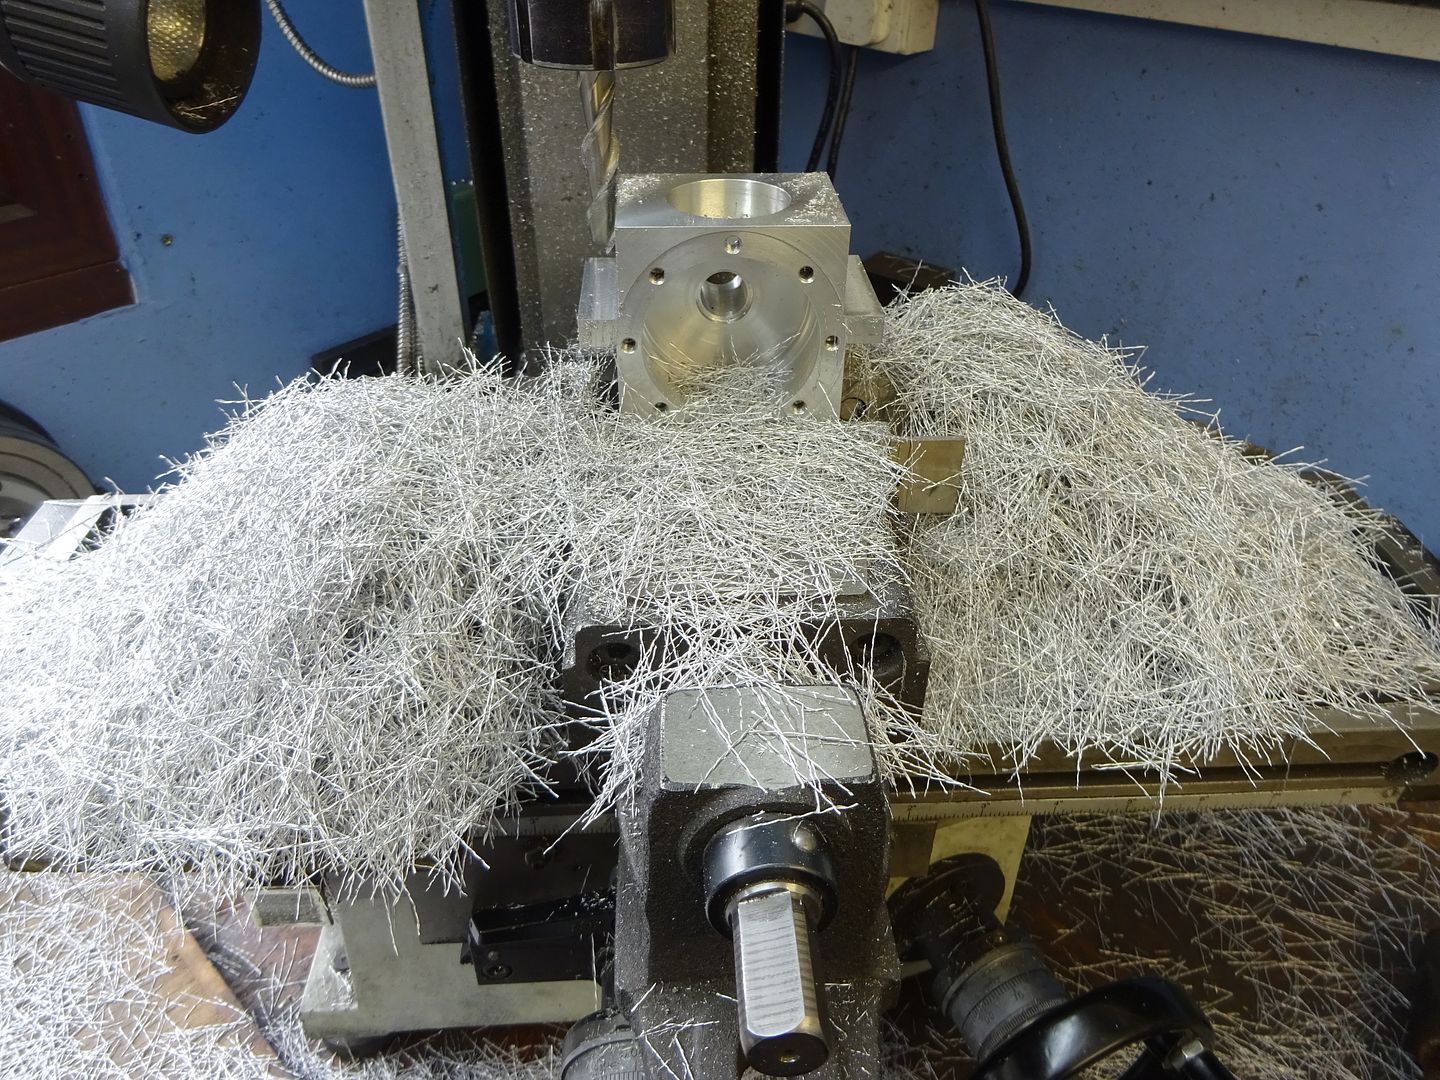
That's it for tonight, there is swarf to be cleaned up :-[


« Last Edit: October 20, 2016, 07:42:53 PM by Jasonb »

Offline Roger B

  • Global Moderator
  • Full Member
  • *****
  • Posts: 6165
  • Switzerland
Re: Recreating a Stuart Lightweight
« Reply #25 on: October 20, 2016, 08:09:01 PM »
That's indeed a lot of swarf (that's why castings were invented  :stir: ) A wood bandsaw should be ok with aluminium, it might struggle with Mould Steel (I know I did  ::) )
Best regards

Roger

Offline b.lindsey

  • Global Moderator
  • Full Member
  • *****
  • Posts: 13860
  • Dallas, NC, USA
    • Workbench-Miniatures
Re: Recreating a Stuart Lightweight
« Reply #26 on: October 21, 2016, 01:49:43 AM »
That is some beautiful work Jason. Still following alone here  :popcorn:

Bill

Offline steamer

  • Global Moderator
  • Full Member
  • *****
  • Posts: 12699
  • Central Massachusetts, USA
Re: Recreating a Stuart Lightweight
« Reply #27 on: October 21, 2016, 01:54:52 AM »
I always love watching you fab up stuff Jason.    Sweet!

Dave
"Mister M'Andrew, don't you think steam spoils romance at sea?"
Damned ijjit!

Offline Ridjobradi

  • Full Member
  • ****
  • Posts: 26
Re: Recreating a Stuart Lightweight
« Reply #28 on: October 25, 2016, 04:55:59 PM »
This is an great build to watch for a newbie.  I am seeing how much more tooling, material, and skills that I need to acquire.  All the more reason to start small and acquire a little at a time.

Sent from my SM-T330NU using Tapatalk


Online Jasonb

  • Full Member
  • *****
  • Posts: 9491
  • Surrey, UK
Re: Recreating a Stuart Lightweight
« Reply #29 on: October 29, 2016, 07:03:34 PM »
When the swarf was cleared away I could see that the lump of ali was starting to look more like an engine crankcase


With the part held in the vice mounted ontop of the rotary table the cylinder mounting flange had some shape added to it.


The rotary table was then mounted vertically and the 3-jaw chucks jaws expanded inside the crankcase opening to hold it. I also turned up a plug to fit the bearing hole so that the R/T tailstock could be used for added support then the case was roughed out to shape.


And then another pass to bring it down to final size.


Then using a ball nose cutter some more excess material was removed.


The R/T was then mounted horizontally again and a start made on machining the stiffening webs at the rear of the crankcase


The top half was a bit trickier as there is a rounded bulge that follows the line of the cylinder liner cutout, not easily seen in this shot but better in the second where I have hade a start at blending some of teh machined surfaces with a carbide burr


I was then just a lot of time with the Dremel and files to refine the shapes. Luckily as the stuart castings are quite textured there was not as much work as there would be doing a diecast crankcase that would be left in bare metal. Here it is with some etch primer.


Thats the crankcase out the way for now while I decide on a nice subtle colour to paint it. Next time I'll see what is hiding inside this piece of EN8 Steel.


J


SimplePortal 2.3.5 © 2008-2012, SimplePortal