Author Topic: 1/4 Scale Cirrus MkI  (Read 30223 times)

Online cwelkie

  • Full Member
  • ****
  • Posts: 195
Re: 1/4 Scale Cirrus MkI
« Reply #75 on: October 29, 2016, 03:59:00 PM »
Time to update this build with the little bit of progress seen over the past months ... before I forget what I did and how.

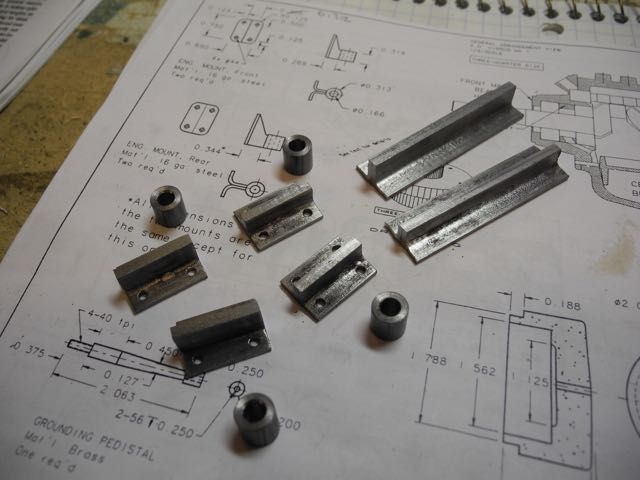
I'd left off at the connecting rods but decided to carry on with the engine mounts for a change.  It was a chance to pay at small-scale fabrication.  I found some square tubing of an appropriate size "in stock" that was split to create some right angles.  Two angles were welded back-to-back to make the "webs" that bolt to the crankcase.  These were then drilled for the crankcase studs and cut to length.  Some solid round stock was drilled to clearance size and parted off to provide the vertical bits.


Then it was time for sorting out a way to hold these parts in alignment so they could be welded together.  Yes, this was an opportunity to play with a TIG welder ... I wasn't comfortable with silver soldering/brazing these parts together given the loads they'd be under.  Here is the fixture I came up with.


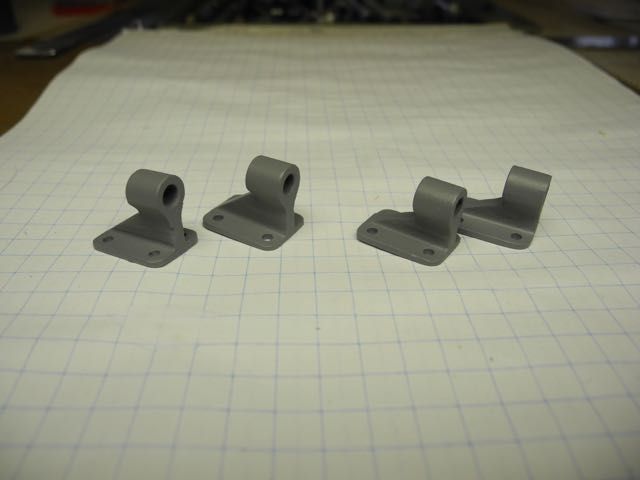
After a tidy-up, a bit of JB Weld and some primer I had some motor mounts.


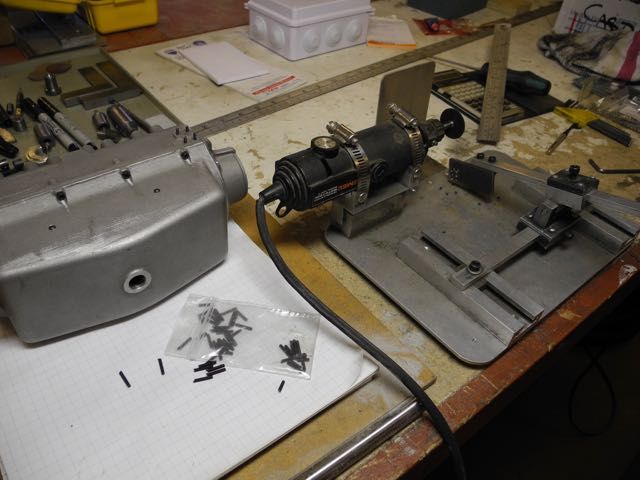
Fortunately I'd put together a gadget from Home Shop Machinist (?) some years back that made (relatively) quick work of cutting the 16 #2-56 studs to length.  (This is one well used tool in a shop that does both aeromodeling and model engineering!)


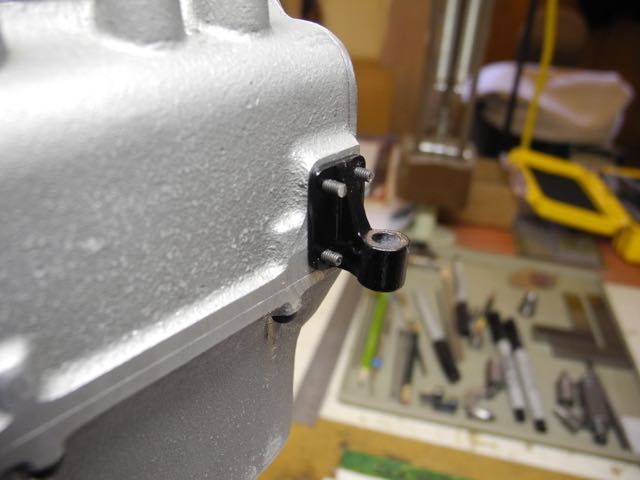
... a bit of black paint and there you have it.


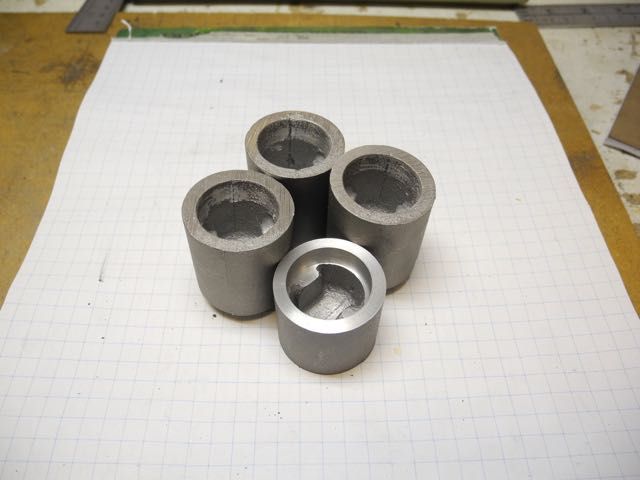
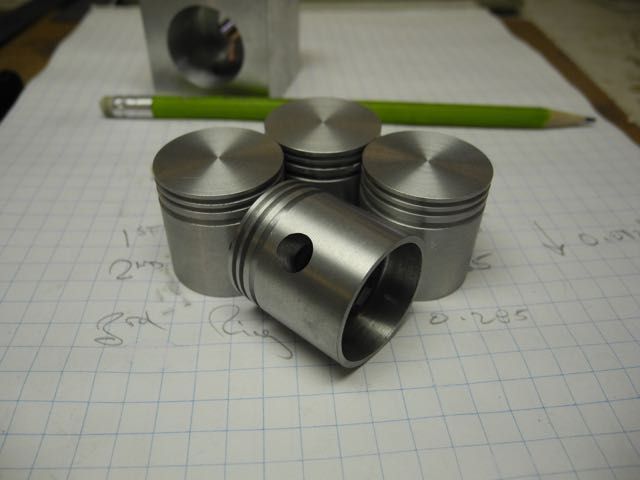
Then it was on to the pistons.  These were the last of the castings and mighty fine ones too - no pin-holes!  Here are three raw castings with one roughed to length and cleaned up inside.


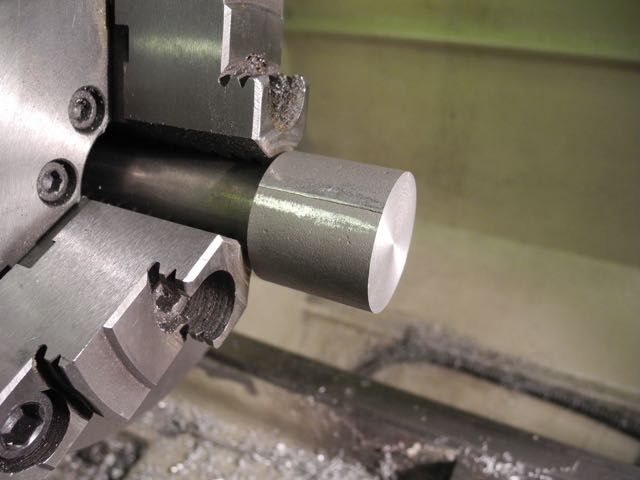
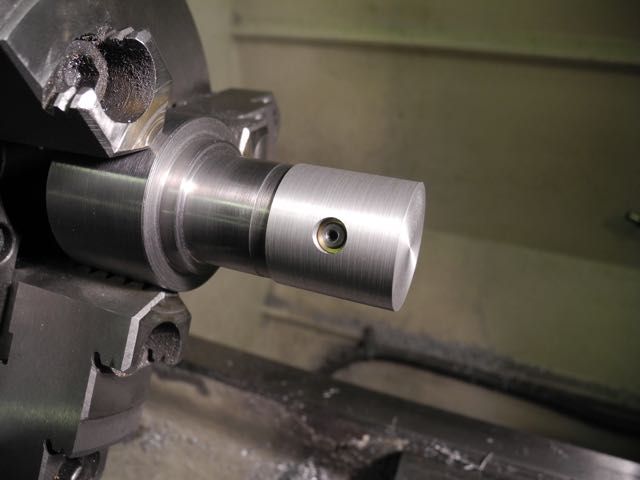
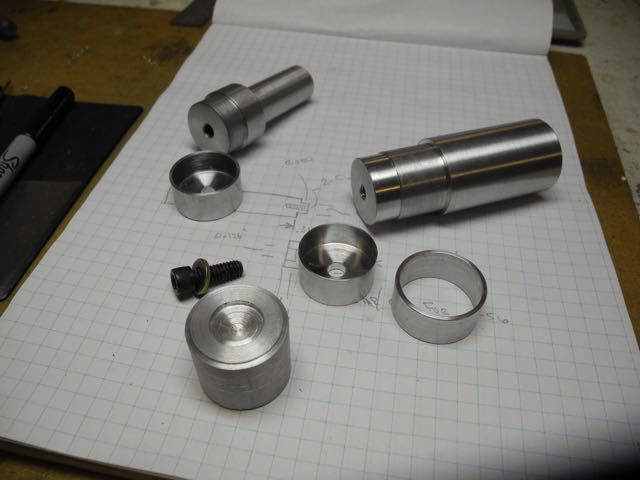
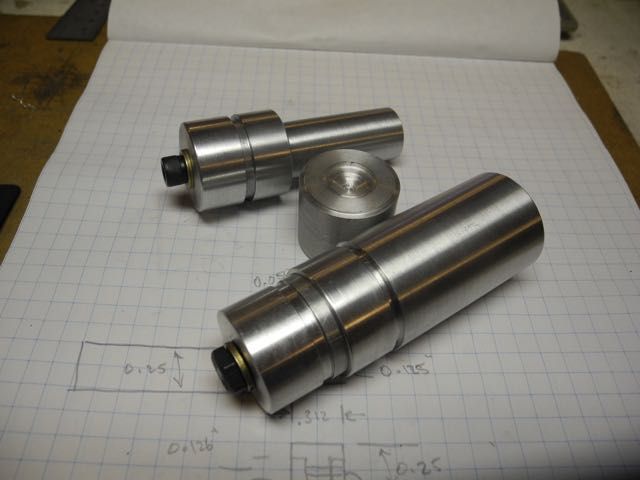
A mandrel was made up to hold the pistons via a heat-shrink fit.  It was used to finish the pistons to length and near outside diameter.


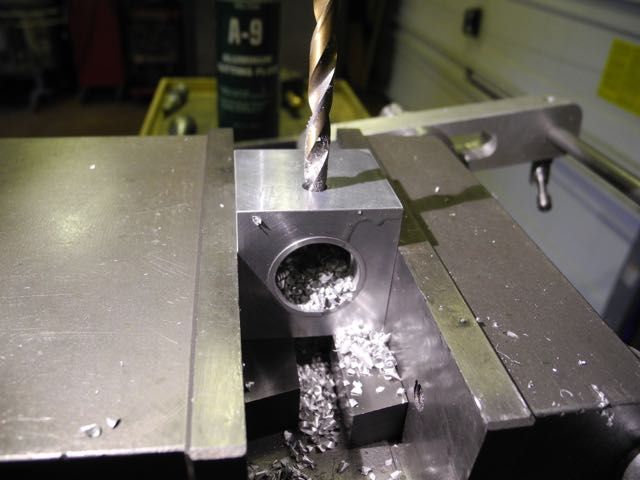
Another fixture was made up to hold the pistons while drill the wrist pin holes.  It's just a block with a blind bore to match the pistons; cross-drilled to pin size.


Now I could re-purpose a piston holding fixture made up ages ago.  It only needed some bushes to size-up the "wrist pin" and a trim to match the piston inside diameter.


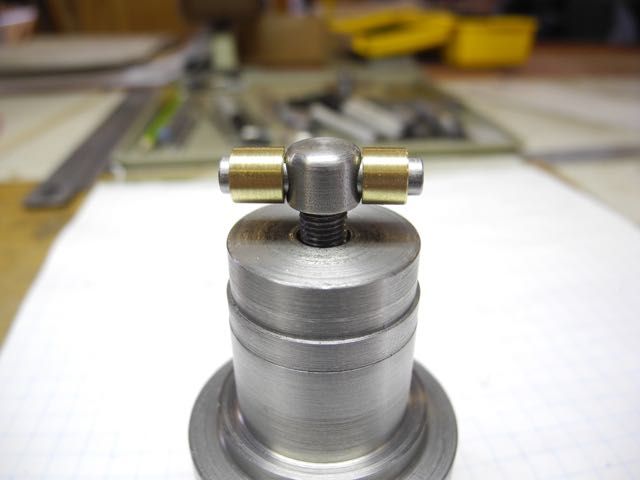
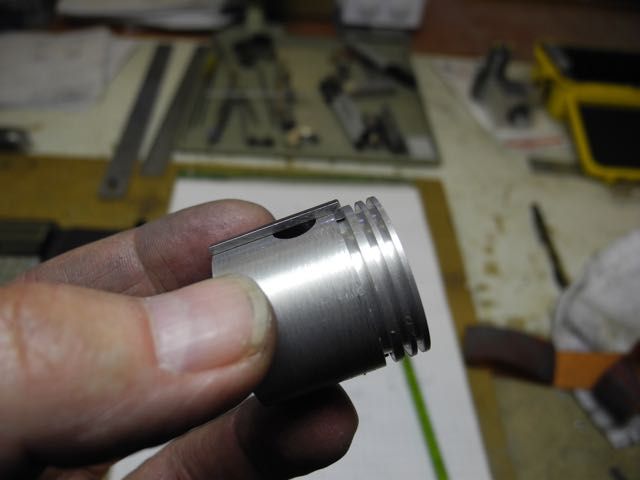
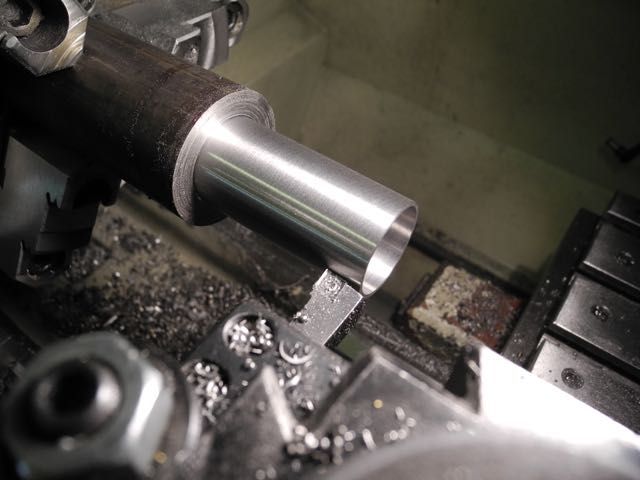
Here is a piston mounted on the fixture and cut to final diameter.


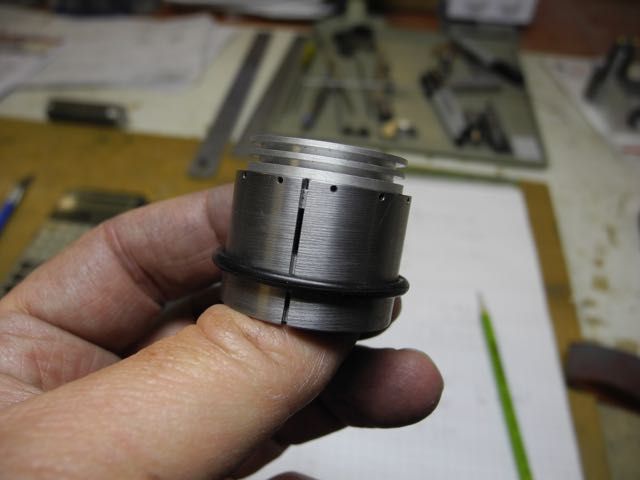
The piston ring grooves were cut with this setup.  Plan to use two compression and one oil control ring.


The batch ...


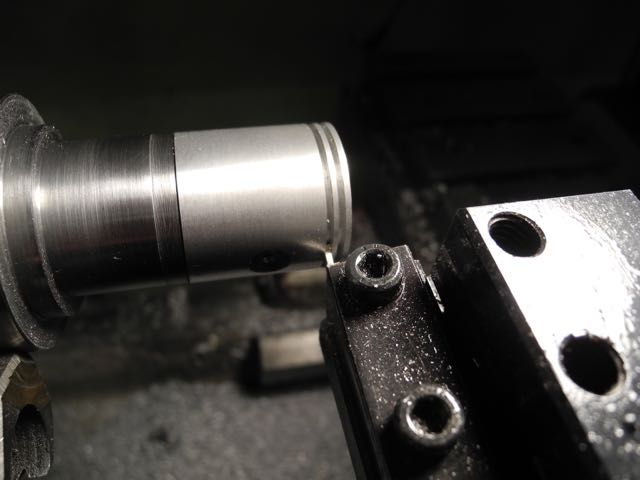
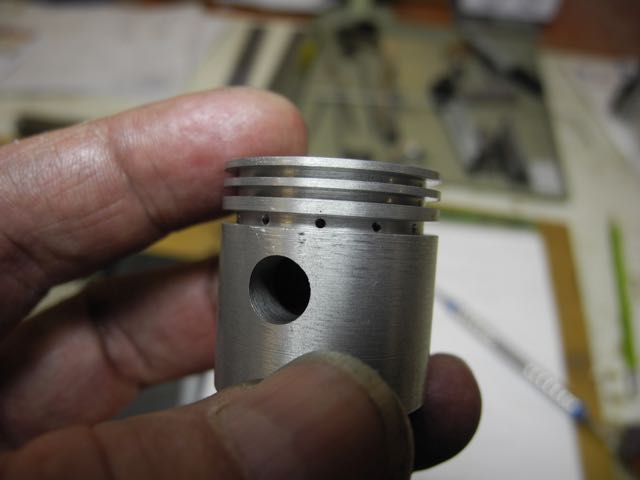
Model Engine Builder magazine included an article about oil control rings a while back.  It illustrated a drilling jig for the piston oil control/drain holes that eliminated any chance for the drill bit to damage the grooves.  Here is my iteration ...


... and the end result.


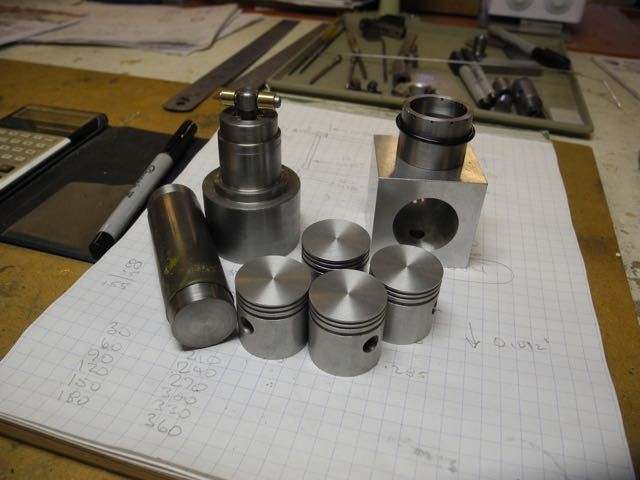
Here is a family photo including all the jigs/fixtures.  It seems to takes more parts to make parts than there are parts themselves!


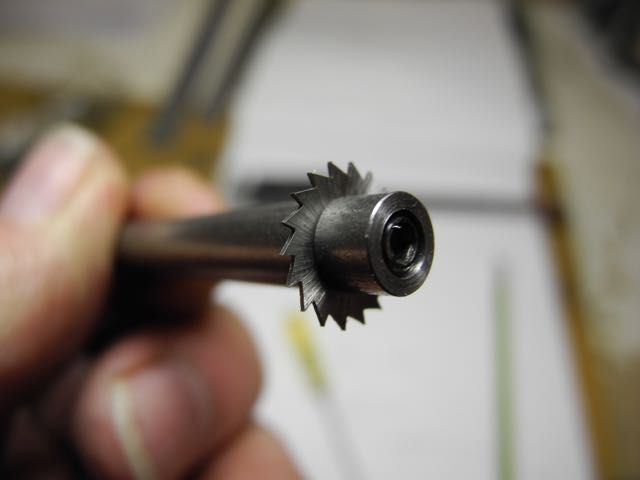
Next up were the piston rings - might as well stick to the theme!  The oil control ring is going to be grooved and then that groove cut through in 12 places with a tiny saw.  These blades are used for cutting electric motor commutators between segments.  This one is 3/8" in diameter and needed an arbour made for it.


Next the fixtures were made to hold the rings while being burnished to width, trimmed to outside diameter, grooved (oil rings) and the gap cut.  For this engine I'm going to use steel piston rings following (yet) another Model Engine Builder article.  They are made to free diameter and the gap cut.  No annealing required ...


The piston ring "tube" was then machined from some "stress-proof" 1134.  It is bored to a calculated ID and turned to the free diameter (plus 10 thou for later finishing after parting off).


Well my friends, that is about it for this time.  Now I just need to find a stretch of time to focus on parting off the ring blanks and carry-on finishing them.
Thanks for looking in ...
Charlie

Offline steamer

  • Global Moderator
  • Full Member
  • *****
  • Posts: 12699
  • Central Massachusetts, USA
Re: 1/4 Scale Cirrus MkI
« Reply #76 on: October 29, 2016, 04:26:20 PM »
Nice!!!!


Great work!

Dave
"Mister M'Andrew, don't you think steam spoils romance at sea?"
Damned ijjit!

Offline b.lindsey

  • Global Moderator
  • Full Member
  • *****
  • Posts: 13860
  • Dallas, NC, USA
    • Workbench-Miniatures
Re: 1/4 Scale Cirrus MkI
« Reply #77 on: October 29, 2016, 06:47:56 PM »
Even though it  has been a while, you have made some fine progress Charlie!!

Bill

Online cwelkie

  • Full Member
  • ****
  • Posts: 195
Re: 1/4 Scale Cirrus MkI
« Reply #78 on: October 30, 2016, 05:30:24 PM »
Thanks Bill and Dave!
Hopefully I can make a bit more headway as we move into autumn and winter.

Offline fumopuc

  • Full Member
  • *****
  • Posts: 3244
  • Munich, Germany, EU
Re: 1/4 Scale Cirrus MkI
« Reply #79 on: October 30, 2016, 11:43:18 PM »
Hi Charlie, if I look out of my window, there are all the nice colours of autumn in the garden, so I hope to see some more progress of your beautiful engine soon.
Kind Regards
Achim

Offline Zephyrin

  • Full Member
  • ****
  • Posts: 769
  • near Paris, France
Re: 1/4 Scale Cirrus MkI
« Reply #80 on: October 31, 2016, 09:43:45 AM »
Great work along this built, fabulous thread to follow, thanks !
The making of the tooling and jig at each step is very instructive, as I'm starting the built of a flat-headed inline 4, only the crankshaft made actually !

Offline Roger B

  • Global Moderator
  • Full Member
  • *****
  • Posts: 6162
  • Switzerland
Re: 1/4 Scale Cirrus MkI
« Reply #81 on: October 31, 2016, 10:01:24 AM »
Good progress  :ThumbsUp:  :ThumbsUp: I like the jig for drilling the oil return holes. I will be following the manufacture of the oil control rings with interest  :wine1:
Best regards

Roger

Offline gbritnell

  • Full Member
  • ****
  • Posts: 2472
Re: 1/4 Scale Cirrus MkI
« Reply #82 on: October 31, 2016, 12:05:03 PM »
You have some great machining ideas for making pistons. I'm still following along to see what the oil rings look like when finished.
gbritnell
Talent unshared is talent wasted.

Online cwelkie

  • Full Member
  • ****
  • Posts: 195
Re: 1/4 Scale Cirrus MkI
« Reply #83 on: November 22, 2016, 04:18:21 AM »
Hi everyone, I finally made time to finish machining the rings for my Cirrus.  I started by doing the oil rings ... get the complicated ones over with first.  I faced off the "tube of rings" for a fresh start and then parted off 8 rings just a touch over thickness.  They were each then finished on a flat surface; figure-8's on some 220 grit for a close but free fit in the groove.  I did the same with the compression rings; 16 of them (can't have enough spares!).

Then the oil rings were put on the free inside diameter fixture in the lathe to cut the 0.018" groove on centre.  This was repeated for each ring.  The cutting tool was one previously ground from HSS and did the job without effort ... it was unnerving to watch but uneventful.

Once the oil rings were all grooved, the same fixture was put into a 3-jaw on a rotary table.  This table has been modified to be driven with a stepper motor and controller.  I could then program the controller to step around the perimeter to equally space the slits and take into account the gap to be cut later.  In other words, 12 slits were cut about 28 degrees apart.  The tiny saw mentioned in a previous post was used and it did a fabulous job start to finish.


Here is the end result ...


Then the rotary table was setup horizontally so the ring gap could be cut.  Once again the stepper drive capability made it easy to move a precise angle every time.  The same saw blade was used to cut the gap.


Next the other arbour was used to trim the outside diameter with the ring in a compressed state.


After fine adjustments to the gaps in a cylinder, we have 7 oil rings and 16 compression rings ... one oil ring got sacrificed to the shop gods (AKA machinist's screw-up).  I couldn't bring myself to cut the gap to final clearance (0.009") and trimmed each individually with a small file.


That's is for now.  Hopefully I can make more time for more parts soon - perhaps the valves should be next.
Cheers
Charlie


Offline Roger B

  • Global Moderator
  • Full Member
  • *****
  • Posts: 6162
  • Switzerland
Re: 1/4 Scale Cirrus MkI
« Reply #84 on: November 25, 2016, 09:13:09 AM »
Those oil control rings are magnificent  :praise2:  :praise2:  :wine1:
Best regards

Roger

Online Jo

  • Administrator
  • Full Member
  • *****
  • Posts: 15302
  • Hampshire, england.
Re: 1/4 Scale Cirrus MkI
« Reply #85 on: November 25, 2016, 11:17:48 AM »
They are rather  8).

I really should do them for my 1/4 scale Cirrus and Gypsy :thinking:

Jo
Enjoyment is more important than achievement.

Offline fumopuc

  • Full Member
  • *****
  • Posts: 3244
  • Munich, Germany, EU
Re: 1/4 Scale Cirrus MkI
« Reply #86 on: November 25, 2016, 09:07:04 PM »
Hi Charlie, that's impressive.
Kind Regards
Achim

Online cwelkie

  • Full Member
  • ****
  • Posts: 195
Re: 1/4 Scale Cirrus MkI
« Reply #87 on: March 05, 2018, 02:57:08 AM »
Well - it's been awhile.  In spite of the lack of updates I have been making some progress.  It's about time that I brought this topic up to date.

Since starting this build I'd wanted to grind the camshaft and considered numerous approaches to take and reviewed many grinder designs.  Given the amount of use I expected to receive I didn't want to over-invest in time and money.  The design used by (our own) Achim stuck in my mind as scalable in size and something I could build to work on my Clarkson T&C grinder.  One of the possibly unique things I did was 3D printing the cam template used.  The proof will be in the running but I think the cam turned out nicely.

Online cwelkie

  • Full Member
  • ****
  • Posts: 195
Re: 1/4 Scale Cirrus MkI
« Reply #88 on: March 05, 2018, 03:04:59 AM »
Another step forward came in the form of the spark plugs.  This model uses 1/4-32 size plugs and so were relatively straight forward.  I still needed to use my magnifying head gear though.  Corian was used for the insulators; 12L14 for the bodies and centre conductor; knurled brass for the lead retention nuts.  The bits were assembled with JB Weld as a sealant/adhesive with a swaged mechanical retention feature for extra security.

Online cwelkie

  • Full Member
  • ****
  • Posts: 195
Re: 1/4 Scale Cirrus MkI
« Reply #89 on: March 05, 2018, 03:10:53 AM »
As I started running out of parts to fabricate time came to begin assembly and final fitting.  It didn't take long before balancing things on 123 blocks became unsatisfactory so a display and running stand had to be designed and built.  I couldn't bring myself to use single vertical rods and wanted something a little more "girder-like" and frankly, more substantial for the anticipated running loads.


SimplePortal 2.3.5 © 2008-2012, SimplePortal