Author Topic: 1/4 Scale Cirrus MkI  (Read 30296 times)

Offline b.lindsey

  • Global Moderator
  • Full Member
  • *****
  • Posts: 13860
  • Dallas, NC, USA
    • Workbench-Miniatures
Re: 1/4 Scale Cirrus MkI
« Reply #60 on: May 08, 2016, 01:57:30 AM »
That is a fine family shot there Charlie!!  I don't blame you for getting out the heads to see how it will look. Beautiful machining on those cylinders too!!

Bill

Offline Don1966

  • Full Member
  • *****
  • Posts: 6818
  • Columbia, MS
Re: 1/4 Scale Cirrus MkI
« Reply #61 on: May 08, 2016, 02:03:22 AM »
Just catch up Charlie and that's is some real fine work. Those cylinders are a treat........ :ThumbsUp:


 :popcorn: Don

Offline 10KPete

  • Full Member
  • ****
  • Posts: 1606
  • Nordland, WA, USA
Re: 1/4 Scale Cirrus MkI
« Reply #62 on: May 08, 2016, 02:07:50 AM »
Sweet!!   :cheers:

Pete
Craftsman, Tinkerer, Curious Person.
Retired, finally!
SB 10K lathe, Benchmaster mill. And stuff.

Offline Art K

  • Full Member
  • ****
  • Posts: 1766
  • Madison, Wisconsin USA
Re: 1/4 Scale Cirrus MkI
« Reply #63 on: May 08, 2016, 03:51:04 AM »
Charlie,
Fantastic job on the head. I'm still following along, good work.
Art
"The beautiful thing about learning is that no one can take it away from you" B.B. King

Offline fumopuc

  • Full Member
  • *****
  • Posts: 3254
  • Munich, Germany, EU
Re: 1/4 Scale Cirrus MkI
« Reply #64 on: May 08, 2016, 10:19:40 AM »
Hi Charlie, thanks for showing it, great progress and nice pictures.
Kind Regards
Achim

Offline Graham Meek

  • Full Member
  • ****
  • Posts: 310
Re: 1/4 Scale Cirrus MkI
« Reply #65 on: May 08, 2016, 07:51:37 PM »
Hi Charlie,

You certainly have been busy since I last looked in, you should be justly proud of your achievement.

My best regards
Gray,

Offline Roger B

  • Global Moderator
  • Full Member
  • *****
  • Posts: 6164
  • Switzerland
Re: 1/4 Scale Cirrus MkI
« Reply #66 on: May 08, 2016, 08:01:16 PM »
That's looking good  :praise2:  :praise2:
Best regards

Roger

Offline cwelkie

  • Full Member
  • ****
  • Posts: 195
Re: 1/4 Scale Cirrus MkI
« Reply #67 on: May 09, 2016, 02:45:15 PM »
Thanks everyone for coming along on this journey.  Like many things - it's better when shared.

I did manage to get the cylinder spigot plate done yesterday - sorry no photos yet - and it looks like it's a "keeper".  Now I just need to get my head wrapped around exactly how it's intended to be used.  The drawings have no detail showing if the plate is intended to go directly under the head or on top of the cylinders.  There is supposed to be an o-ring sized to match the OD of the cylinder spigots in there somewhere too.  I can't imagine using an o-ring in lieu of a sheet head gasket ... The length of the spigot seems to short for both the plate and the o-ring - a great deal of compression needed on the ring to seat the head.

Oh well; another lesson in looking further ahead and not blindly following drawings.

BTW, have any of you used the Caswell Black Oxide kit?  Is it as easy as made out to be in their videos?  Also wondering about the most effect way to clean parts (short of an ultrasonic cleaner) in preparation for treatment.  Looking at this product because it is available from a Canadian supplier ... shipping "creepy chemicals" across the 49th parallel might be interesting.

Charlie

Offline petertha

  • Full Member
  • ****
  • Posts: 784
Re: 1/4 Scale Cirrus MkI
« Reply #68 on: May 10, 2016, 06:17:05 AM »
Very nice progress Charlie. I haven't used the Caswell kit myself, only the 'regular' blackening stuff with 'Meh' so-so results. Its black all right, but its very thin & slight scratching is all that's required to show metal. One kit came from KBC Tools, the other was from a local jewelry supplier. They both looked & smelled the same and were meant to be used un-diluted as-is. The Caswell is interesting because it indicates 1:9 distilled water dilution formula, which infers its much stronger than what I have.

My experience has been that degreasing is the paramount issue. I'm not sure if an ultrasonic would do much better. I always envision an oil skim on the surface of the water. Yes its been removed from the part, but then you risk re-coating the part again on the way out of the tub? My best results were scrub with dish wash detergent soapy water, blow dry immediately, then  successive baths in brake cleaner & wipes with paper towels. Regular mild steel for some reason looks better to by eye than 12L14 all thing equal. Not sure if its the lead content of 12L14?

Another issue is sealer procedure. My kit recommends first a water bath after chemical dip, wipe off, then application of 'their sealer'. But the water wash inevitably gives it a somewhat brownish rusty tinge & especially in nooks & crannies which is hard to get out. It does come off with rubbing. Maybe I should be using distilled water vs. tap water? The sealer gave it a slight lustre but it wasn't like OMG spectacular. Not sure what it is but seems like some oily waxy liquid. For some reason on who-cares machine tool parts I skipped the water altogether, slightly buffed any excess black with clean cloth & then immediately wiped with WD40. To tell you the truth I like it a bit more & less fuss.

I assume you are considering this blackening for your cylinders? One thing I can pass on, I've been making liner 'prototypes' for my radial: 12L14, CI & 1140-SP. The two 12L14 liners machined nice, one was WD40 covered in baggy storage. The other was dry. A few months later the dry one has rusty spots starting on it & Calgary is bone dry humidity. So I'm a bit worried by that long term in a methanol fuel environment. I'm familiar with after-run oil for RC stuff so I think that would be part of the storage ritual. I've seen other IC builders use 12L14 cylinders but have had them professionally gun blued/blacked with the hot bath nasty chemical bit. Or they were liners where the OD is sealed against the cylinder & gasoline fueled, so maybe not as bad as methanol? So just a heads up, maybe test this yourself. I'm no expert.
« Last Edit: May 10, 2016, 06:23:00 AM by petertha »

Offline cwelkie

  • Full Member
  • ****
  • Posts: 195
Re: 1/4 Scale Cirrus MkI
« Reply #69 on: May 10, 2016, 02:52:54 PM »
Thanks for sharing your experiences with blackening 12L14 Peter.  I'm glad to know that you've had some positive results.  Perhaps this is like many other things, I'll just have to dive in and give it a try.  There are lots of bits and pieces of tooling around the shop that will make good test samples.  I even have a couple/three left over cylinders from previous projects as a final test.

I'd agree the cleaning is likely the key to success and the rinse water (if used) should be as "pure" as possible.  Distilled would probably be better than tap water.  One of those car wash filters on a hose (Turtle brand I think) might be a good thing - no spots on the car ...  Or maybe I'll have to bring some RO water home from "work".

Cheers
Charlie

Offline cwelkie

  • Full Member
  • ****
  • Posts: 195
Re: 1/4 Scale Cirrus MkI
« Reply #70 on: July 01, 2016, 11:59:46 PM »
It has been ages since I last posted anything about the Cirrus.  Too many of life's distractions getting in the way I guess.  There has been some progress however small.  In my world, any progress at all counts.

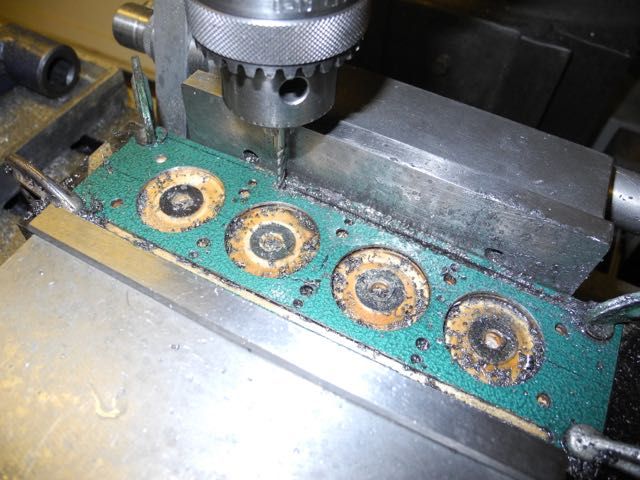
I had left off trying to decide what to tackle next and ended up doing the cylinder spigot plate.  It is a thin plate that acts as a sort of cylinder spacing stabilizer if that makes any sense.  The head sits directly on top of the cylinders.  The cylinders each have a spigot long enough for an o-ring and then the plate.  Anyway - I found a piece of steel of the right thickness and re-purposed it by cutting all the right holes and stripping the paint off.


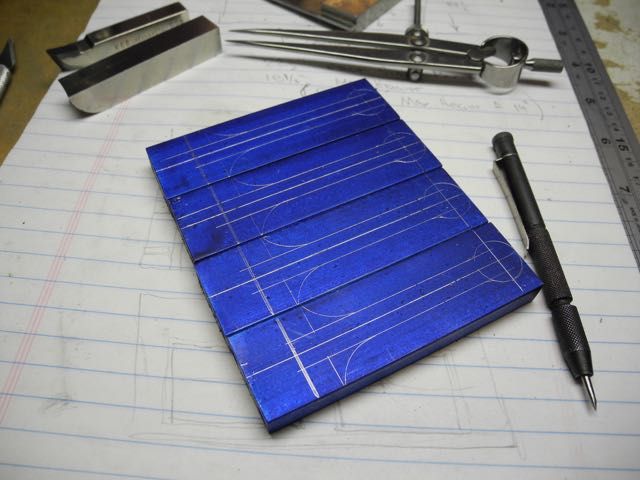
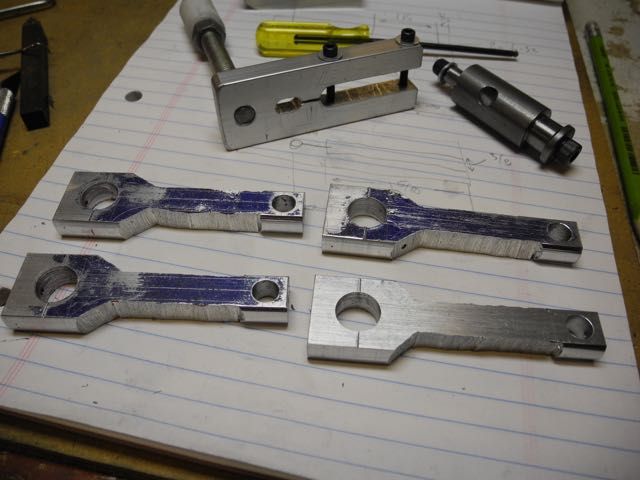
Next I tackled the connecting rods.  All the blanks and the radius cutting tools needed got prepared in advance.


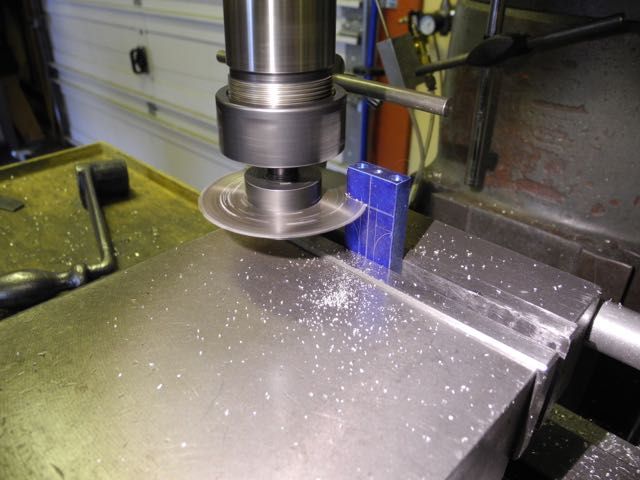
Then some centres were put in each end and the big-end cap screws were drilled to tapping and clearance sizes before cutting the caps off.


Once the outline was roughly cut back it was into the lathe to turn each end to size while mounted on centres.
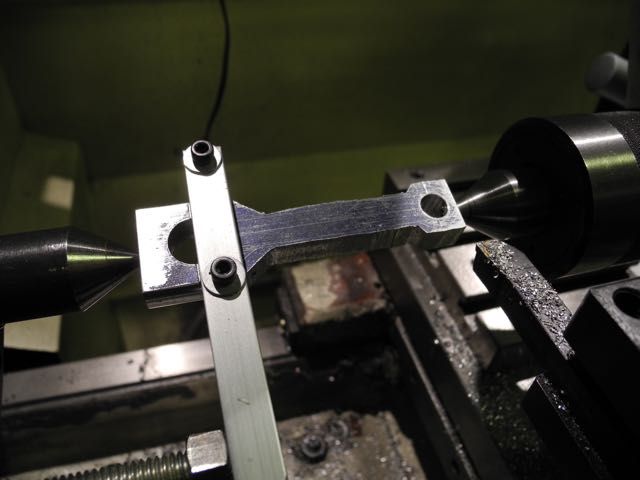


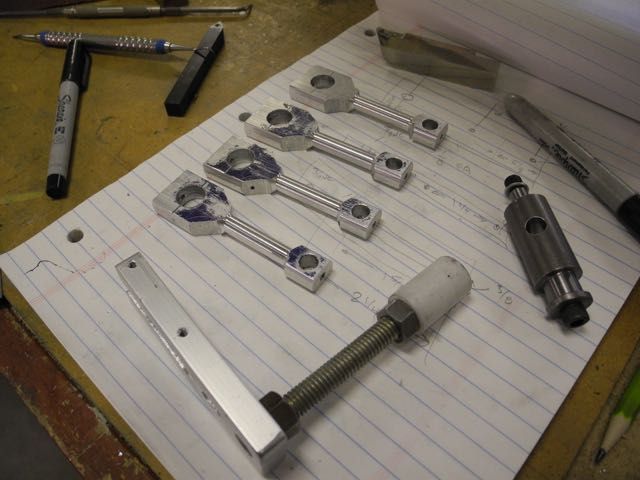
... might as well do all the rods together.


Then the middle section diameter was turned on all the rods.
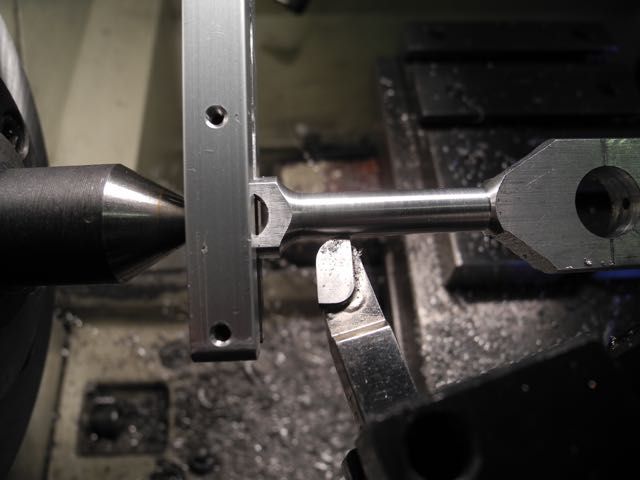


Another family shot; this time with the double-ended arbour used to turn the faces of each rod end.


Next the radii at each end were turned with 1/4" and 1/2" radius tools.


Here is a view of the rod end being trimmed back to reduce the face diameter.
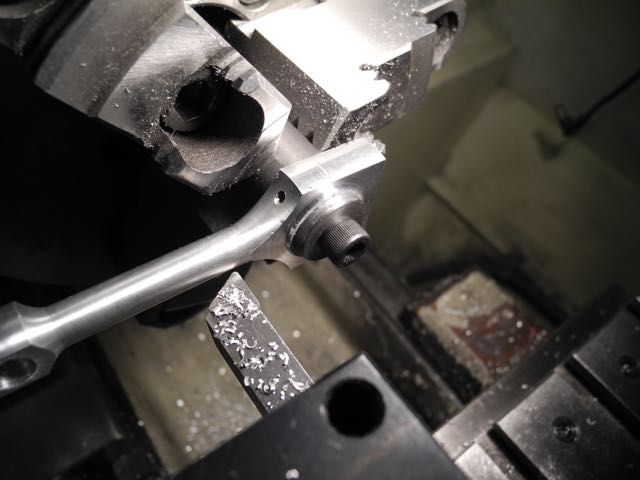


Time for some rotary table work to round off the ends and make them pretty; used the same arbour.
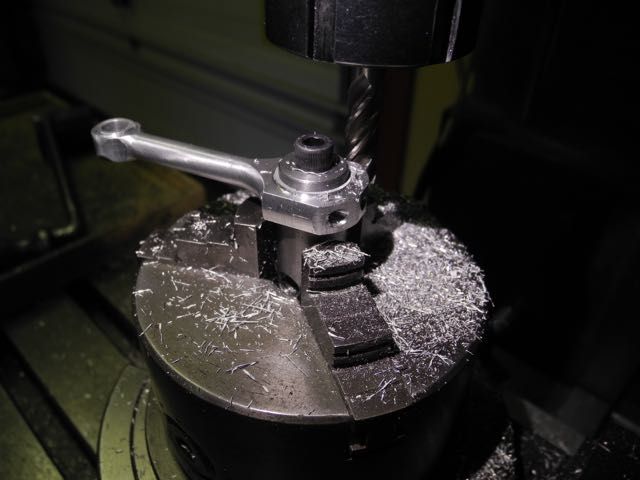


Almost done ...
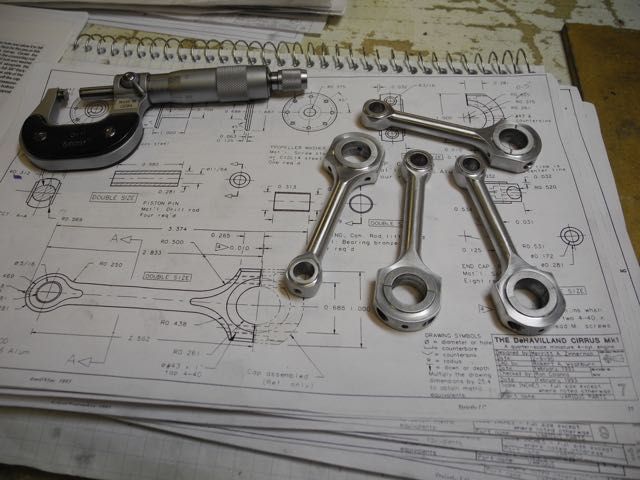


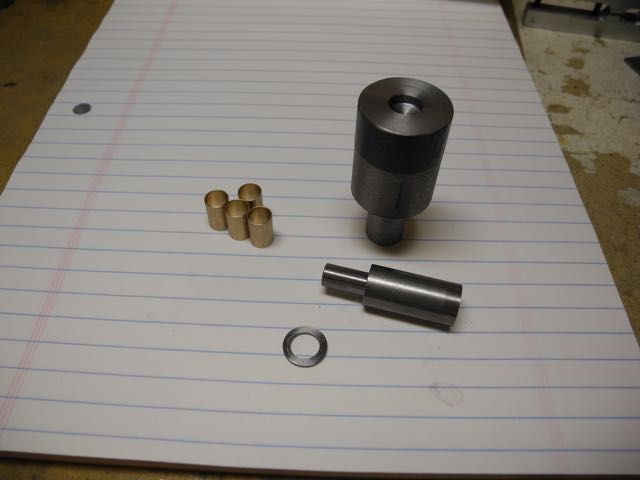
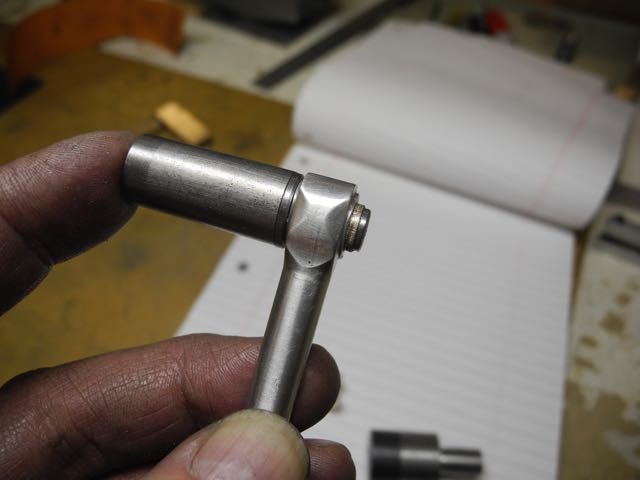
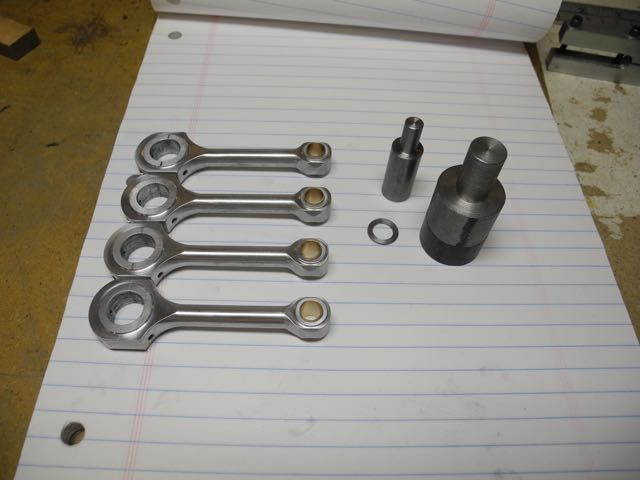
Here are the small end bushings (bronze) and the press tool and spacer used to ensure the bushing was inserted straight and with equal "stick-thru" on both sides.


Success ...


Now they are done.


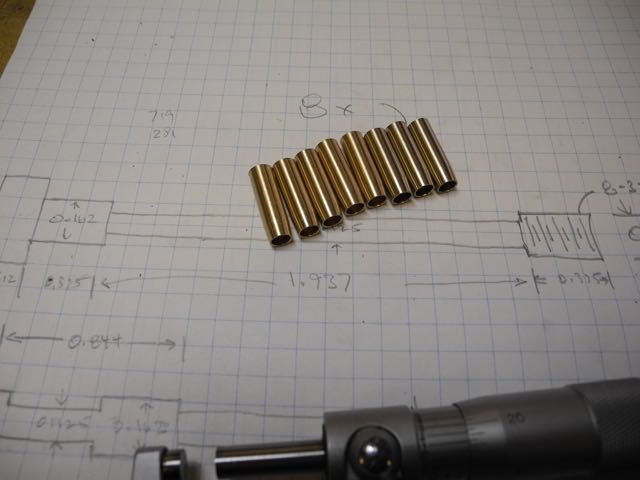
Then it was on to the wrist (gudgeon) pins and their pads.  The pads were made from "pop rivets".  Thought I'd try after reading about using them somewhere.  Don't know if I'd bother again; it may have taken the same time to turn up purpose-made ones.


While fiddling with little bits I figured I might as well get the (bronze) valve guides out of the way as well.


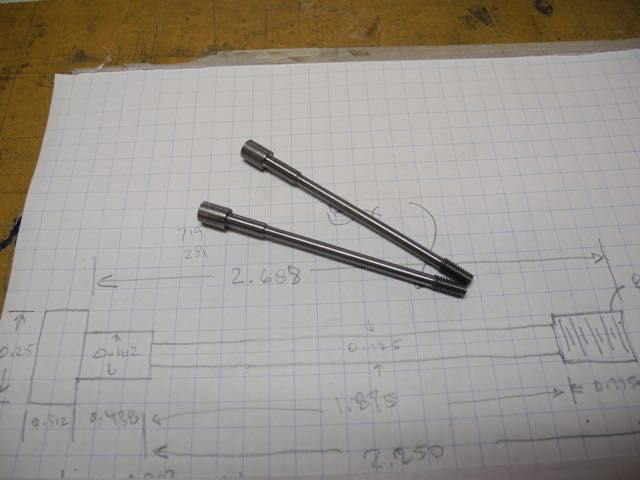
This is the beginning of the head bolts.  There ten of them with two being longer and double-waisted.  They are long relative to their diameter so I did the turning in stages and used a small centre throughout.
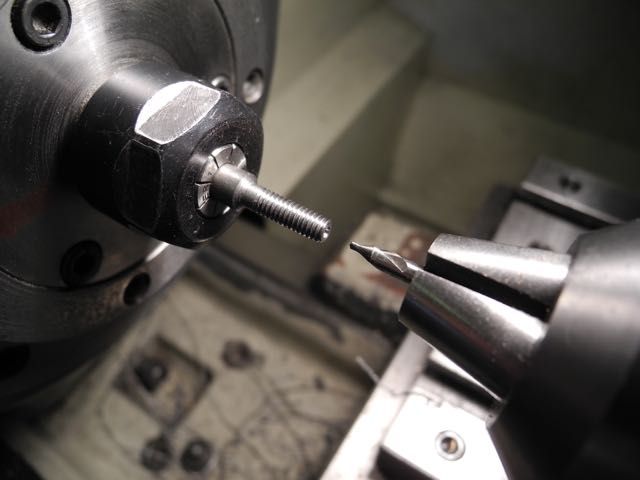


... about 1/2" at a time.
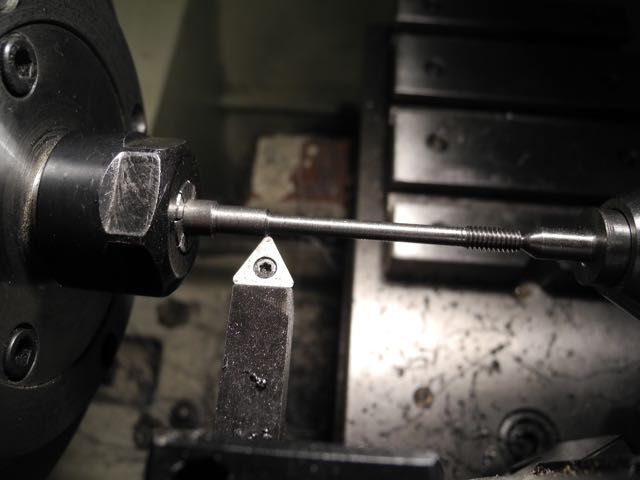


To get this ... this is a long bolt with an extra waisted section where the bolt goes through the siamese intake port.
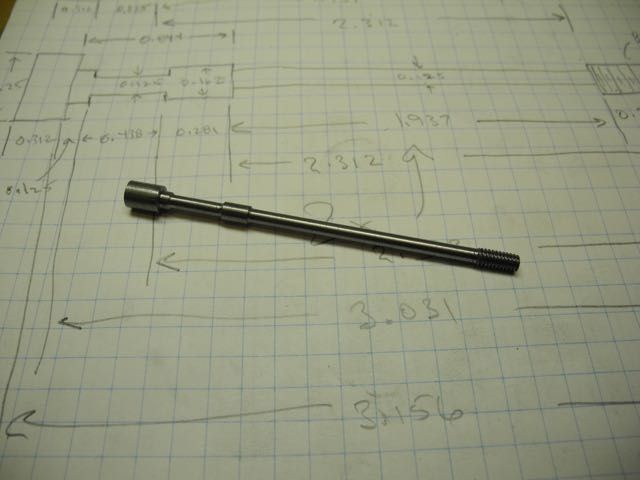


Here are a couple of the shorter ones.


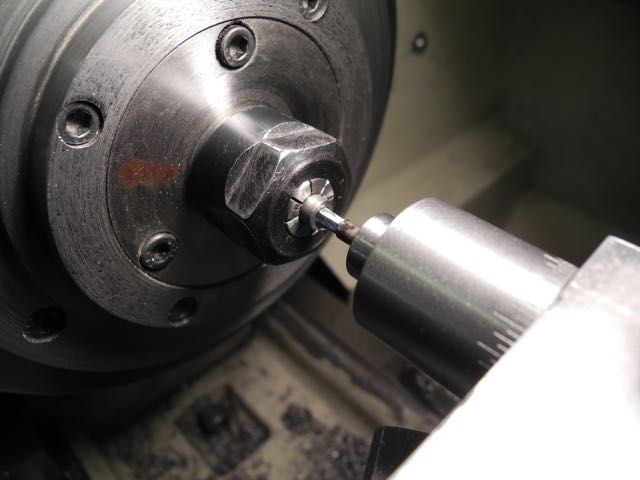
Once the end was trimmed to length and the socket head hole drilled to a couple thou over wrench size I could use my simple rotary broaching tool to cut the internal hex.


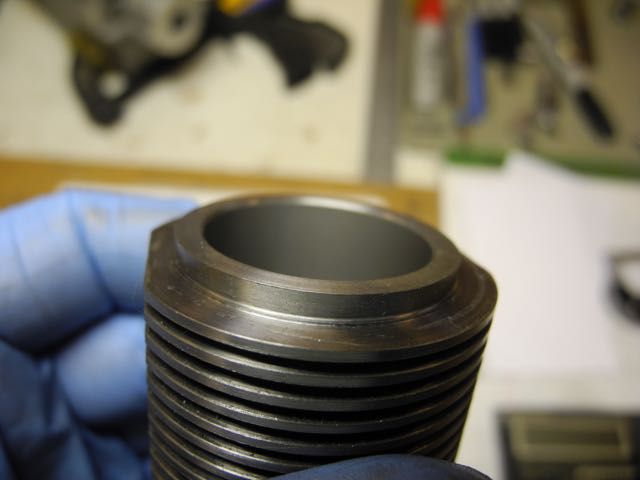
After all the new parts I went back to the cylinders and re-used a brass lapp from an earlier build to finish the cylinder bores.  Didn't realize until after uploading the picture that the camera focused on the near side instead of the bore ... oh well, you get the idea.  All cylinders ended up very close to each other (and print) and with a nice dull, smooth finish.


That's about it for this time.
Charlie


Offline Dave Otto

  • Full Member
  • *****
  • Posts: 4707
  • Boise, Idaho USA
    • Photo Bucket
Re: 1/4 Scale Cirrus MkI
« Reply #71 on: July 02, 2016, 01:25:17 AM »
Very nice work Charlie.

The rods turned out great; good to see progress on your engine.

Dave

Offline yogi

  • Full Member
  • ****
  • Posts: 450
  • Duncannon, PA USA
    • Yogi's Workshop
Re: 1/4 Scale Cirrus MkI
« Reply #72 on: July 02, 2016, 01:47:39 AM »
Fantastic work Charlie!  :ThumbsUp: :ThumbsUp: :ThumbsUp:
Thanks for the update.  :cheers:

Offline fumopuc

  • Full Member
  • *****
  • Posts: 3254
  • Munich, Germany, EU
Re: 1/4 Scale Cirrus MkI
« Reply #73 on: July 02, 2016, 06:33:29 AM »
Hi Charlie, nice up date. Thanks for showing. Good to see your progress and the way to do it.
« Last Edit: July 02, 2016, 04:39:26 PM by fumopuc »
Kind Regards
Achim

Offline Steamer5

  • Global Moderator
  • Full Member
  • *****
  • Posts: 1272
  • The "Naki" New Zealand
Re: 1/4 Scale Cirrus MkI
« Reply #74 on: July 02, 2016, 10:23:13 AM »
Hi Charlie,
 Those are some very nice rods!

Looking forward to the next update, when ever life allows!

Cheers Kerrin
Get excited and make something!


SimplePortal 2.3.5 © 2008-2012, SimplePortal