Author Topic: "Robby" a Novel Mill Engine  (Read 31565 times)

Offline tvoght

  • Full Member
  • ****
  • Posts: 1003
  • Indiana
Re: "Robby" a Novel Mill Engine
« Reply #90 on: February 11, 2016, 01:44:44 AM »
Glad you agree Carl.

BIll and Chris: I patterned the valve after one in the book of Ray Hasbrouck's steam engine plans. Ray's was shaped that way, so mine is too! I imagine any reduction of mass in a reciprocating part is desirable, especially in full scale.

--Tim

Offline Don1966

  • Full Member
  • *****
  • Posts: 6818
  • Columbia, MS
Re: "Robby" a Novel Mill Engine
« Reply #91 on: February 11, 2016, 03:55:34 AM »
Looking good Tim and just caught up on your thread........ :ThumbsUp:

Don

Offline fumopuc

  • Full Member
  • *****
  • Posts: 3256
  • Munich, Germany, EU
Re: "Robby" a Novel Mill Engine
« Reply #92 on: February 11, 2016, 07:59:32 AM »
Hi Tim, great progress.
Kind Regards
Achim

Offline tvoght

  • Full Member
  • ****
  • Posts: 1003
  • Indiana
Re: "Robby" a Novel Mill Engine
« Reply #93 on: February 24, 2016, 05:17:02 PM »
Thanks Don and Achim for watching and commenting.

The cylinder was the next item on my list. I started with a 2 inch square chunk of what the supplier calls Class 40 cast iron. I sawed slabs off the sides to get closer to dimension.


The saw not only saved some endmill life, but I got some quite credible thin cast stock for the pile. You can see how I pasted a drawing on the stock to keep the sawing within boundaries.


I squared up the sides a bit in the mill and then center drilled the bore location, followed by drilling and reaming for a reference rod.


It was a toss-up whether I would make the part on the CNC mill or manually on the Bridgeport. The Bridgeport won out. Here I'm centering up the part on the rotary table using the reference rod.


I used a tailstock for support since I only have the shallow first step of the reversed vise jaws to hold the part at the index end.


Milling commences.


This is not bad:


And this is not so good. See the extra divots taken out where the round flange meets the flat. Just a missed step in a long list of operations. I'll have to find some way to cover up the mistake.


The ends were cleaned up and the mill was centered at the tailstock support center. I drilled 7/8" in one go.


It was kind of dicey getting the part both centered and straight in the 4-jaw, but I did my best. I bored to 1 inch in the lathe.


Then faced off the end in the same setup so that the inboard cylinder end would be normal to the bore.


Back at the mill, the cylinder was clamped at the correct angle to drill an inlet passage. I spot-faced and center drilled:


Then peck drilled until I broke out at the valve face. This was repeated for the other end. Not shown is the drilling of the exhaust passage.


The holey cylinder. The actual valve ports will be machined in a separate plate that will be screwed to the flat face with along with the steam chest. Extra gasketing will be required to seal the port plate, but I wanted to be able to re-cut the ports if necessary without re-making the cylinder. There is still drilling and tapping to do for the heads. Those will be matched drilled from the those parts when they are finished.


Another shot shows the exhaust pipe nipple trial fitted. You can see clear through the inlet passage to the blue towel behind.


Thanks for watching.

--Tim

Offline Bertie_Bassett

  • Full Member
  • ****
  • Posts: 152
Re: "Robby" a Novel Mill Engine
« Reply #94 on: February 24, 2016, 05:42:52 PM »
looking good there
one day ill finish a project before starting another!
suffolk - uk

Offline b.lindsey

  • Global Moderator
  • Full Member
  • *****
  • Posts: 13860
  • Dallas, NC, USA
    • Workbench-Miniatures
Re: "Robby" a Novel Mill Engine
« Reply #95 on: February 24, 2016, 05:56:15 PM »
That is some very nice carving there on the cast iron Tim. Bummer about the little divot, but you should be able to recover from that I think. The cast iron is kind of nice to work with isn't it :)

Bill

Offline tvoght

  • Full Member
  • ****
  • Posts: 1003
  • Indiana
Re: "Robby" a Novel Mill Engine
« Reply #96 on: February 24, 2016, 07:06:07 PM »
Thanks Bertie! Glad you're watching.

Thanks Bill. The cast iron does machine nicely. A bit dusty, though. I should mention that I will later clean up the faceted edges with a file to make the flanges nicely round.

I won't think twice about using putty to finish up the fabricated frame -that has been the plan all along- but it pains me to think of using putty for this booboo. If I had a surplus of time, I would make another cylinder, but I don't get enough shop time as it is. N.A.M.E.S. is coming up, and I really want to have this engine running by then. Looking at a list of tasks remaining, I see I have to redouble by efforts.

--Tim


Offline Bertie_Bassett

  • Full Member
  • ****
  • Posts: 152
Re: "Robby" a Novel Mill Engine
« Reply #97 on: February 24, 2016, 07:36:45 PM »
you could always leave it as a reminder? although that may spoil the look.
one day ill finish a project before starting another!
suffolk - uk

Offline zeeprogrammer

  • Full Member
  • *****
  • Posts: 6811
  • West Chester, PA, USA
Re: "Robby" a Novel Mill Engine
« Reply #98 on: February 25, 2016, 12:55:30 AM »
Looks good to me.
Wow. 7/8" in one go.

Nicely done.
Carl (aka Zee) Will sometimes respond to 'hey' but never 'hey you'.
"To work. To work."
Zee-Another Thread Trasher.

Offline tvoght

  • Full Member
  • ****
  • Posts: 1003
  • Indiana
Re: "Robby" a Novel Mill Engine
« Reply #99 on: March 14, 2016, 02:14:07 AM »
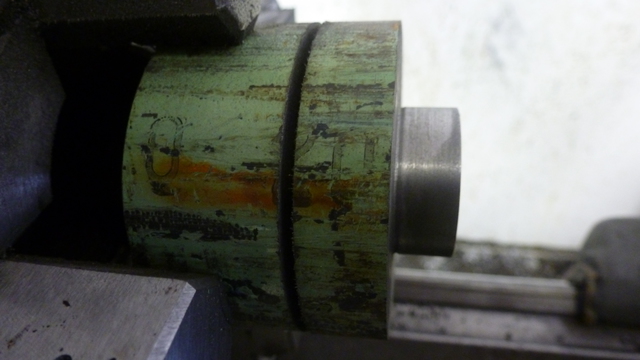
Thanks Bertie and Carl. We were last discussing the issue with the nasty endmill gouge on one cylinder flange. I have determined this will be fully hidden by the outboard cylinder cover and the cylinder lagging.

There has actually been a good bit of progress on the engine (I've been spending more discretionary time in the shop, rather than reporting on the progress).

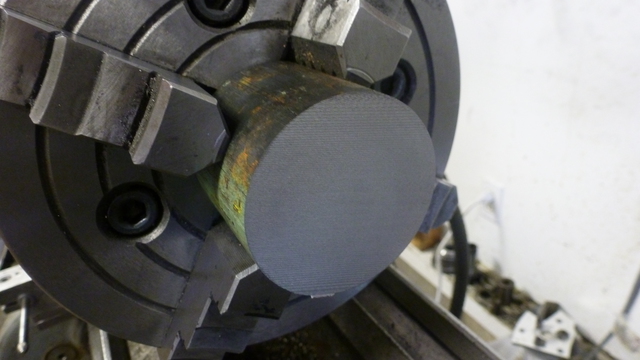
I set to making the cylinder covers. When I bought the square cast iron stock for the cylinder, I added a length of 2 inch round stock to the order. I'm using that for the covers. I cut a piece long enough for both covers and centered it up reasonably well in the 4-jaw.


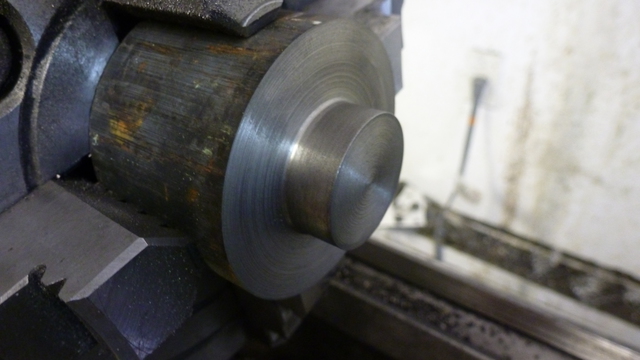
The inboard cover -which includes the packing gland- came first.
I turned a 1 inch stub on the end which will fit nicely in the cylinder bore. As luck (and planning) would have it, it also fits nicely in a 1 inch 5C collet...


I cutoff with a cutoff tool as far as possible, then turned to the indispensable bandsaw.


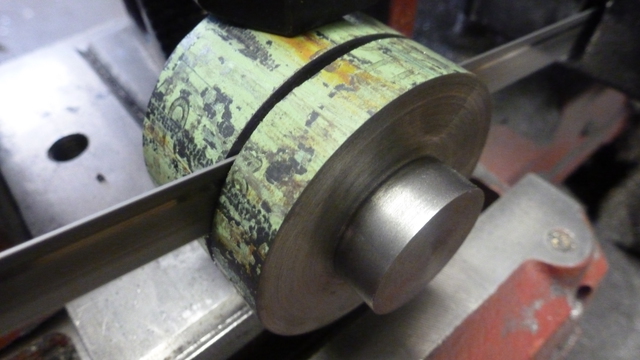
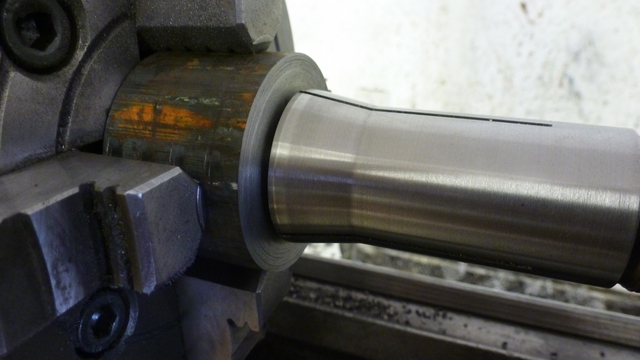
A lot of material was turned off, leaving the male part of the packing gland. I drilled clearance for the piston rod and threaded with a die.


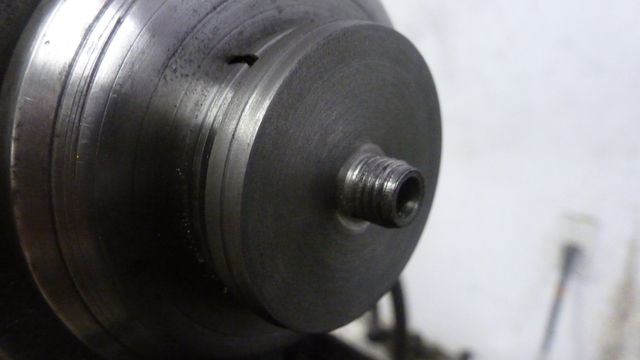
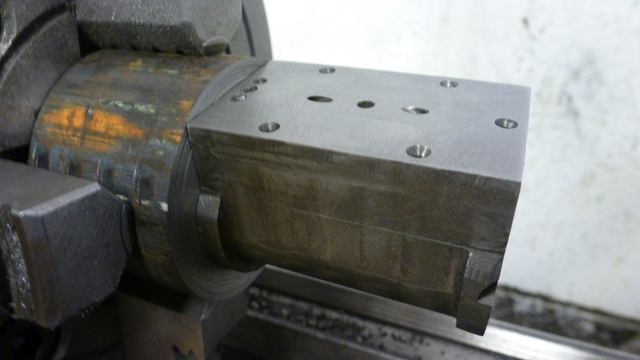
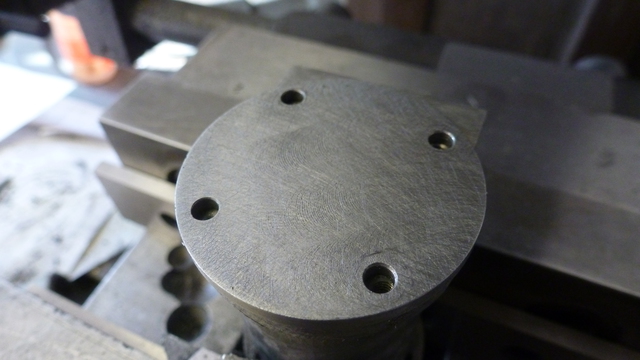
At the mill, I milled the chucking stub down to leave just a short locating boss.


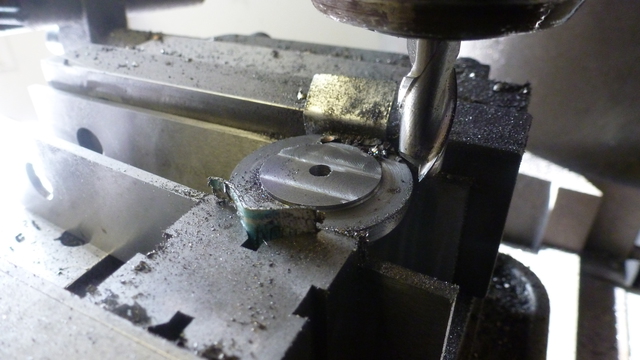
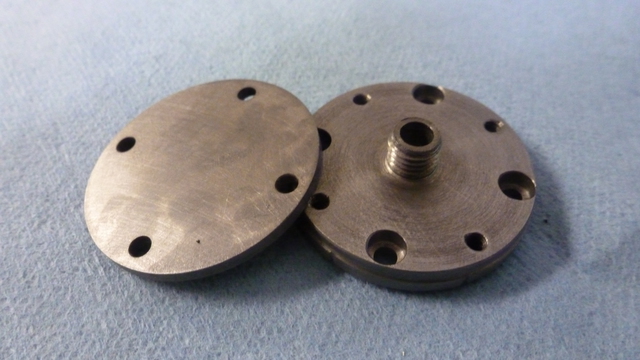
8 holes were drilled. Every other hole is drilled for a 4-40 through-hole, while every other other hole is tapped through for 4-40.


Flipped over, the 4-40 through holes are countersunk for 4-40 cap screw threads. These cap screws will be fully hidden.


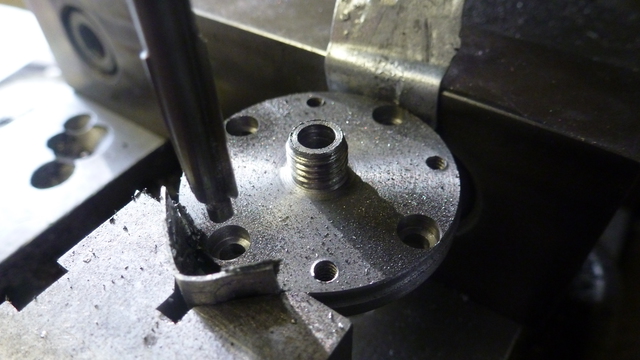
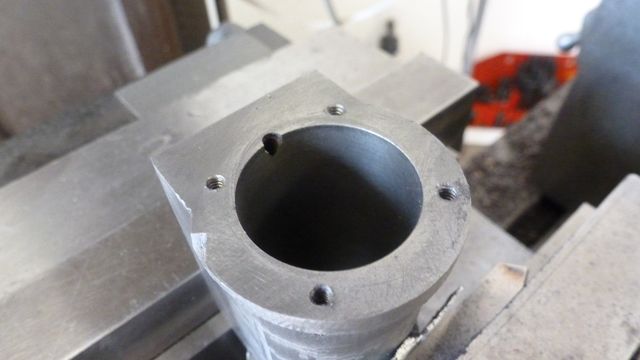
There seems no end of holes needing to be made in the cylinder. Here, every other hole is tapped 4-40 to match up with the through holes on the cover. The cover will be attached to the cylinder by the hidden cap screws. The remaining holes are for attachment of the cylinder to the frame. Look how one of the holes intersects the steam passage. A near design disaster. I'll use a short screw there (with a sealing compound to avoid blocking the passage or inviting a leak.


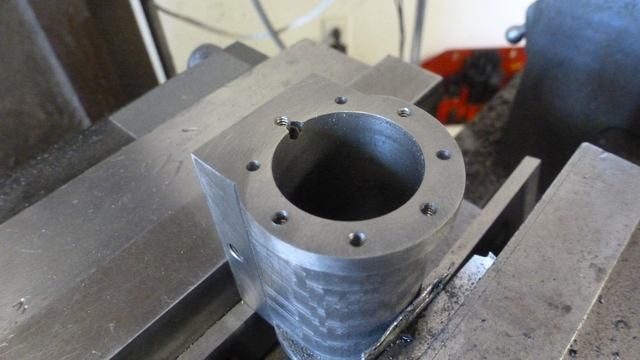
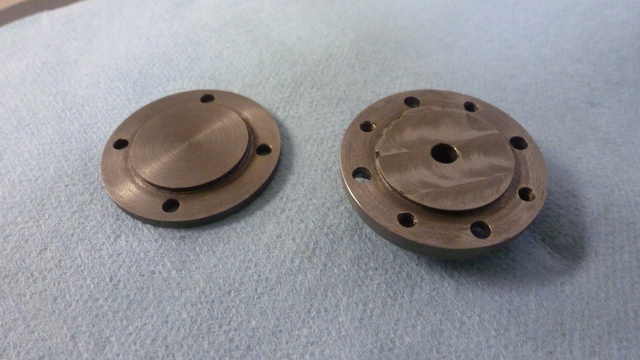
The other end of the cylinder was drilled and tapped for the outboard cover. The second photo shows a trial fit. I provide no documentation of the making of that cover, which is rather plain looking don't you think?


The covers in my traditional blue shop towel pose.


More to come when I get the write-ups done.

Thanks to all who watch!

--Tim
« Last Edit: March 17, 2016, 12:43:49 PM by tvoght »

Offline tvoght

  • Full Member
  • ****
  • Posts: 1003
  • Indiana
Re: "Robby" a Novel Mill Engine
« Reply #100 on: March 15, 2016, 04:28:30 PM »
Nuts were to be made for the packing glands at both the inboard cylinder cover and the steam chest. Both are similar, but of different sizes. The photo grouping here shows the making of the piston rod packing nut.


First drilling for the 5/16-24 tap to be used.

Second drilling through the nut depth for clearance of the piston rod.

Taking a bit of care to chamfer for aesthetics.


In a hexagonal collet block for forming wrench flats. The diameter remaining was made to be distance across hex corners.

Cutoff at the lathe was started...

And part way through, a little chamfering for appearances.

The two nuts.


Thanks.

--Tim

Offline b.lindsey

  • Global Moderator
  • Full Member
  • *****
  • Posts: 13860
  • Dallas, NC, USA
    • Workbench-Miniatures
Re: "Robby" a Novel Mill Engine
« Reply #101 on: March 15, 2016, 04:43:49 PM »
Very nice Tim. Those turned out beautifully...Dave Otto has some competition now :)

Bill

Offline Don1966

  • Full Member
  • *****
  • Posts: 6818
  • Columbia, MS
Re: "Robby" a Novel Mill Engine
« Reply #102 on: March 15, 2016, 05:27:49 PM »
Nice results Tim, I need to get some good old fashion cast iron stock. I see a lot of members use it..

Don

Offline tvoght

  • Full Member
  • ****
  • Posts: 1003
  • Indiana
Re: "Robby" a Novel Mill Engine
« Reply #103 on: March 16, 2016, 12:03:49 AM »
Thanks Bill. Honestly, I don't think Dave Otto has anything to worry about. :)

The cast iron barstock machines like a dream, Don, but as others will tell you, there sure is a lot of tiny chips and black dust to clean up.

--Tim

Offline tvoght

  • Full Member
  • ****
  • Posts: 1003
  • Indiana
Re: "Robby" a Novel Mill Engine
« Reply #104 on: March 17, 2016, 12:32:40 AM »
A piston was made from 6061 aluminum. It was drilled to fit a reduced diameter on the end of the piston rod, and a cavity was bored for an inset nut.


After cutting an o-ring groove and parting off, I made a steel nut (which really needs some provision for some kind of tightening spanner). The rod is also shown in this shot.


And here's the whole piston and rod assembly.


Thanks for checking in.

--Tim


SimplePortal 2.3.5 © 2008-2012, SimplePortal