The Dremel is a wonderful, versatile tool in the hobbyist's workshop. While it's meant to be a hand-held tool, I often find it far more comfortable to bring the work to the tool rather than vice-versa.
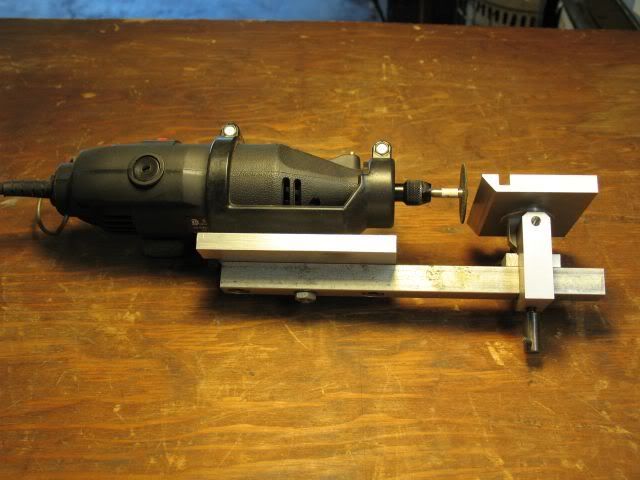
To that end, I built this jig to hold the tool.

The plastic grip that clamps the Dremel was removed from a Dremel router attachment*. Without modification, it was attached to a baseplate - thus it can be returned to the router jig when needed. The baseplate has a 1/2" square aluminum 'backbone' which can be conveniently gripped in the bench vise when the tool is used.
Attached to the end of backbone is a small adjustable table. In addition to sliding along the backbone, it can be adjusted in height and tilted to various angles. The table has a slot milled into it into which various sliding accessories can fit.
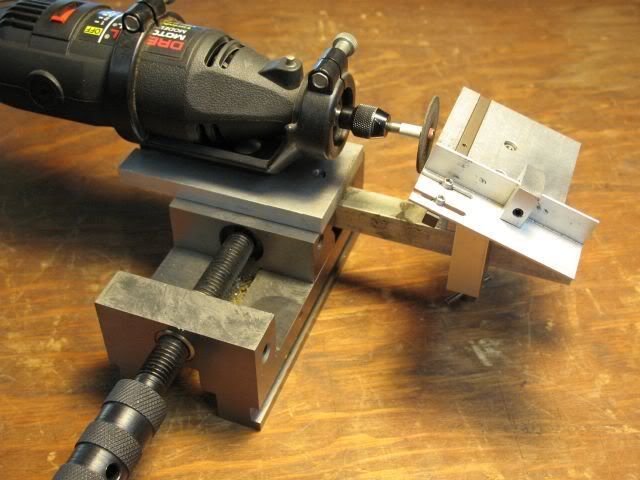
This (staged) shot shows how the jig mounts in a vise (small vise used for clarity - my bench vise was too messy for photography) and how the accesory table tilts. Also, one of the sliding accessories is shown positioned on the tilting table.

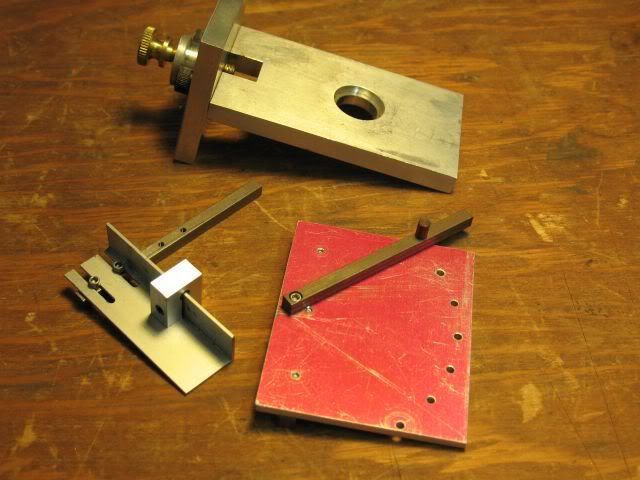
Here are some of the accessories. Bottom left is a cutoff guide. For cutting small rod, tubing or screws, the workpiece is held against the aluminum fence and the adjustable depth stop with the bit to be cut off projecting to the left. The whole assembly is then slid along the table guide groove into a cutoff disk mounted in the Dremel. Makes very nice neat, well-contolled cuts.
Lower right is a sliding protractor table. The protractor arm is settable to a variety of angles and locks in place with a small brass pin. Angled cutoffs are possible with this although its primary use is, in concert with the table tilting, to produce compound angles on the 1/8" HSS specialty tool bits I grind for making obscure parts.

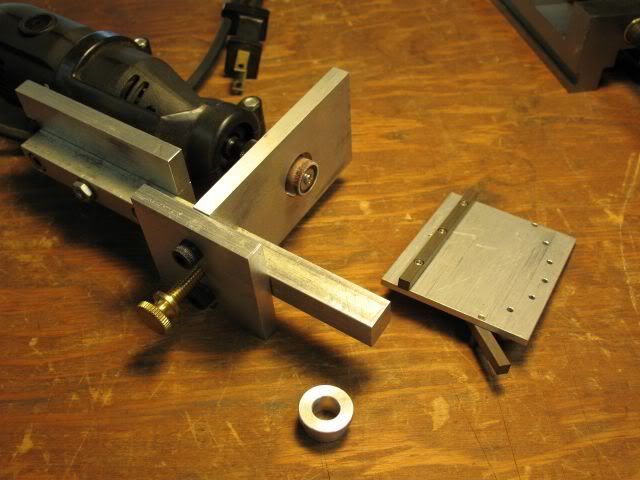
The jig shown at the top is a sanding table. It attaches to the backbone as shown in the photo below,

and a sanding drum projects up through the hole. When this is used, the backbone is held vertically in the vise and the plate through which the drum projects acts as a small table. By using very small sanding drums, this arrangement can do a lot of the work one might more conventionally use a filing machine to achieve.
Shown in front is a bushing which reduces the diameter of the hole when smaller sanding drums are used. (Too much clearance around the drum can cause tiny parts to go walk-about.)
-----------------
* Since I built this, Dremel has marketed an accesory that consists of a tool holder that fits into a universal ball joint base (similar to a Panavise base).
It may be easier to adapt this tool holder to the jig described above than use the holder from the router jig that I employed. Incidentally, this new accesory is quite useful in its own right, especially so for freehand activities like deburring.