Whistle Redux"If you want me just whistle. You know how to whistle don't you? Just put your lips together and blow."
LAUREN BACALL, To Have and Have NotIn my previous whistle build, I was designing as I went. All of the critical factors were absolutely random. The whistle worked, but I wasn't very happy with it. One chime was good; nice sound and didn't need much air to get a decent tone. The other two chimes? Not so much.
I did register for the steam whistle group on Yahoo and learned a lot by reading past posts. The group seems to be mainly collectors of full size whistles.
After reading about mouth arcs, resonant frequencies, discharge coefficients and organ vs 360 degree bells vs Helmholtz bells, I decided to just build the damned thing but, this time, armed with more information. I realized that I was not at all interested in the physics, the math or the fund mechanics of whistles. I just want one on my boiler.
For your viewing pleasure, a three-chime, 360 degree mouth whistle.
I needed some Super Glue. The best I've found is the type that wooden bowl-turners use as a finish. Off to the woodworker store. (It's OK.I wore a disguise.)
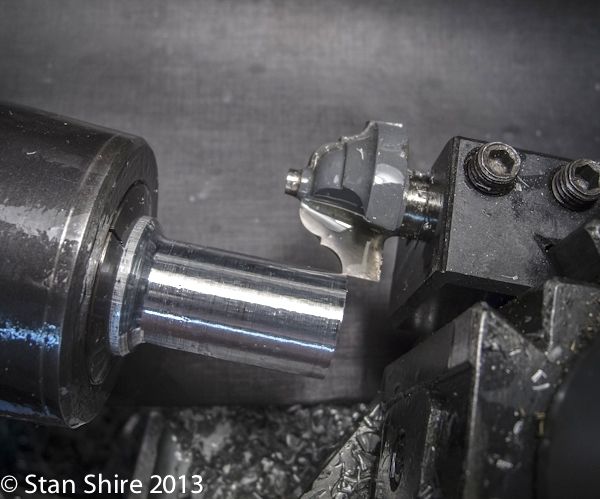
Of course, there was a sale table with about 500 carbide router bits. One shape was particularly fascinating and at only $7.50 it came home with the Cyanoacrylate. (I'm quite sure I have $7.50 worth of brass chips under the lathe.)
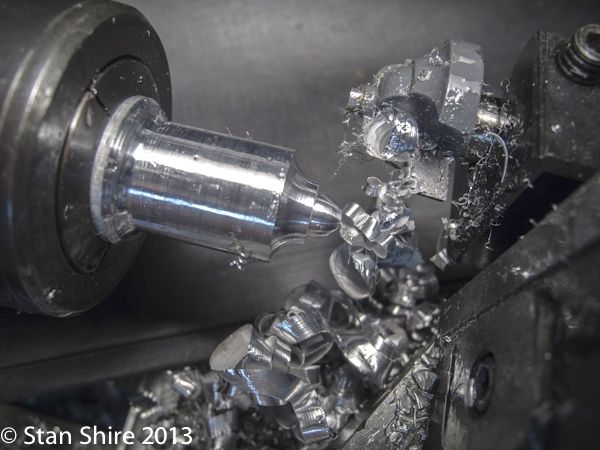
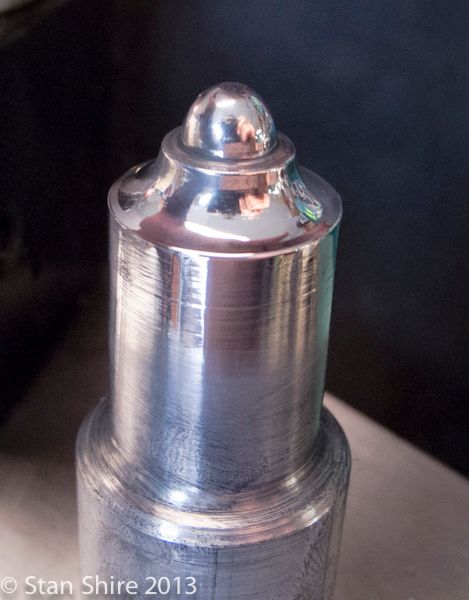
Many of the old whistles had decorative caps on top of the bell. With the router bit in a QC tool holder and the lathe running in reverse, I had a form tool.
Two more to make
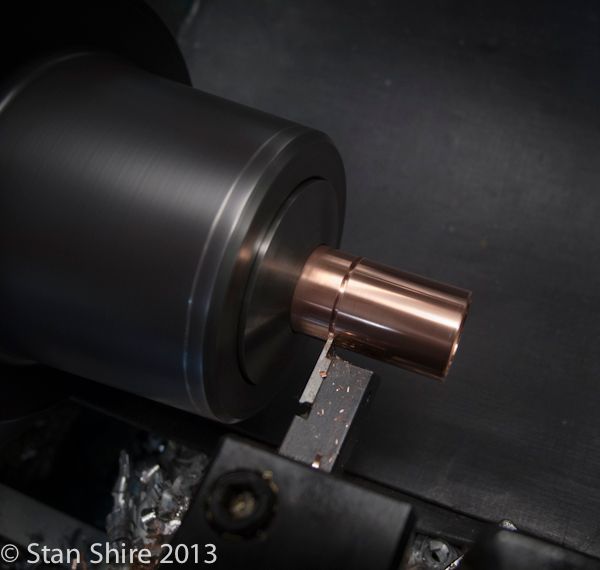
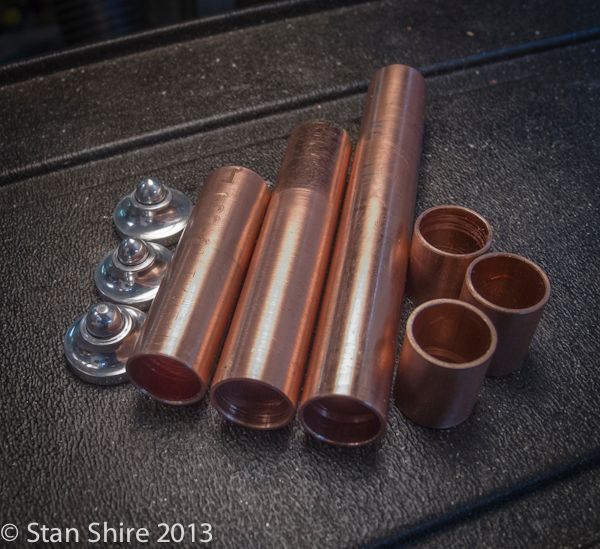
Some preliminary polishing and parting for the bells.
I've now got this group of parts.
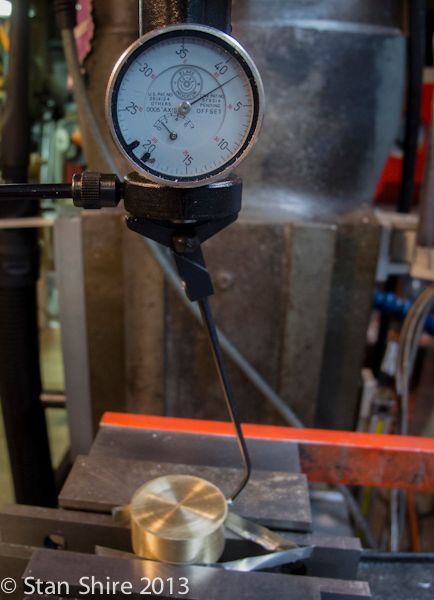
The three bottoms for the bells will be soldered in recesses in an air chamber. First, I centered the brass round on the mill.
The DRO was given all of the information for the bolt hole circle and the recesses were milled.
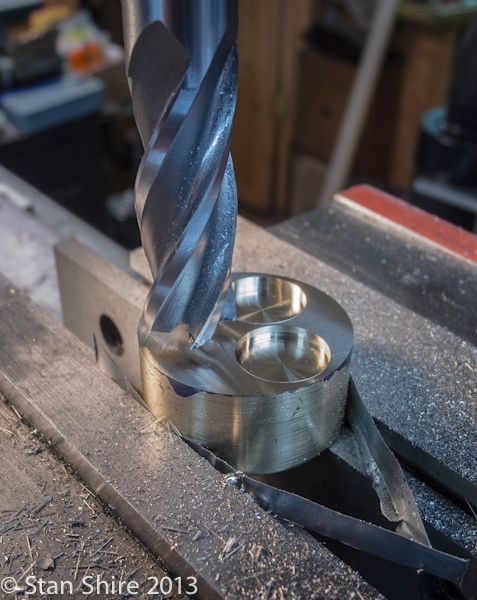
Using the same bolt hole circle coordinates, I drilled each pocket. The hole will be tapped 5-40 for a threaded rod which will support the aperture and the bell.
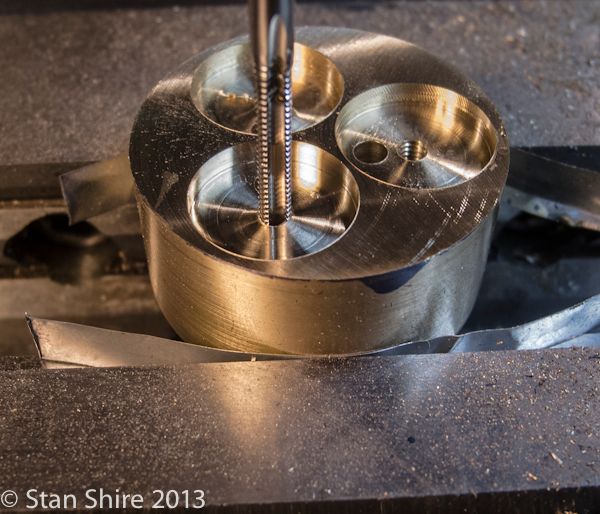
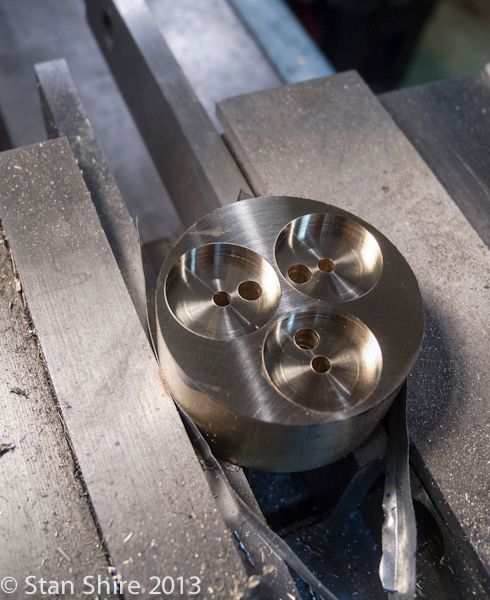
The larger, second hole in each recess is the air passage.
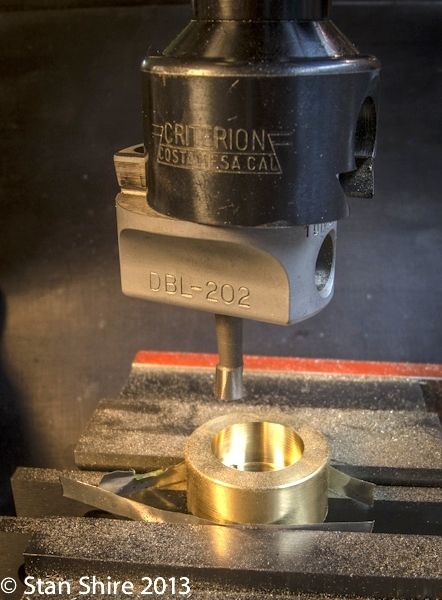
The piece was then flipped over to make the air chamber.
I had no end mill between, 0.75" (a bit small) and 1.0" (too large). The boing head fixed that issue.
Hoping to complete this tomorrow or Saturday Then I can make the whistle valve.
Stay tuned.


