Author Topic: Scale I beams  (Read 5677 times)

Offline Dan Rowe

  • Full Member
  • ****
  • Posts: 1170
  • Dripping Springs TX USA
Scale I beams
« on: September 08, 2013, 07:14:18 PM »
Over the years I have tried several methods to make scale I beams. My first try used continuous cast bronze using a standard end mill. The bronze was easy to machine and because it was cast it did not warp after machining. I was not really happy with the look and the cost of bronze went through the roof so I switched to hot rolled steel. I used a tapered bur for the sides after a rough cut was made with an end mill. This worked reasonably well for a short section but a long section had a bunch of tooling marks that would take a lot of work to remove. Hot rolled steel did not warp between machine passes.

My next idea was to forge a section using a set of dies and the oxy-acetylene torch. This worked for a short section so I made a larger die and made a couple of beams. It was a lot of work and a lot of heat and it still required machining the top and bottom flanges to remove the hammer marks.


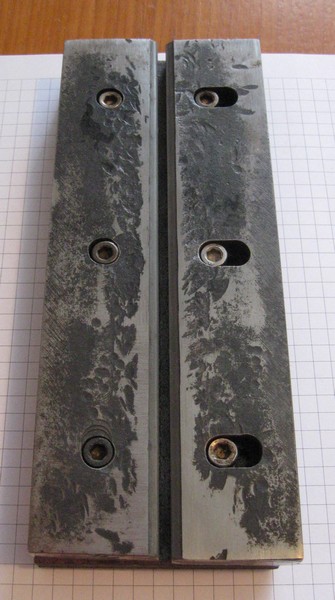
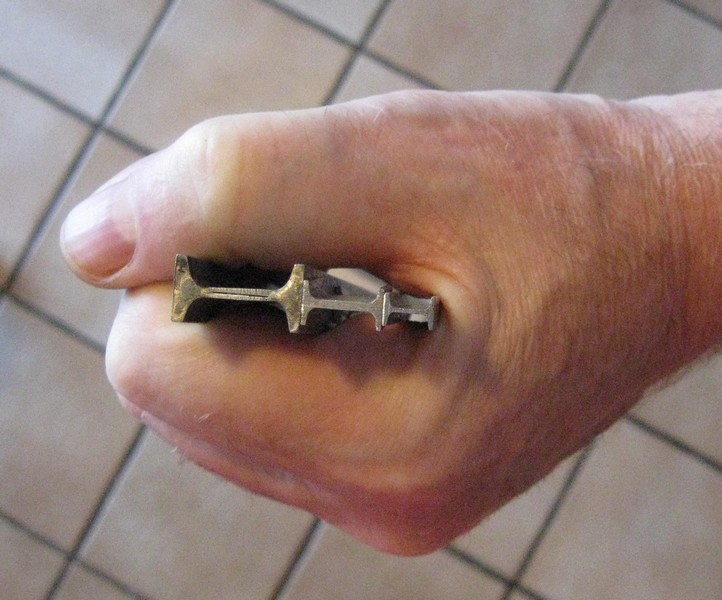
Here are the three beams end on. The middle one used the tapered bur for the flanges. The forged beam was never completely machined


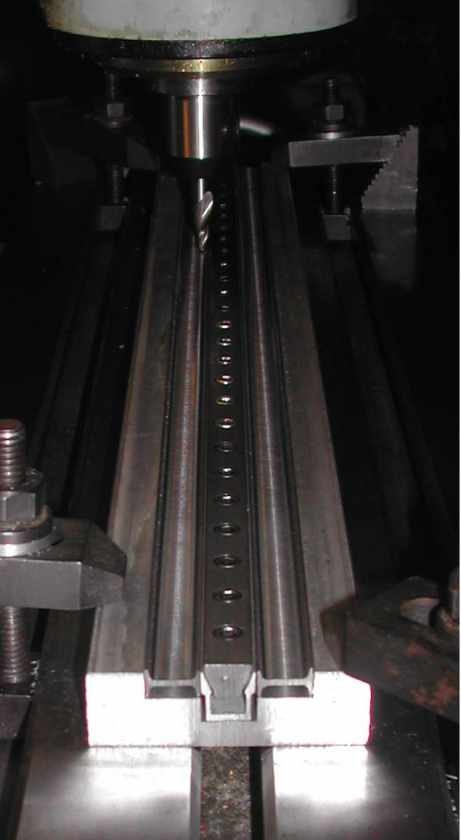
My next attempt was to use cold rolled steel and an expensive carbide tapered end mill with a ball end. I roughed out the section with an end mill with radius corners because I wanted a smooth transition between the rough cut and tapered flange cuts. I made a fixture to hold two sections for machining. The cold rolled steel has a bad habit of warping and I had to remove the same amount of stock from both sides to control the warping. I had to use a second set of clamps to force the stock back into the fixture when the stock was flipped to the other side. This method worked very well but the ball end of the cutter only lasted for 8 sections of I beam 20 inches long.

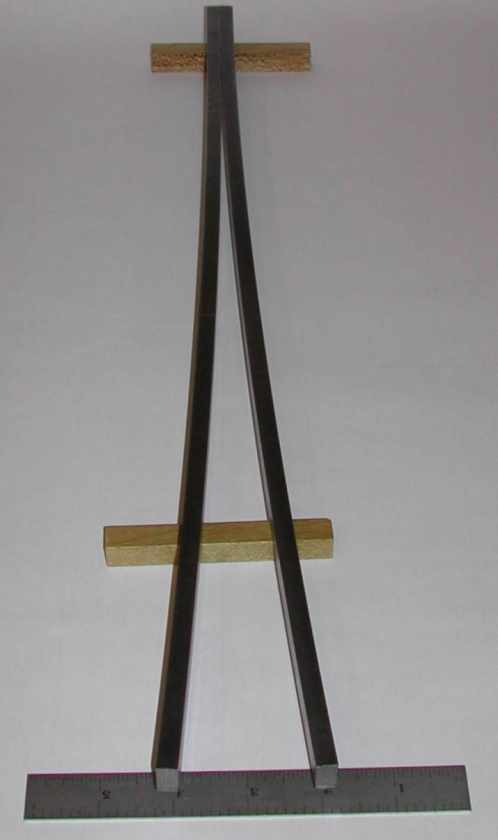
Amount of warp on a 20" long rough blank.


Milling beams.


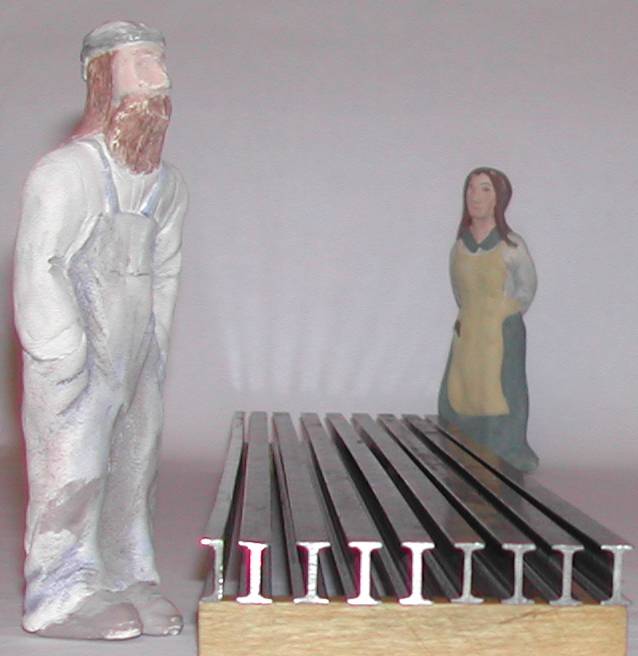
Finished beams and channel.


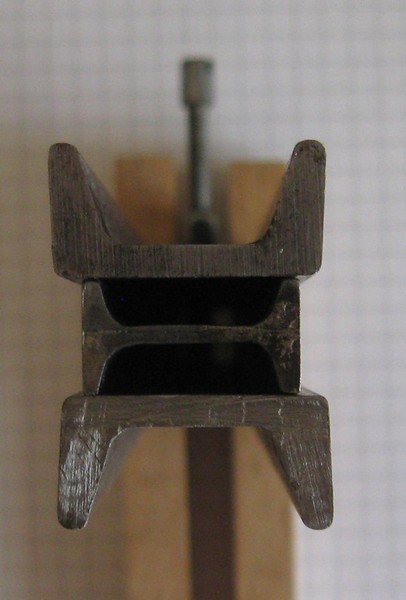
I made a larger beam by machining the backs of 1” hot rolled channel then silver soldering two back to back. I then machined the flanges down to make a realistic section. This worked fine but it is a larger beam than I need for most of the work I am doing.

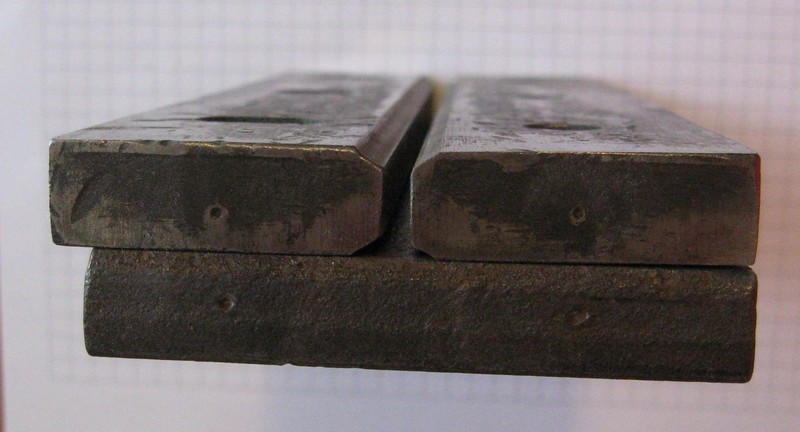
The finished beam between two sections of the channel used to make it.


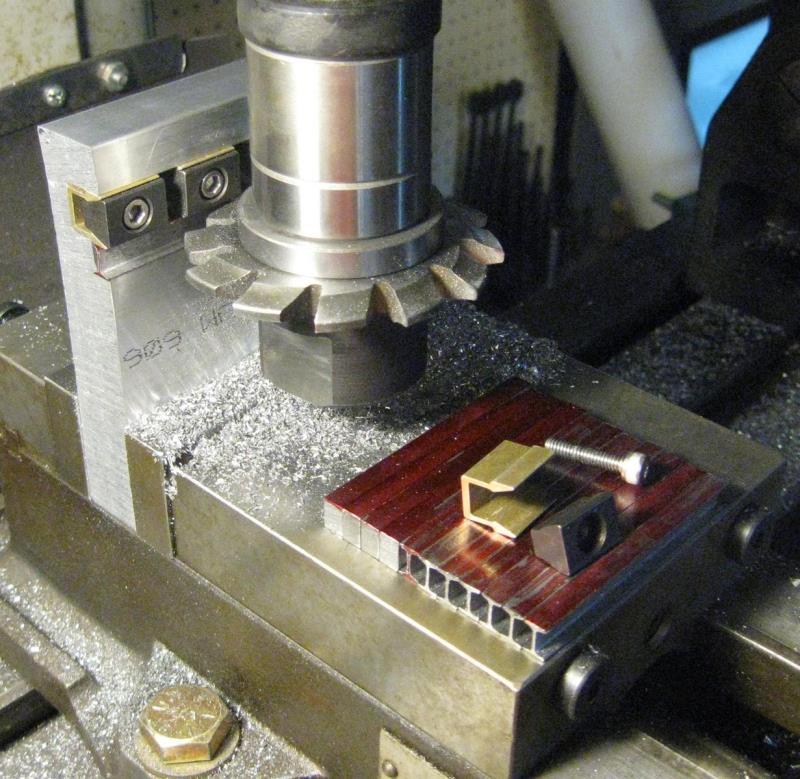
My new method of machining I beam is to use a 14.50 pressure angle gear cutter. The #1 cutter is used to cut 135 teeth to a rack. I chose a 10DP cutter because I found a cheep used one. The corner radius is much closer to what is needed. The advantage of this method is a single cutter can be used for the whole operation. Long sections of cold rolled would still need to be forced back into the fixture.

Milling beams with 10DP #1 gear cutter.


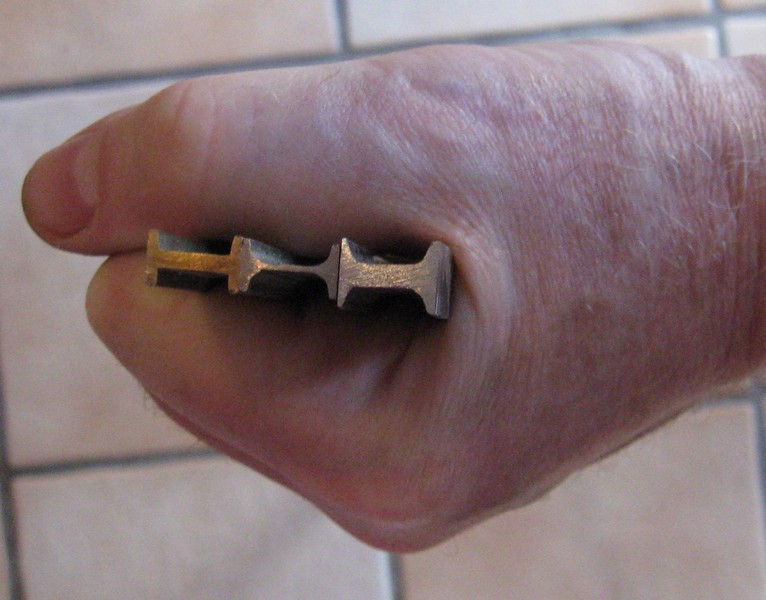
Here are the ends of more successful methods. The small one was cut with the gear cutter and the large one is C channel cut down and silver soldered.


Dan
ShaylocoDan

Offline zeeprogrammer

  • Full Member
  • *****
  • Posts: 6811
  • West Chester, PA, USA
Re: Scale I beams
« Reply #1 on: September 09, 2013, 02:25:02 AM »
Interesting.

I think most people (me included for a while) don't associate warping with metal.
This characteristic of metal is probably the one thing that really surprised me when I started this hobby.
Or at least told me that metal working is a whole more than I had initially thought.
(So true about a lot of lines of study eh?)

What are the I beams for?
Carl (aka Zee) Will sometimes respond to 'hey' but never 'hey you'.
"To work. To work."
Zee-Another Thread Trasher.

Offline ths

  • Full Member
  • ****
  • Posts: 1801
  • Kangaroo Valley, NSW, Australia
Re: Scale I beams
« Reply #2 on: September 09, 2013, 10:17:49 AM »
They look like shrunken real ones.

Cheers, Hugh.

Offline lakc

  • Full Member
  • ****
  • Posts: 76
  • Detroit, MI
Re: Scale I beams
« Reply #3 on: September 09, 2013, 10:52:15 AM »
You can stress relieve the cold rolled to avoid warping. Since you have OA torches and seem to be pretty good making jigs, with a couple sets of rollers and a hand crank you could probably squeeze them out just like full size practice if you need that many of them.
I too would be interested in seeing the 'rest of the project". :LickLips:
Jeff

Offline b.lindsey

  • Global Moderator
  • Full Member
  • *****
  • Posts: 13860
  • Dallas, NC, USA
    • Workbench-Miniatures
Re: Scale I beams
« Reply #4 on: September 09, 2013, 11:46:56 AM »
Interesting post Dan, and I must say, those beams and channels certainly do look the part...or as Hugh said...just like shrunken real ones!

Bill

Offline Dan Rowe

  • Full Member
  • ****
  • Posts: 1170
  • Dripping Springs TX USA
Re: Scale I beams
« Reply #5 on: September 09, 2013, 12:43:38 PM »
Thanks guys and yes that is what I was going for shrunken real ones. I started with an accurate drawing from a 1923 Carnegie steel catalog which has the corner radii listed for each section. I can use this information to match the gear cutter radius.

All the beams are for Shay locomotives there is a thread here: http://www.modelenginemaker.com/index.php/topic,171.30.html
The larger beam is for a 36 ton Shay not really started yet except for the drawings and the main frame I beams. The smaller sections are for the brake beams that support the brake shoes for the Shays I am building now.

I had considered rollers and I have an old bead roller that could be used for the test. I will most likely stick to the gear cutter method with steel beams as rolling red hot iron does not sound as fun as it once did.

Dan
ShaylocoDan

Offline Mainer

  • Full Member
  • ****
  • Posts: 40
Re: Scale I beams
« Reply #6 on: October 28, 2013, 02:58:39 PM »
You can indeed stress relieve CRS so it doesn't warp, or warps minimally. Since you've got a torch, just start at one end of the CRS bar and heat red hot, working your way along the bar. It will cool slowly behind you as you progress down the bar. 


SimplePortal 2.3.5 © 2008-2012, SimplePortal