Author Topic: A portable steam engine  (Read 86942 times)

Offline Firebird

  • Full Member
  • ****
  • Posts: 1328
  • East Midlands UK
Re: A portable steam engine
« Reply #150 on: June 07, 2015, 02:50:16 PM »
Hi

Enough shop time to finish the flywheel today :whoohoo:

The brass ring in the lathe, faced and internally skimmed


The chuck is transferred to the rotary table and 6   1/4"   holes drilled.


The spokes have been polished and placed into the ring.


The spokes are screwed into the hub a touch at a time until they are all tight. It sort of self centres as they are screwed in.


Hows it look so far, not bad.


Cut off the excess spokes.


Make up another mandrel and mount in the lathe.


Turn the outer rim.


On the engine.


Cheers

Rich


Online Kim

  • Global Moderator
  • Full Member
  • *****
  • Posts: 7924
  • Portland, Oregon, USA
Re: A portable steam engine
« Reply #151 on: June 07, 2015, 04:10:05 PM »
That's pretty slick Rich!  :ThumbsUp: :ThumbsUp:
Did you loktite the spokes in, so they don't work their way out? Just wondering...
Enjoying your build.  :popcorn:
Kim

Offline fumopuc

  • Full Member
  • *****
  • Posts: 3254
  • Munich, Germany, EU
Re: A portable steam engine
« Reply #152 on: June 07, 2015, 06:56:51 PM »
Hi Rich, nice flywheel. This chuck in the chuck at your mill looks like  a small adventure.
Kind Regards
Achim

Offline Firebird

  • Full Member
  • ****
  • Posts: 1328
  • East Midlands UK
Re: A portable steam engine
« Reply #153 on: June 07, 2015, 07:57:41 PM »
Hi

Thanks Kim and Achim.

No I didn't use any loctite. I held the waste part of each spoke in my vise and tightened it into the hub. As the spoke entered the counterbore in the hub it was to tight to turn by hand. I doubt it will loosen.

I have an adapter threaded to take myford chucks. I held that in the chuck on the rotary table then unscrewed the chuck from the lathe complete with workpiece and screwed it onto the adapter. It was solid enough to drill holes. I wouldnt attempt any machining without further support.

Cheers

Rich

Offline fumopuc

  • Full Member
  • *****
  • Posts: 3254
  • Munich, Germany, EU
Re: A portable steam engine
« Reply #154 on: June 07, 2015, 08:14:08 PM »
.......

I have an adapter threaded to take myford chucks. I held that in the chuck on the rotary table then unscrewed the chuck from the lathe complete with workpiece and screwed it onto the adapter. It was solid enough to drill holes. I wouldnt attempt any machining without further support.

Hi Rich, that is a very good system, something to think about.
Kind Regards
Achim

Offline NickG

  • Global Moderator
  • Full Member
  • *****
  • Posts: 1430
Re: A portable steam engine
« Reply #155 on: June 07, 2015, 08:46:36 PM »
Nice flywheel Rich, how tight were the spokes in the holes in the rim? I only ask because when you turned the od I was surprised you couldn't see them?

Offline bouch

  • Full Member
  • ****
  • Posts: 54
Re: A portable steam engine
« Reply #156 on: June 07, 2015, 09:44:31 PM »
Hi

Thanks Kim and Achim.

No I didn't use any loctite. I held the waste part of each spoke in my vise and tightened it into the hub. As the spoke entered the counterbore in the hub it was to tight to turn by hand. I doubt it will loosen.

Rich

Since its too late to loctite the threads, I would suggest you put a spot of solder on each spoke to make sure they don't loosen.  Touch of flux on the inside of the rim, a small piece of solder, and heat from the outside of the rim so the solder is pulled through the rim.

Anything held just by threads can loosen, isn't that one of murphys laws?

Mike

Offline rarach22

  • Full Member
  • ****
  • Posts: 392
Re: A portable steam engine
« Reply #157 on: June 07, 2015, 09:55:13 PM »
Beautiful work, congratulation. Pavel

Offline Firebird

  • Full Member
  • ****
  • Posts: 1328
  • East Midlands UK
Re: A portable steam engine
« Reply #158 on: June 07, 2015, 10:08:57 PM »
Hi

I forgot to mention that the holes in the rim were drilled then reamed so the spokes were a dead fit. The thread on the spokes was a tight, not loose, fit. i had to hold each spoke in turn in the vise then turn the hub with a bar through its centre to tighten them. I'm confident they won't come loose.

Cheers

Rich

Offline b.lindsey

  • Global Moderator
  • Full Member
  • *****
  • Posts: 13860
  • Dallas, NC, USA
    • Workbench-Miniatures
Re: A portable steam engine
« Reply #159 on: June 08, 2015, 01:18:41 AM »
You have made so fine progress since I last checked in Rich. The flywheel turned out great as well and the whole thing is going to be quite an accomplishment!!

Bill

Offline Firebird

  • Full Member
  • ****
  • Posts: 1328
  • East Midlands UK
Re: A portable steam engine
« Reply #160 on: June 21, 2015, 06:33:45 PM »
Hi

Thanks Bill

Today is Fathers day  :whoohoo: so I get to do whatever I want. A day in my shed sounds perfect :cartwheel:

So I made the eccentric and started on the sheave, I think its called the sheave.  :noidea:

The eccentric needs to be adjustable on the crankshaft to get the timing right. The simplest way, a way I have used before is to drill and tap the eccentric hub and fit a grub screw. I wanted something that looks a bit better than a grub so came up with this idea. I will only show a few photos now, I wasn't happy with the finish on the first attempt so I have made another that I will show later. Its basically the same just finished better.

A piece of steel is turned to size and centred then transfered to the mill. Recentred then the offset is centred.


Back in the lathe and centred in the 4 jaw using a DTI and spring loaded plunger


After turning the hub it went over to the mill and had half th hub machined away and drilled and tapped 3/32


A cap is made to suit


The eccentric clamps to the crankshaft


The sheave I am making from a piece of 1 1/2"  X 1/4" brass bar. Marked out


Cut off and centre in the 4 jaw


First drill out with a large drill


Then finish with a boring bar


Grind a tool to machine the groove


And machine the groove


A bit of hacksaw work


Make up another mandrel


Back in the mill and rotary table for a bit of turning


Cheers

Rich
« Last Edit: June 21, 2015, 06:43:09 PM by Firebird »

Offline Jim Nic

  • Full Member
  • ****
  • Posts: 227
  • Buckingham, UK
Re: A portable steam engine
« Reply #161 on: June 21, 2015, 08:00:52 PM »
Hi Rich
Just catching up here.
I like your flywheel which is a method I had in mind for my current project.  Now I have seen what is possible I will definitely be using it.
I was also taken with your eccentric which avoids the use of a grubscrew marking the crankshaft, allows easy adjustment and looks suitably "technical".  What's not to like?
Thanks for posting, keep up the good work.
Jim
The person who never made a mistake never made anything.

Offline Firebird

  • Full Member
  • ****
  • Posts: 1328
  • East Midlands UK
Re: A portable steam engine
« Reply #162 on: July 19, 2015, 01:32:09 PM »
Hi

Thanks Jim.

Funny how you think you are getting on well only to find you have made a ^&**%$ up of things.

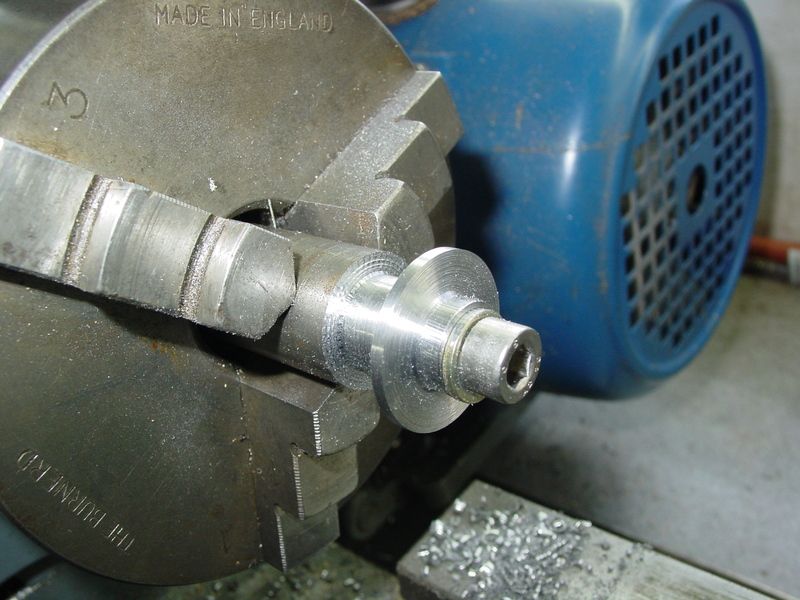
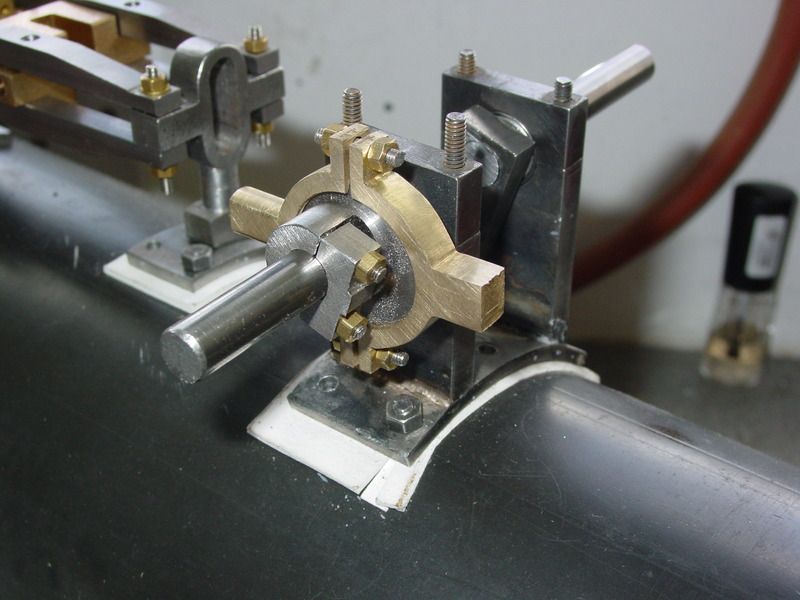
The sheave is drilled then tapped for the link rod.


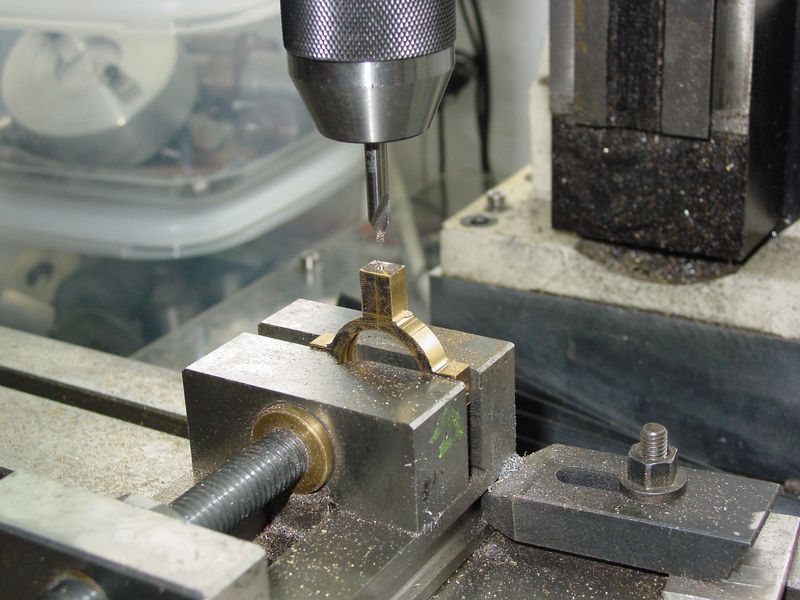
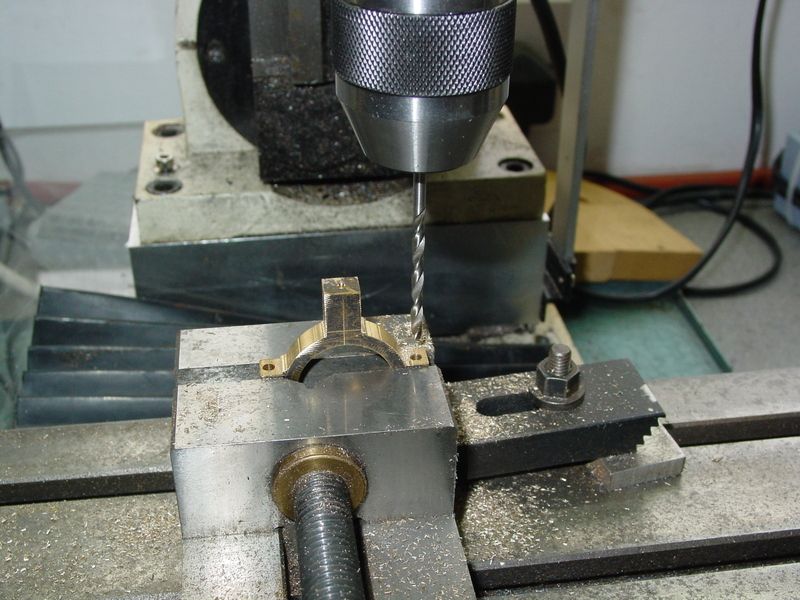
Then drilled through at where the joint will be


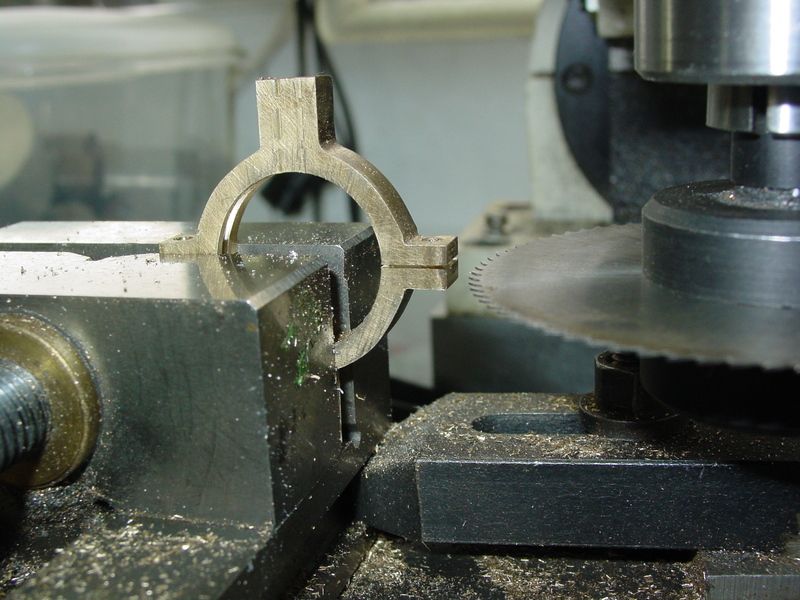
Cut in half with a slitting saw. This one is only .015 thick.


Its at this point that I found out I had made a mistake.  :facepalm:

The sheave didn't fit the eccentric :help: I had cut the groove .040 undersize.

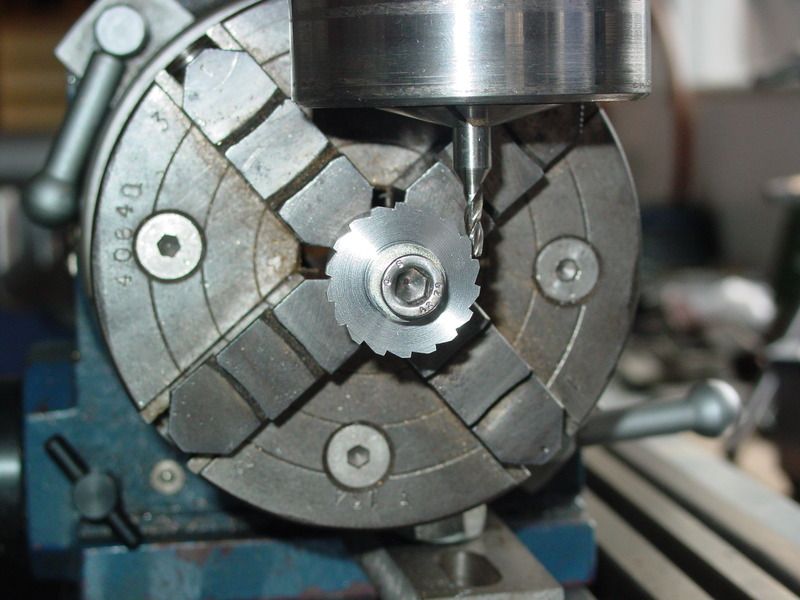
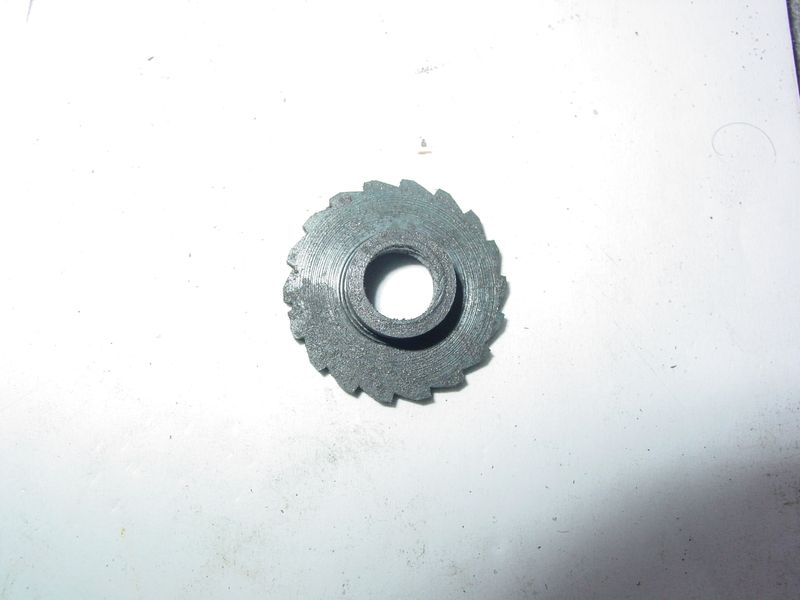
Unfortunately there was not enough materilal on the eccentric to turn that down a bit. I was almost resigned to scrapping it and starting again when I had an idea. On another project I have been wondering whether or not cutters can be made from mild steel then case hardened. No time like the present to find out.

I made up a mandrel, the boss is 8mm then drilled and tapped 6mm


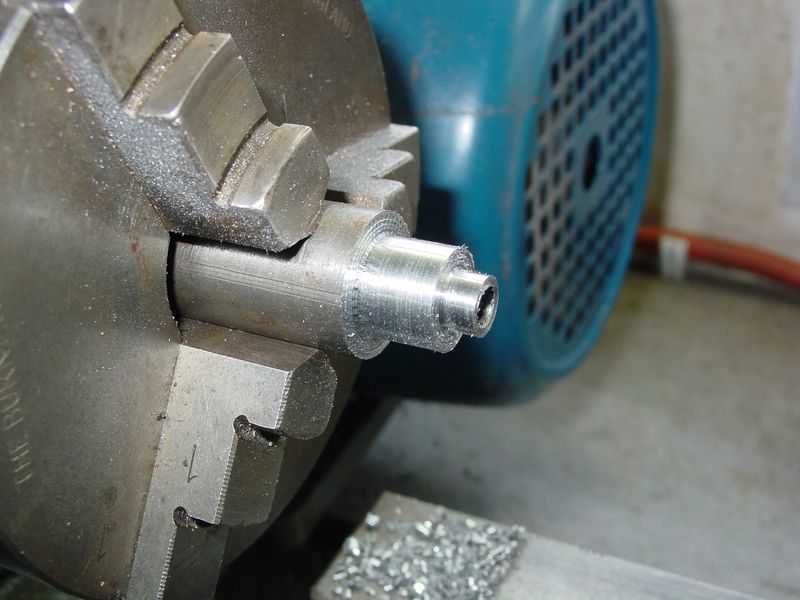
A piec of steel drilled 8mm fitted to the mandrel and turned to the exact size of the eccentric, .972


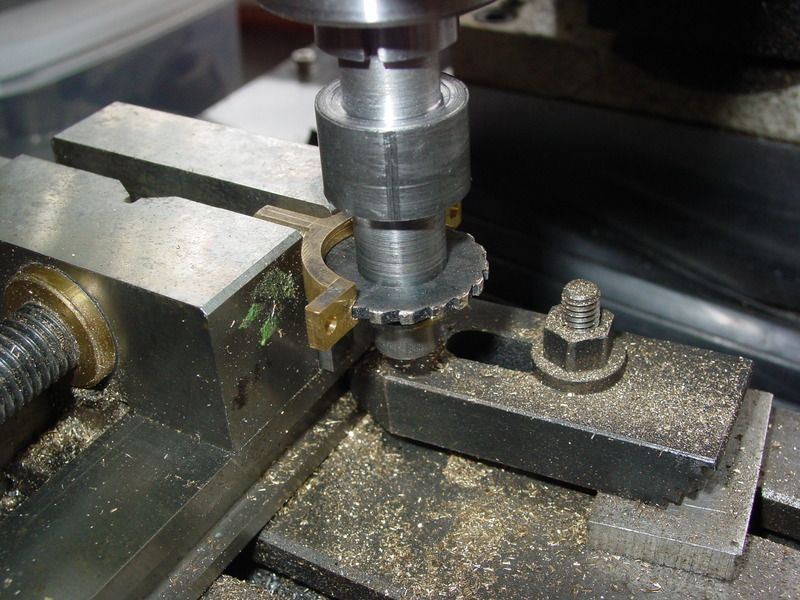
Over to the mill and rotary table to have the teeth cut


Heat to cherry red


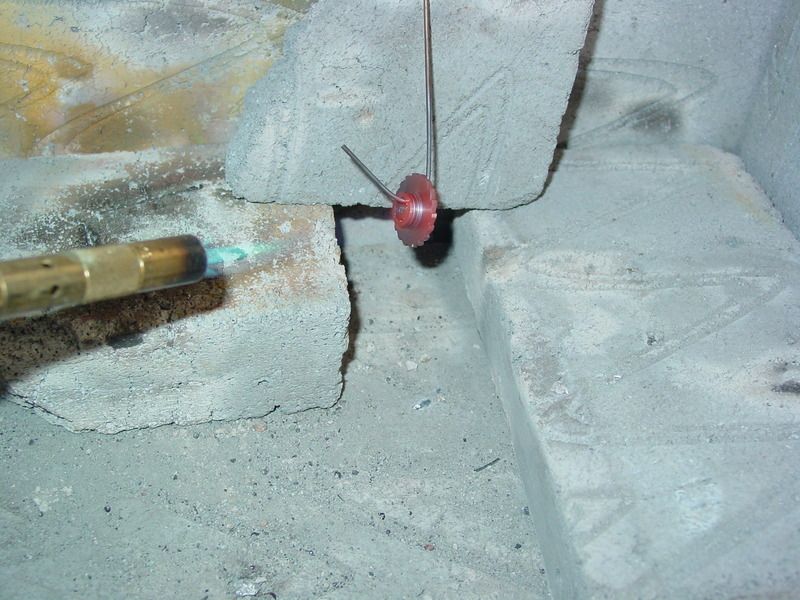
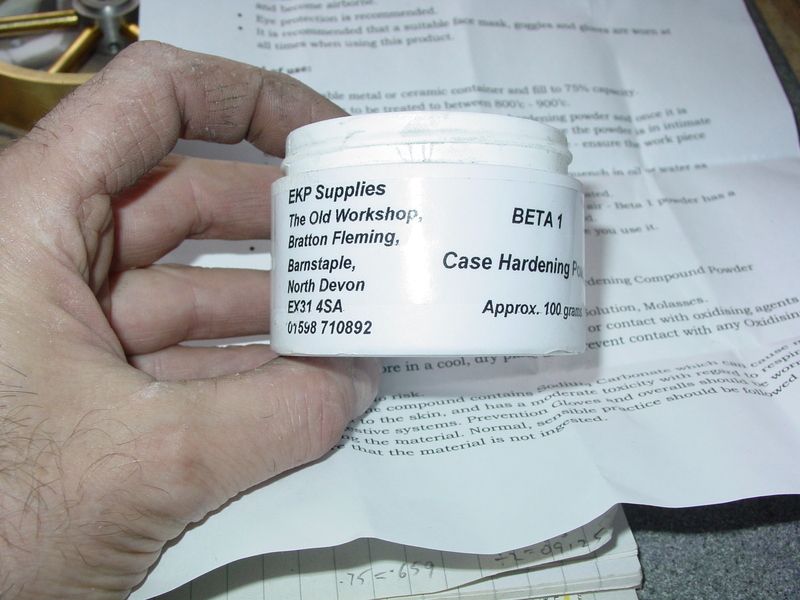
And drop into the case hardening powder


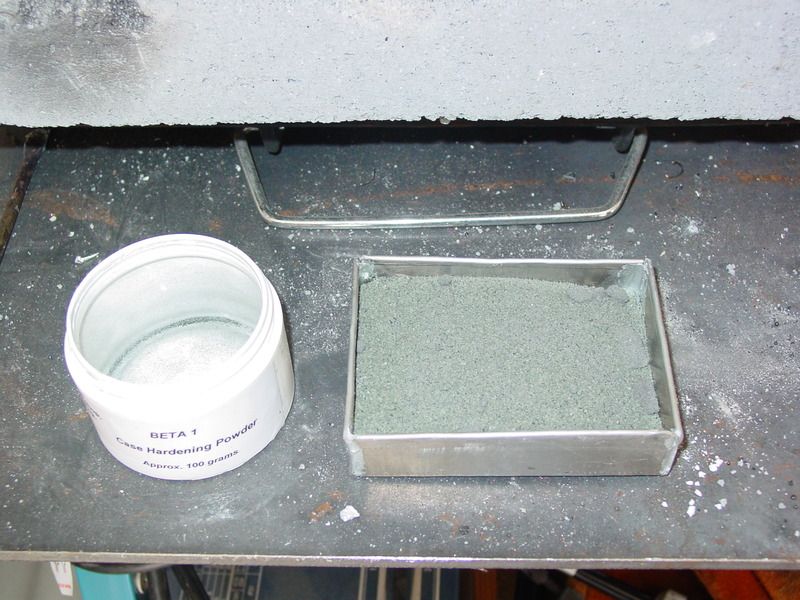
Leave it for 30 minutes


After a clean up mount it on the mandrel and re machine the two halves of the sheave


It worked. Well enough to get the correct size. The teeth could do with backing off to give a bit more clearance but it cut the brass ok.


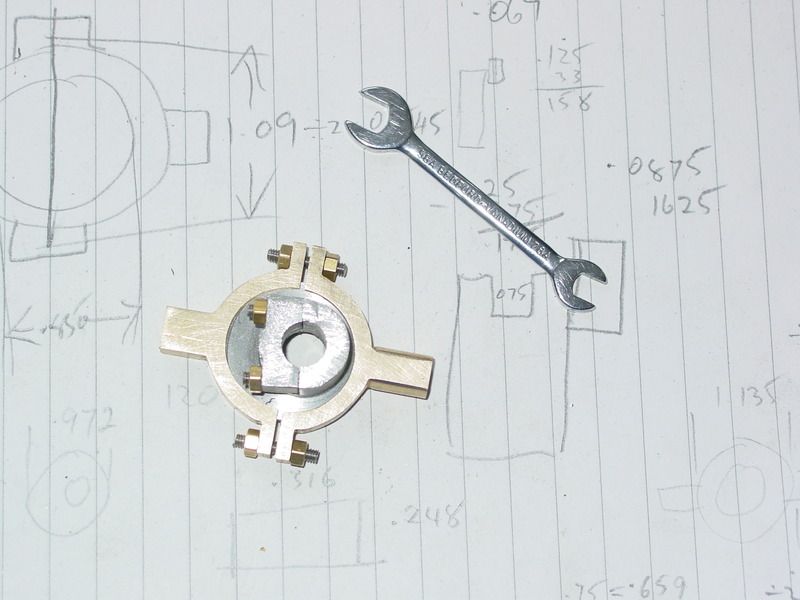
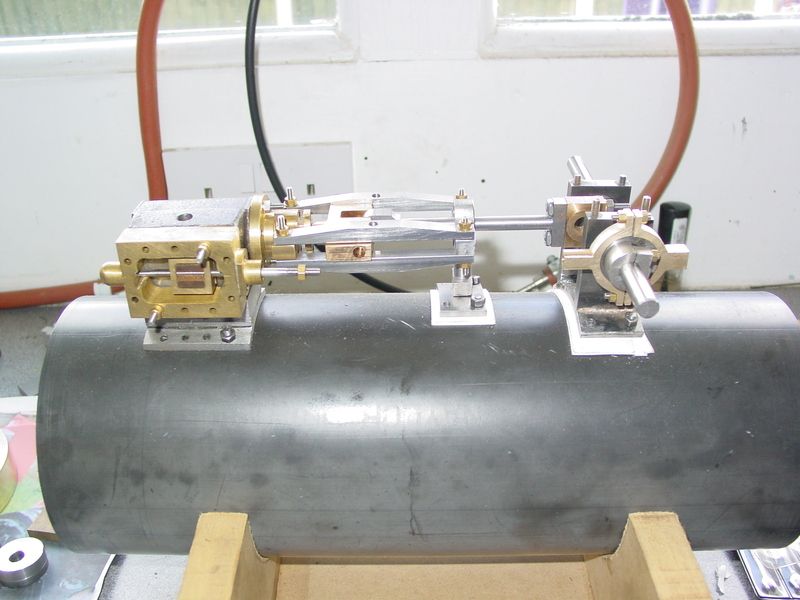
I have fitted the slide valve and housing to measure for the link rod.


Thats it for now. There is a little when I get the photos uploaded.

Cheers

Rich


Offline Admiral_dk

  • Full Member
  • *****
  • Posts: 3777
  • Søften - Denmark
Re: A portable steam engine
« Reply #163 on: July 19, 2015, 09:22:22 PM »
It's nice when you can save / correct a mistake you made and end up with something useable  :ThumbsUp:

Offline Firebird

  • Full Member
  • ****
  • Posts: 1328
  • East Midlands UK
Re: A portable steam engine
« Reply #164 on: July 21, 2015, 08:13:39 PM »
Hi

Thanks Admiral.

The connecting rod is 5/32 stainless steel. The coupling is made from 1/4" square brass.


Cheers

Rich


SimplePortal 2.3.5 © 2008-2012, SimplePortal