Author Topic: 1/3rd Scale 5hp Galloway Build  (Read 61073 times)

Offline Jasonb

  • Full Member
  • *****
  • Posts: 9489
  • Surrey, UK
1/3rd Scale 5hp Galloway Build
« on: June 30, 2013, 08:29:47 PM »
Well I've been getting nagged to start posting about the build of this engine for a while so better do something about it, I won't say who's been nagging as I would not want to embaress her :embarassed:

The model is of the 5hp Galloway round rod hit and miss engine to 1/3rd scale so its quite a big old lump.


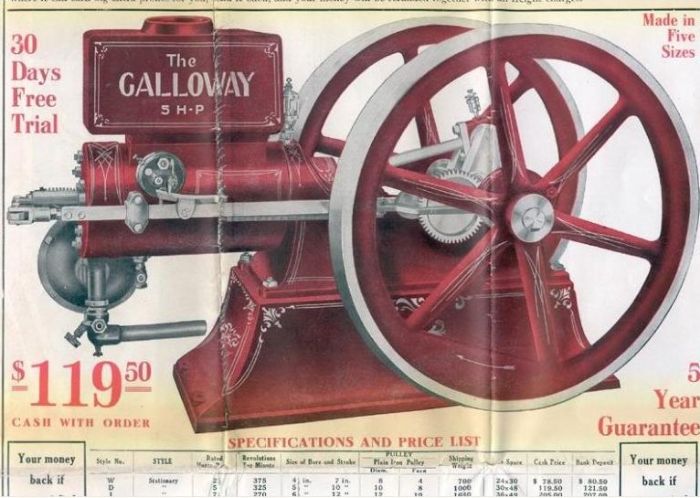
Originally made by Richard Shelley the Galloway kits are now done by Linley Machine under the Minicastings range and are available in a number of different scales. You can also get them via Forrest Classics in the UK.

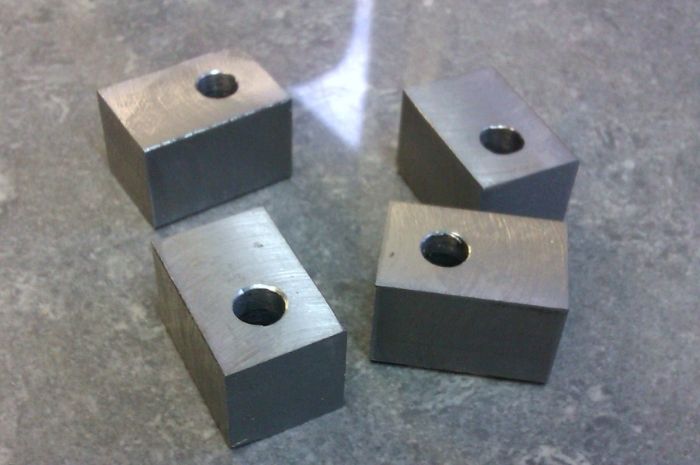
So lets start at the bottom. The kit is supplied with a sub-base and on the larger scale castings the four mounting lugs have to be added as it makes it easier to cast the base without them. These started off as a length of 5/8" hot rolled.


These were cleaned up all round with a fly cutter, cut and milled to length and a hole drilled through each.


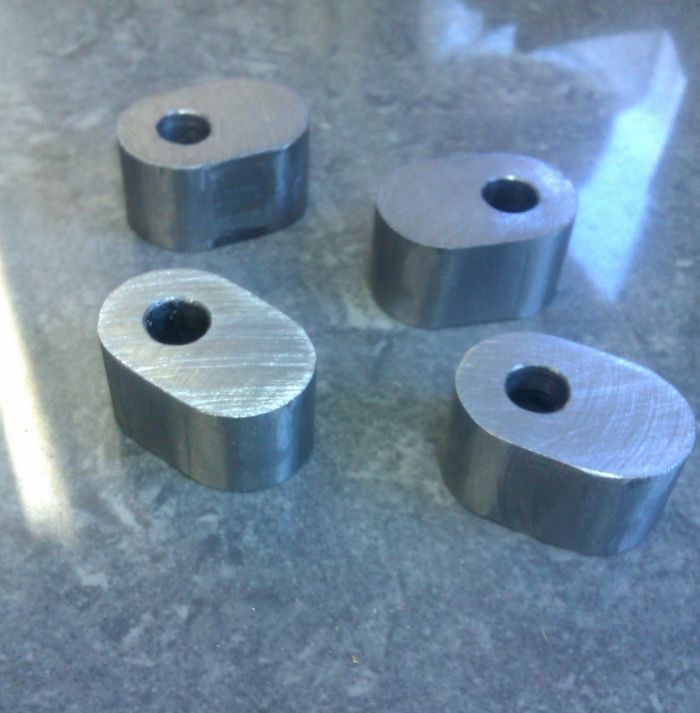
I then set up the vice on top of the rotary table with a stop and rounded the two ends.


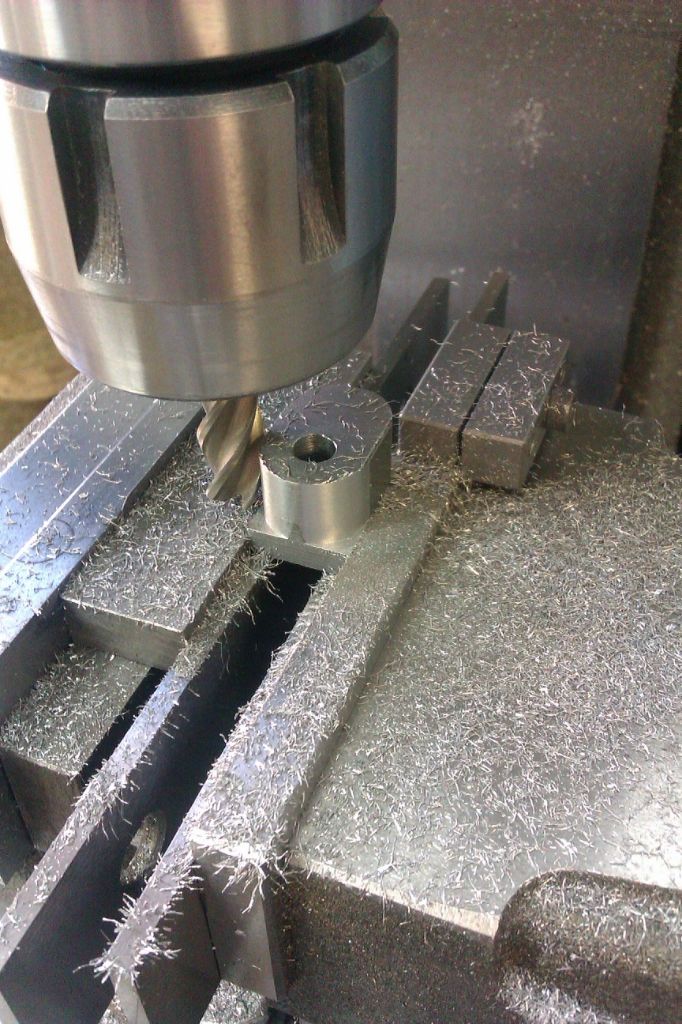
The last job was to machine these to the correct height which got rid of the piece that was in the vice and therfore not rounded off.


I then spent some time shimming up the base with packers and feeler gauges to ensure that when the underside was machined it would sit true when turned upright


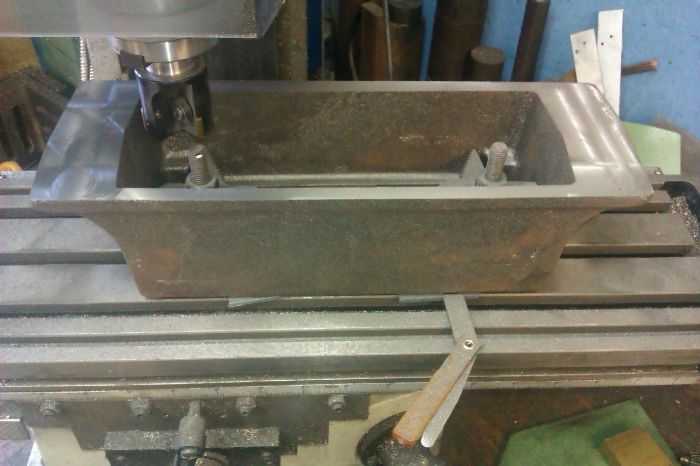
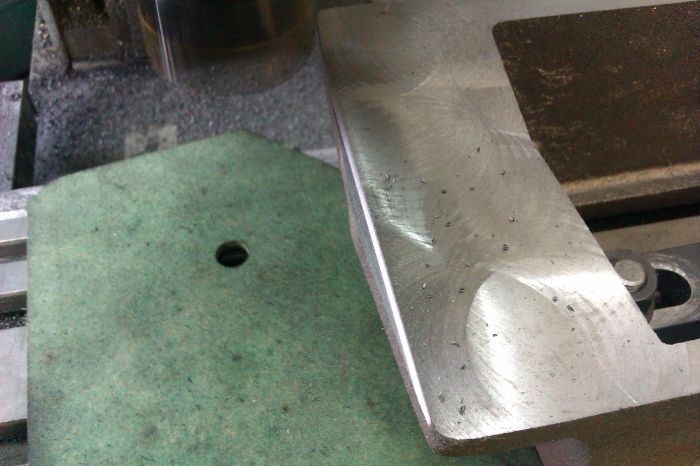
You may be able to see a darker shiny area in the corner, this is where the thin extremities of the casting have cooled quickly and "chilled" the iron, luckily I was using a carbide tipped cutter as these hard chilled spots will take the edge straight off HSS tooling.


It was then a simple job to clamp the casting the right way up to machine the top surface


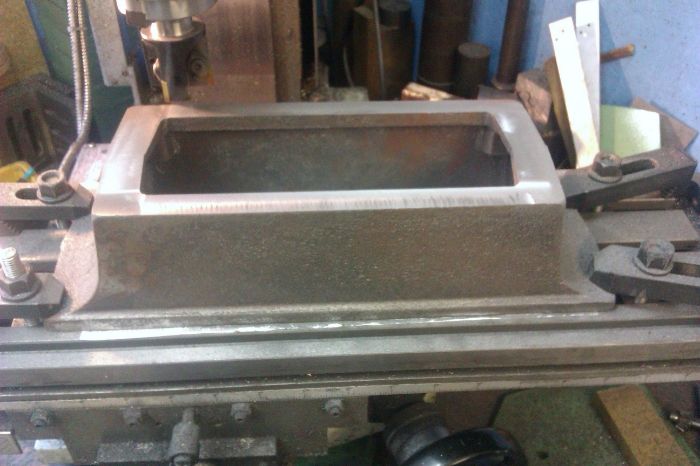
The sockets for the mounting lugs were roughed out with a drill and then finished with a 5/8" milling cutter


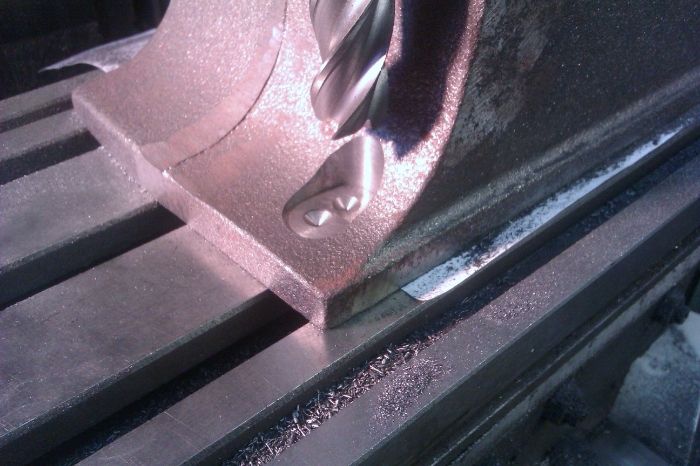
Not a bad fit, these will now be bonded with JB Weld which will also be used to fillet the internal corners.


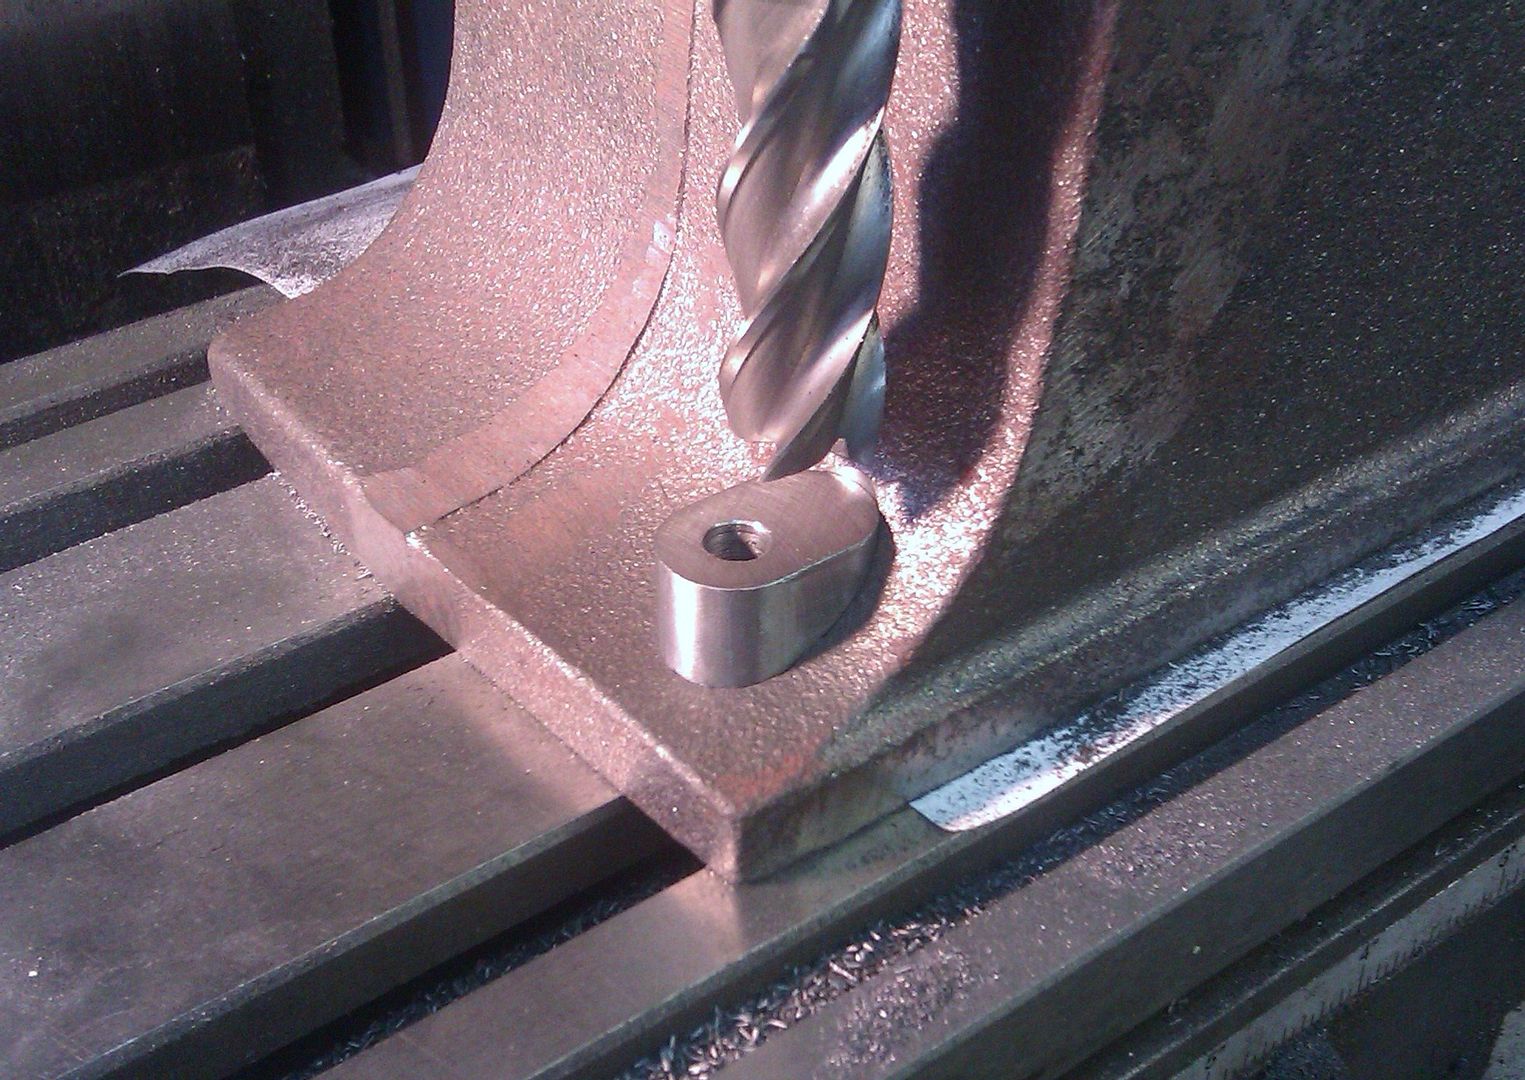
I also took a pass off the ends to remove some of the excess draught angle


All that work and this piece may not get used, it all depends on how I mount the engine when finished.

J

Offline Jo

  • Administrator
  • Full Member
  • *****
  • Posts: 15305
  • Hampshire, england.
Re: 1/3rd Scale 5hp Galloway Build
« Reply #1 on: June 30, 2013, 08:42:37 PM »
Watching with interest... I have a little one of my own to make  ;D

Jo
Enjoyment is more important than achievement.

Offline b.lindsey

  • Global Moderator
  • Full Member
  • *****
  • Posts: 13860
  • Dallas, NC, USA
    • Workbench-Miniatures
Re: 1/3rd Scale 5hp Galloway Build
« Reply #2 on: June 30, 2013, 08:47:59 PM »
Nice start Jason...this will be one to watch for sure!!

Bill

Offline stevehuckss396

  • Full Member
  • ****
  • Posts: 1554
  • Sterling Heights, MI USA
    • Steve's Miniature Sparkplugs
Re: 1/3rd Scale 5hp Galloway Build
« Reply #3 on: June 30, 2013, 09:02:49 PM »


All that work and this piece may not get used, it all depends on how I mount the engine when finished.


Doesn't look that bad. Maybe a little bondo can fill the pits before you paint. Mechanically it looks great.
Do not be like the cat who wanted a fish but was afraid to get his paws wet.

Offline Jasonb

  • Full Member
  • *****
  • Posts: 9489
  • Surrey, UK
Re: 1/3rd Scale 5hp Galloway Build
« Reply #4 on: June 30, 2013, 09:22:18 PM »
Steve its not the casting thats the issue, as I said it will depend on how I decide to mount the engine , the other options that I'm still considering do not use the cast sub base. There is also going to be a lot more bondo on some of the other parts, stay tuned ;)


Offline Jasonb

  • Full Member
  • *****
  • Posts: 9489
  • Surrey, UK
Re: 1/3rd Scale 5hp Galloway Build
« Reply #5 on: July 07, 2013, 07:37:19 PM »
As I wanted to be able to bolt the bearing caps in place while doing some of the machining on the base these were tackled next.

The two edges were machined first, note the strips of aluminium to take up any uneveness between the vice jaws and the cast surface.


I could then support the casting on parallels while gripping by the previously machined edges to bring the base to thickness


While in this position the step that locates the caps into the base was milled 1/16" deep either side.


The two ends were then machined square to the other faces


The casting was then sawn in two and the cut ends machined but leaving the caps 1/8" over length.


The mounting holes were then spot faced and drilled, make sure you follow the drawings of the base and not the caps for this as the holes are not central on one drawing but central on the other!!


J

Offline Jo

  • Administrator
  • Full Member
  • *****
  • Posts: 15305
  • Hampshire, england.
Re: 1/3rd Scale 5hp Galloway Build
« Reply #6 on: July 07, 2013, 07:42:12 PM »
Meany  :(: I wanted to see them fitted.

It looks like quite nice CI are you finding any hard spots?

I just got the drawings out for my little one. I see what you mean they have been drawn centrally but the measurements imply they are way off centre :o

Jo
« Last Edit: July 07, 2013, 07:49:37 PM by Jo »
Enjoyment is more important than achievement.

Offline Jasonb

  • Full Member
  • *****
  • Posts: 9489
  • Surrey, UK
Re: 1/3rd Scale 5hp Galloway Build
« Reply #7 on: July 07, 2013, 07:48:50 PM »
You have already seen everything I have got :naughty: I best get a bit more typing done before Top Gear starts.

Have a look back at the first post where I mentioned hard spots in the base ::), none in these caps but plenty to come in the base and a few holes in one of the bronze castings. Its not a bad iron but definately harder than a nice bar of Meehanite.

Offline Jo

  • Administrator
  • Full Member
  • *****
  • Posts: 15305
  • Hampshire, england.
Re: 1/3rd Scale 5hp Galloway Build
« Reply #8 on: July 07, 2013, 07:50:16 PM »
Would you like some Invar  :mischief:

Jo
Enjoyment is more important than achievement.

Offline Jasonb

  • Full Member
  • *****
  • Posts: 9489
  • Surrey, UK
Re: 1/3rd Scale 5hp Galloway Build
« Reply #9 on: July 07, 2013, 08:18:46 PM »
To keep the Lady happy the next job is the main base. On the full size this is a single casting with the water cavities cast in place, the model uses three parts - the base and cylinder jacket which are both supplied as casting and the liner which comes as a length of dura-bar. There is a lot of work in these three bits so I will break the post up into the various parts.

The base is a bit awkward to hold firmly so after some initial marking out to see what needed to come off where I mounted it the right way up on the mill with packers and feeler gauges to get it sitting true and stop any distortion when bolted down. I took a very light skim off the oiler hole and edges of the  bearing housings which gve me 3 nice "legs" to mount it by.


I noted the difference in height when machining the 3 points so it was a simple matter to arrange suitable packing so the underside could be milled flat and true. At the same setting the 4 mounting holes were drilled and the ones under the cylinder reverse spot faced with a home made cutter


The ones at the crankshaft end were easily done in the conventional way.


And a quick test fit on the sub-base. You may also be able to see a vertical line that is cast into the side of the bearing support to indicate where the crankshaft should come and just to the side of that another cast dot also to indicate where the centre should be!!


The base was then bolted to a machining plate and mounted at 30deg to allow the bearing housings to be machined to height, I took this as the vertical cast line and my scribed line at the correct height from the bottom of the casting. you can now see the groove where the bearing caps locate.


The last bit of metal under the timing gear stud hole had to be removed with a fly cutter and then the mounting holes drilled & tapped.


The bearing caps were then bolted in place with temporary cap screws and along with the housings machined back to finished width.


And the final photo in this sequence shows how I had to mount the casting. As I don't have a tilting table or mill head my usual pair of angle plates were set at the required angle and some additional clamping added at the lower end, i looks a bit bodged but was surprizingly ridgid. The machining plate makes it easy to clock the casting true.


J

I hope that has left you satisfied for the evening Jo :embarassed:


Offline Don1966

  • Full Member
  • *****
  • Posts: 6818
  • Columbia, MS
Re: 1/3rd Scale 5hp Galloway Build
« Reply #10 on: July 07, 2013, 08:21:37 PM »
Jason I am differently following this build. Your builds are always very educational. I am very envies of your craftsmanship abilities. Following with great interest.

Don

Offline Jo

  • Administrator
  • Full Member
  • *****
  • Posts: 15305
  • Hampshire, england.
Re: 1/3rd Scale 5hp Galloway Build
« Reply #11 on: July 07, 2013, 08:38:56 PM »
You have already seen everything I have got :naughty:

But being allowed to peek only partially satisfies the need ;)   

Those bolts still look more central than the drawings show them. My drawing shows the gear side one the mounting being about a third of the way across (6.65mm on a 16.4 width). So I am assuming that there will be more to come off shortly  ;).

Jo
Enjoyment is more important than achievement.

Offline Jasonb

  • Full Member
  • *****
  • Posts: 9489
  • Surrey, UK
Re: 1/3rd Scale 5hp Galloway Build
« Reply #12 on: July 07, 2013, 08:52:53 PM »
My drawing shows the gear side one the mounting being about a third of the way across (6.65mm on a 16.4 width).

Are you sure My 1/6th drawings split that one 8.45 / 7.95mm??

Offline Jo

  • Administrator
  • Full Member
  • *****
  • Posts: 15305
  • Hampshire, england.
Re: 1/3rd Scale 5hp Galloway Build
« Reply #13 on: July 07, 2013, 09:12:17 PM »
Found the scaling problem  :)

Jo
Enjoyment is more important than achievement.

Offline vcutajar

  • Full Member
  • *****
  • Posts: 2555
  • Marsascala, MALTA
Re: 1/3rd Scale 5hp Galloway Build
« Reply #14 on: July 07, 2013, 09:46:26 PM »
Following along and learning new things.

Vince


SimplePortal 2.3.5 © 2008-2012, SimplePortal