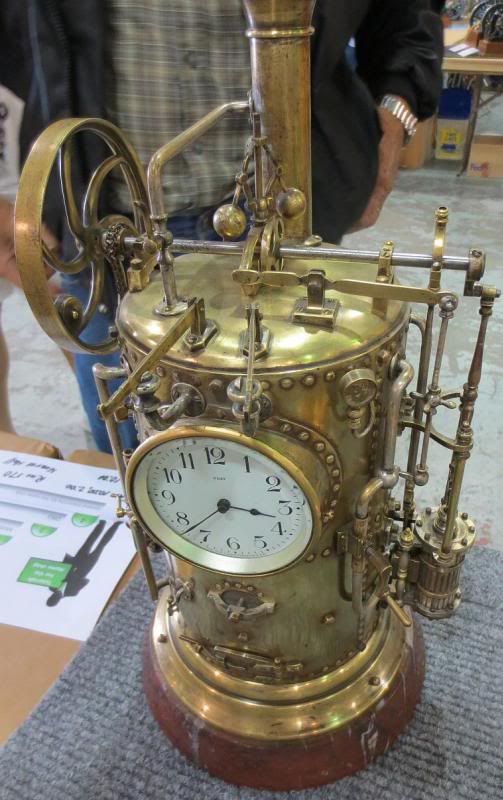
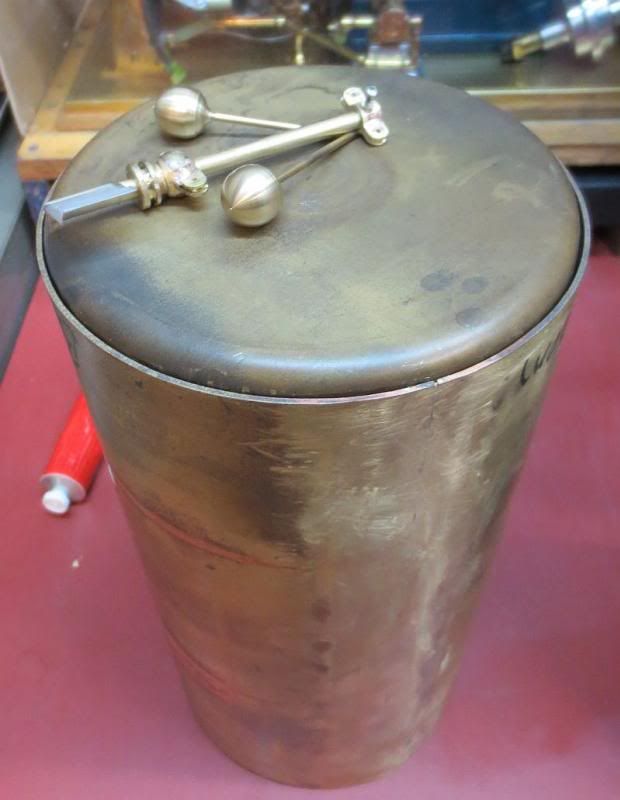
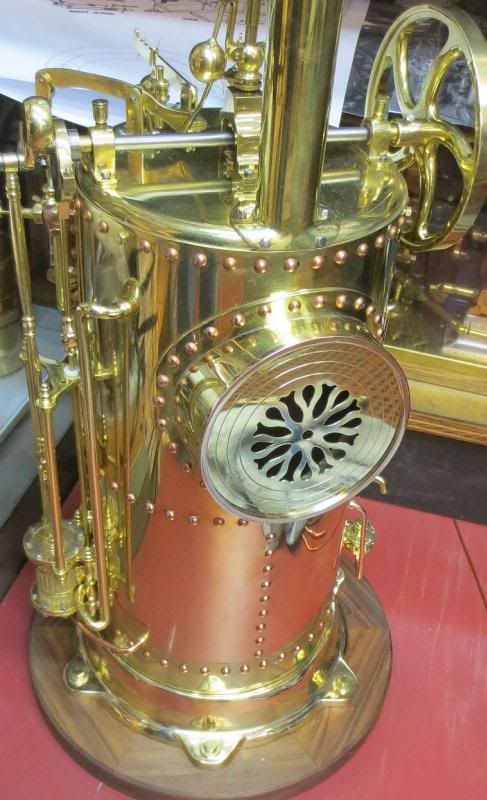
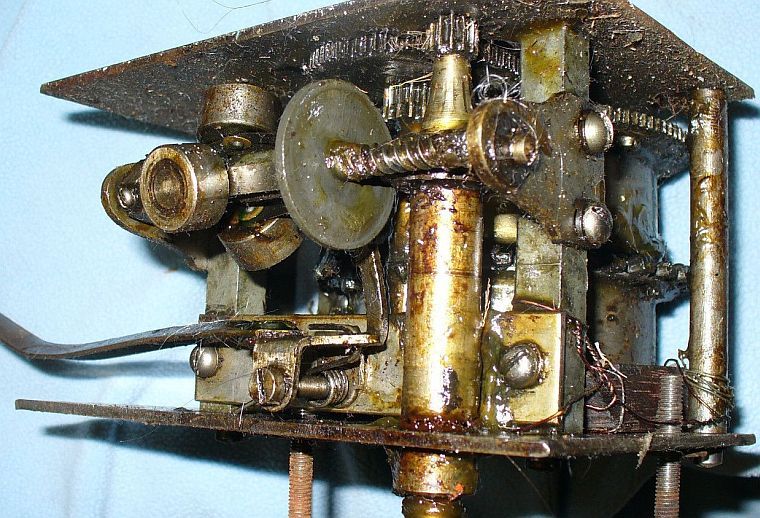
Seen this French Industrial clock that looked like a boiler with steam engine at the 2012 GEARS show. The owner told me that if you opened the fire box door you could put in a key and wind it up and the steam engine would run.
I thought it looked neat and took some pictures and decided later to have a go at making something like it.
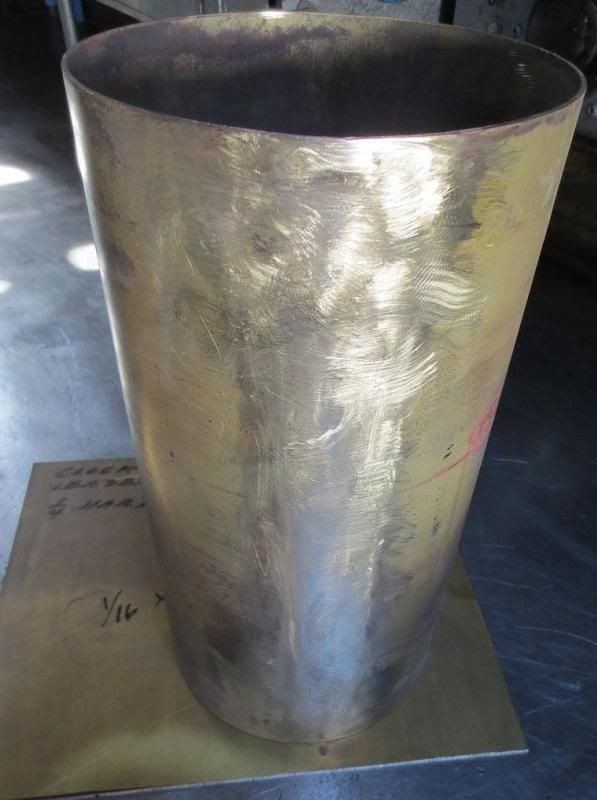
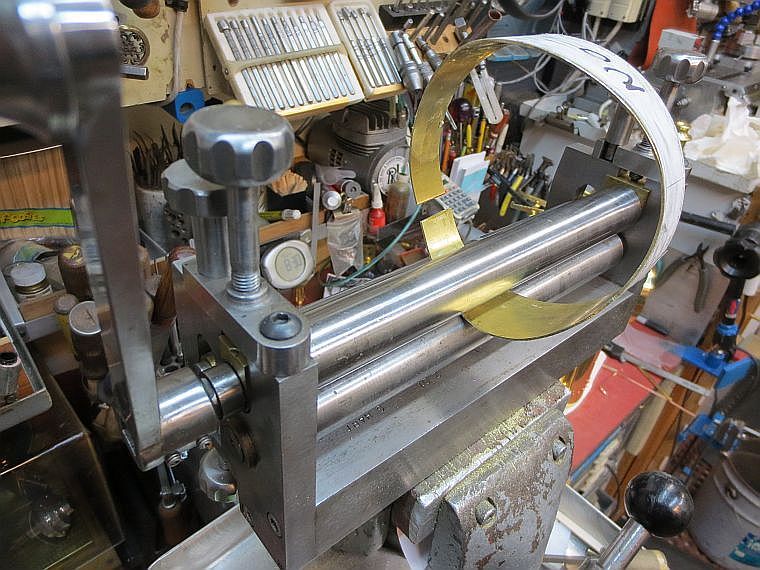
Getting started. Didn't have any brass tube but had a nice brass sheet that was just enough to make the main tube, the top and two cross tubes. Rolled the brass for the tube about 6" in diameter and 12" tall. Wasn't sure how to fit the top with a lap joint so decided for a silver brazed butt joint. Wired tube joint tight with soft wire and some wire for going the long way to keep wire going around the tube off at the joint. Wasn't sure if joint would stay in alignment at the edges so drilled and tapped. Inserted some brass 2-56 screws.
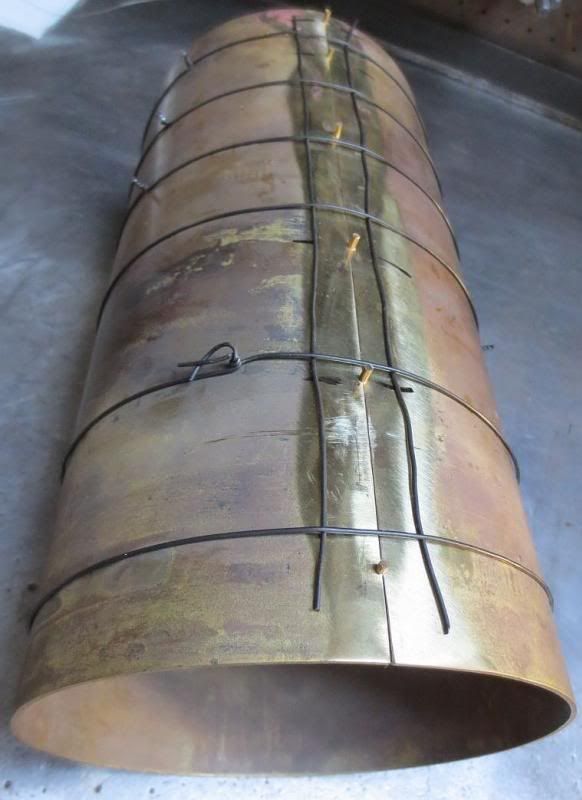
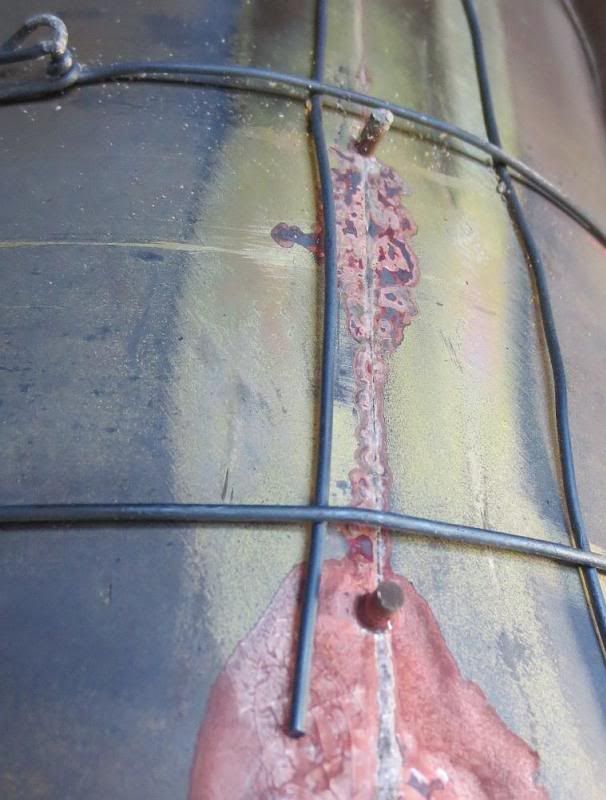
Silver brazed joint turned out "good 'nuff" some little flaws but can live with.
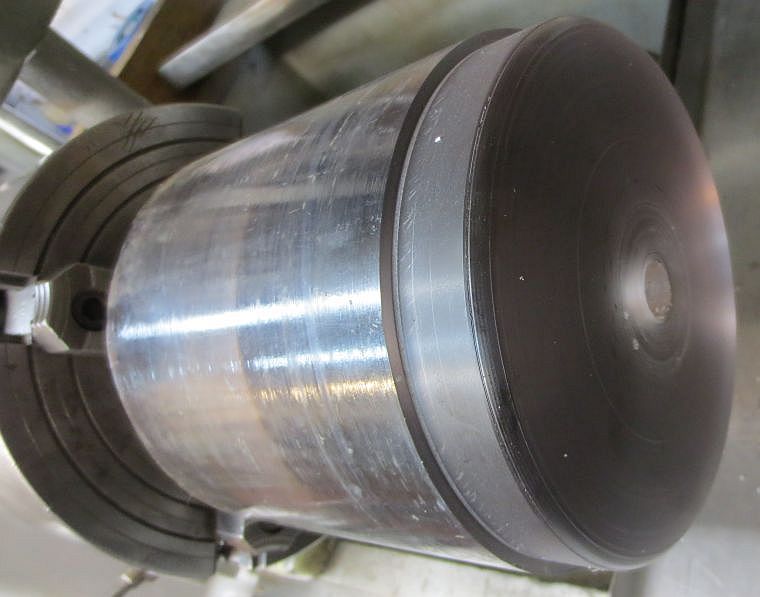
Had some unknown type of cast resin that was the right size to use for a form for the top. Turned the resin to size to allow the formed top to fit inside the brass tube. Put a slight crown on the top. Cut a blank disk about the right size plus a little for trimming.
Put the resin form in hydraulic press with the annealed brass disk centered on top and then a steel disk about right size on top that. Squeezed the works in the press and worked way around with wood hammer forming the edge down on the form. Edge formed great but didn't get domed top. Too much pressure from the press flattened out the resin. This was a stroke of good luck as brackets that mount to top could be flat on bottom instead of having to match a radius.
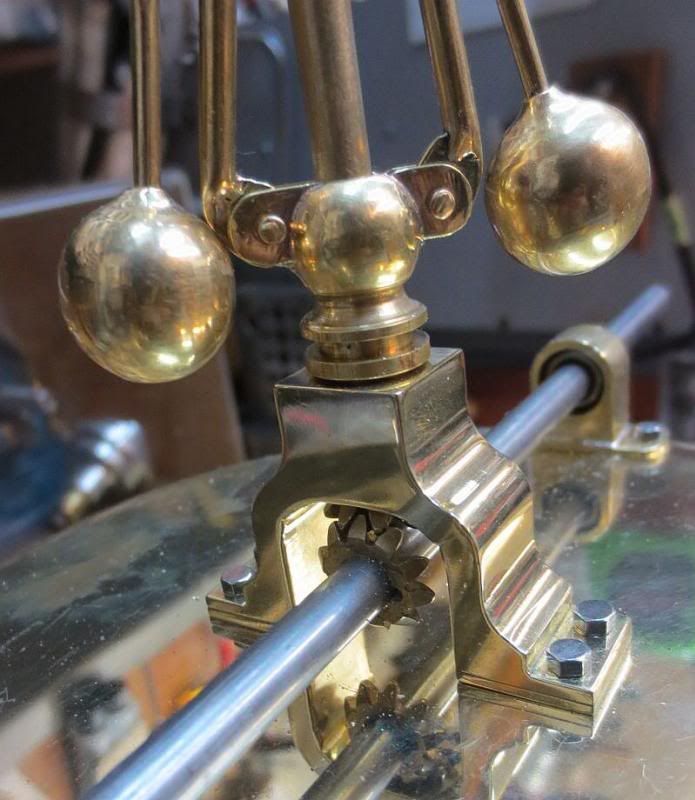
Starting on the fly-ball governor. Using ball turner made from cheap boring head mounted in tool post turn couple brass balls.
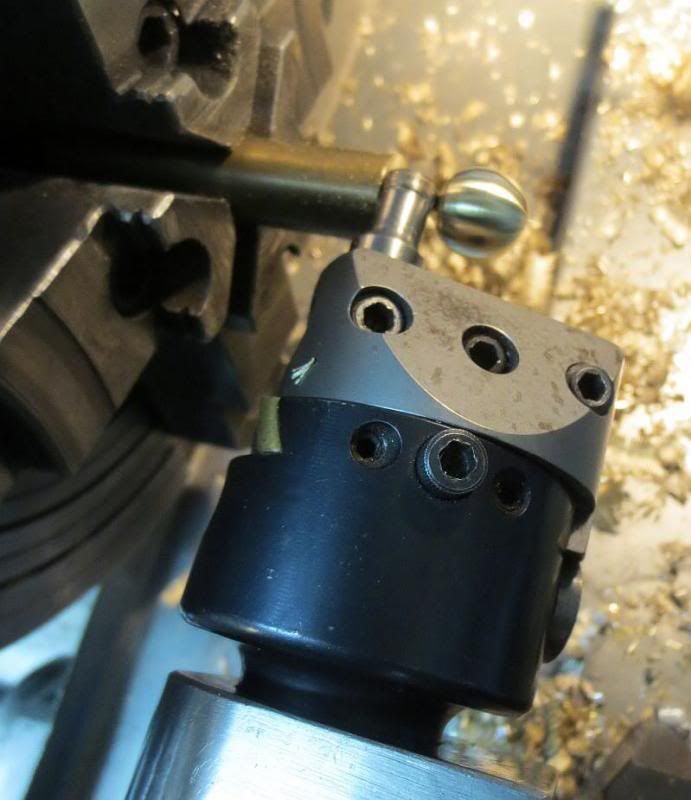
Brass balls are drilled and tapped. The other connections are either silver brazed or riveted.

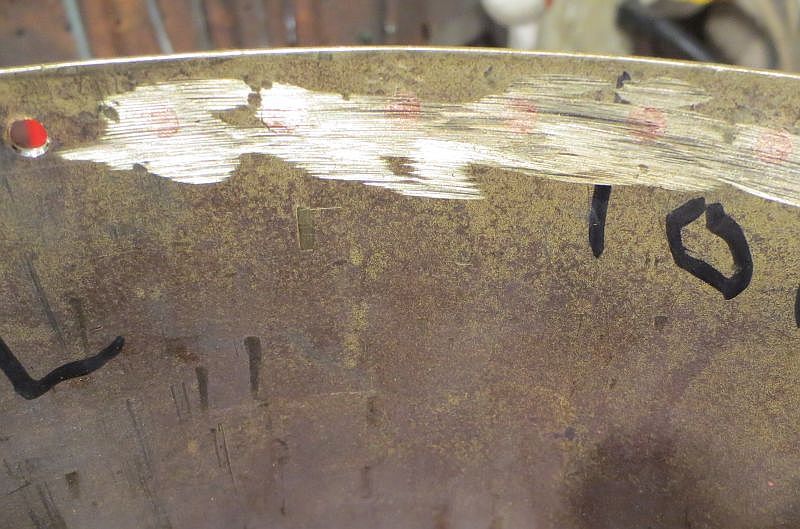
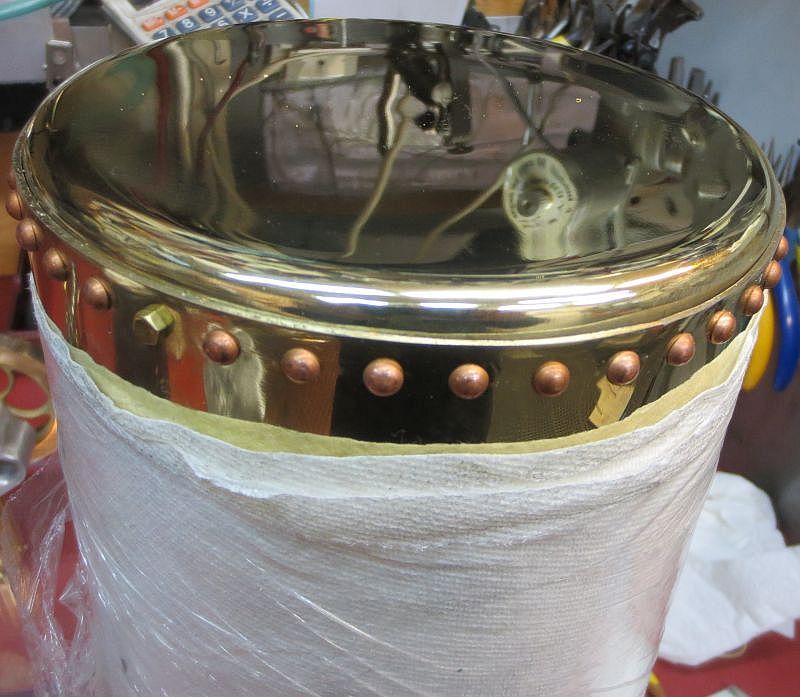
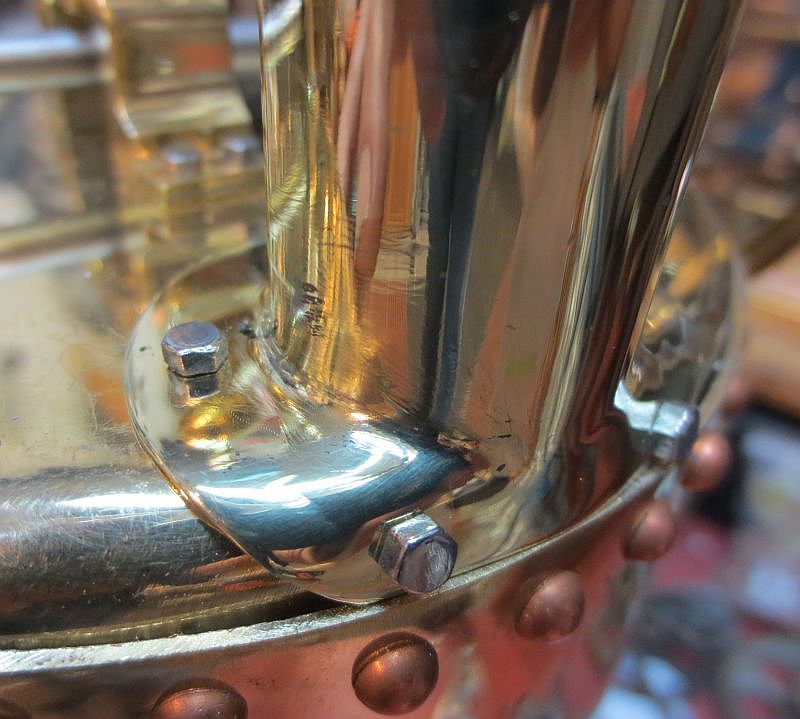
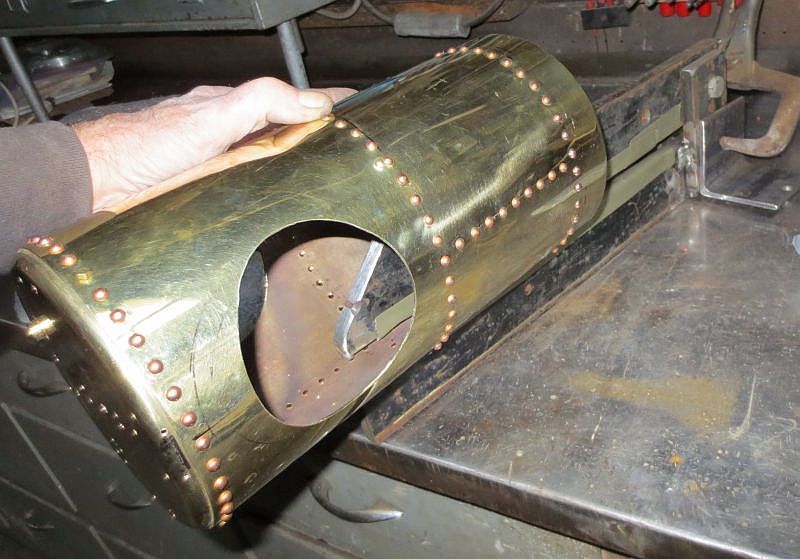
Using a CAD program drew out a evenly spaced row of rivets. Printed it out and used a little white wood glue and glued to top rim of brass "boiler" shell. Using a little high speed drill press to drill the hole centers and then followed with drill for the rivet size.

Studying the picture of the original that am trying to copy it shows 3 bolts evenly spaced between the rivets. So seems that the top could be removed which made sense to me. So the holes were given a little chamfer on inside. Rivets were squeezed a little to hold them in place and then ground flush on the inside. Three of the holes were drilled and tapped for bolts to do the actual holding of the top on.
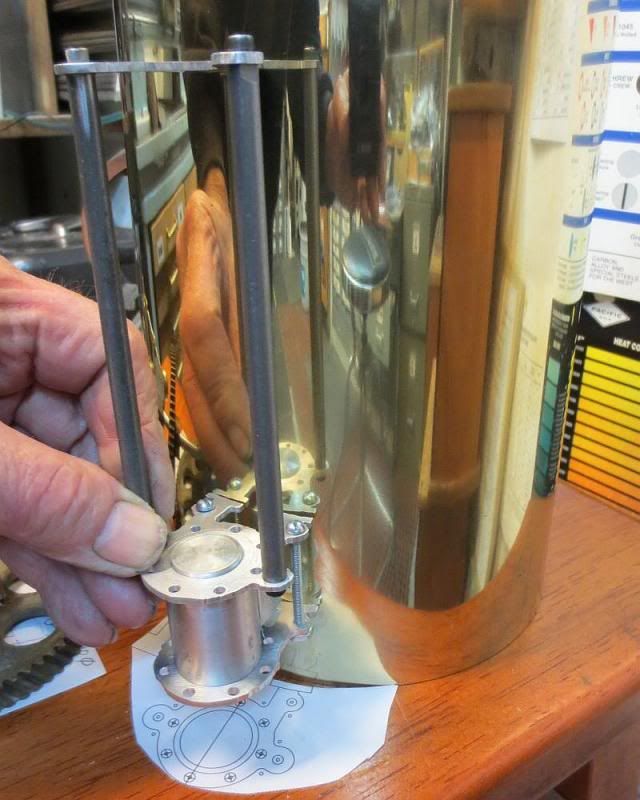
Make up a dummy steam cylinder to get a feel of sizes and ideas how to go about getting started on making the steam engine.
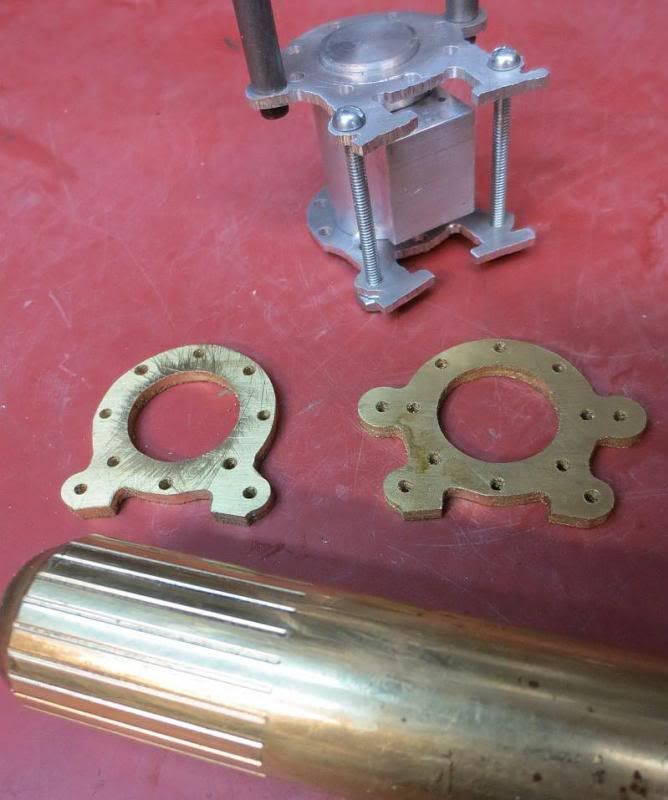
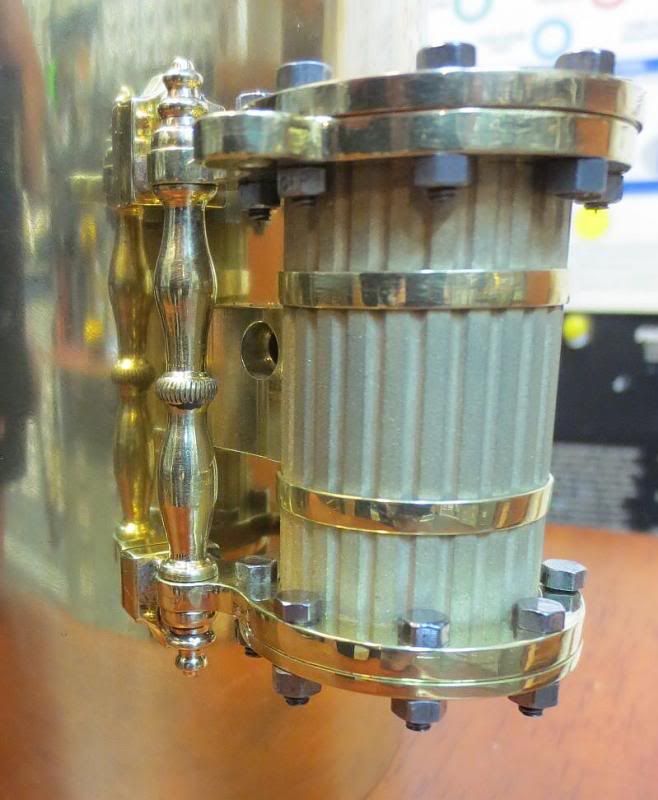
Had some 1" brass rod so that determines outside size of steam engine. Flute the brass and make top and bottom parts.
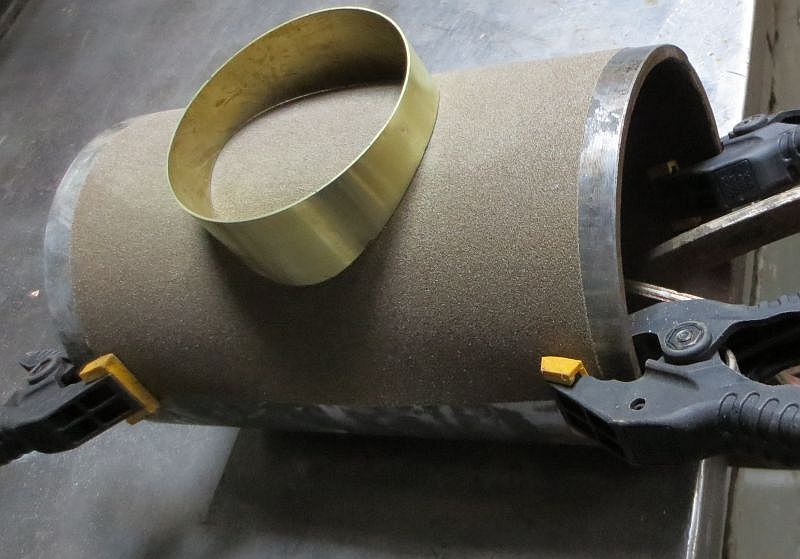
Bead blast lagging and make couple of brass bands, polish and force on. A little screw up, to mount the engine to the boiler shell the engine has to be taken apart to get access to the mounting screws. Oh well, going to live with that.
I liked the simple cross head and for this application it seems to be working good.
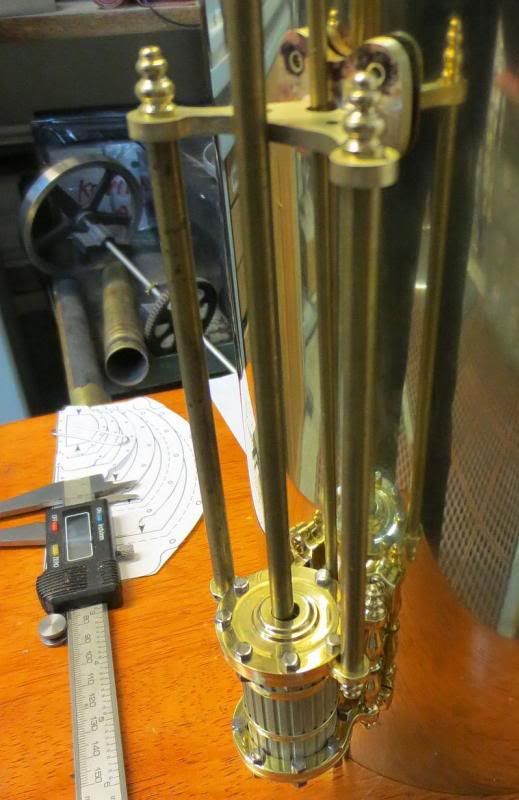
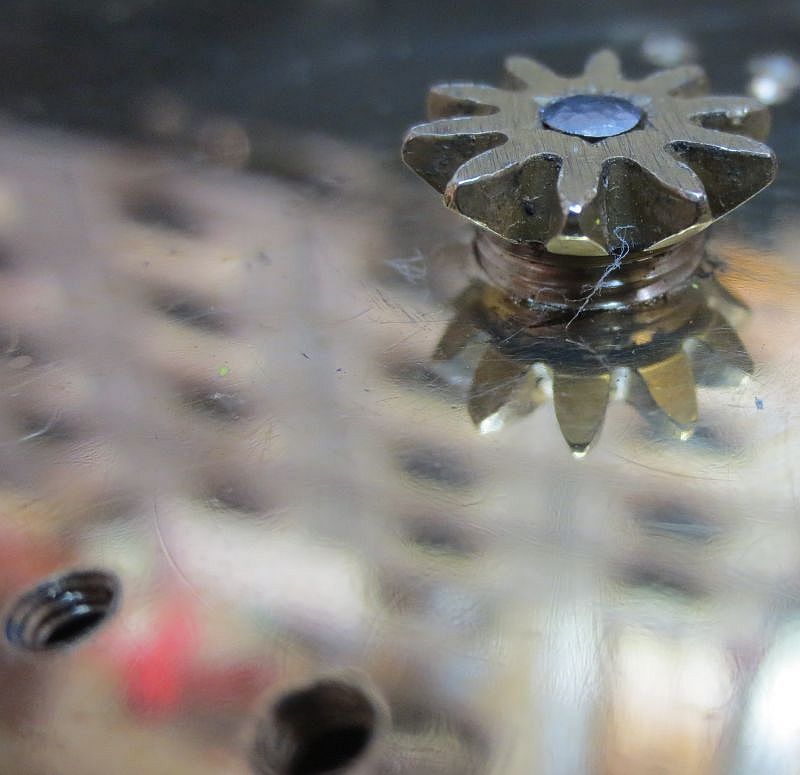
Bearing holders for crankshaft have needle bearing inserts. Gear to drive governor on crankshaft and roughed out stand for crankshaft.
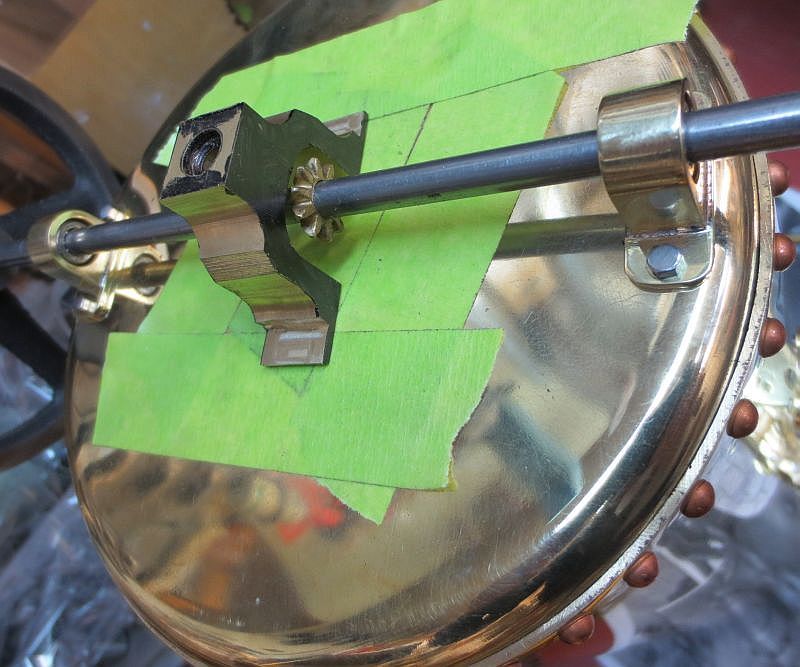
governor mount and gear installed.
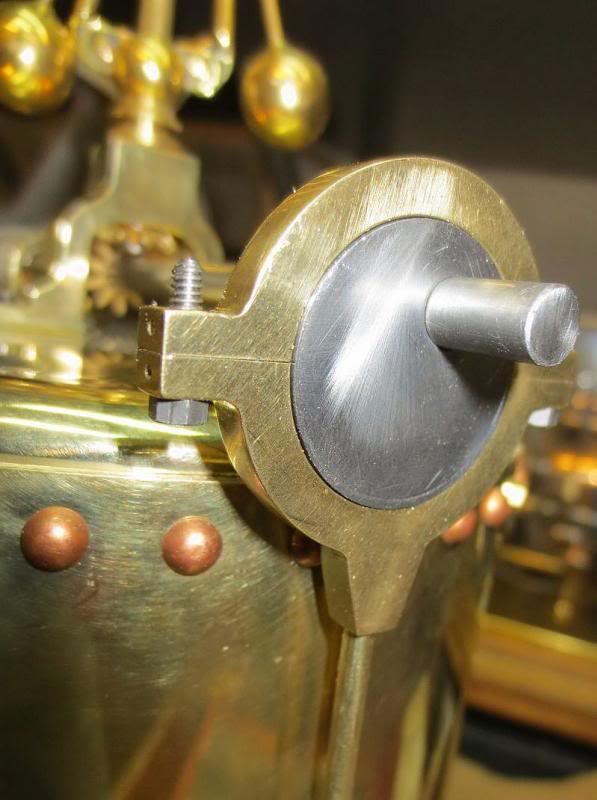
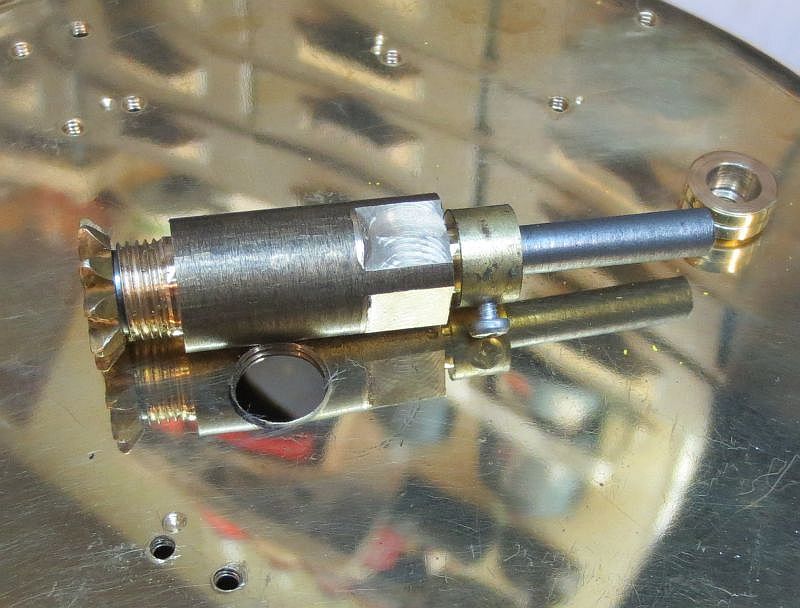
Turning groove inside eccentric strap.
Eccentric with strap for valve installed. Dang threaded wrong half, will have to put nuts on to make look little better.
Better shot of the engine
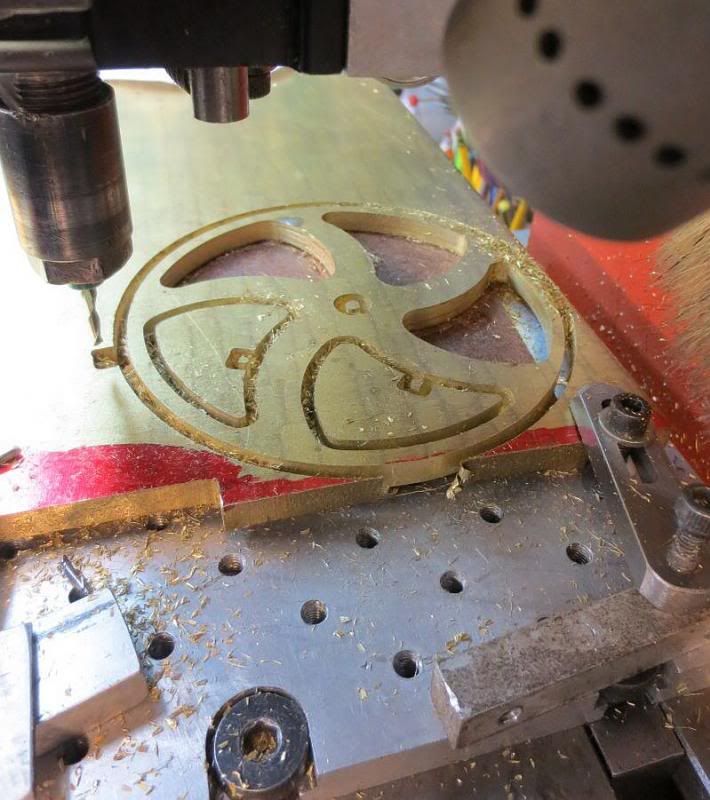
Blank for flywheel cut out of 1/4" brass on little cnc.
Roughing off corners

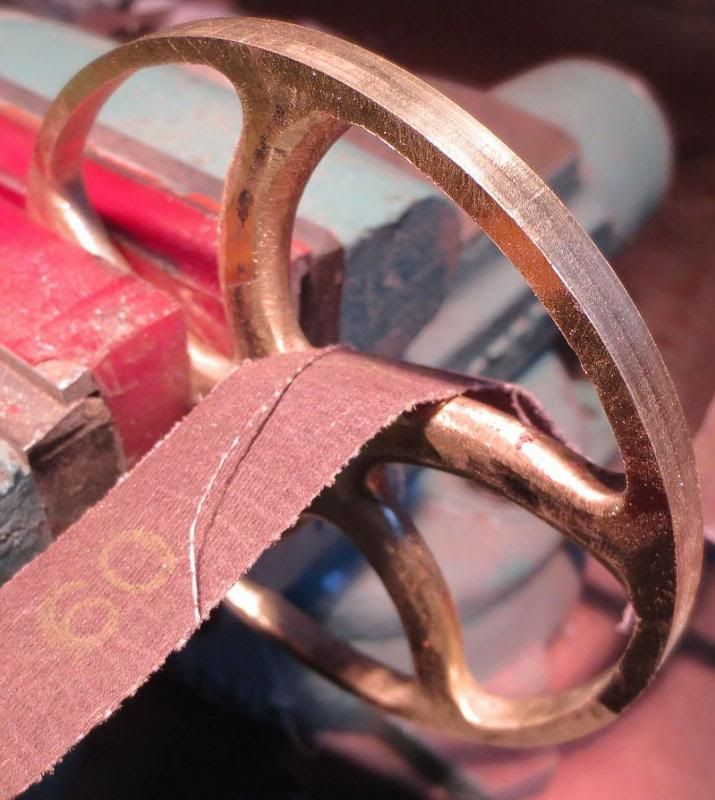
Sanding, shoe polish style
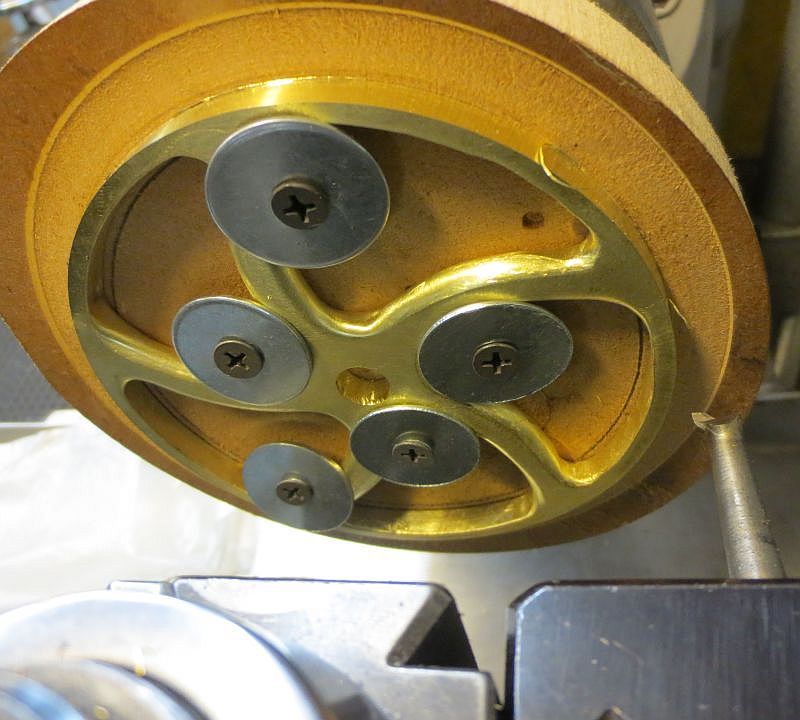
Boring out center for hub and truing up OD.
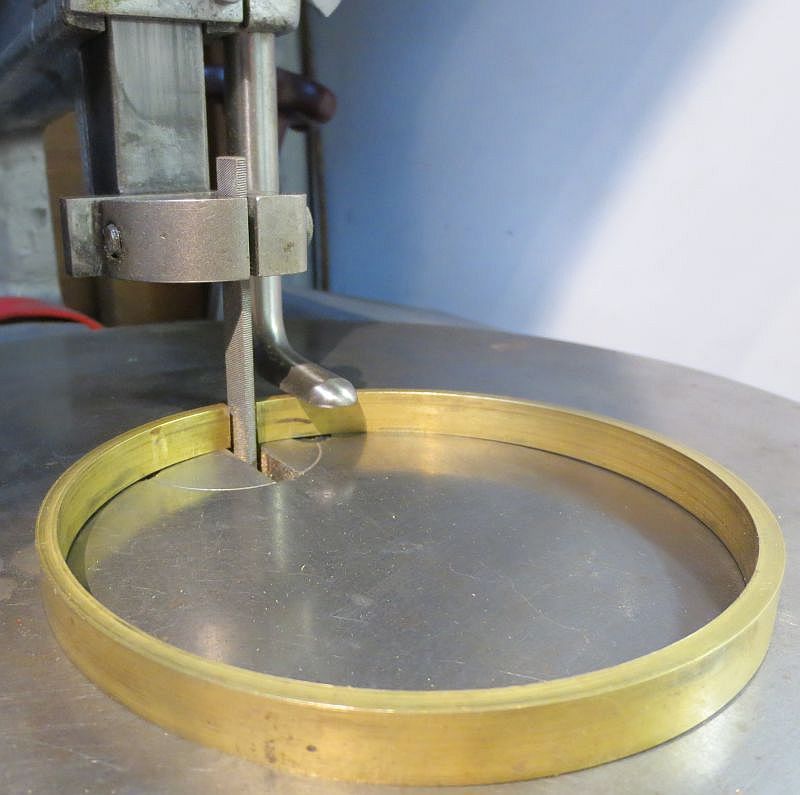
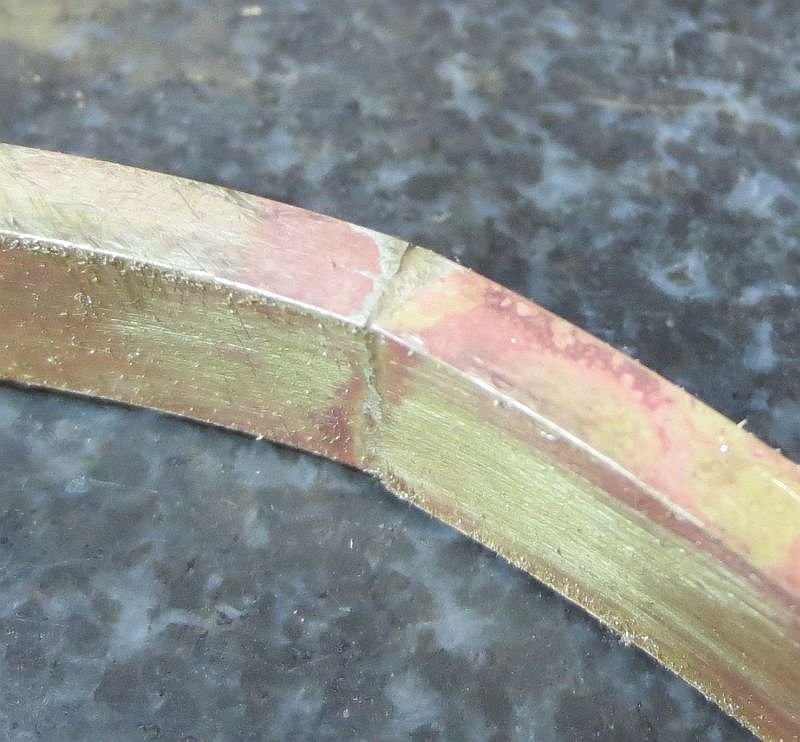
Roll brass for flywheel rim and file for length and good butt joint.
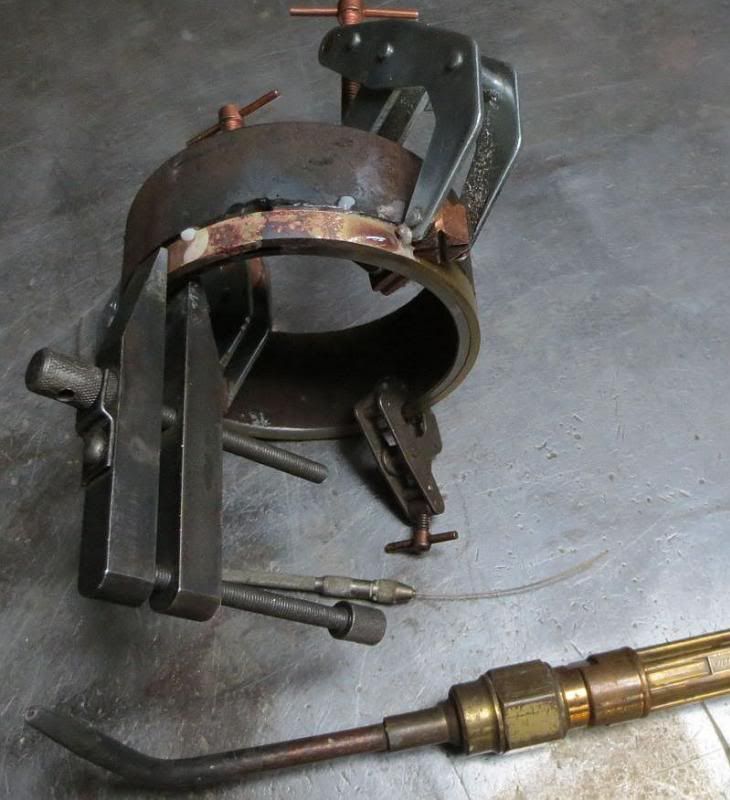
Turned some pipe to hold rim while silver brazing.
Silver brazed butt joint.
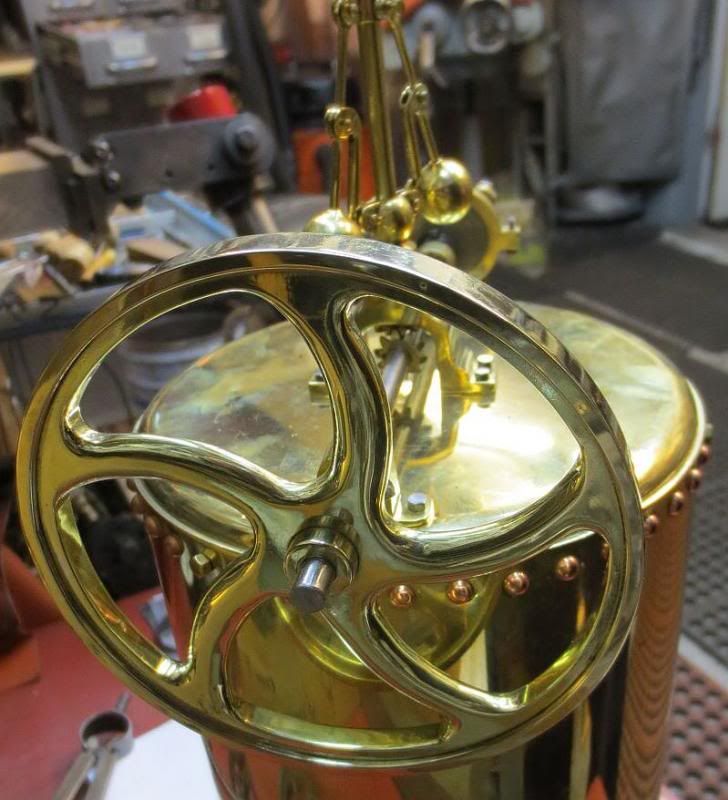
finished flywheel
Hammer formed piece of brass tubing for flange on chimney.
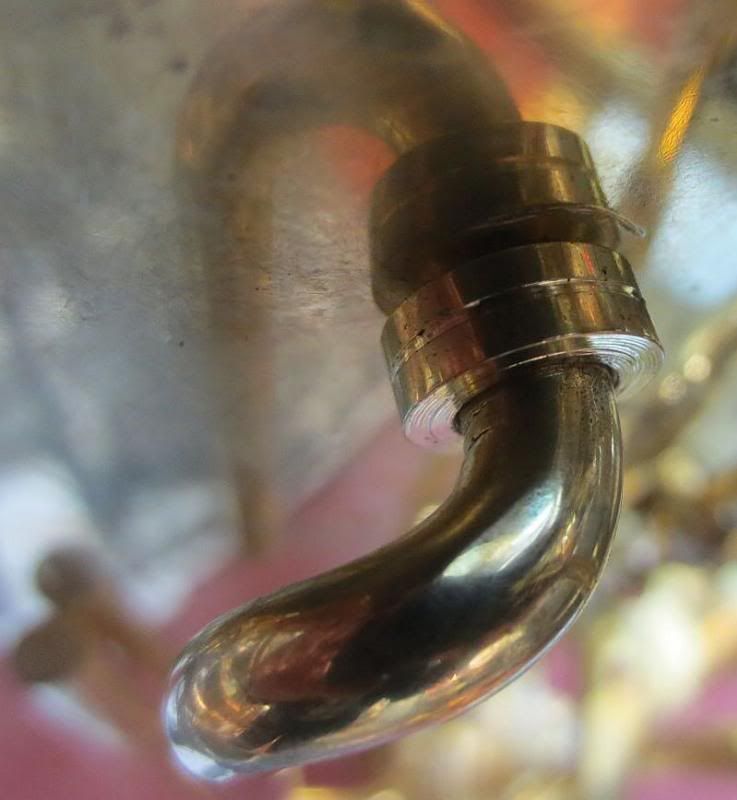
Bushing for connecting plumbing to boiler shell.
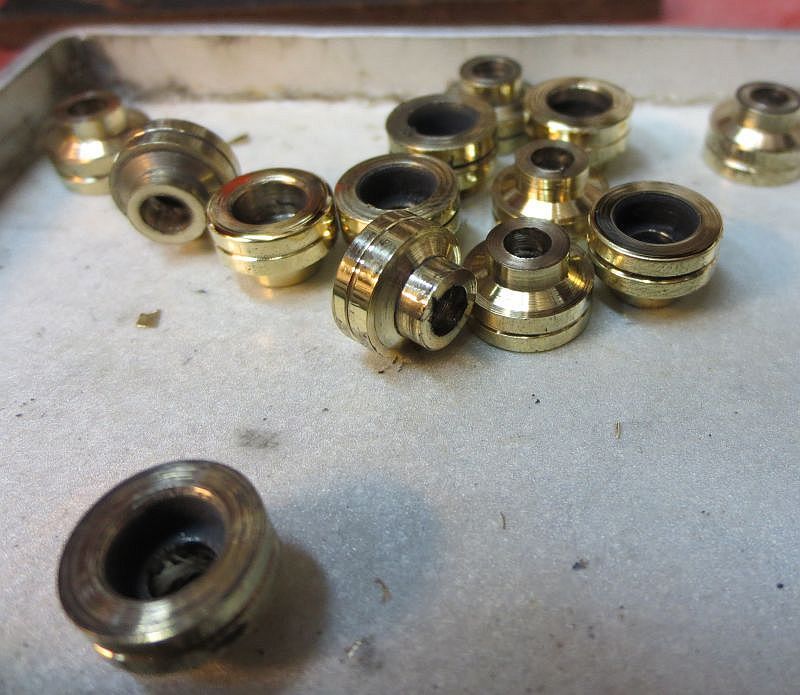
Pipe connection to boiler. Bushing is tapped and screw from inside boiler screws into bushing to hold it. Pipe can be held in by light press fit and Loctite or a few are threaded into boiler if that works.
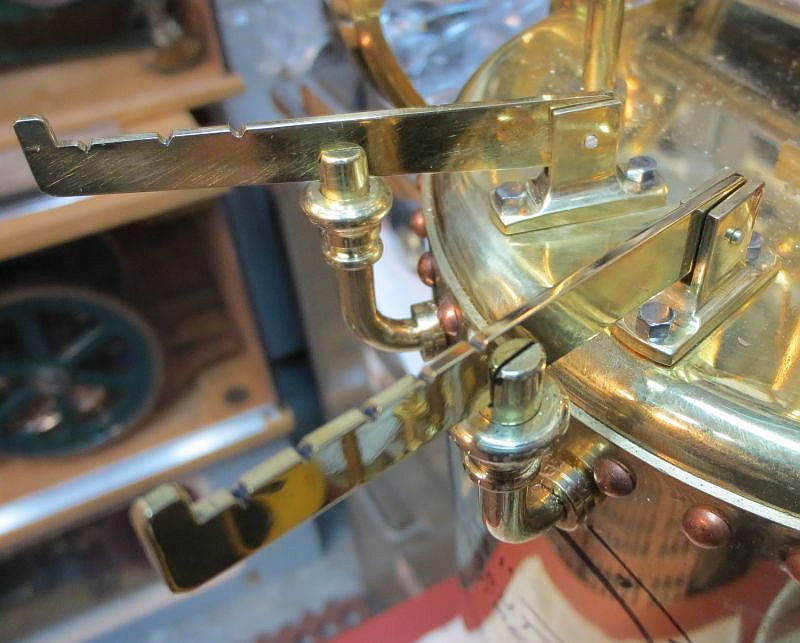
Pair of safety valves.
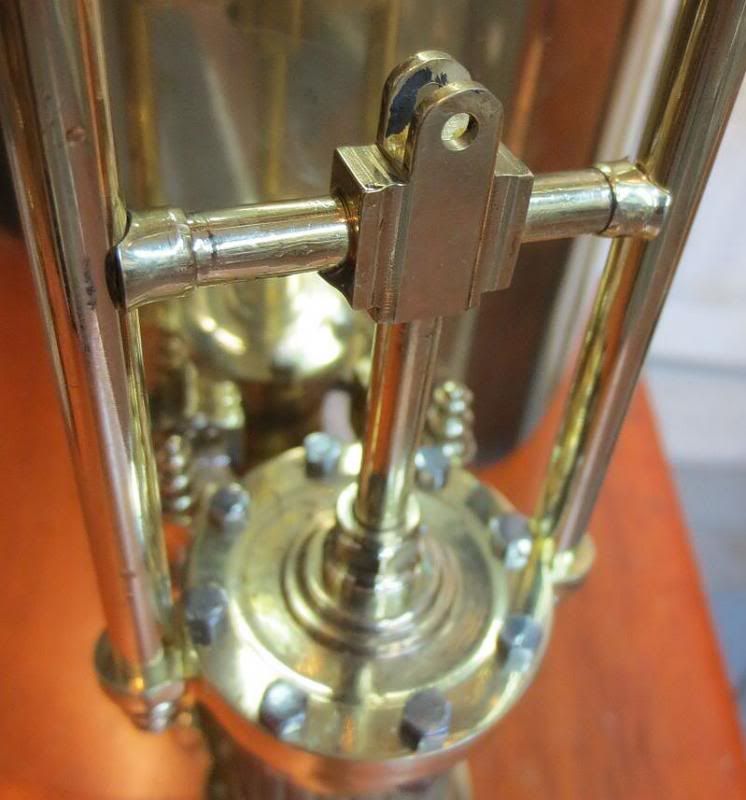
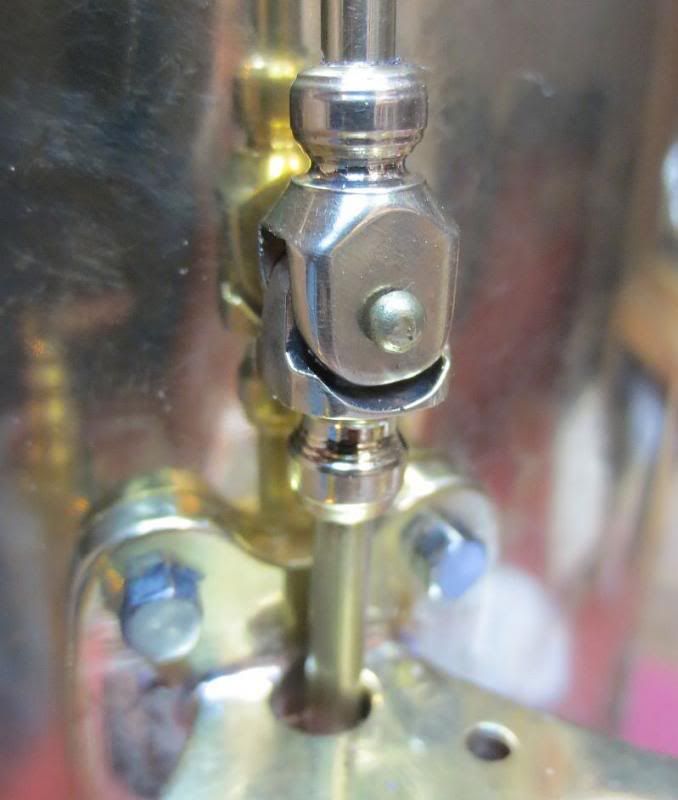
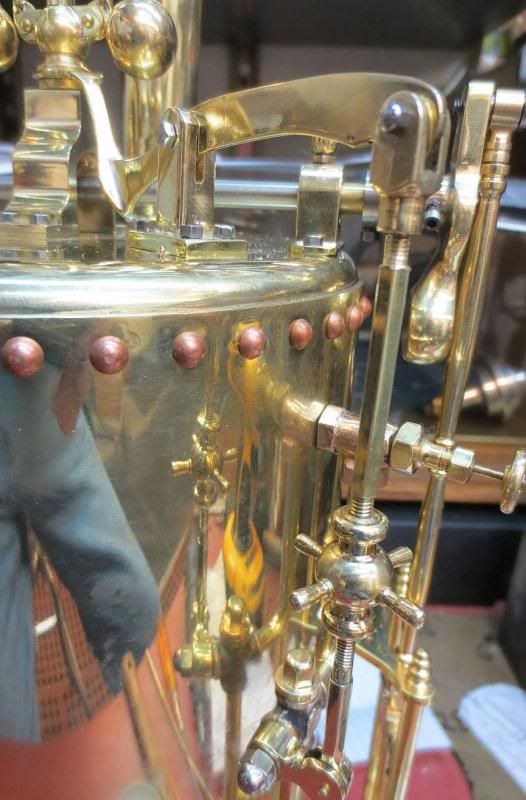
Governor linkage.

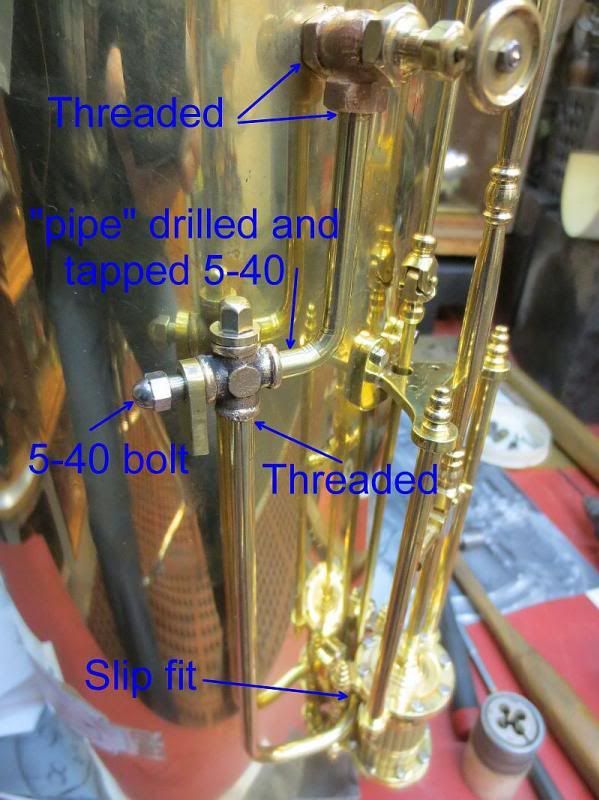
Turnbuckle for adjusting governor linkage to steam control valve.
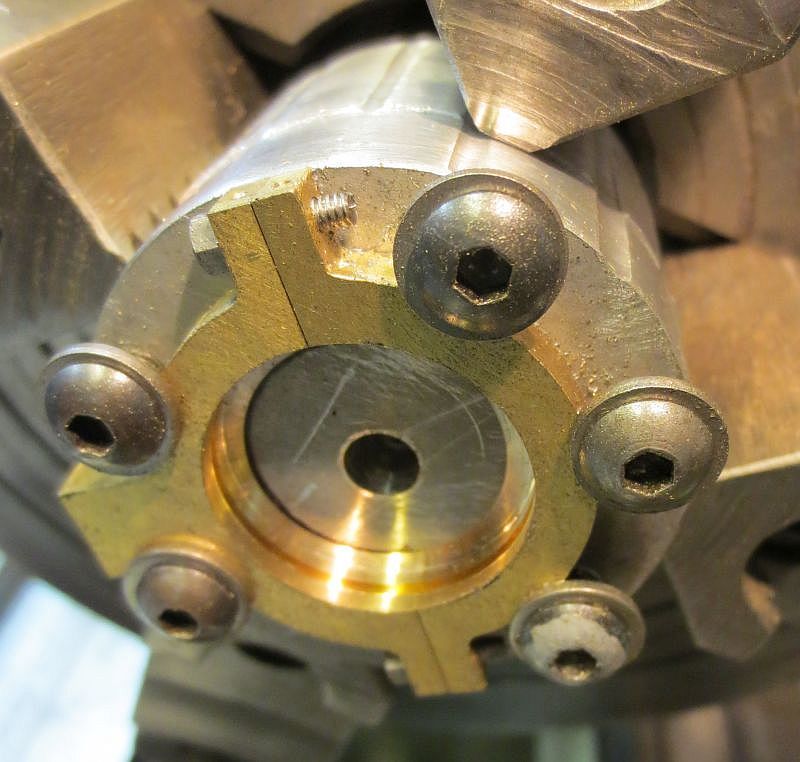
Bronze bushing that will screw in top from the bottom. This gear will drive the crankshaft and the gear on the crankshaft will drive the governor.
Drive gear installed in boiler top.
Paper rivet pattern glued to boiler shell and holes drilled ready for rivets. All these rivets are just for show.
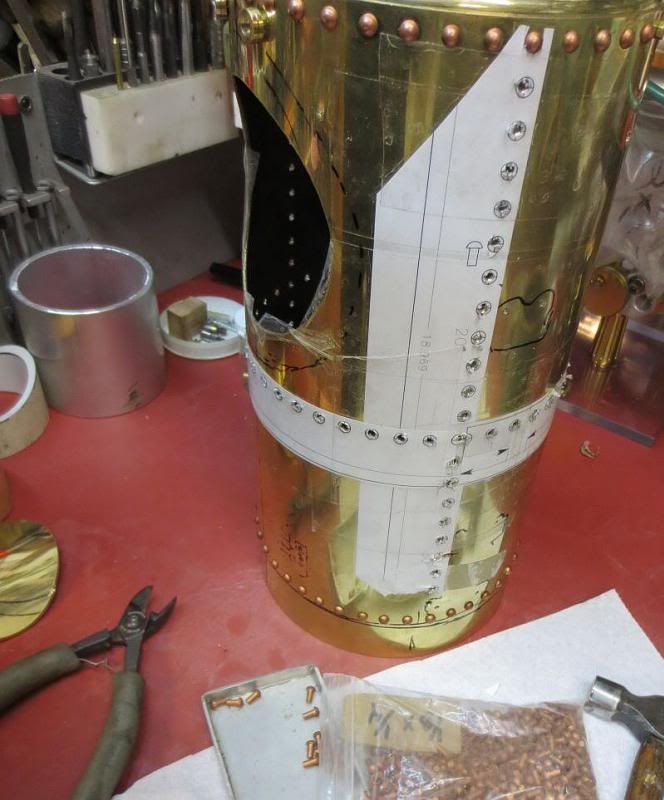
Some 1/2" thick flat bar with insert dies and pivot at back for setting rivets deep inside. Hammering flat bar on outside to set the rivet inside the tube. Lesson learned several light taps is much better then heavy blows as the brass is in annealed state and easy to ding up.
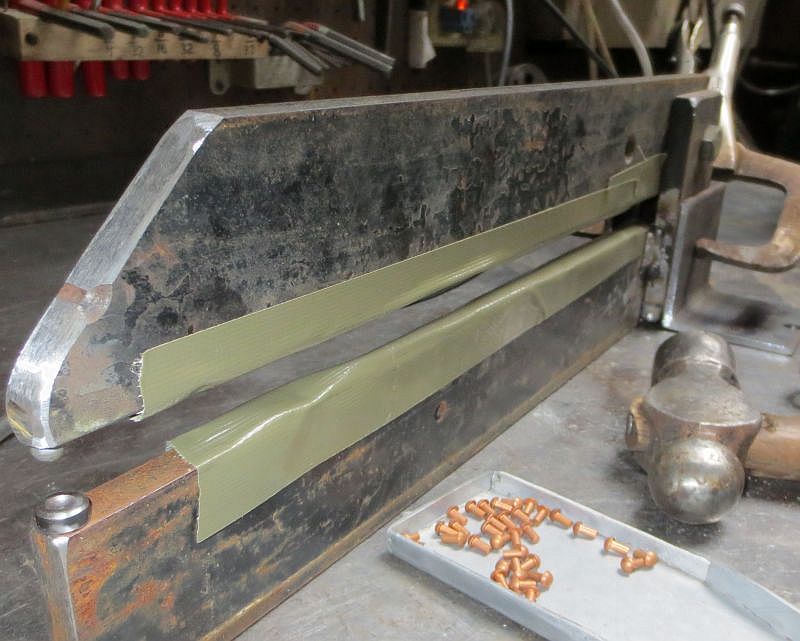
Drawn up on the computer, printed out and pasted to brass sheet was pattern with fish mouth cutout for cross tube that will hold the clock face. This was then rolled and made ready for silver brazing.
A piece of pipe the right diameter had sandpaper taped to it and the fishmouth was sanded for a good fit with the flange that will be silver brazed to it.
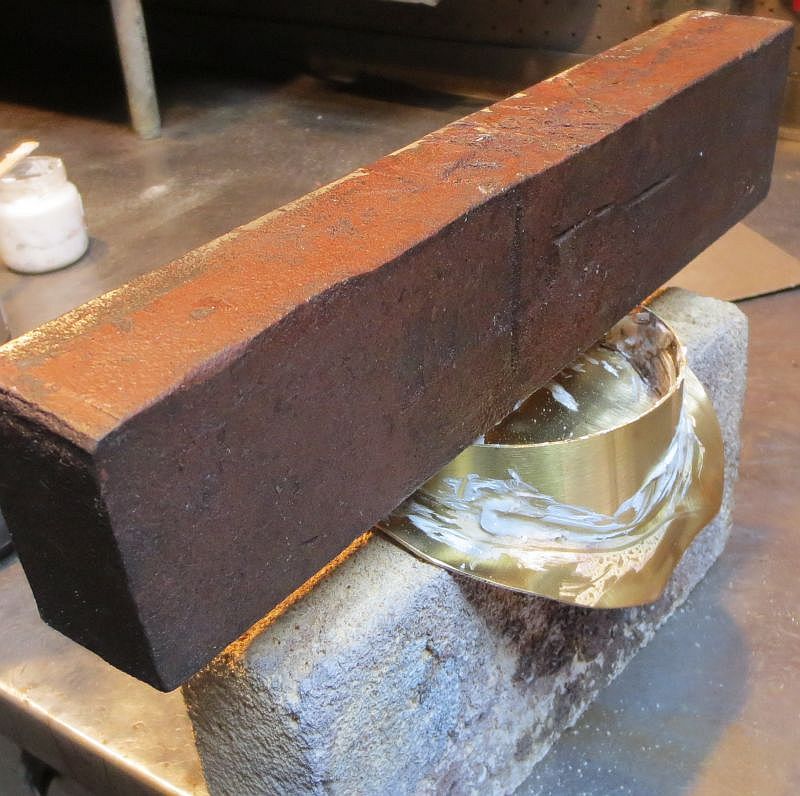
A piece of brass was cut oversize without a hole in the center. This was rolled for a good fit to diameter of boiler shell. Laid on a soft fire brick with heavy weight on top in prep for silver brazing.
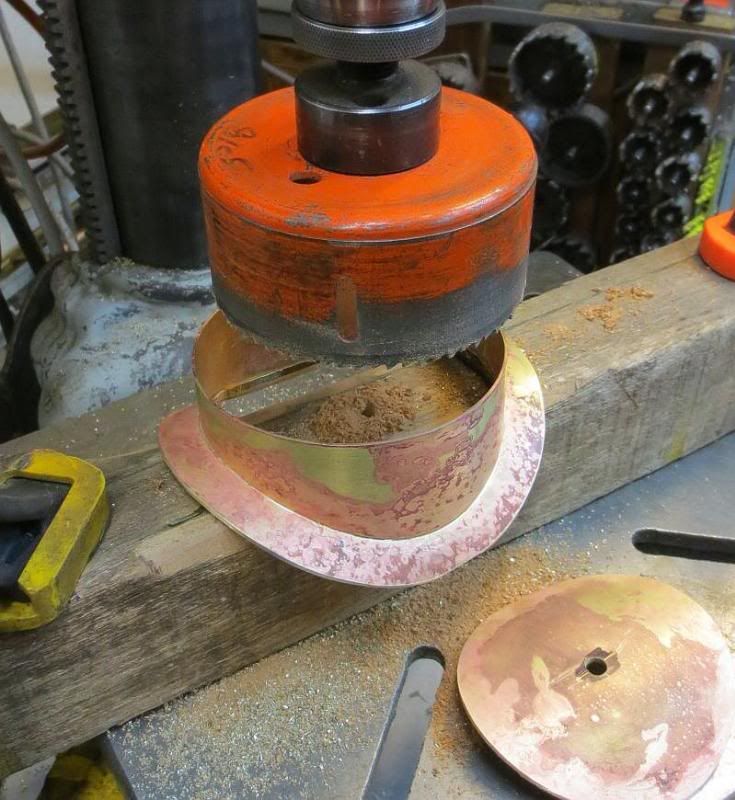
After brazing and pickling the center was cut out with hole saw.
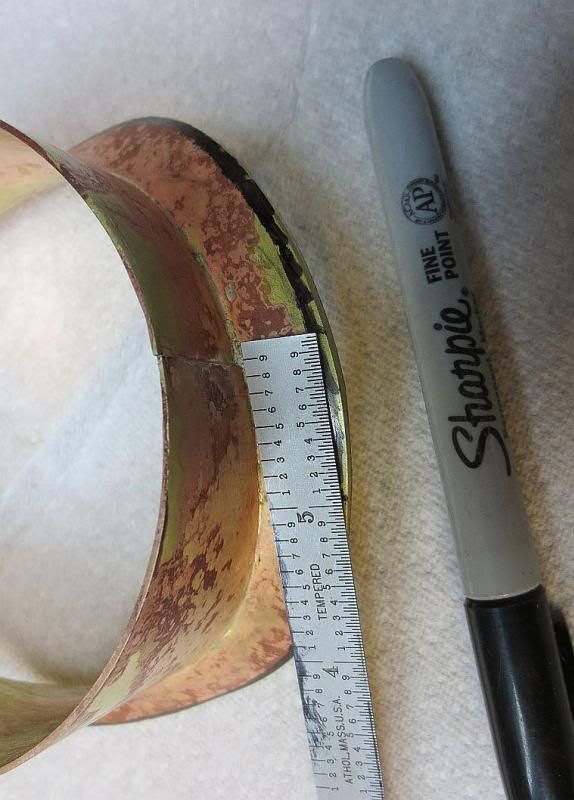
The outside of the flange was laid out for grinding, used rule for marking the width.
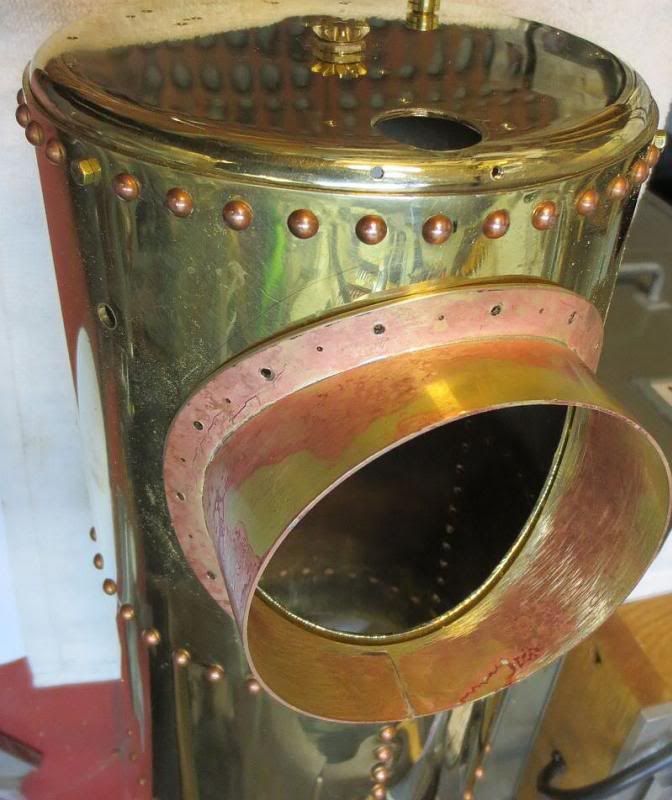
Checking fit of cross tube for clock.
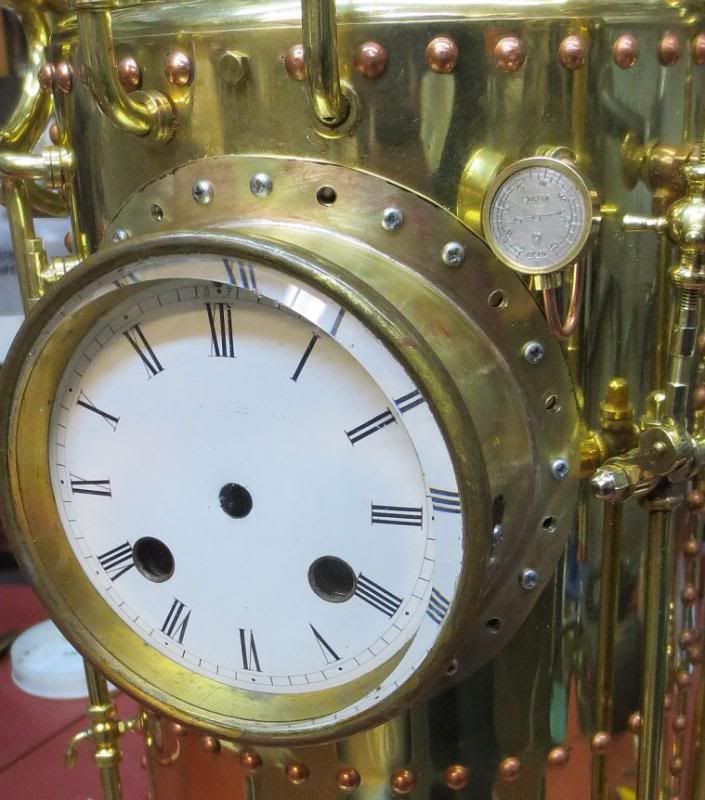
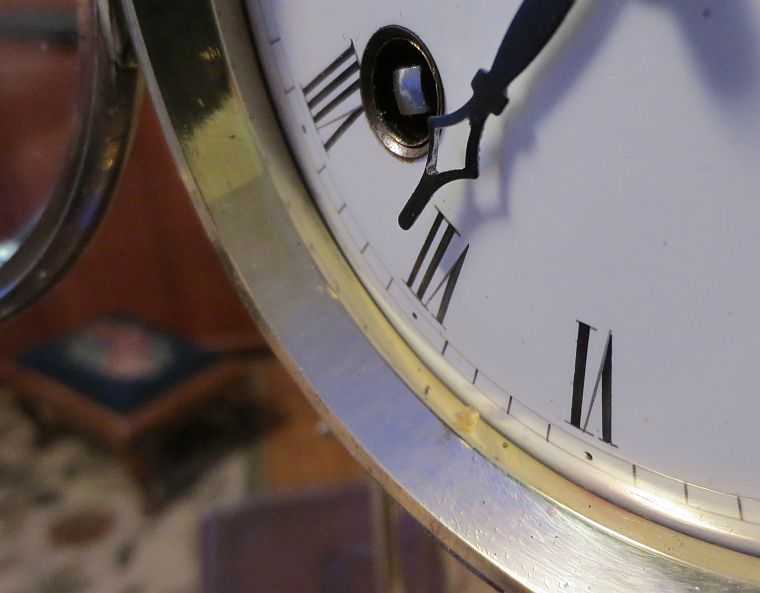
First every other hole was drilled and tapped with 2-56 screws to get good tight fit. Clock face and glass hinged door were an Ebay purchase. Clock face in place for checking fit.
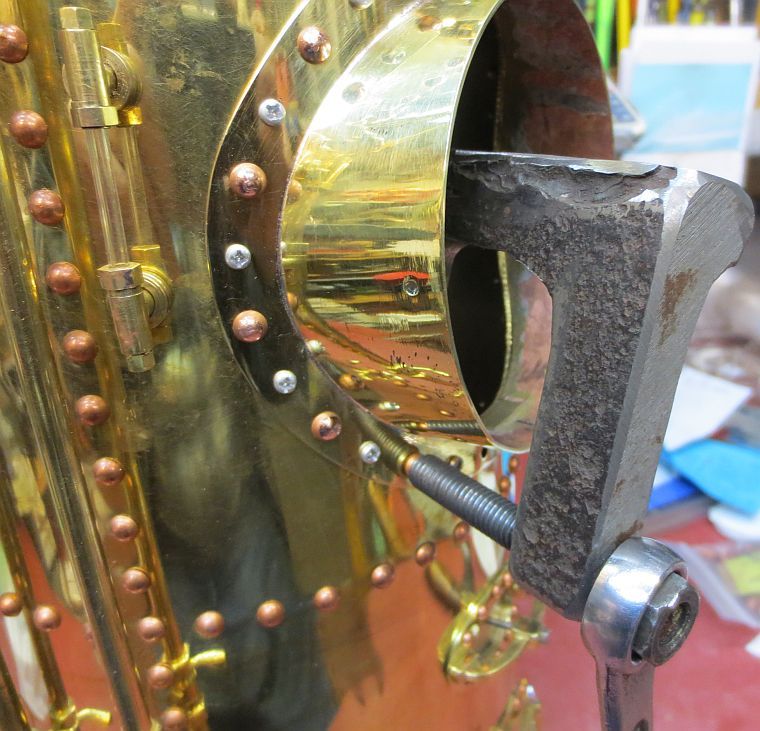
The holes in between the screws were riveted by squeezing with C-clamp and then the screws were removed and those riveted.
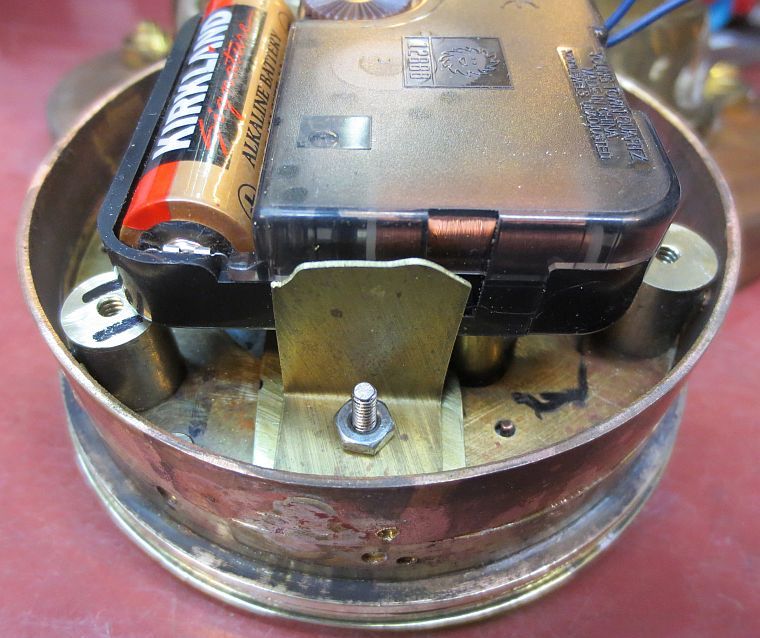
Guess it should be a crime but put a cheap quartz battery operated clock in. It sure would of been nice to have an old mechanical clock but they were out of price range and needing repair.
Fake key wind posts installed and a spacer ring had to be made as wasn't enough room for dial post when glass door was closed.
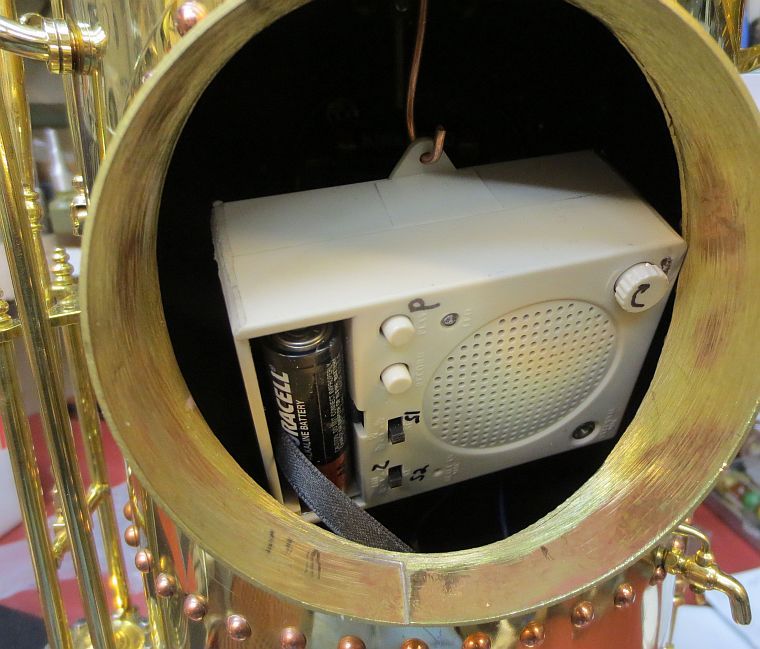
In the back cross tube is access to speaker for the clock. This has a 10 second record message that can be played on the hour. Have found some steam engine sounds on internet for download but haven't found cord yet that will fit the input jack on recorder yet. So it plays the Westminister Chimes now.
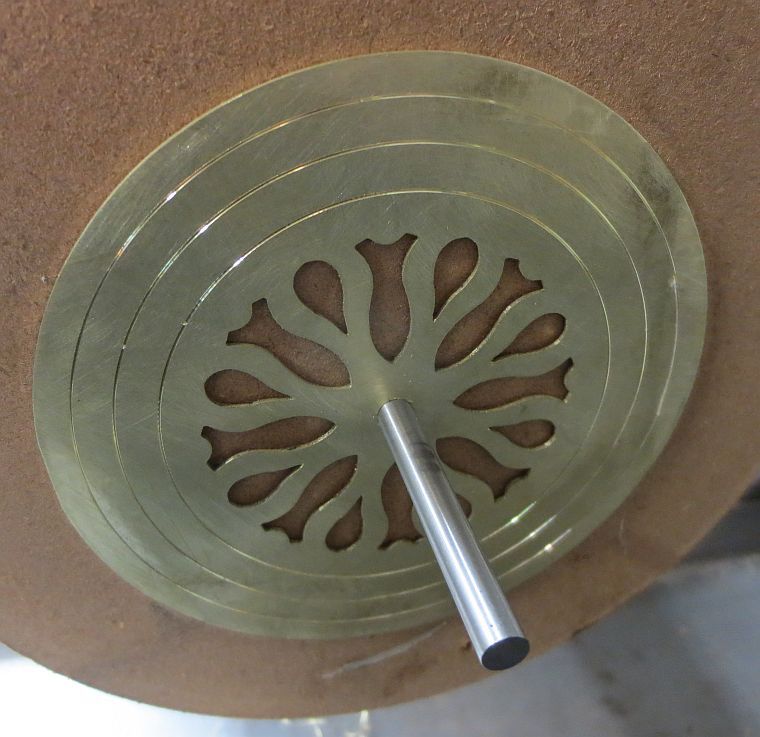
Door panel for back door cnced out and centered on wood face plate and held on with some clear packing tape for make some circular grooves.
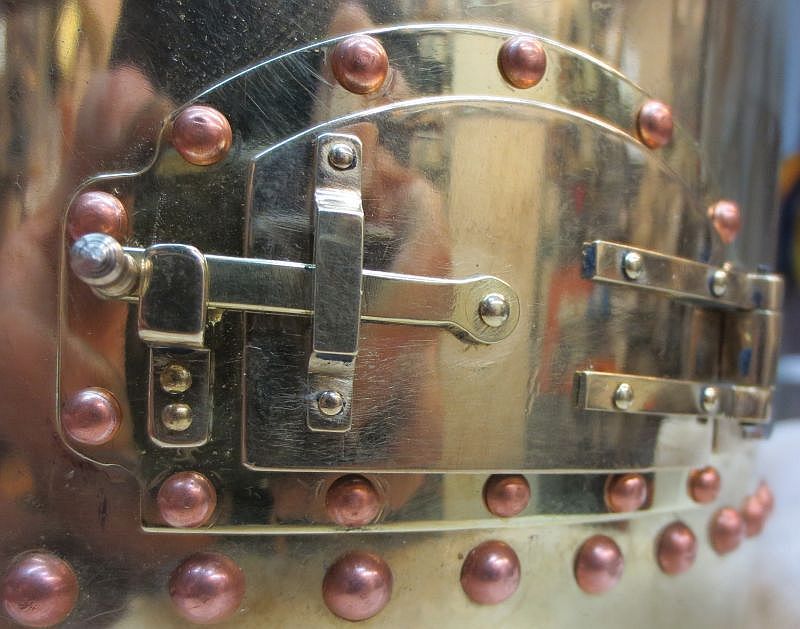
Back "door" in place.
Fire box door. Will be access to wind spring motor.
Lucky find in my scrap brass was this large cast brass casting that looked like some kind of pipe adapter. Clamped to mill table and with slitting saw went around from the inside to cut in two. First had set up on faceplate in lathe but looked too scary. The mill was a good choice. This will be the base for the boiler shell.

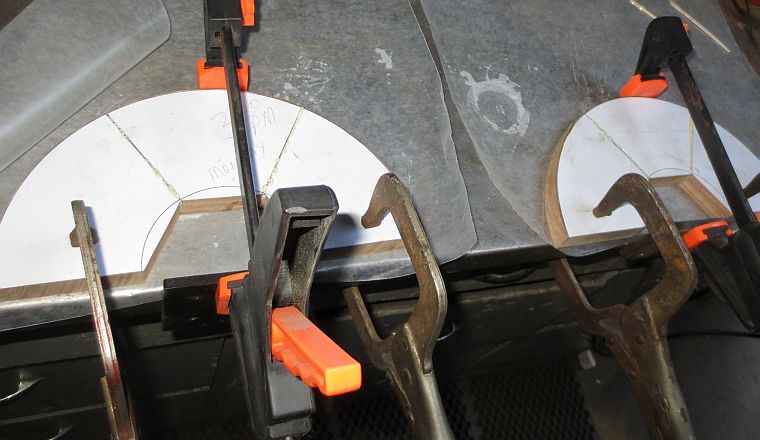
Gluing up some wood segments for base. Using the trick of gluing up in two halves and making the halves match by sanding mating edges straight before gluing to each other.
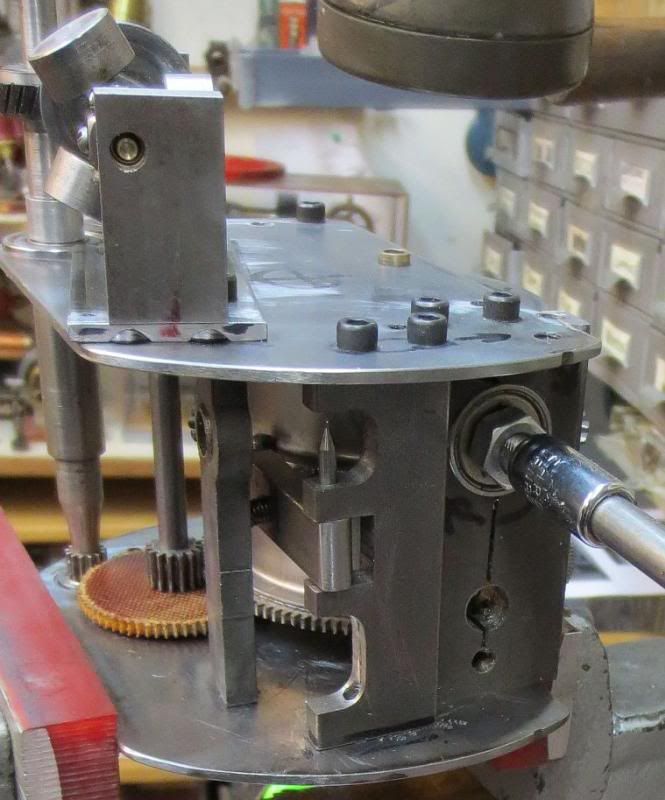
Got off Ebay an old spring motor from old wind up phonograph. Needed some work and rearranging of parts to make fit inside the boiler tube. The mystery why the hunk of wood was wired in was because the gears for the governor were stripped and the wood was a brake to slow the speed down. Luckily there is You Tube videos on how to take apart, clean and re-grease the two 14 foot clock springs.
All the shaft bearings had been steel shaft in steel hole. Bored out the holes and put in ball bearings. Had to make two replacement gears. Too make smaller diameter too fit inside the boiler shell the governor was moved on the top and the wrap spring one way clutch was replaced with a ratchet pawl so input windup shaft could be shortened.
Spring motor installed inside base. The belt drive was used to move the output shaft to the center to be in alignment for shaft to drive the crankshaft.
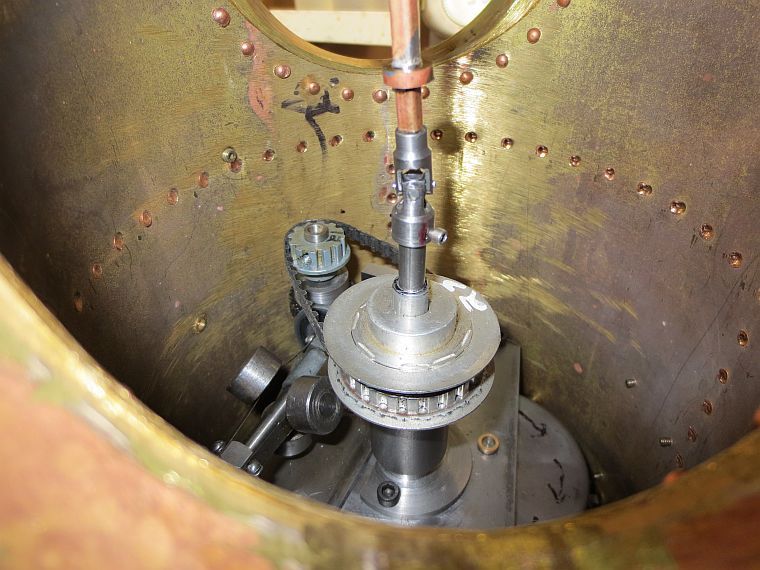
To be able to connect the spring motor to the works on the top a square drive shaft was used with spring loaded brass sliding brass tube. That way can reach in one of the cross tubes to complete the connection.


