Author Topic: HEMINGWAY DIVIDING ATTACHEMENT  (Read 66968 times)

Offline ths

  • Full Member
  • ****
  • Posts: 1801
  • Kangaroo Valley, NSW, Australia
Re: HEMINGWAY DIVIDING ATTACHEMENT
« Reply #15 on: February 08, 2013, 09:27:39 AM »
Norman, we can, all of us, stand questioning. Isn't it great when the answer is 'yes'?

Looking forward to the next bit, Don,

Cheers, Hugh.

Offline steamer

  • Global Moderator
  • Full Member
  • *****
  • Posts: 12699
  • Central Massachusetts, USA
Re: HEMINGWAY DIVIDING ATTACHEMENT
« Reply #16 on: February 08, 2013, 12:02:30 PM »
Truth and knowlege require questions.   Answers and understanding require respect and patience.

So far I think I see all of the above.  and THAT is always a good thing!  Wot Tel and Jo said! :cheers:

Dave
"Mister M'Andrew, don't you think steam spoils romance at sea?"
Damned ijjit!

Offline swilliams

  • Full Member
  • ****
  • Posts: 896
  • Canberra Australia
Re: HEMINGWAY DIVIDING ATTACHEMENT
« Reply #17 on: February 08, 2013, 12:37:43 PM »
This is very nice Don. I'm sure it will turn out really great.

I'm a big fan of GHT. I think this is one of the coolest accessories for the super 7. The original was actually due to a chap from NZ called J. A. Radford. He also made the original design for the ball turning tool that swung on a spindle with it's axis running parallel to the cross slide travel. All his old Model Engineer articles have been put together in a book call "Improvements and accessories for your lathe" Tee publishing. It's a fun read if you're into building workshop equipment.

I know the design is graduated down to 1/1000 of a degree  (as correctly stated) but that doesn't mean it is accurate to that level. When it comes to this sort of stuff there a three separate things.
1) How finely is it graduated down to?
2) How repeatable is it when you come back to the same setting again?
3) How accurate is it? When you think you move to a setting how close are you to what the dial says?

These questions all have different answers of course. So to really know how accurate it is you need to know the answer to all three. But do you actually need to know? Probably not. I think GHT designed this with the idea that it was graduated more finely than would ever be needed. That way you could divide any number to the actual accuracy of the contraption with a limited number of division plates and no compound indexing. Actually I'm pretty sure he states just that in his book, but its some time since I read it.

Anyway look forward to seeing the rest of your build Don. You must really be nicely kitted out now?

Steve


Offline swilliams

  • Full Member
  • ****
  • Posts: 896
  • Canberra Australia
Re: HEMINGWAY DIVIDING ATTACHMENT
« Reply #18 on: February 08, 2013, 01:34:59 PM »
Sadly we are missing 'what it says on the tin'. True, Jack Radford handed over the drawings to GHT but he( GHT) added the smaller division plates as well as the 'micro adjustment' which does as LBSC would have said 'The Necessary'.

I'd argue that it was Radford's ingenious arrangement of mounting the thing to the lathe that did "The Necessary". Let's not forget that Radford's design did actually work. Was never trying to deny what GHT added to it. But that's all he did, add to Radford's design which was published in ME long before GHT's.

Steve

Offline John S

  • Full Member
  • ****
  • Posts: 141
Re: HEMINGWAY DIVIDING ATTACHEMENT
« Reply #19 on: February 08, 2013, 02:00:39 PM »
I'd sooner take Radford any day over GHT.
Radford was innovative, GHT modified and was more concerned with details.
John Stevenson, Nottingham , England

Offline ScroungerLee

  • Full Member
  • ****
  • Posts: 299
  • Southwest Connecticut, US, North America, Earth
Re: HEMINGWAY DIVIDING ATTACHEMENT
« Reply #20 on: February 08, 2013, 02:11:38 PM »
Sorry if my question was taken the wrong way by anyone.  I was just asking for clarification to educate myself since I am ignorant :)

Lee
Mmmmm.... Shiny!

Offline Chris J

  • Full Member
  • ****
  • Posts: 233
  • Great Yarmouth - England
Re: HEMINGWAY DIVIDING ATTACHEMENT
« Reply #21 on: February 08, 2013, 02:19:43 PM »
Sorry if my question was taken the wrong way by anyone.  I was just asking for clarification to educate myself since I am ignorant :)

Lee

Trying to educate yourself and being ignorant, hmm, you are not alone Lee  ;)
Don't believe everything you read on the internet - Abraham Lincoln.

Offline steamer

  • Global Moderator
  • Full Member
  • *****
  • Posts: 12699
  • Central Massachusetts, USA
Re: HEMINGWAY DIVIDING ATTACHEMENT
« Reply #22 on: February 08, 2013, 03:41:13 PM »
I don't see anything wrong with any of this.....everything is fine......who's to say we don't figuire an even better way to make this attachement?.....

Dave
"Mister M'Andrew, don't you think steam spoils romance at sea?"
Damned ijjit!

Offline tvoght

  • Full Member
  • ****
  • Posts: 1003
  • Indiana
Re: HEMINGWAY DIVIDING ATTACHEMENT
« Reply #23 on: February 08, 2013, 03:42:19 PM »
Interesting build Don, I'm watching.

--Tim

Offline Don1966

  • Full Member
  • *****
  • Posts: 6817
  • Columbia, MS
Re: HEMINGWAY DIVIDING ATTACHEMENT
« Reply #24 on: February 08, 2013, 06:30:35 PM »
I gather every one is enjoying them self here. I am glad you are having discussions over this. I for one fine no problem with the design and it is what it is. Of coarse I will never use that accurate of a setup but who knows.

Lee there was nothing wrong with your question. I just had to get my facts straight.

STEVE, G.H. also had a mishap when he was making the modification to Radfords design. He miss drilled holes in a dividing plate by mistake. And after he had calculated the error out it was very small and not of any concern. The error in this type of set up even if you make one will not show itself unless you make a big one

Thanks all for you inputs and lets keep it simple here please?

Don

Offline Don1966

  • Full Member
  • *****
  • Posts: 6817
  • Columbia, MS
Re: HEMINGWAY DIVIDING ATTACHEMENT
« Reply #25 on: February 08, 2013, 10:50:13 PM »
Today I did get some shop time in and even though I didn't make that much headway I will post what I have. Aside from making some nuts and starting to mill the bearing blocks I did get the detent plunger all made up and the indexing arm and acorn nut.
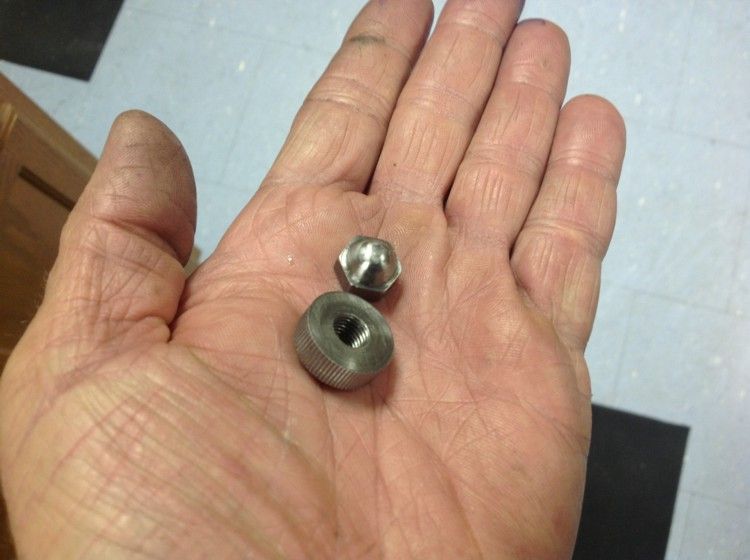
This photo is the odds and end pieces for the swinging latching Bar. The adjustment nut, latch nut, and rocker washer.

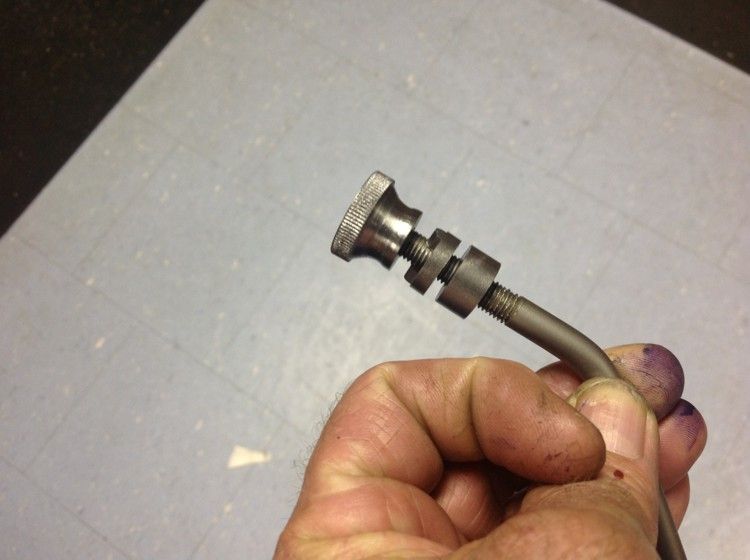
The Acorn nut and knurl adjustment screw

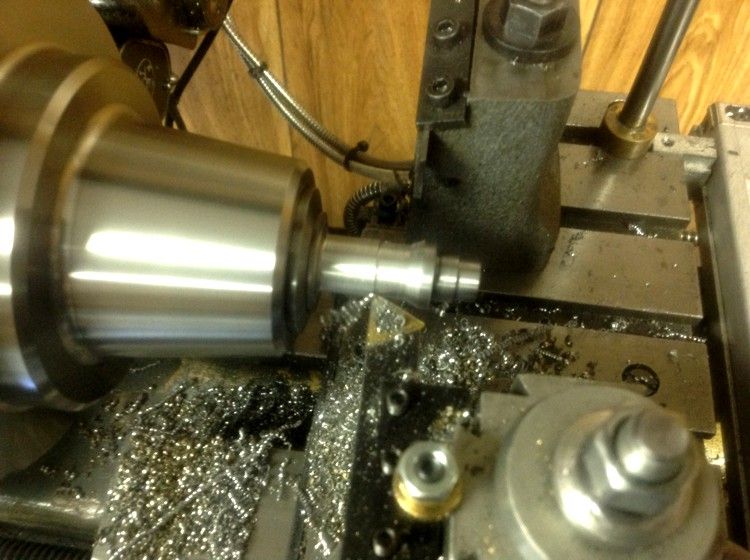
I started the Plunger sleeve by first cutting it down to size then cutting the 1/2x56 threads on the lathe. I removed the collet chuck from the lathe and mounted it on the RT on the mill and cut the 3/32" groove and offset plus the two flats.

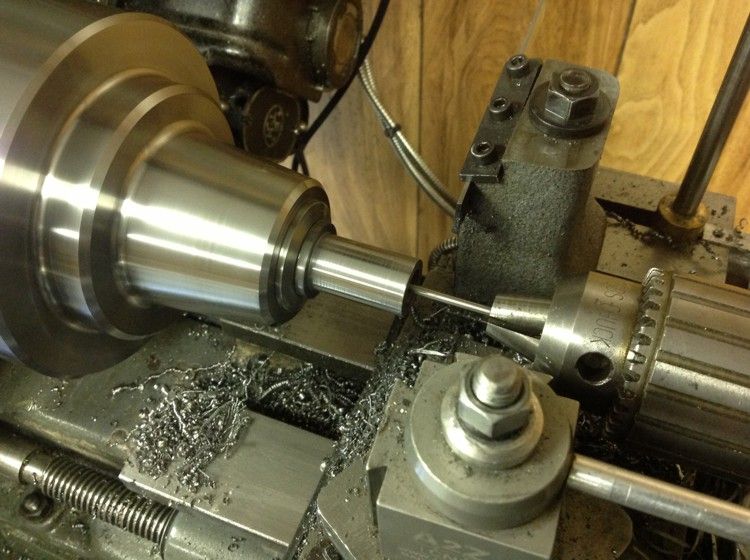
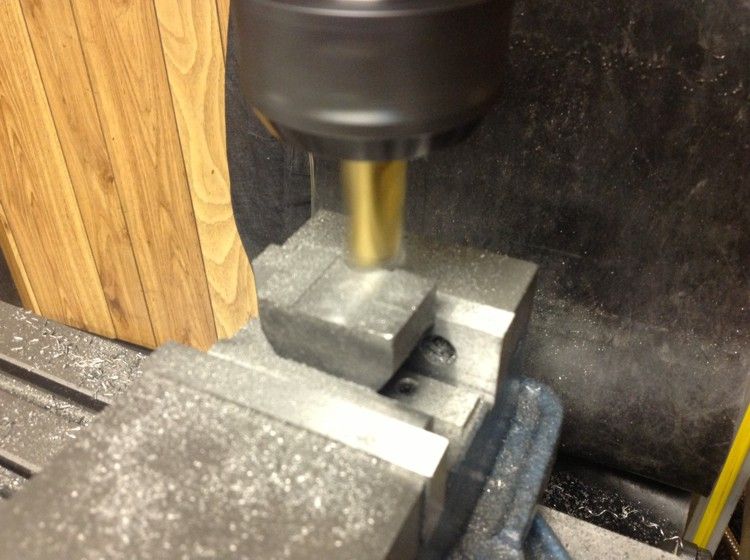
Next I made the plunger knob  by turning to size in the lathe cut the two grooves and drill the center to depth and finish with 1/8" drill bit straight through.

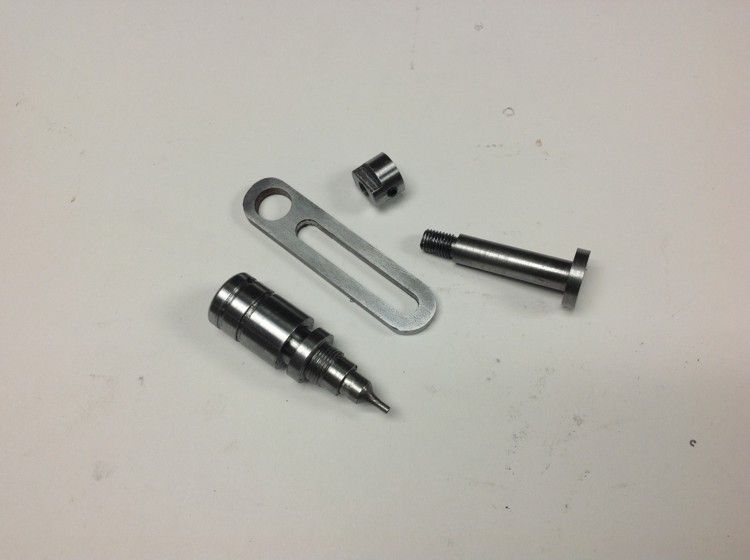
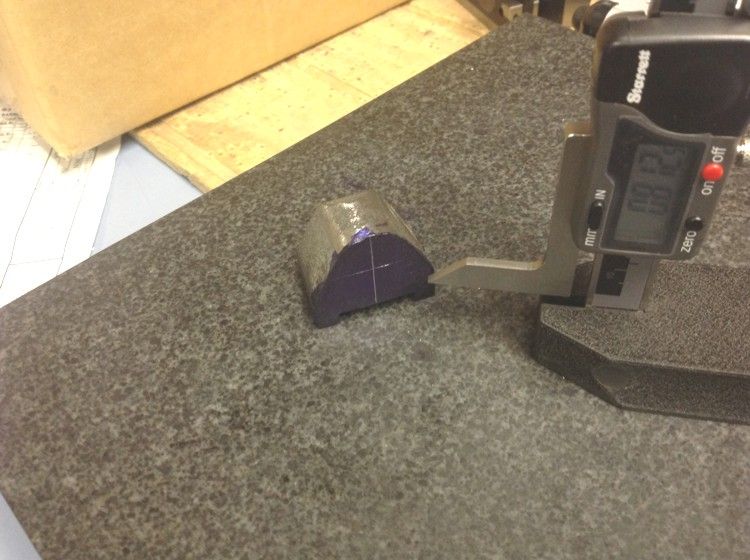
I didn't get a shot of the plunger being made it was just straight turning except the curve on the end which I used a profile tool to cut. This is the detent all completed.

Next I milled the indexing arm by first drill with an undersize bit along the perimeter and finished with final size mill.

A shot at some of the completed parts

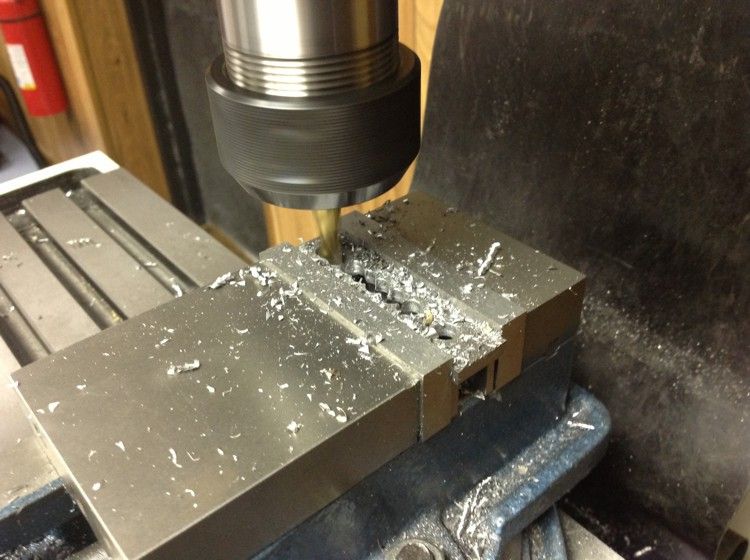
I started to mill the small bearing blocks. I set them up in the mill as true and straight as I could get them. Used the edge finder to locate the two edges and centered the mill and cut the 3/16" x 1" slots down the middle. I used and 11/16" end mill down the center and finish the width to 1" with more side passes.

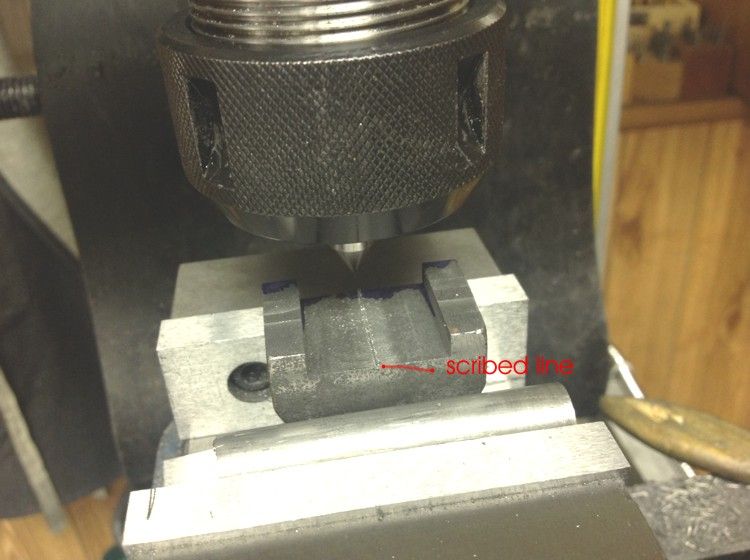
After Milling the 1" slot I inserted my punch from my optic punch set and scribed a line down the middle of the groove for reference when marking out.

I layed the bearing block on the surface plate and scribed in the lines for boring on the lathe later. I also center punched the crossing lines.

That's about it for now, like I said yesterday my job is starting up so it will be a week or so before more progress on this. Thanks for following and commenting.

Don
« Last Edit: February 08, 2013, 10:55:21 PM by Don1966 »

Offline steamer

  • Global Moderator
  • Full Member
  • *****
  • Posts: 12699
  • Central Massachusetts, USA
Re: HEMINGWAY DIVIDING ATTACHEMENT
« Reply #26 on: February 08, 2013, 11:23:42 PM »
Nice Job Don!

Dave
"Mister M'Andrew, don't you think steam spoils romance at sea?"
Damned ijjit!

Offline Don1966

  • Full Member
  • *****
  • Posts: 6817
  • Columbia, MS
Re: HEMINGWAY DIVIDING ATTACHEMENT
« Reply #27 on: February 09, 2013, 11:34:20 PM »

Offline zeeprogrammer

  • Full Member
  • *****
  • Posts: 6811
  • West Chester, PA, USA
Re: HEMINGWAY DIVIDING ATTACHEMENT
« Reply #28 on: February 10, 2013, 01:06:28 PM »
I've been watching Don.
I don't know much (anything) about dividing attachments so I'm very curious to see it completed and in use.
Carl (aka Zee) Will sometimes respond to 'hey' but never 'hey you'.
"To work. To work."
Zee-Another Thread Trasher.

Offline Don1966

  • Full Member
  • *****
  • Posts: 6817
  • Columbia, MS
Re: HEMINGWAY DIVIDING ATTACHEMENT
« Reply #29 on: February 10, 2013, 03:38:06 PM »
Thanks Carl, I will set it up on the lathe as a demo just for you to see. If you go to here http://www.martinmodel.com/MMPtools-subfiles/Pillar/tools-pillar.html on the bottom of the page are two manuals by G.H. Thomas called "Workshop Techniques" and " Model Engineers Workshop" get them. You will not be sorry for investing and little money for them. There is a lot to be learned in them.

Don


SimplePortal 2.3.5 © 2008-2012, SimplePortal