Ron, Eric, Jerry, Larry & Steve, thanks for checking in Gents

Eric, shrink fitting can be useful in our hobby; I've used it to fit flywheel rims to spoke hubs like
this one, but in general most models require the flywheel to be removable from the shaft for assembly and maintenance. On this specific build, one would have to have split-bearings if the flywheel was heat-fitted to the shaft, and as you mentioned, it can be a tricky operation. With the smaller parts, the heated bits cool down much quicker, so getting one's timing right could be a major pain.
Jerry, I've also built it in my head... While I have made similar style, but much smaller flywheels in the past, I have had problems with the drill bits wandering. This turned out to be much easier to do in the bigger size with steel than the bronze concoctions I've made.
You're right; a flat is usually needed for grub screws to seat on, but I have also cheated a bit in the past by filing the tip on the grub screw flat to clear off the bluing, and then applying a small ball of lead-based electronics solder to the tip. The solder easily takes to the tip of the grub screw, and when tightened on the shaft does not mar it. The lead has a fairly high coefficient of friction, so keeps the flywheel on very well. As you mentioned - for steam, hot air and Stirling engines only. I have yet to build an IC; I love to look at others' IC engine builds and see them running, but for my own builds, there's only about two that I'd like to build.
First off, I used a junior hacksaw to saw off the spoke stubs as close to the rim as possible. Turning them down would have taken ages, and the interrupted cutting could easily throw off the carefully clocked up rim:
Next there was a major scare in today's shop session - not at all physically dangerous, but I nearly crapped myself, and Shrek the parrot definitely knows a couple of words now that he shouldn't have overheard

. When I started up the lathe motor, it went clickyclickykgrrr, and all the electricity in the shop went off... The lathe's motor shouldn't make that noise; on my lathe it just should start up with a gentle "clickWhump" sound (amplified by the lathe cabinet) and run with a quiet hum. Checking the electrical switchboard in the shop, the earth leakage breaker had tripped. I thought the motor had gone bust, so with great trepidation I unplugged the lathe, switched on the earth leakage, and still no power in the shop. Back to the house and my main DB which feeds the shop, and that earth leakage breaker had tripped as well. Switched that one on, and power was back up. So, definitely something wrong with the lathe's motor - that's when Shrek learned the new words; there is no way I can afford a new motor for the lathe right now.
After I cooled down a bit, I started pulling things apart. There's no photos of this lot; the camera was the last thing on my mind.
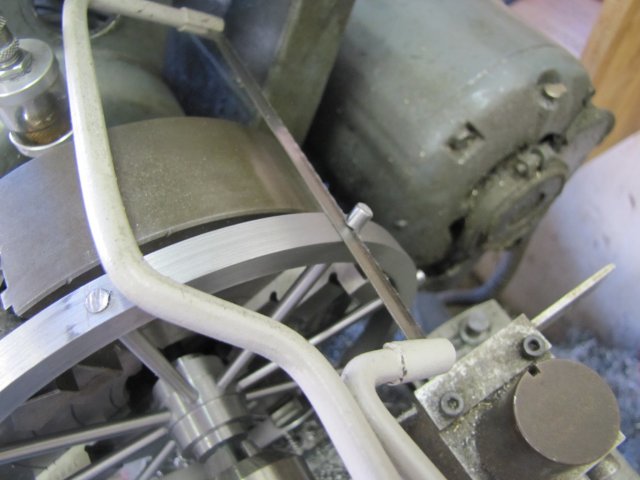
Once the motor was off the lathe I opened it up - and there I found it; one of the bits of spoke I'd sawn off earlier had somehow found it's way into the motor

and caused a short-circuit. After checking all the bits through and a general clean-up, I couldn't see anything else amiss, except for some wear on the bushes, and the rubber mountings are definitely starting to perish. Rob Wilson once told me these Brook-Crompton motors fitted to the Myfords are "bullet proof", so I assembled the lot up again, and started her up... "clickWhumpHummmmmmm"

- back in business, albeit two hours later. Not bad for a fourty-odd year old motor either. At least I know the earth leakage breakers also still work as expected; it's been a long time since those were tested, and overdue. And I need to make a guard for the motor... Hmm... on the subject of safety, all the fire extinguishers need their annual 3
rd party service as well - I make a point of up-ending the powder extinguishers one a month to keep the powder loose.
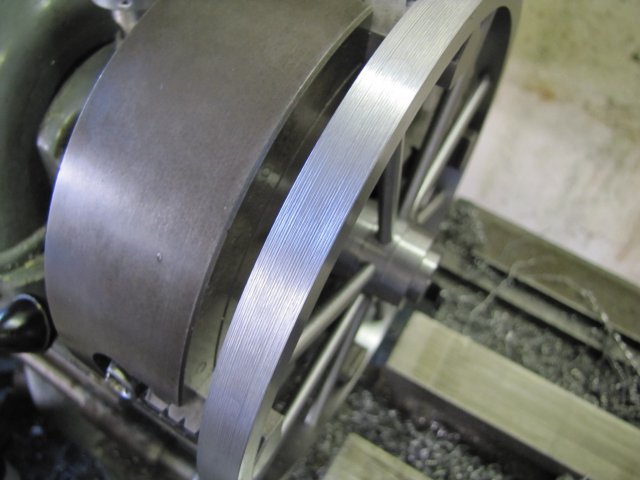
With the lathe drama sorted, I got back to machining, and turned the excess off the spokes - with very fine cuts; just 5 thou infeed at a time and dead-slow while feeding the carriage. Once the rim was reached, I upped the carriage feed a bit, and turned it down to the point where the outer rim "just" started to fit - keeping the finish on the outside of the inner rim intentionally very rough:
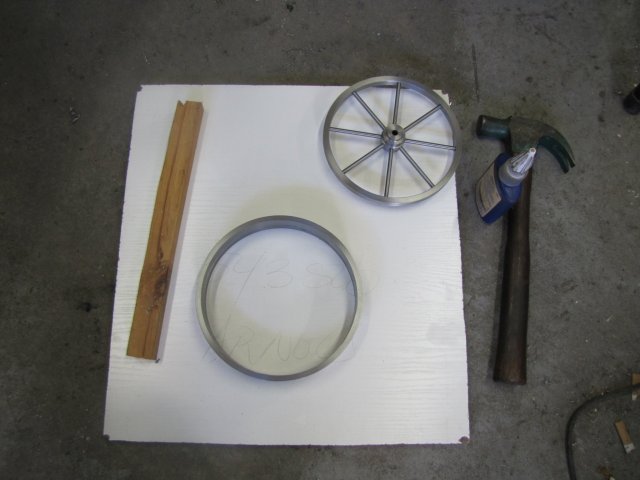
Next I assembled some bits together: A bit of flat wood off-cut from kitchen renovations a couple of years a go, a bit of wood to use to tap the inner rim into place without marring it, a hammer, and a bottle of retainer:
I smeared the inner rim with retainer on the outside; the coarse finish I left on it allowed a space for the retainer to sit while gently knocking it into place. I also smeared the inside of the outer rim with retainer, then used the hammer and wooden stick to knock the lot together; gently going around in a circular fashion till the inner rim settled against the ridge I left in the outer rim. This formed a combination of a press-fit and a "Loctited" fit; plenty strong enough for this job. It might fly apart at 8000rpm+, but this engine should never reach those kinds of speeds; in fact, anybody trying to run it at over 1000 rpm should be flayed alive and then drawn and quartered. I'll be quite happy if I can get it to run at about 60rpm or less. Anyway, I ended up with this lot:
When I drilled the hole in the hub earlier, I left it at 7mm, rather than the final 8mm needed to fit the crankshaft. I did that on purpose, so that I could finish-bore the shaft hole once the flywheel was assembled to compensate for any minor miss-alignments. So as a last step, I clocked up the flywheel in the 4-jaw chuck again gripping and clocking on the outer rim. None of my small boring bars had enough reach to bore through the entire hole, so I used a 6mm end-mill offset at a very small angle axially from the lathe center line, and with one cutting tip on center height to bore the hole to size:
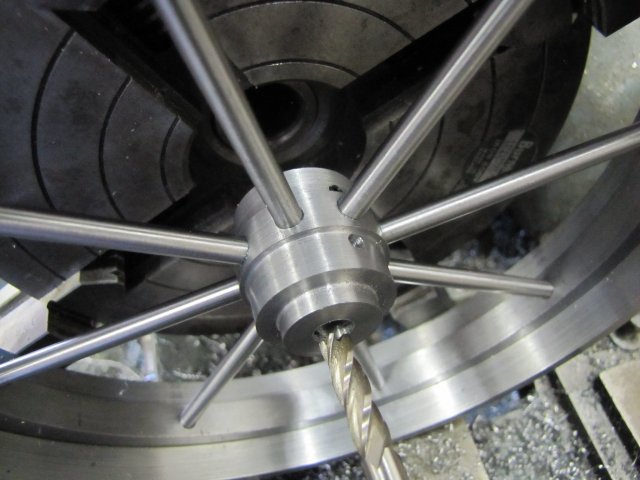
First time I used this method, but it worked very well indeed

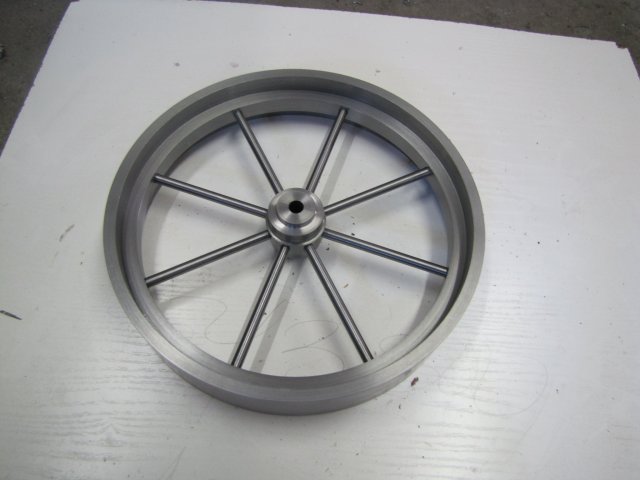
The finished flywheel:
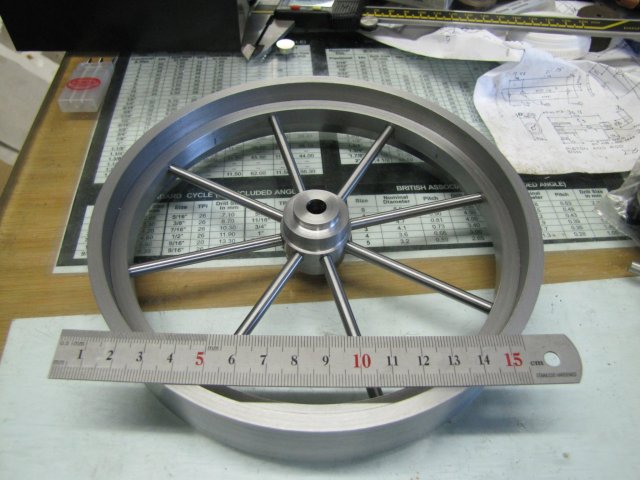
You'll notice some marks on the inner rim from chucking it up. Those will be invisible once it's painted - though I could apply some elbow grease with emery to get rid of them.
At least it seems to run true:
It's not often I say this, but I'm pretty well pleased with how it's turned out. In fact, there's a bit of my braincell that's screaming at me not to paint the flywheel...
Kind regards, Arnold


