Here is another of my transfer posts that I hope will help a few members upgrade their mill vice.
If the pictures look too small for you to see, place your mouse pointer over the picture and right click, then left click 'View image'. This will open pictures up in another window, and by placing the mouse pointer on the picture whilst holding 'Ctrl', you will be able to enlarge the picture by use of your scroll wheel. To put picture back to normal, let go of 'Ctrl' and left click the image.
#######################################################################
I will be making an adjustable backstop that is mounted permanently onto the vice, and can be swung into use whenever it is required.
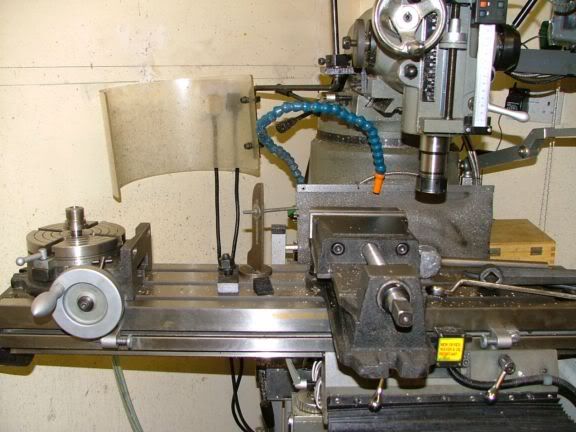
This picture shows the old mobile backstop that I used to use for many years. Unfortunately, now that I have decided to mount both my RT and vice permanently onto the table, the old system will not work, so a new method of having a backstop had to be devised.
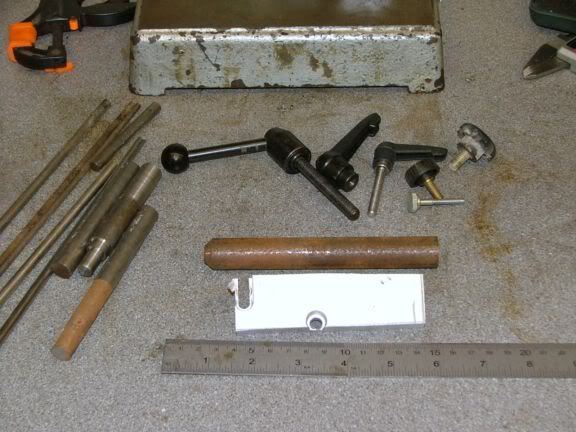
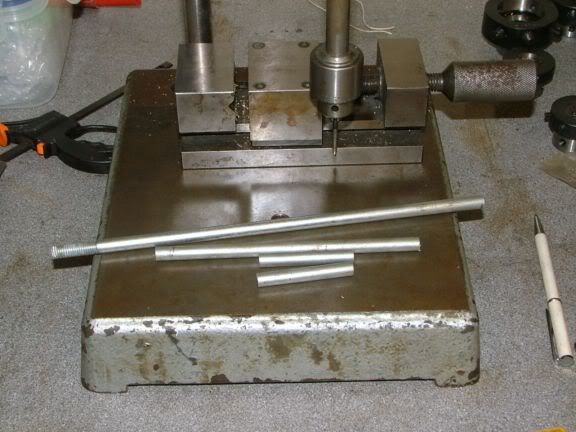
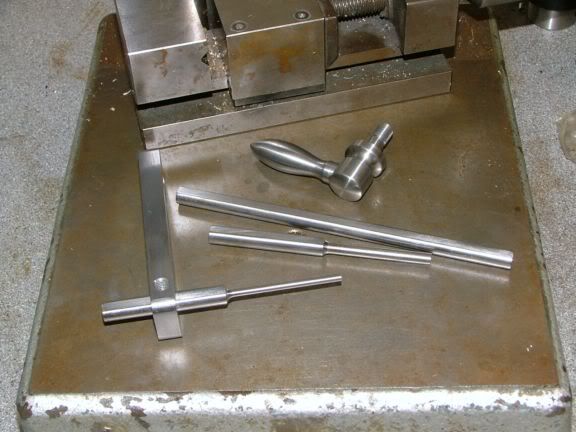
So I raided my bitsa boxes and metal bits and found a few things that might be useful. The only things that are definitely going to be used at this time is the rough bit af 1/2" ali plate and the rusty bit of bar above it. The rest of the bits are just to give me a few choices as I get on with it.
The first bit that needs to be done is to drill a hole in the side of the vice in the correct position, making sure it is parallel to the jaws and the vice base.
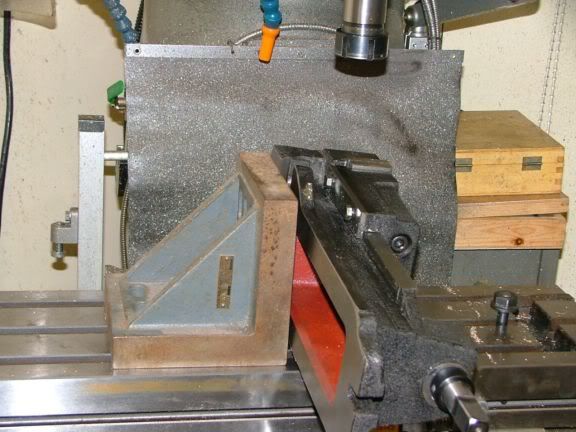
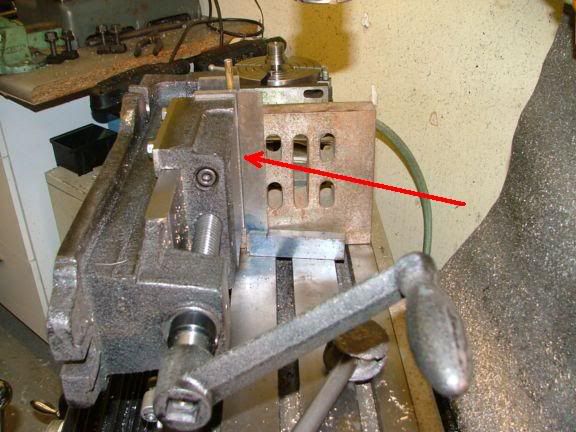
I got out the largest angle plate I have, but it looks like something else is needed to get the vice clamped to it.
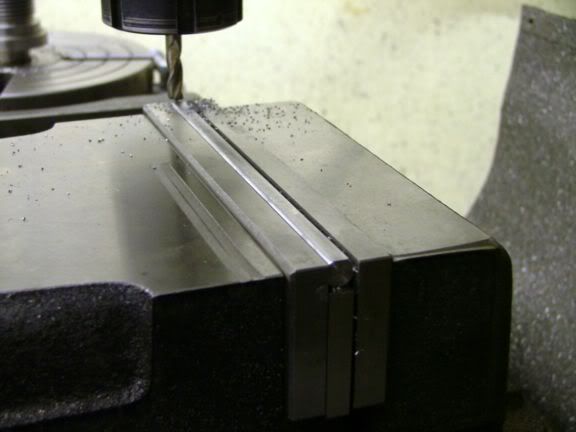
I used my brass t-slot blocks that I made up ages ago, they are a nice tight push fit in the slot (see arrowed item). The angle plate was then pushed against the blocks, and clamped down. So the plate is now perfectly square to the t-slots.
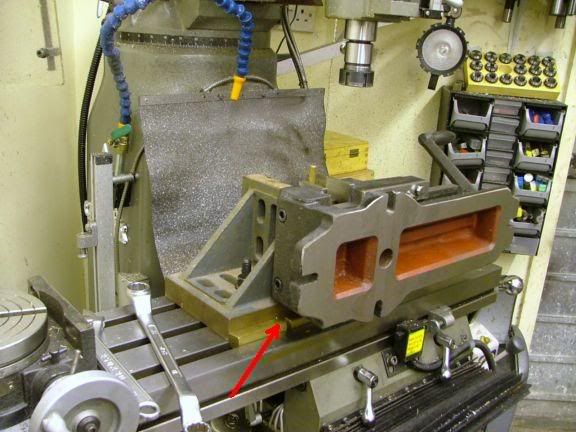
The vice was then clamped under it's own pressure with the moveable jaw against the front machined face of the angle plate and the fixed jaw was tight against the back casting but with a piece of round brass between the jaw and the angle plate, this is to take up any minor irregularities. At the same time, the vice was tapped to a perfect upright position by checking with an engineers square against the top of the jaws. The jaws on my vice are parallel to the vice base, others may not be. If you don't know what an engineers square looks like, follow the arrow.
Now I have a vice whose base and jaws are square to the quill. Just what I was after. The setup isn't super rigid, but perfectly secure and safe for the jobs I will be doing on the vice.
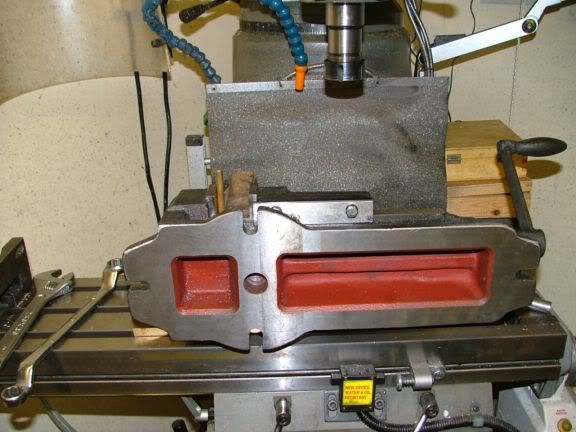
First off I found an area on the vice side that, if drilled into, wouldn't hit any area used for mounting anything, plus in a nice beefy area of the casting.
I now needed a nice flat area for later additions to sit on, but the casting in the area I wanted to drill was all shapes and angles.
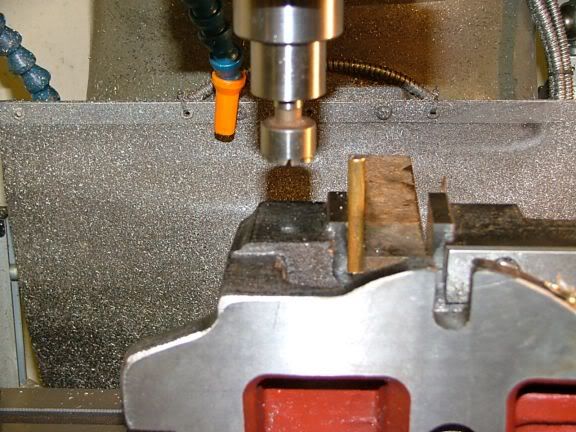
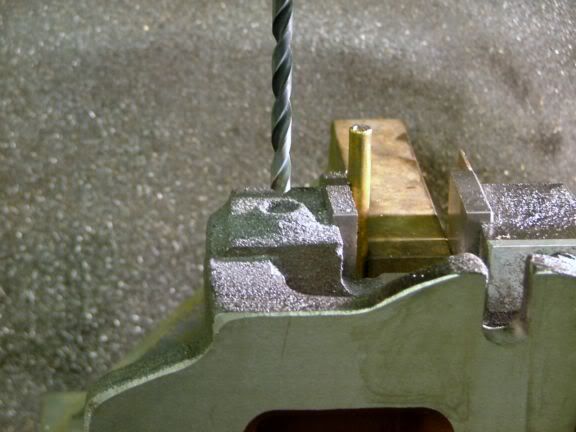
So the first thing I did was put a spot face cutter in, larger than the area needed, and cut down until I had a nice working face. You will see that in later piccies. You could use a large slot drill to do it at this stage, or a face mill if you have already drilled the hole. But take it steady.
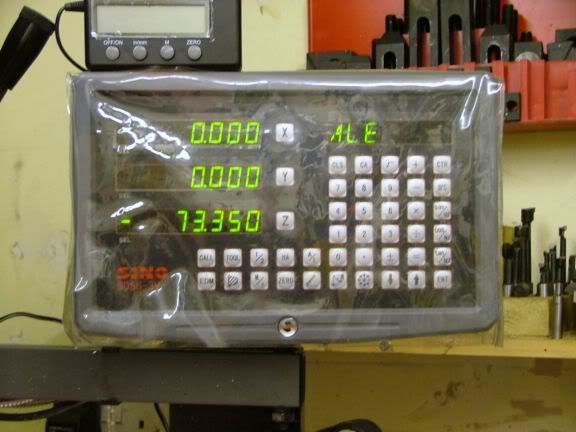
The DRO was zeroed up so all the following actions were done in the same spot.
With a tapping drill the right size for 8mm coarse thread, I drilled to 20mm deep.
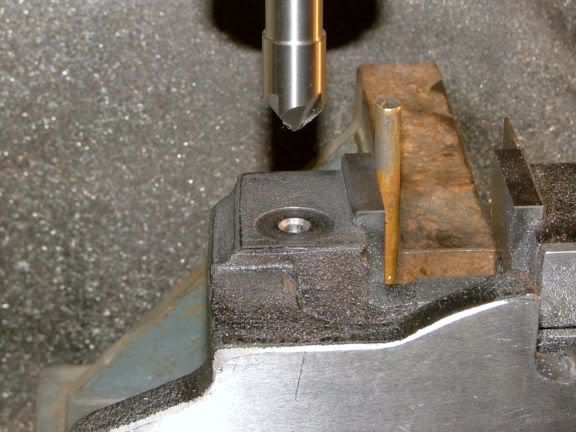
This was followed by a fairly deep countersink, I don't want the block I will be putting on here being held off by the threads. In this shot you can plainly see the spot face I put on earlier.
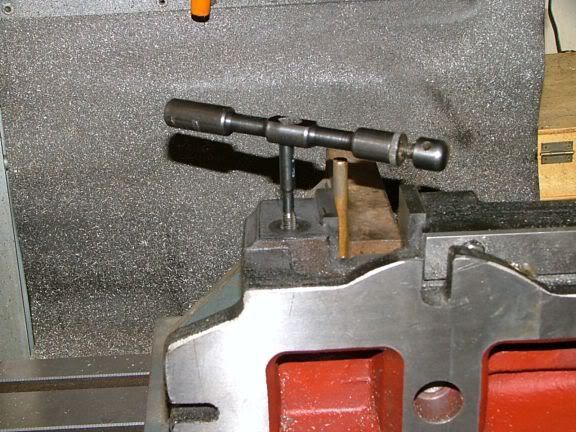
The hole was then hand tapped to depth, making sure the tap was kept truly vertical.
All machining jobs on the vice were now finished, so the setup was stripped down and cleared away.
I was going to use a piece of ali for the main support bar, but thought better of it, so after a rummage in my steel box, I came up with a crappy bit of hot rolled steel.
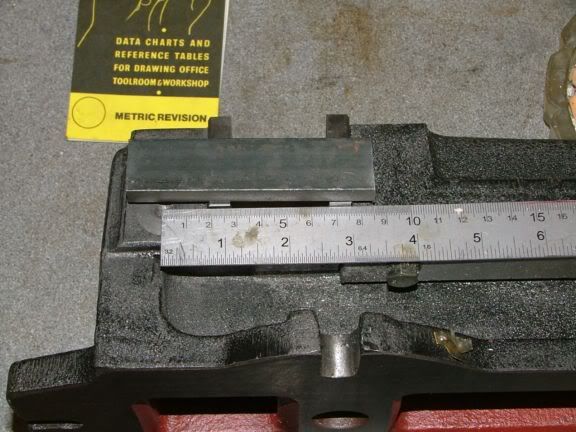
I only want the backstop to reach about 2" into the jaw opening width, so it was cut to rough length. If you want it to reach further, cut the bar longer.
The vice was remounted to the table, and squared up. The RT was put back at the same time.
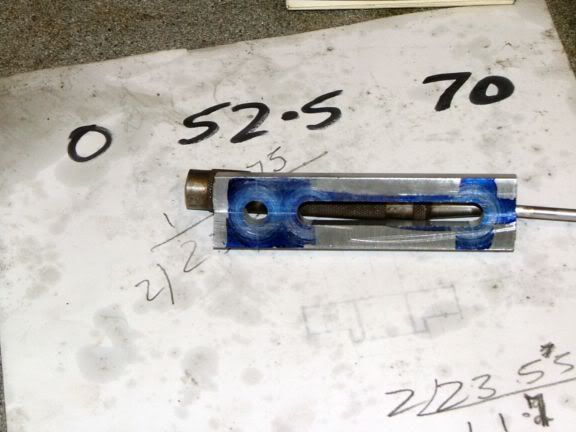
After a run in with a cutter on the mill, the crappy black bar miraculously turned into a bit of accurate crappy shiny bar, complete with marking out blue and three pop marks and a rough slot shape scraped on the surface. There are no measurements for these, they were guestimations by laying it alongside the vice and marking where the holes should go.
The centre of the width of the bar was found using an edge finder, and by using increasing sizes of drills, all three pop marked holes were brought up to 8mm diameter.
Now for the slot.
If you want an oversized slot, plunge in with the correct sized cutter, and hack away. Not only will you end up with an oversized slot, it will most probably end up all rough with wiggly sides as well.
You have to caress a slot to the right size, this is how I do mine, others might have a different method.
I found an unmarked end mill (not too worried about plunging because I will be going down the pre drilled holes) that was just under 8mm diameter (I don't know exactly, about 0.4mm undersized, most probably some sort of imperial one).
The cutter was fed about 1mm down the hole, and a cut was taken until it reached the other hole. Another 1mm cut and fed again in the opposite direction. This was done until the complete slot was done.
The cutter was then changed for one of 8mm and plunged all the way thru the hole, and a very fine feed with a lot of cutter speed was put on until it eventually reached the other hole.
I ended up with a slot which when an 8mm rod was fed along it, it was like silk, with no sign of side to side wobble.
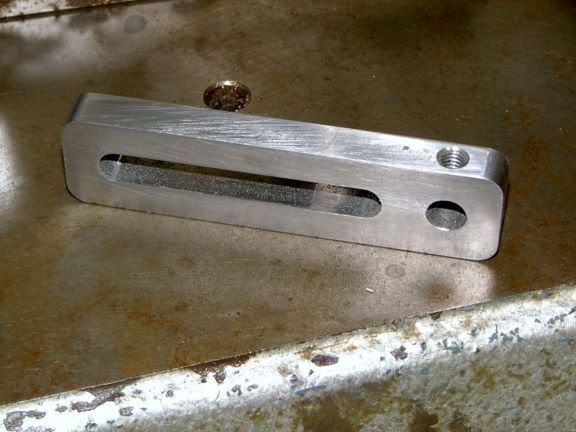
A 5mm hole was drilled half way across the width and half way across the single hole, and it was duly tapped out 6mm.
After a bit of cleaning up and rounding over, the major part of the job is finished.
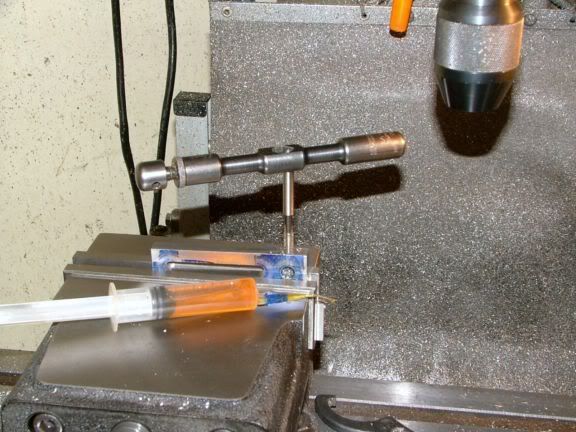
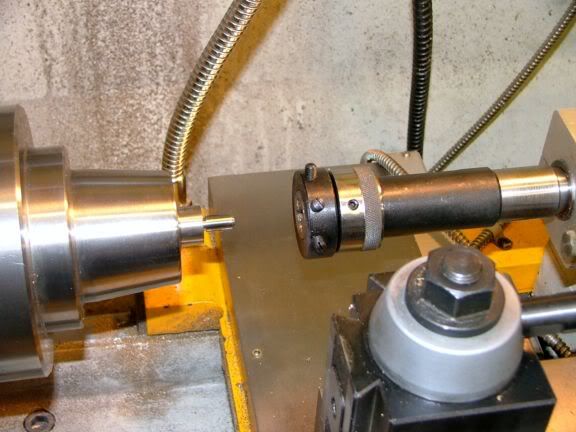
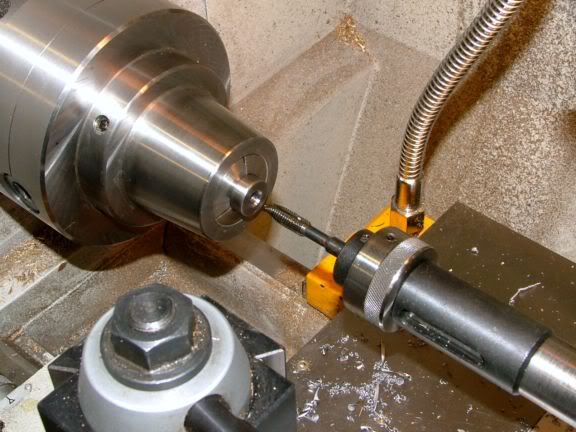
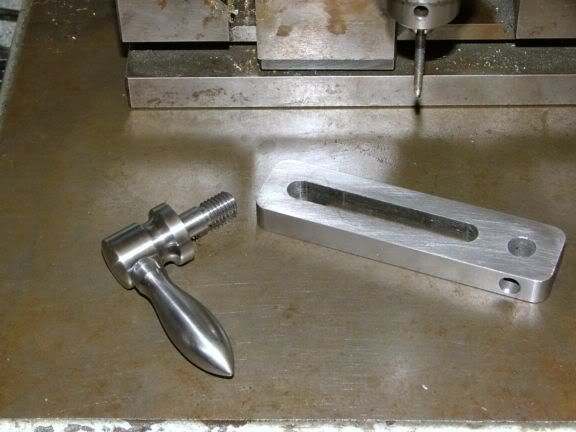
The second piece of this job to be made is the standoff from the vice, here it is ready to have a thread cut on the end using an 8mm die, power fed. This bit of thread screws into the vice.
The 3/4" bar was parted off at about 25mm long, remounted the other way around, faced up and an 8mm thread was power cut in to a depth of 18mm.
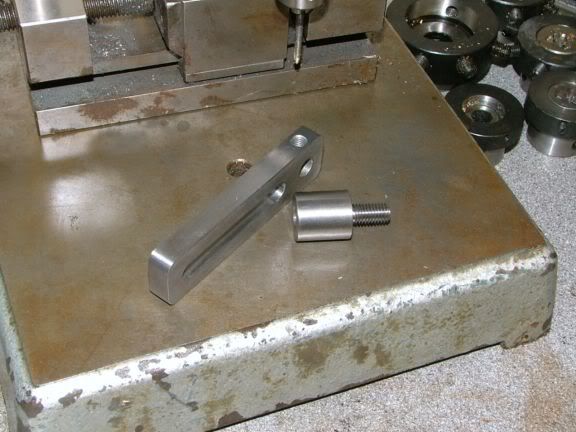
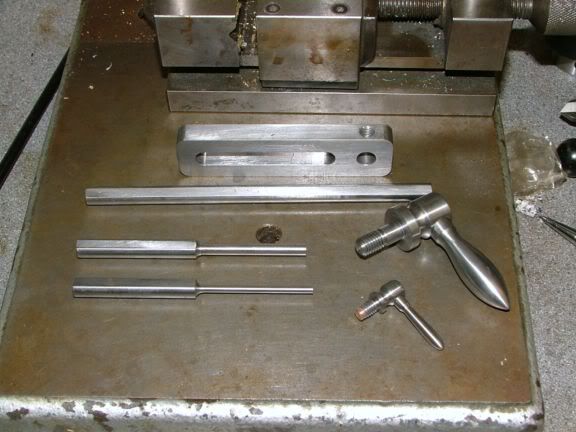
Parts 1 and 2. Getting really exciting now, zzzzzzzzzzzzzzzzzzzzzzzzzz
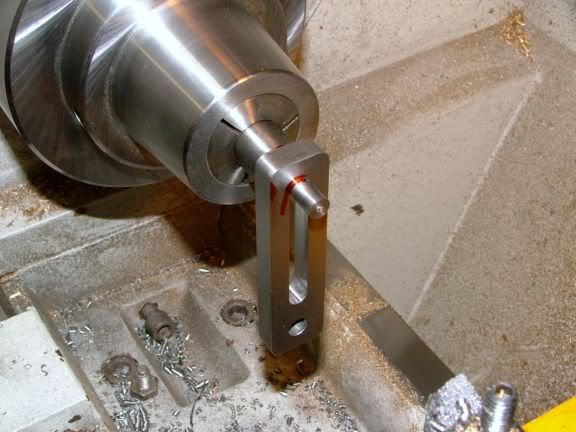
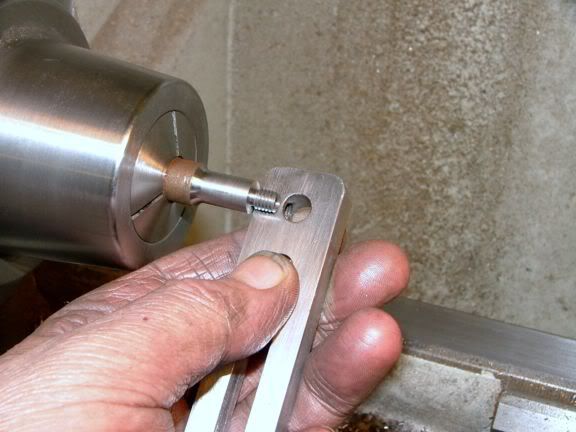
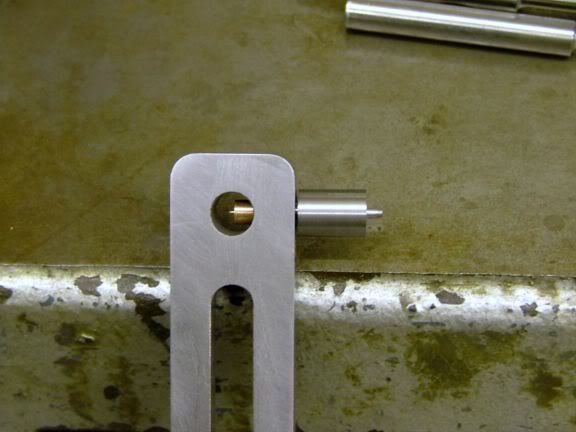
So now using part 1 as a gauge. An 8mm spigot was cut on the end of the rusty old bar. Part 1 was put onto the now emerging part 3, and marked to where it stuck out of the slot.
An 8mm thread was cut on the spigot until it was just further along the spigot than where it was marked. The thread was trimmed to a length of 15mm from where it protruded out of the slot, this will make sure it doesn't bottom out in the hole in part 2.
You can just make out where the plain portion finishes and the thread starts inside the groove. This makes sure there is plenty of tightening length to clamp the parts together.

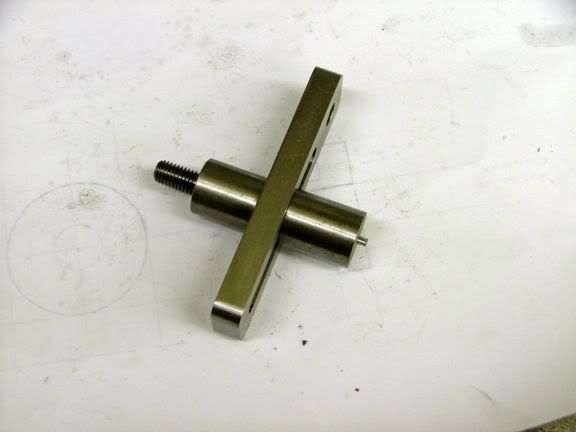
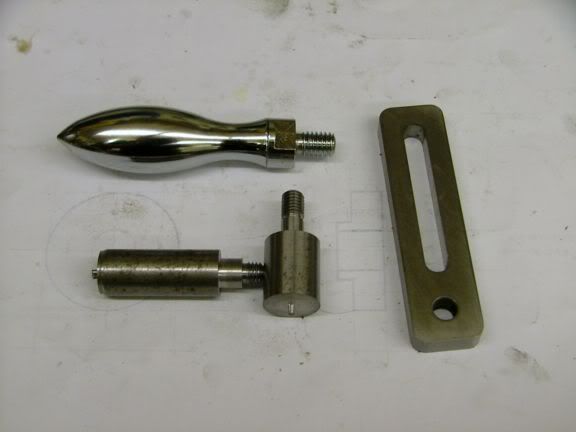
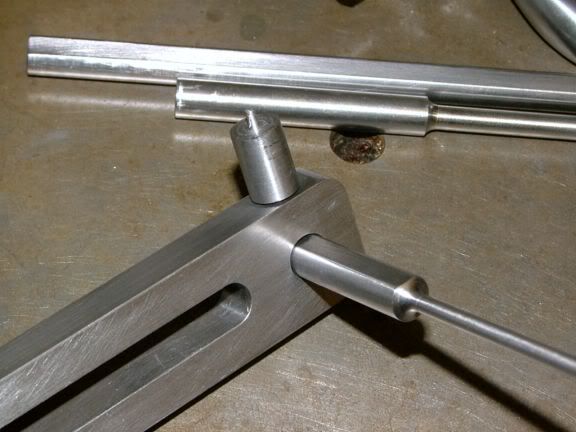
This is how they will assemble together.
A spot of threadlock was put on the threads of part #2 and it was screwed into its permanent position on the vice. I don't want this part screwing out of the vice while I am undoing the clamp handle.
This is where I wake up and start to get excited. The part I had just made (#3) was in fact the first part of the clamp handle. This shows the second bit of the handle partially completed.
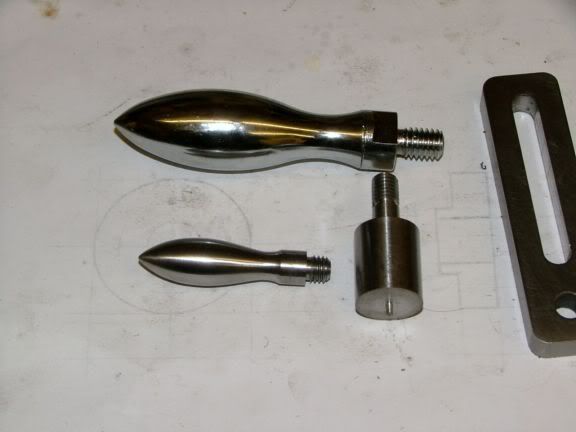
As with my lathe, when I fitted handles to it, I kept within the look of the lathe. This time, I want to try to keep the same look as the mill, and at the top is a sample of the handles used on the mill.
Unfortunately I don't have one of those new fangled ball turning watzits yet, so I am going to have to revert to my 'old' ways, and use my hands.
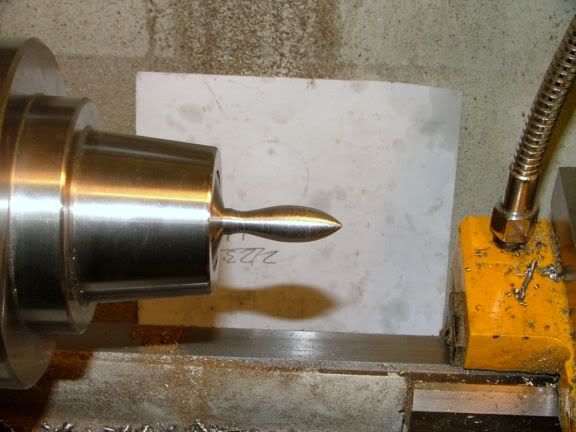
Using a profile cutter in the toolpost, coupled with a bit of hand/eye coordination, I roughed out the basic shape of the handle.
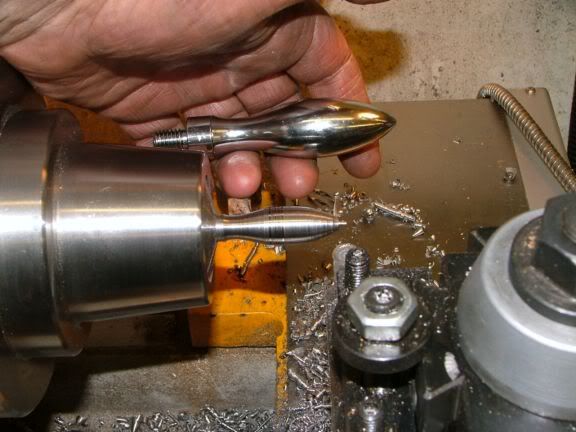
Machining time was now over, using various shapes of files, I gently stroked the handle into shape. The piece of paper behind is to make it easier to see the contours of the handle being made. This still isn't quite to shape, there are still a few straights and bulges to get rid of or blend together. After the filing came emery cloth, followed by fine wire wool.
This handle took about 40 minutes to profile, from start to finish. It isn't a perfect match, but close enough for me.
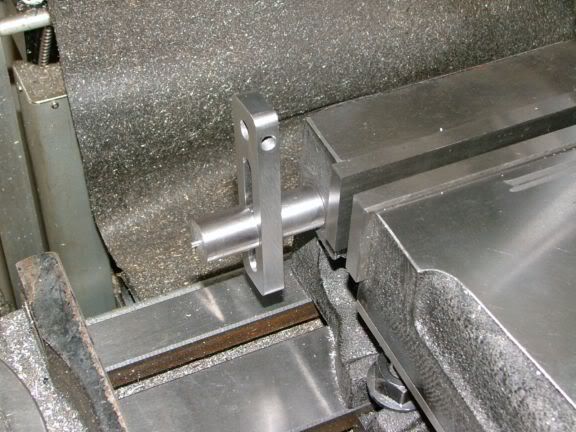
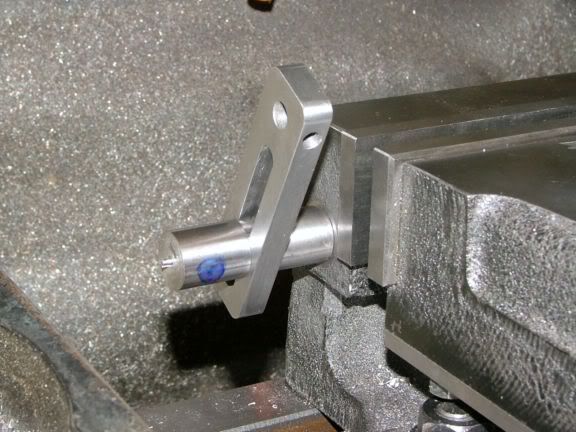
I tightened the newly made screw into the mounting, so it was in it's normal operating position when tightened up.
Because it is always easier to tighten something up when pushing down on it, I marked up the position for the profiled handle, and also made sure it wasn't sticking straight out, but angled down a bit, explanation later.
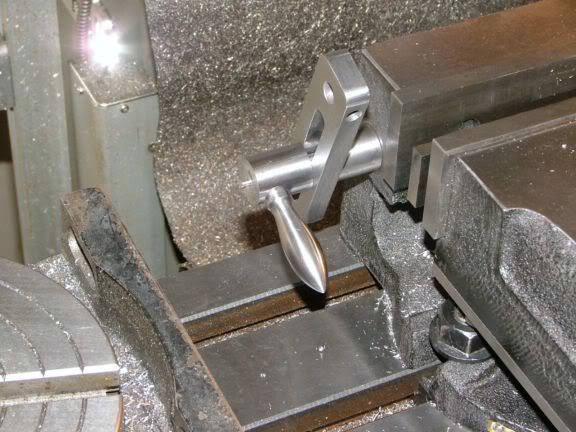
The hole was drilled and tapped for the profile, and the position was checked. All OK.
The screw bit was given a bit of hand profiling and cleaning up.
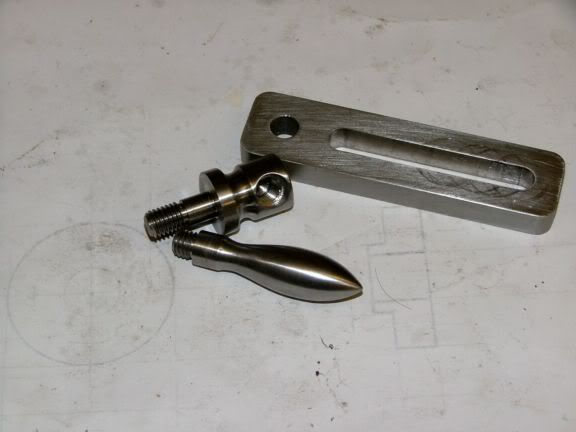
After screwing the two bits together with a bit of loctite on the joint, the main bits are done.
Remember me saying about asking neighbours not to throw anything away. Well my next door neighbour thinks he is a bit of a carpenter (a nail it and glue it man really), was given an old drop side baby's cot to recycle, he asked me if I wanted the metal rods off it. I took them with thanks.
Once it has had the crap plating emeried off, it will be ideal for what I am doing.
Cleaned up and faced off, a perfect fit in the hole.
All three rods had a 5mm flat machined on their sides. This is for the holding screw to press against, and if any damage is caused on the rod by the screw, it will still slide freely in the hole.
The two shorter rods were drilled and had a length of smaller rod loctited into the ends of them. Then all three were polished on the tip faces. Not only should the tips be square and flat, but there must be no sharp edges either. The last thing you want is to put a nearly finished soft surfaced part against the stop, and end up with a mark on the surface of the job.
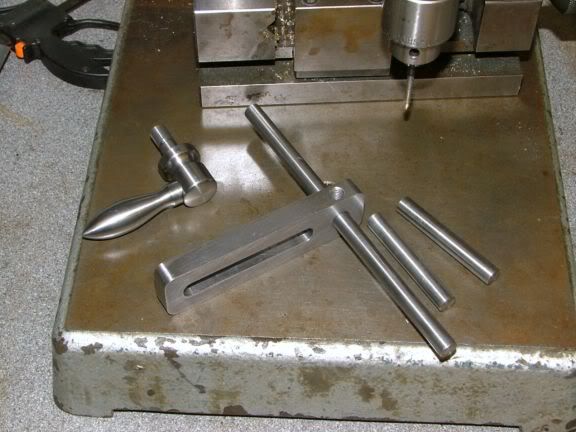
So now I have three different sized stops, 8mm, 5mm & 3mm. This range should be fine for almost every job that needs a back stop.
Now to the locking screw.
A bit of rough bar was turned down to just smaller than the thickness of the main holder. A 6mm thread was put on the end of the bar so that it was just a bit short of the length of the hole it was going into. On the end of the thread, a 3mm plain hole was drilled about 10mm deep.
A 3mm spigot was turned on the end of a bit of 5mm diameter phos bronze, it could have just as easily been brass. It was then parted off about 7mm long (not critical as it is turned to length later.)
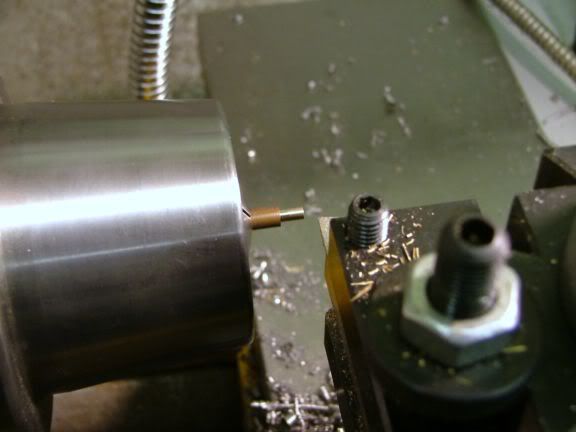
The bronze slug was loctited into the end of the screw.
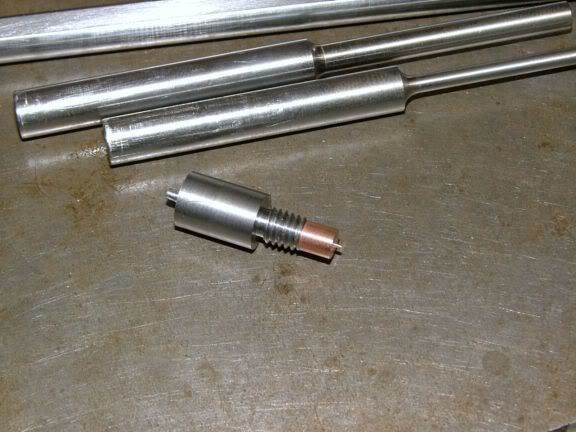
As you can see, the screw with the tip on is now way too long.
BTW, because the tip is 5mm diameter, it will easily go thru a 6mm tapped hole, as it is smaller than the root diameter of the 6mm thread.
The tip was gradually reduced in length until, with the bar well gripped, there was about 0.5mm gap under the screw head.
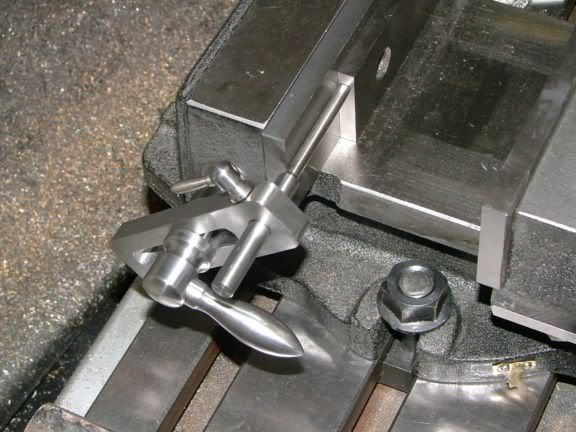
A small profiled handle was made for the screw, and the screw itself was given a bit of shaping. The handle was positioned in the screw so that when it was tight, it ran down the main clamp bar, stopping it from being a nuisance by sticking out and getting in the way.
So now, all bits are finished, time to see if it will do the job.
With one of the small bars in, you can see, even if it is fully adjusted back, it would still keep anything in the jaws away from the drop edge of the jaw bottom.
The large bar will be able to cope with almost anything along the whole jaw length.
All pins can operate from the jaw base to about 25mm above the jaw top, and just over 50mm jaw opening.
If these won't cope, I don't know what will.
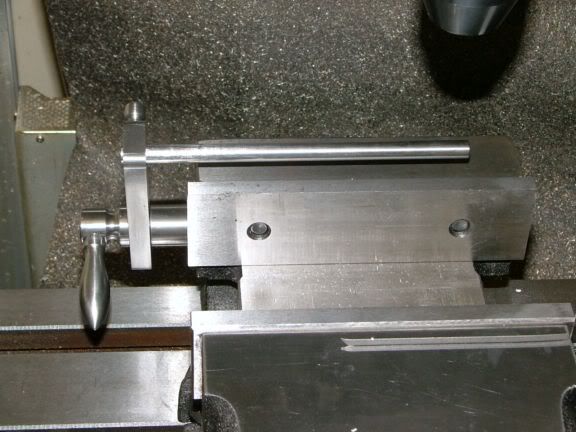
It all stows behind the vice when not in use. The vice can be operated as though it wasn't there.
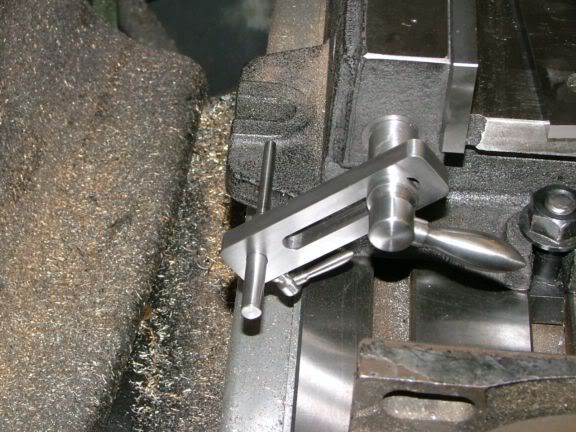
Now back to the clamp screw angle. With it in the stowed (and used) position, the full depth of the vice can still be used.
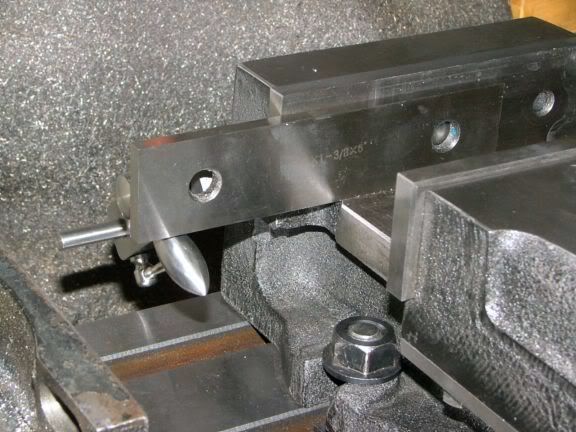
That's it, job done.
Now for the sermon.
Why has the old fart taken this much trouble over a backstop?
Anyone that knows me, knows that I won't make any sort of gizmo's or tooling without it having a good useful life. I use a backstop all the time, and because my old one is now difficult to use in the setup I now have, the new has taken over from the old.
The next bit is about the way I work.
If I was making something for a one off job, it most probably wouldn't even get the rust removed. On this one, it is now a part of my workshop, and as such is made to the best of my abilities. If that means spending a couple of days shaping up handles to make it match, then so be it. As long as it sees me out, and most probably a few of the next owners as well, I am happy.
John


