Author Topic: Mini SRM Project  (Read 3584 times)

Offline PStechPaul

  • Full Member
  • ****
  • Posts: 688
  • Cockeysville, MD 21030
Mini SRM Project
« on: December 17, 2015, 05:27:46 AM »
Some time ago I showed what I had made as a switched reluctance motor (SRM), but it was mostly just a (flawed) concept. I had made a rotor and stator from a USS 7/16" and a 1-1/4" steel washer, which just happen to fit inside each other. The first prototype will be a flat model, but eventually I may stack more of the washers to make a thicker, more powerful motor, and that will also result in laminated magnetic components, although that may not be needed for an SRM. So here is my new concept:


I should be able to re-use the pieces I already made:

The new design incorporates some principles I have learned since then, particularly the need for radial force which is greater with narrow pole pieces.
« Last Edit: December 17, 2015, 09:01:31 AM by PStechPaul »

Offline Ian S C

  • Full Member
  • ****
  • Posts: 1080
  • Stirling Engine Maker Darfield Canterbury N Z
Re: Mini SRM Project
« Reply #1 on: December 17, 2015, 12:21:30 PM »
Hi Paul, what voltage do you propose to run the motor on, it looks an interesting little project.
Ian S C

Offline PStechPaul

  • Full Member
  • ****
  • Posts: 688
  • Cockeysville, MD 21030
Re: Mini SRM Project
« Reply #2 on: December 17, 2015, 06:29:14 PM »
I plan to have it run on 12 VDC, or possibly just 6V. It will require quite a few turns of fairly fine magnet wire to develop enough resistance to limit the current to a reasonable and safe value of a few amps. I may need to add series resistance. Ideally, for best efficiency, the current would be limited by inductance and PWM, and I may even incorporate that into the design. Being a magnetic motor, it can hold any position without dissipating power other than coil losses, but there will be power drawn when rotating with a load on the shaft. At higher speeds, the pulse widths will become faster and more narrow, so the current will be limited by inductance and voltage. A higher voltage would allow higher speed.
 
Here is a video of my previous SRM prototype:
<a href="https://www.youtube.com/watch?v=W6LwlhsnT-k" target="_blank">http://www.youtube.com/watch?v=W6LwlhsnT-k</a>

Offline Don1966

  • Full Member
  • *****
  • Posts: 6818
  • Columbia, MS
Re: Mini SRM Project
« Reply #3 on: December 17, 2015, 10:43:18 PM »
Paul the air gap between the stator should be between .02 to .2 mm. The two poles opposite each other should be of the north to south poles. Polarity of the switching power is not important. You could also shack three cores and armature at 120 degrees to each other and produce more torque. Somewhat like the stator of a hybrid motor.

Don

Offline PStechPaul

  • Full Member
  • ****
  • Posts: 688
  • Cockeysville, MD 21030
Re: Mini SRM Project
« Reply #4 on: December 18, 2015, 01:43:26 AM »
That's a pretty narrow air gap at 0.02mm, but 0.2mm (0.007") is reasonable. I'm sure the radial force on the rotor increases as air gap decreases, and should balance out if everything is well centered. But a little bit of misalignment could cause unequal radial forces that would put load on the bearings and probably result in noise. Here was my original idea for pole sequence and rotation:


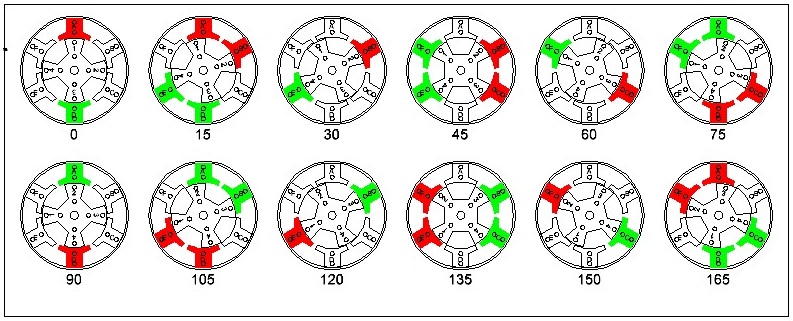
But I don't think it will work that way. Here are two other possibilities, showing the revised geometry:

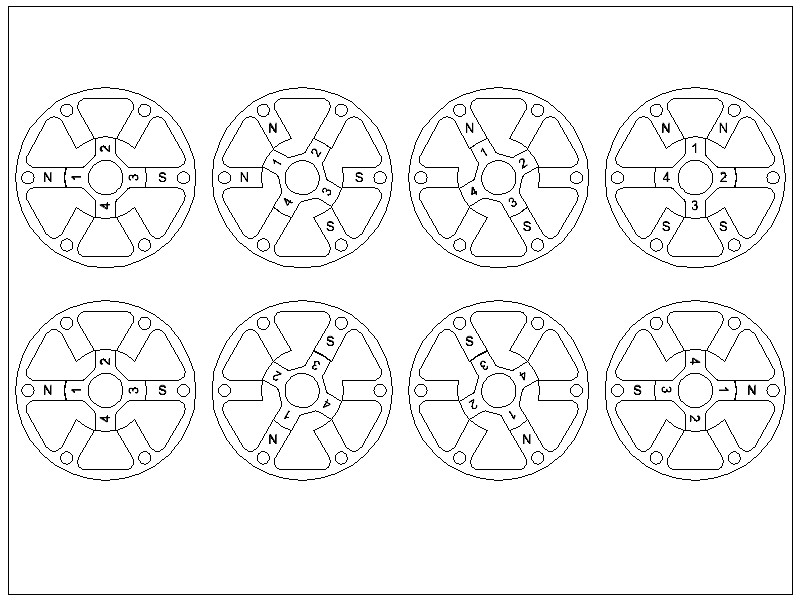
The bottom is probably the more usual sequence, but it still seems that the polarity will need to be reversed at 180 degrees. It will be interesting to experiment with this. I have a prototype board with three H-bridges that can drive each pole pair either way.
 
Now I am trying figure out how to do the machining. It may be difficult to hold the round washers in the mill vise, so I might drill the six mounting holes in the stator and then bolt it down to a piece of wood or scrap aluminum to drill the corner holes for milling, and there will be horizontal cuts for the left and right pole piece, and the "throat" top and bottom. Then I can rotate it 60 degrees, take more cuts, then 60 degrees again, for final cuts.
 
For the rotor, I may be able to do something similar, drilling small holes where the numbers are in the illustration above, and using them to bolt it to a piece of scrap. Main cuts are then horizontal and vertical. I would also need to turn it 45 degrees for the "throat" cuts.
 
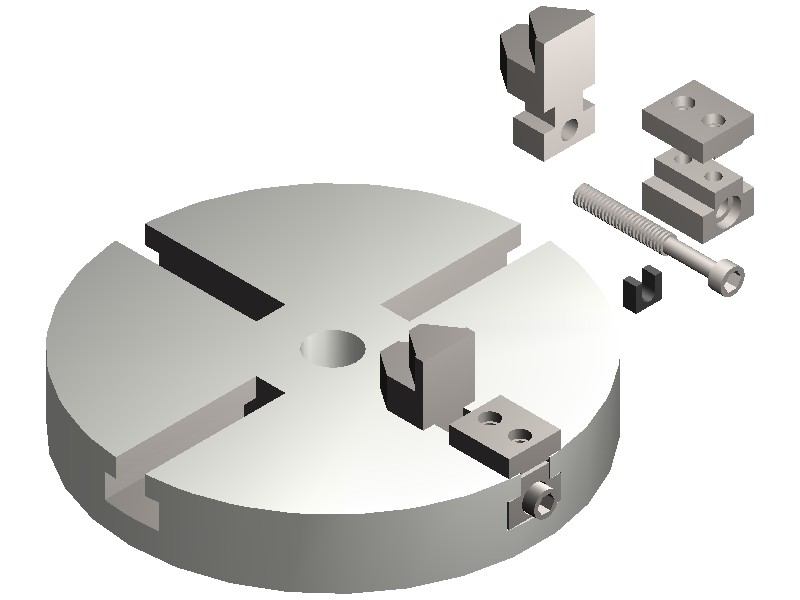
I might be able to use my rotary table, but I'd need to mount a chuck on it. I have a small chuck that fits the MT2 (or maybe MT1) center opening:


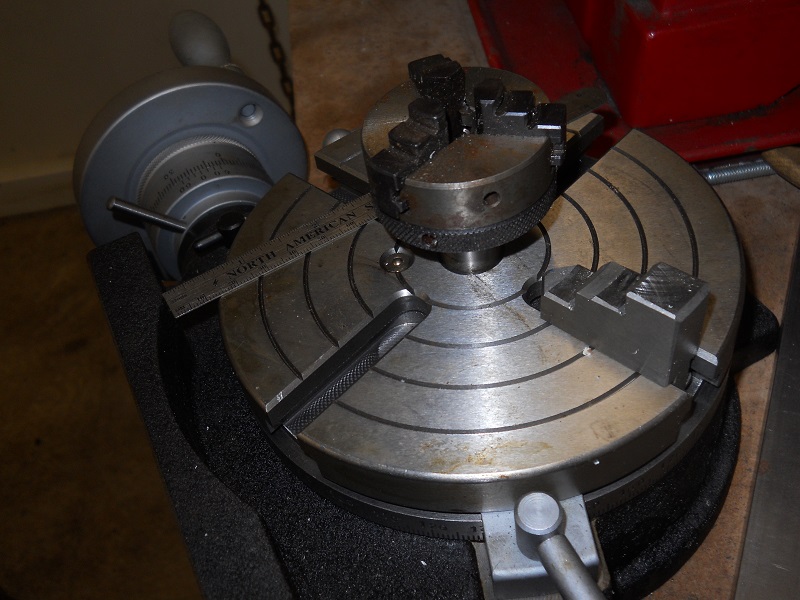
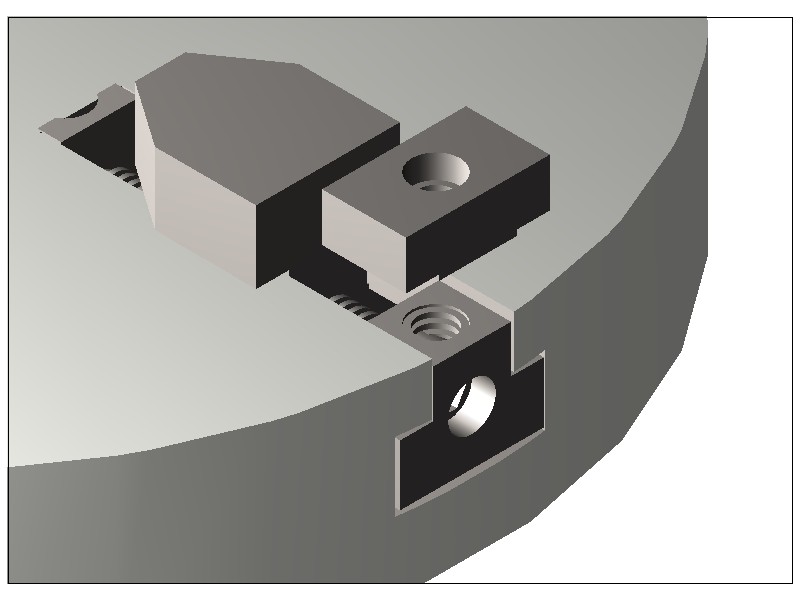
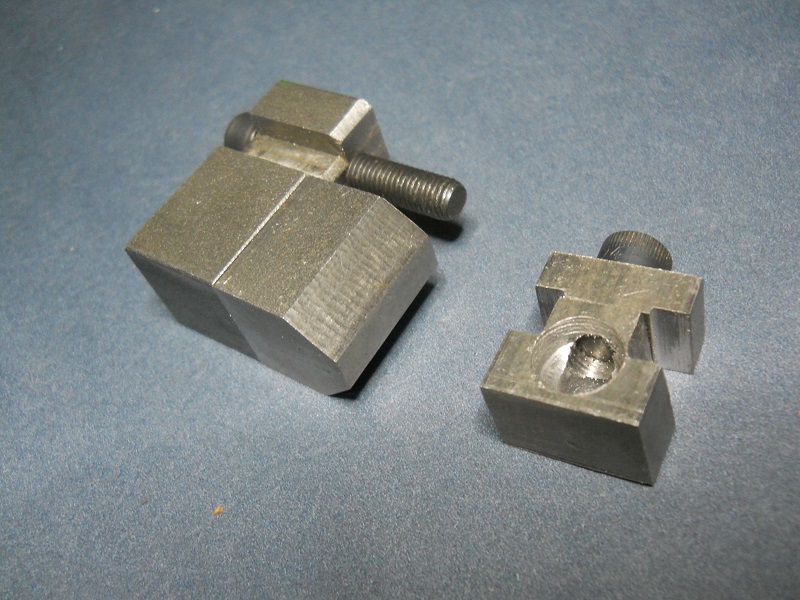
Or maybe I can finish my rotary table chuck jaw project:


Offline Don1966

  • Full Member
  • *****
  • Posts: 6818
  • Columbia, MS
Re: Mini SRM Project
« Reply #5 on: December 18, 2015, 02:29:18 AM »
Paul I believe that your setup is for 30 degree steps and only one set of coils entergized at one time. the misaligned poles would entergize with the next set by repetitively switching on the stator phases in the sequence ABCA and the rotor will rotate in 30 degree steps. This mode of operation is known as "one- phase -on" and is the simplest way of making the motor step. The other option would be to stack stators and then coils in between and could be entergized with it.

Don

Offline Noitoen

  • Full Member
  • ****
  • Posts: 108
  • Setúbal - Portugal
Re: Mini SRM Project
« Reply #6 on: December 18, 2015, 11:58:13 AM »
If you use a stepper motor driver's output stage, you don't have to worry much about the windings and use the switched current limiting capabilities of the device.


SimplePortal 2.3.5 © 2008-2012, SimplePortal